How to Make 3D Version of Any Movie Using DepthAnythingV2 and Parallax (StarWars4 as Example)
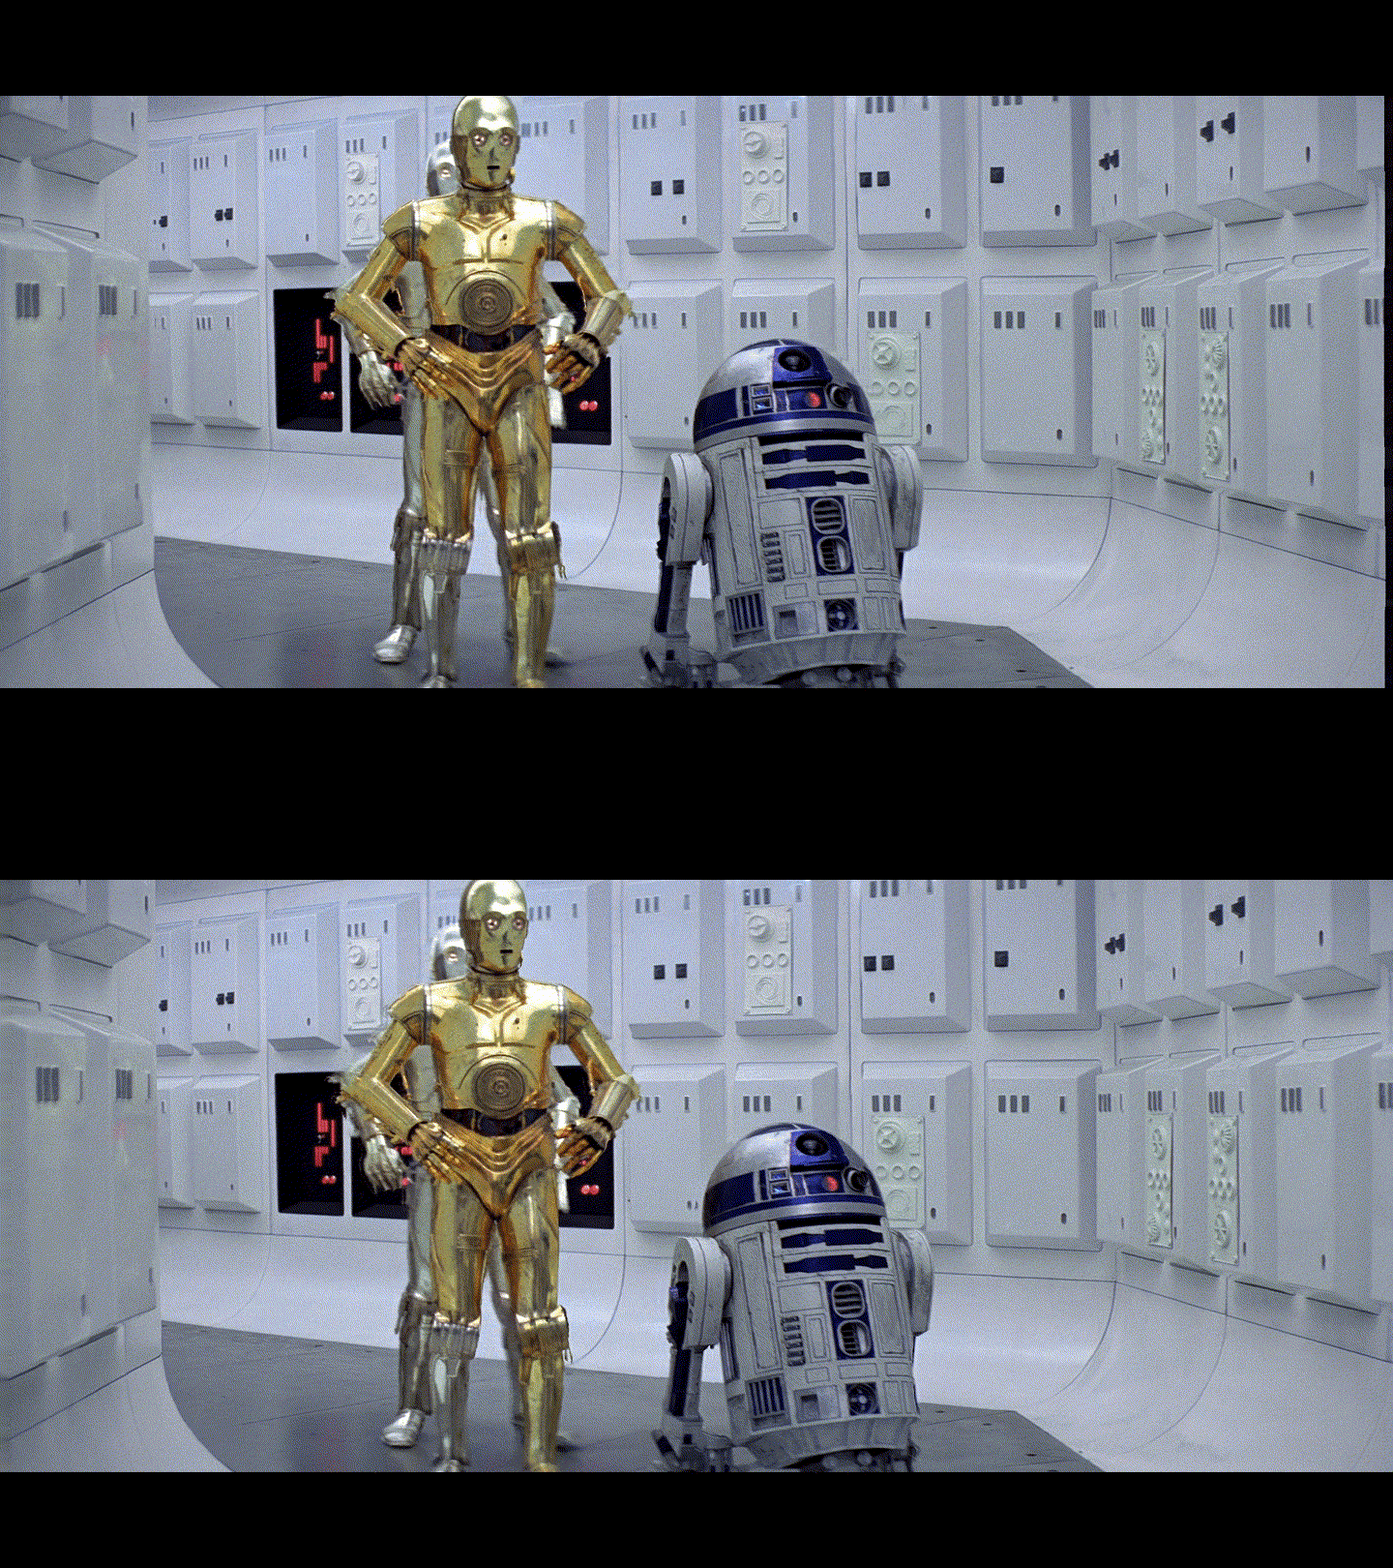 This is the result of the 2D to 3D conversion we will obtain
The title isn’t entirely accurate, because you can make a 3D version of any 2D material: movies, cartoons, your personal videos/photos, etc, even a screenshot from your desktop can be converted to 3D. But in this article, we’ll be making a 3D version of a movie.
As the source material, we will use Star Wars. Episode IV: A New Hope (1977).
For this, we will need:
- GPU with CUDA support
- ffmpeg
- Python
- Depth-Anything-V2 library
- A sufficient amount of disk space. For a typical FullHD 1080p movie with a duration of ~1.5–2 hours, about 400–500GB will be required for the source frames in PNG format, and 150–200GB for the final 3D frames in JPG format at the highest quality. In fact, the required volume for the source data can be reduced - frames can be extracted in parts, this will be discussed below.
My configuration for this task:
- Gigabyte A520M, AMD Ryzen 5 PRO 3600, 32GB DDR4 3200 MT/s (16+16)
- Gigabyte GeForce RTX 3060 12GB, CUDA Version: 12.5
- Ubuntu 22.04
Algorithm overview:
- Using ffmpeg, unpack the movie into frames
- Using Depth-Anything-V2, generate a depth map for each frame
- For each pair of images “Source frame” + “Depth map for this frame”, generate a 3D frame using the parallax effect
- Using ffmpeg, encode the resulting 3D frames into a 3D version of the movie + attach the audio tracks from the source material
- Watch and be surprised that it works
Spoiler: yes, it works. The 3D quality is excellent - you would never guess that the 3D was synthesized programmatically.
Now to the point.
Software installation
Installing ffmpeg
Ubuntu:
sudo apt update
sudo apt install ffmpeg
Windows: https://www.ffmpeg.org/download.html
Download one of the latest builds, unpack the archive, either entirely or only the ffmpeg.exe file (this is the only one we need here), save it for example to c:\ffmpeg.
You can add the path to the ffmpeg folder to PATH so that ffmpeg can be called from the command line anywhere in the system.
Installing Python
Ubuntu:
sudo apt update
sudo apt install python3 python3-pip
Windows: https://www.python.org/downloads/windows/
Download one of the latest releases for your OS and install it.
For Python, also install the numpy library:
pip install numpy
Installing Depth-Anything-V2
GitHub: https://github.com/DepthAnything/Depth-Anything-V2
The description from there:
git clone https://github.com/DepthAnything/Depth-Anything-V2
cd Depth-Anything-V2
pip install -r requirements.txt
The models must be downloaded separately. I work with the Large model (335.3M parameters, size ~1280Mb). The Base model (97.5M parameters, size ~372Mb) has also performed well. There is also a Small model (24.8M parameters, size ~95Mb), and the site also lists “Coming soon” for the Giant model with 1.3B parameters.
More about the models. I tested all 3 models; all of them are suitable for this task, even with the Small model you get good volumetric 3D. Personally, I settled on the Large model, since processing speed is not a critical factor for me (an average movie is processed within a 24 hours), and the quality of the Large model is noticeably better, especially in details. The Base model also produces excellent 3D, and an average movie is processed overnight.
Stage 0: test run
As a test, we take this frame:
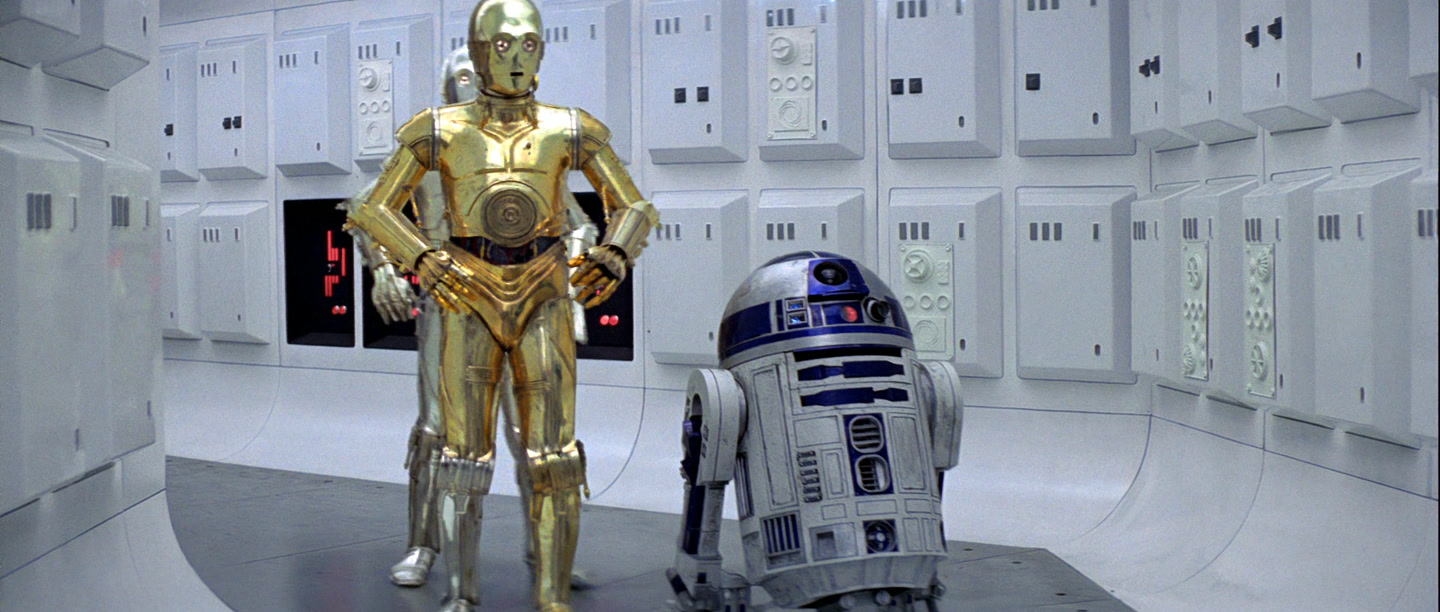 C-3PO and R2-D2 do not yet suspect that they will soon become 3D
The Depth-Anything-V2 page has an example for running depth map generation:
Code:
import cv2
import torch

from depth_anything_v2.dpt import DepthAnythingV2

DEVICE = 'cuda' if torch.cuda.is_available() else 'mps' if torch.backends.mps.is_available() else 'cpu'

model_configs = {
    'vits': {'encoder': 'vits', 'features': 64, 'out_channels': [48, 96, 192, 384]},
    'vitb': {'encoder': 'vitb', 'features': 128, 'out_channels': [96, 192, 384, 768]},
    'vitl': {'encoder': 'vitl', 'features': 256, 'out_channels': [256, 512, 1024, 1024]}
}

encoder = "vitl" # vits, vitb, vitl

model = DepthAnythingV2(**model_configs[encoder])
model.load_state_dict(torch.load(f'checkpoints/depth_anything_v2_{encoder}.pth', map_location='cpu'))
model = model.to(DEVICE).eval()

raw_img = cv2.imread('your/image/path')
depth = model.infer_image(raw_img) # HxW raw depth map in numpy
Let’s slightly modify this script and add saving the results to a file:
Code:
import os
import cv2
import torch
import numpy as np

from depth_anything_v2.dpt import DepthAnythingV2


# GENERAL OPTIONS
# Path to the folder with depth generation models
depth_models_path = "/home/user/DepthAnythingV2/models"

# Source file path
image_path = "/home/user/sw4test/file_000790.png"

# Folder to save result
output_path = "/home/user/sw4test"  # Saving in the same folder, the filename will be file_000790_depth.png

# Computing device
device = torch.device('cuda')


# DEPTH OPTIONS
depth_models_config = {
        'vits': {'encoder': 'vits', 'features': 64, 'out_channels': [48, 96, 192, 384]},
        'vitb': {'encoder': 'vitb', 'features': 128, 'out_channels': [96, 192, 384, 768]},
        'vitl': {'encoder': 'vitl', 'features': 256, 'out_channels': [256, 512, 1024, 1024]}
}

# Selecting the DepthAnythingV2 model: vits - Small, vitb - Base, vitl - Large
encoder = "vitl" # vits, vitb, vitl

model_depth_current = os.path.join(depth_models_path, f'depth_anything_v2_{encoder}.pth')
model_depth = DepthAnythingV2(**depth_models_config[encoder])
model_depth.load_state_dict(torch.load(model_depth_current, weights_only=True, map_location=device))
model_depth = model_depth.to(device).eval()


# START PROCESSING
# Loading the image
raw_img = cv2.imread(image_path)

# Extract the image name to save the depth map later
image_name = os.path.splitext(os.path.basename(image_path))[0]

# Depth calculation
with torch.no_grad():
    depth = model_depth.infer_image(raw_img)

# Depth normalization before saving
depth_normalized = cv2.normalize(depth, None, 0, 255, norm_type=cv2.NORM_MINMAX, dtype=cv2.CV_8U)

# Saving the depth map
output_path = os.path.join(output_path, f'{image_name}_depth.png')
cv2.imwrite(output_path, depth_normalized)

# OPTIONAL: SAVE DEPTH MAP IN COLOR
depth_colored = cv2.applyColorMap(depth_normalized, cv2.COLORMAP_JET)

# Saving the depth map in color
output_path = os.path.join(output_path, f'{image_name}_depth_color.png')
cv2.imwrite(output_path, depth_colored)


print("DONE.")


# Delete model and clear Cuda cache
del model_depth
torch.cuda.empty_cache()
We get a depth map:
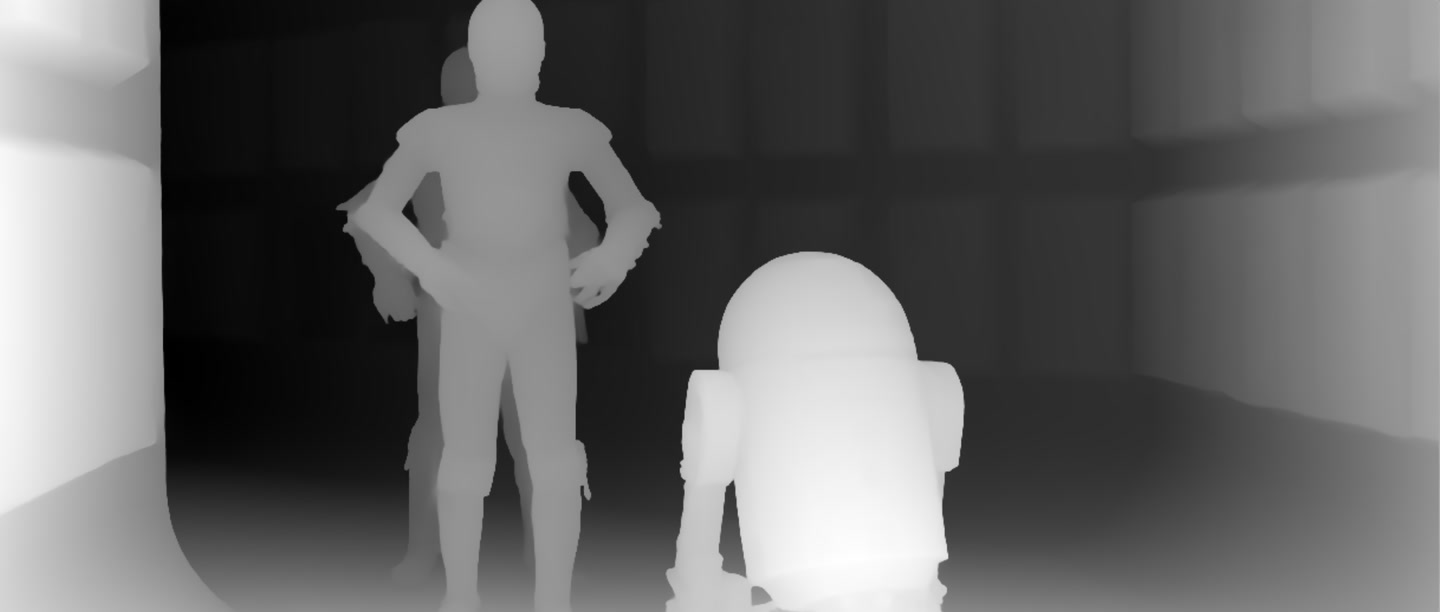 Depth map, the lighter the object, the closer it is
Or a colorized version of the depth map, for clarity (it won’t be needed for our task):
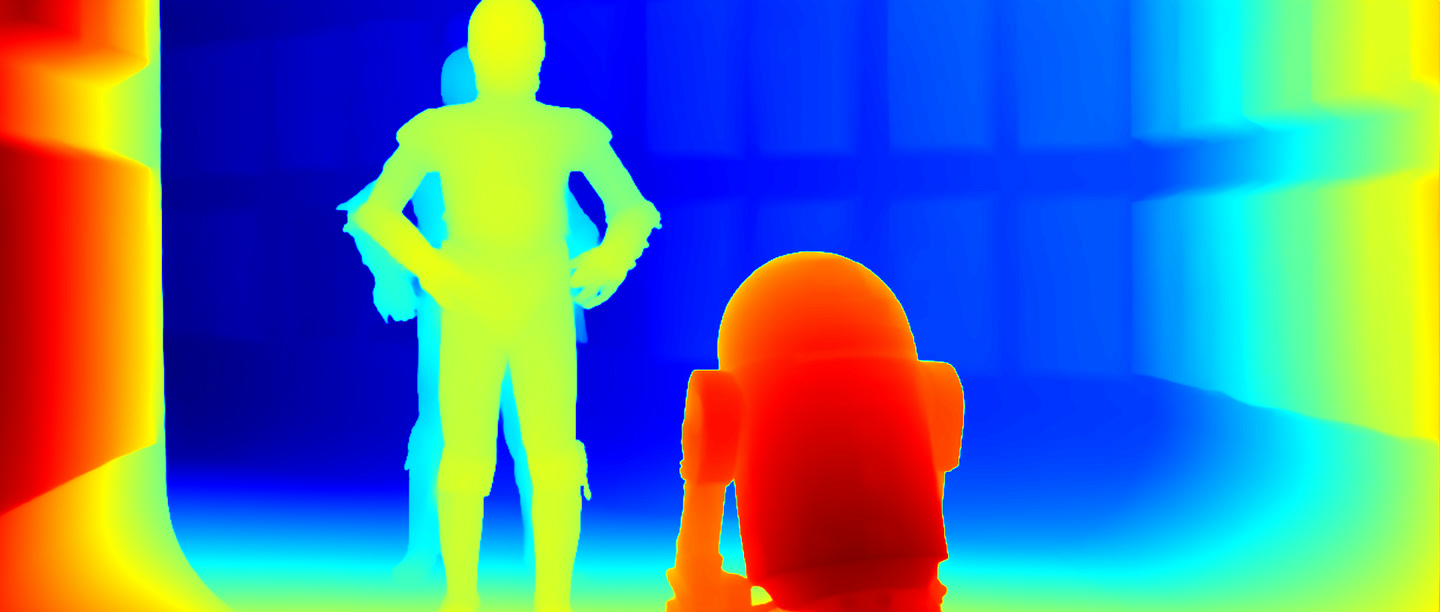 Color depth map, from dark red (closer) to dark blue (farther)
Related article: Visual Comparison of Depth-Anything-V2 Models →
Now, based on the obtained depth map, let’s make a 3D image, for example in the FOU (Full Over-Under) format:
Code:
import os
import cv2
import numpy as np


# GENERAL OPTIONS
# Source file path
image_path = "/home/user/sw4test/file_000790.png"

# Depth map path for the source image
depth_path = "/home/user/sw4test/file_000790_depth.png"

# Folder to save result
output_path = "/home/user/sw4test"  # Saving in the same folder, the filename will be file_000790_3d.jpg

# 3D OPTIONS
PARALLAX_SCALE = 15  # Recommended 10 to 20
PARALLAX_METHOD = 1  # 1 or 2
INPAINT_RADIUS  = 2  # For PARALLAX_METHOD = 2 only, recommended 2 to 5, optimum value 2-3
INTERPOLATION_TYPE = cv2.INTER_LINEAR  # INTER_NEAREST, INTER_AREA, INTER_LINEAR, INTER_CUBIC, INTER_LANCZOS4
TYPE3D = "FOU"  # HSBS, FSBS, HOU, FOU
LEFT_RIGHT = "LEFT"  # LEFT or RIGHT

# 0 - if there's no need to change frame size
new_width  = 0
new_height = 0


def image_size_correction(current_height, current_width, left_image, right_image):
    ''' Image size correction if new_width and new_height are set '''

    # Calculate offsets for centering
    top = (new_height - current_height) // 2
    left = (new_width - current_width) // 2

    # Create a black canvas of the desired size
    new_left_image  = np.zeros((new_height, new_width, 3), dtype=np.uint8)
    new_right_image = np.zeros((new_height, new_width, 3), dtype=np.uint8)

    # Placing the image on a black background
    new_left_image[top:top + current_height, left:left + current_width] = left_image
    new_right_image[top:top + current_height, left:left + current_width] = right_image

    return new_left_image, new_right_image

def image3d_processing_method1(image, depth, height, width):
    ''' The function of creating a stereo pair based on the source image and depth map.
        Method1: faster, contours smoother, but may be less accurate
    '''

    # Creating parallax
    parallax = depth * PARALLAX_SCALE

    # Pixel coordinates
    x, y = np.meshgrid(np.arange(width, dtype=np.float32), np.arange(height, dtype=np.float32))

    # Calculation of offsets
    shift_left =  np.clip(x - parallax, 0, width - 1)
    shift_right = np.clip(x + parallax, 0, width - 1)

    # Applying offsets with cv2.remap
    left_image =  cv2.remap(image, shift_left,  y, interpolation=INTERPOLATION_TYPE)
    right_image = cv2.remap(image, shift_right, y, interpolation=INTERPOLATION_TYPE)

    return left_image, right_image

def image3d_processing_method2(image, depth, height, width):
    ''' The function of creating a stereo pair based on the source image and depth map.
        Method2: slightly slower than the first method, but can be more accurate
    '''

    # Calculating the value for parallax
    parallax = depth * PARALLAX_SCALE

    # Parallax rounding and conversion to int32
    shift = np.round(parallax).astype(np.int32)

    # Grid coordinates
    y, x = np.indices((height, width), dtype=np.int32)

    # Image preparation
    left_image  = np.zeros_like(image)
    right_image = np.zeros_like(image)

    # Left image shaping by offset coordinates
    x_src_left = x - shift
    valid_left = (x_src_left >= 0) & (x_src_left < width)
    left_image[y[valid_left], x[valid_left]] = image[y[valid_left], x_src_left[valid_left]]

    # Right image shaping by offset coordinates
    x_src_right = x + shift
    valid_right = (x_src_right >= 0) & (x_src_right < width)
    right_image[y[valid_right], x[valid_right]] = image[y[valid_right], x_src_right[valid_right]]

    # Missing pixel masks for inpainting
    mask_left  = (~valid_left).astype(np.uint8) * 255
    mask_right = (~valid_right).astype(np.uint8) * 255

    # Filling voids via inpainting
    left_image  = cv2.inpaint(left_image,  mask_left,  INPAINT_RADIUS, cv2.INPAINT_TELEA)
    right_image = cv2.inpaint(right_image, mask_right, INPAINT_RADIUS, cv2.INPAINT_TELEA)

    return left_image, right_image

def image3d_combining(left_image, right_image, height, width):
    ''' Combining stereo pair images into a single 3D image '''

    # Images size correction if new_width and new_height are set
    if new_width and new_height:
        left_image, right_image = image_size_correction(height, width, left_image, right_image)
        # Change the values of the original image sizes to new_height and new_width for correct gluing below
        height = new_height
        width = new_width

    # Image order, left first or right first
    img1, img2 = (left_image, right_image) if LEFT_RIGHT == "LEFT" else (right_image, left_image)

    # Combine left and right images into a common 3D image
    if TYPE3D == "HSBS":  # Narrowing and combining images horizontally
        combined_image = np.hstack((cv2.resize(img1, (width // 2, height), interpolation=cv2.INTER_AREA),
                          cv2.resize(img2, (width // 2, height), interpolation=cv2.INTER_AREA)))

    elif TYPE3D == "HOU":  # Narrowing and combining images vertically
        combined_image = np.vstack((cv2.resize(img1, (width, height // 2), interpolation=cv2.INTER_AREA),
                          cv2.resize(img2, (width, height // 2), interpolation=cv2.INTER_AREA)))

    elif TYPE3D == "FSBS":  # Combining images horizontally
        combined_image = np.hstack((img1, img2))

    elif TYPE3D == "FOU":  # Combining images vertically
        combined_image = np.vstack((img1, img2))

    return combined_image


# PREPARATION
# Extract the image name to save the 3D image later on
image_name = os.path.splitext(os.path.basename(image_path))[0]

# Load image and depth map
image = cv2.imread(image_path)  # Source image
depth = cv2.imread(depth_path, cv2.IMREAD_GRAYSCALE).astype(np.float32) / 255.0  # Depth map

# Image size
height, width = image.shape[:2]

# START PROCESSING
# Runing image3d_processing and getting a stereo pair for the image
PARALLAX_FUNCTIONS = {
	1: image3d_processing_method1,
	2: image3d_processing_method2,
}

if PARALLAX_METHOD in (1, 2):
	left_image, right_image = PARALLAX_FUNCTIONS[PARALLAX_METHOD](image, depth, height, width)
else:
	print(f"Set the correct {PARALLAX_METHOD}.")

# Combining stereo pair into a common 3D image
image3d = image3d_combining(left_image, right_image, height, width)

# Saving 3D image
output_path = os.path.join(output_path, f'{image_name}_3d.jpg')
cv2.imwrite(output_path, image3d, [int(cv2.IMWRITE_JPEG_QUALITY), 100])


print("DONE.")
Here it is necessary to explain the main parameters.
Parameter: PARALLAX_SCALE = 15
The parallax value in pixels, how many pixels distant objects (more precisely, pixels) will be shifted at maximum relative to closer ones (the closest is 0, the farthest is 15). The larger the value, the greater the depth. At excessively large values, the image will be unwatchable. It is important to note that the shift occurs for each frame separately - for the left and for the right, thus the total parallax is doubled.
The recommended value is from 10 to 20. I usually set 15; this gives good depth without significant distortions.
Parameter: PARALLAX_METHOD = 1
Available values: 1 or 2. Choice of the parallax creation method, handled by the functions image3d_processing_method1 and image3d_processing_method2 respectively.
In the first method, the displacement occurs faster and the contours of the displaced objects look smoother. In the second method, the displacement is performed using a different principle, the processing takes a bit longer, but the 3D may be sharper. Also, the depth of different objects may differ between these methods. Overall, the depth and 3D quality are good in both cases. I recommend experimenting with both methods and choosing the one you like.
Parameter: INPAINT_RADIUS
The radius for filling shifts in pixels for the second parallax creation method (image3d_processing_method2). Responsible for filling with neighboring pixels at the edges of images when they are shifted. Recommended values are from 2 to 5; in most cases 2–3 is optimal. If the value is larger, for example INPAINT_RADIUS = 15, then the edges will be too blurred and processing time will increase significantly. With small values - 0 or 1 - the edges will look too sharp and inaccurate.
Parameter: INTERPOLATION_TYPE = cv2.INTER_LINEAR
Interpolation type for the first parallax creation method (image3d_processing_method1). Since we deform the image by shifting objects (pixels) on it, the resulting empty areas need to be filled with something. For this, the nearest-neighbor method in various variations is used:
INTER_NEAREST - nearest neighbor, fast and simple interpolation, not the highest quality
INTER_AREA - better suited for image downscaling, in this case we will not consider it
INTER_LINEAR - bilinear interpolation in a 2x2 pixel neighborhood, a balance of quality and speed, the most optimal option
INTER_CUBIC - bicubic interpolation in a 4x4 pixel neighborhood, considered higher quality than bilinear, but takes a bit more time
INTER_LANCZOS4 - Lanczos interpolation in an 8x8 pixel neighborhood, the highest quality, but works significantly slower than the others
I tested all options, carefully reviewing the results; I did not notice a significant difference when viewing 3D. Therefore, I usually use the fast and optimal method - INTER_LINEAR. But if speed is not critical for you, it is better to use INTER_LANCZOS4 - the best quality.
It should be noted here that the speed difference is measured in milliseconds. For example, here are measurements of interpolation of the frame with a resolution of 1920x1080:
NEAREST: 0.039 seconds
INTER_AREA: 0.041 seconds
INTER_LINEAR: 0.041 seconds
INTER_CUBIC: 0.053 seconds
INTER_LANCZOS4: 0.090 - 0.096 seconds
For example, between INTER_LINEAR and INTER_LANCZOS4 the difference is ~50 milliseconds per processing of the frame with a resolution of 1920x1080. This may seem insignificant, but if you multiply 50 ms by 194000 frames, you get ~162 minutes. That is, INTER_LINEAR will process faster than INTER_LANCZOS4 by 162 minutes, or 2 hours 42 minutes. And this is only parallax interpolation processing.
Perhaps later I will write a comparative review of all these methods, with a visual demonstration and indication of the processing time; for now I can recommend using any of these 3 methods: INTER_LINEAR, INTER_CUBIC, INTER_LANCZOS4.
Parameter: TYPE3D = “FOU”
The type of stereo pair we want to obtain:
HSBS (Half Side-by-Side) - half horizontal stereo pair
FSBS (Full Side-by-Side) - full horizontal stereo pair
HOU (Half Over-Under) - half vertical stereo pair
FOU (Full Over-Under) - full vertical stereo pair
I think everything here is obvious for those who watch 3D on their devices, but just in case I will explain.
HSBS - half horizontal stereo pair, the second frame is placed to the right of the first frame. If the source frame had a resolution of 1920x1080, then both frames of the stereo pair are compressed horizontally by a factor of 2 (in this case to 960 pixels, the full resolution of each frame becomes 960x1080), so that the total width of the entire stereo pair remains in the original 1920x1080 format. When viewing, both halves of the stereo pair are stretched to full size for each frame - it was 960x1080, it becomes 1920x1080. In this case, there is a significant loss of detail, since the number of pixels horizontally is halved. On the other hand, the frame/video size will be significantly smaller than a full stereo pair, by 1.5–2 times.
FSBS - full horizontal stereo pair, the second frame is placed to the right of the first frame. If the source frame had a resolution of 1920x1080, then both frames of the stereo pair will create a combined frame of 3840x1080 pixels. In this case, there will be no loss of detail, but the frame/video size will become 1.5–2 times larger.
HOU - half vertical stereo pair, the second frame is placed below the first frame. If the source frame had a resolution of 1920x1080, then both frames of the stereo pair are compressed vertically by a factor of 2 (in this case to 540 pixels, the full resolution of each frame becomes 1920x540).
There is an opinion that when choosing among half stereo pairs, the best choice is HOU - half vertical stereo pair. This is quite logical, given that fewer pixels are lost here: 1080/2=540, instead of 1920/2=960 in the case of a horizontal stereo pair.
FOU - full vertical stereo pair, the second frame is placed below the first frame. If the source frame had a resolution of 1920x1080, then both frames of the stereo pair will create a combined frame of 1920x2160 pixels.
Often, half stereo pairs (HSBS and HOU) work on 3D TVs. All variants work on VR headsets, and you can get maximum enjoyment from watching 3D on full stereo pairs (FSBS or FOU).
Parameter: LEFT_RIGHT = “LEFT”
The order of the frame pair in the combined 3D image: LEFT - left first, RIGHT - right first. The default value is LEFT. This order can also be configured on the equipment when viewing 3D video.
Parameters: new_width = 1920 and new_height = 1080
An important setting. The point is that there are movies with “non-standard” resolution, for example 1920x816 pixels (as in our case). If we make stereo pairs with such a resolution, there will most likely be problems when playing on equipment that displays images in a standard resolution (for example FullHD 1920x1080 16:9), this is especially critical for half stereo pairs.
A simple and working solution was found - we increase the image to the required resolution, where the missing pixels are filled with black color, simply put - we add black bars. For example, the source frame resolution is 1920x816, we want to increase it to the standard 1920x1080, we specify in the parameters:
new_width  = 1920
new_height = 1080
Thus, the frame is not deformed (not stretched or squeezed), and the missing space is filled with black color. Instead of a 1920x816 frame, we get a standard 1920x1080 frame with added black bars vertically.
If it is not required to change the frame size, then we specify:
new_width  = 0
new_height = 0
Note: Here and further we use PARALLAX_METHOD = 1 (function image3d_processing_method1), all examples and calculations are based on this method.
So, let’s run the script and get a stereo pair:
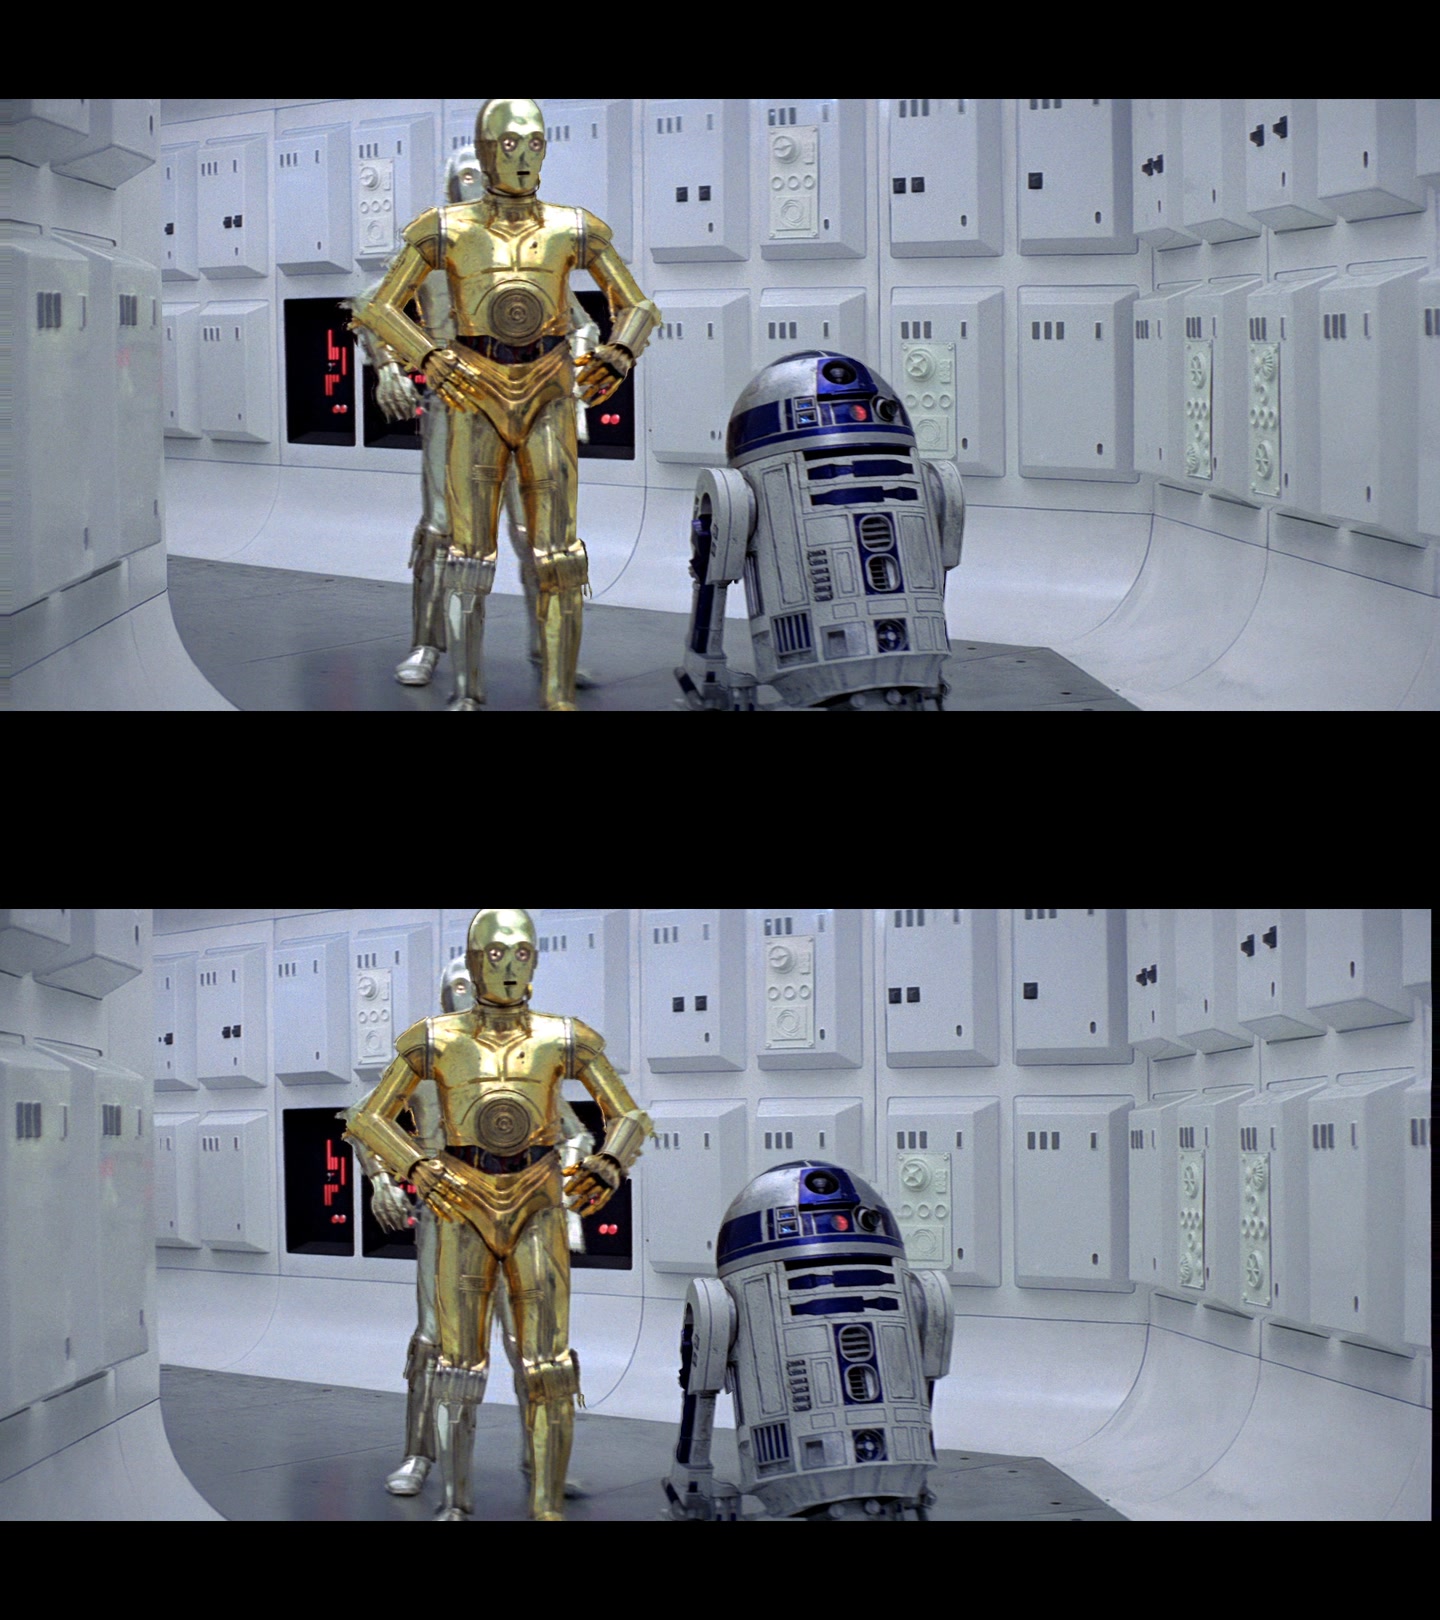 C-3PO and R2-D2 now from two different angles, without realizing it themselves
Let’s make a 3D GIF to visually demonstrate the scene’s depth:
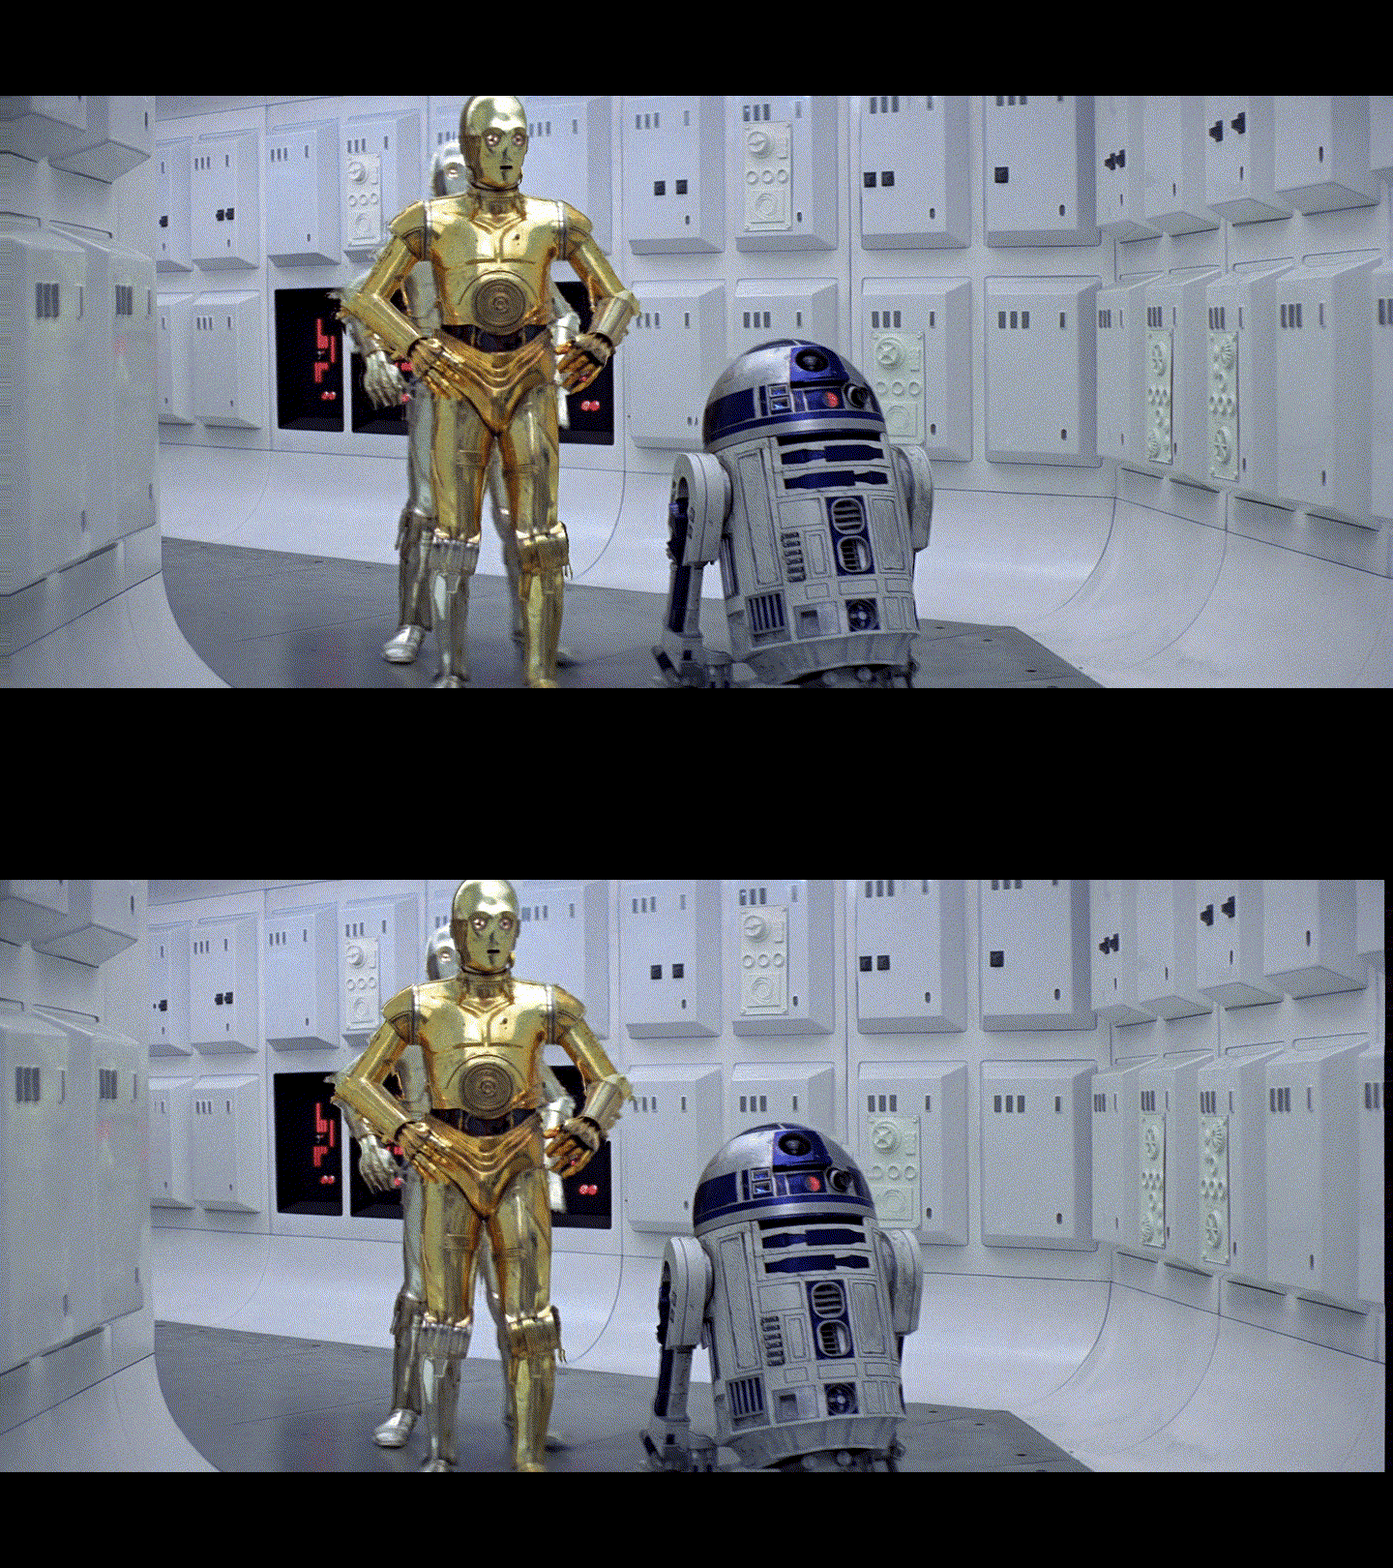 C-3PO and R2-D2 in 3D now!
A few more GIFs:
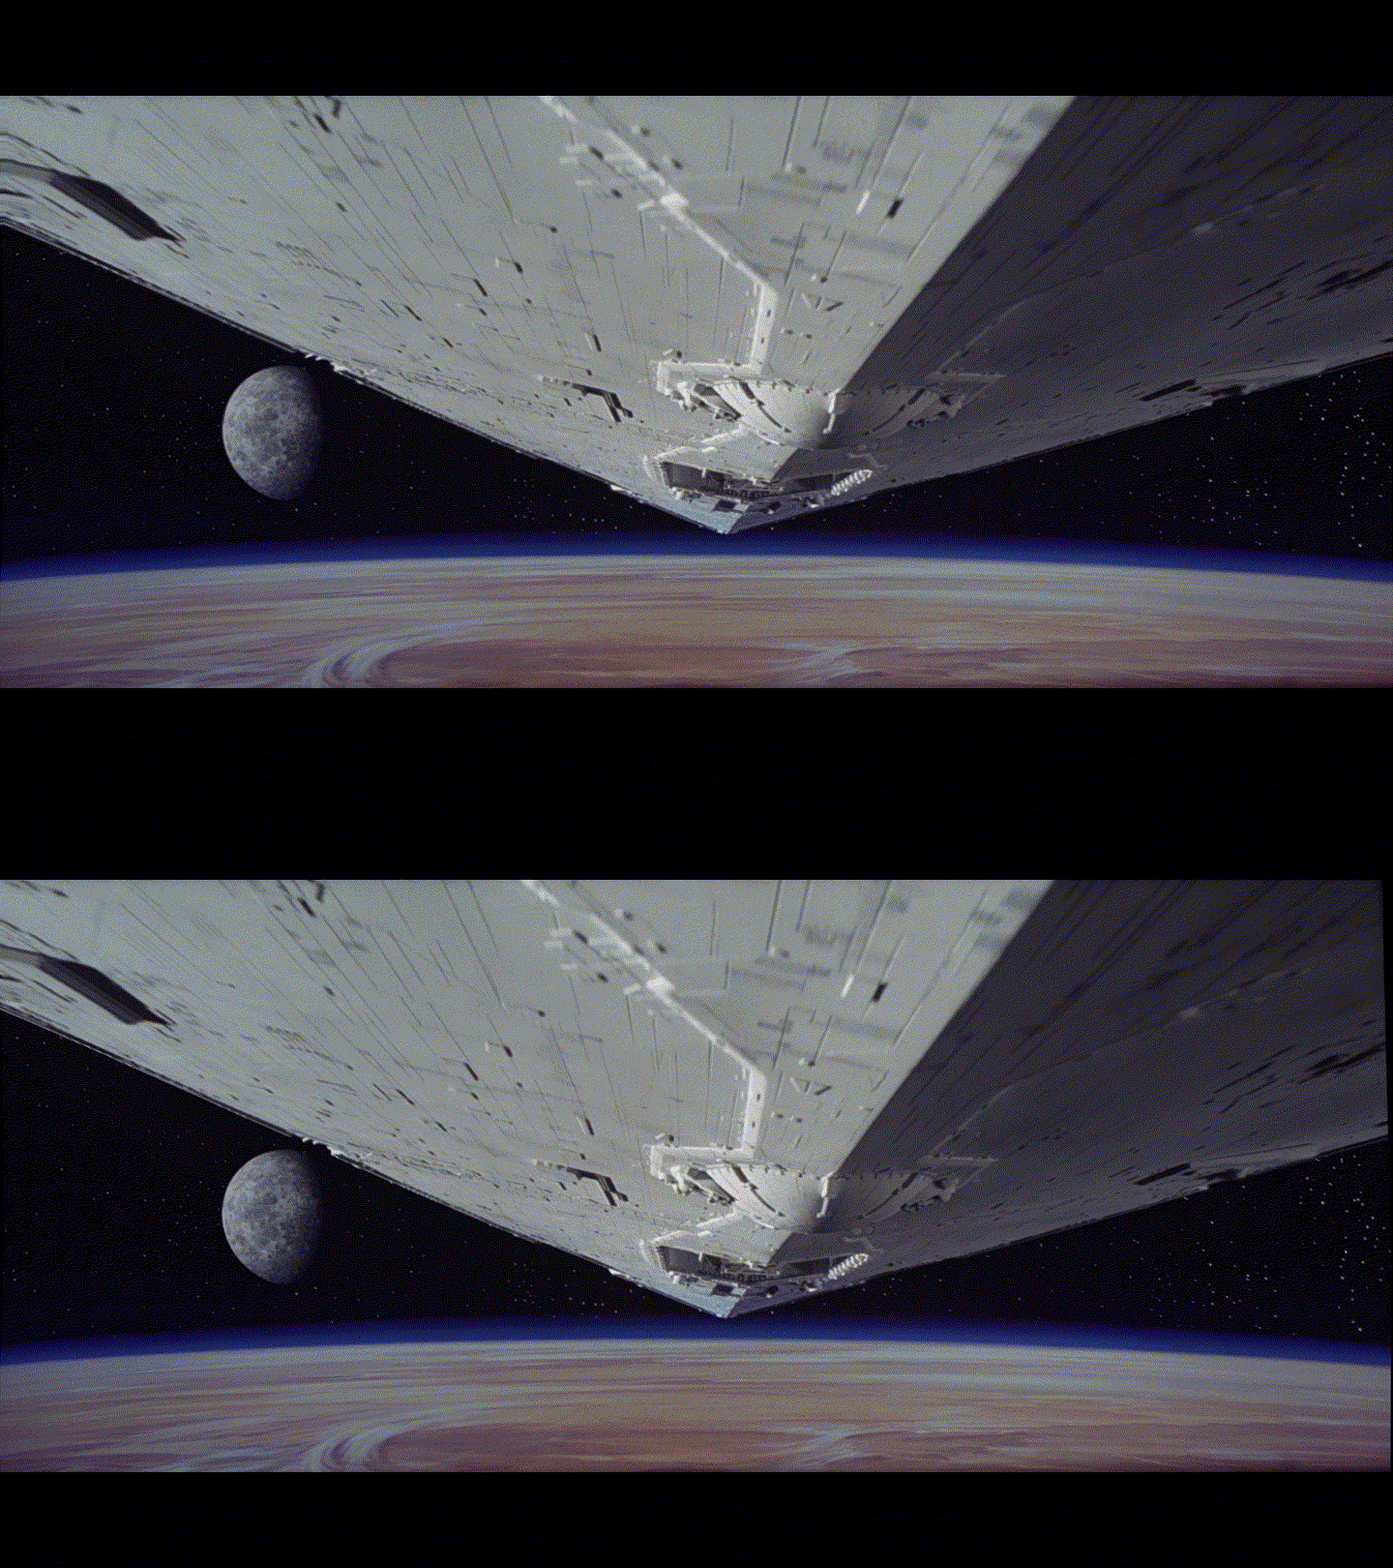 The ship was well converted into 3D, as if DepthAnythingV2 had been trained on it as well
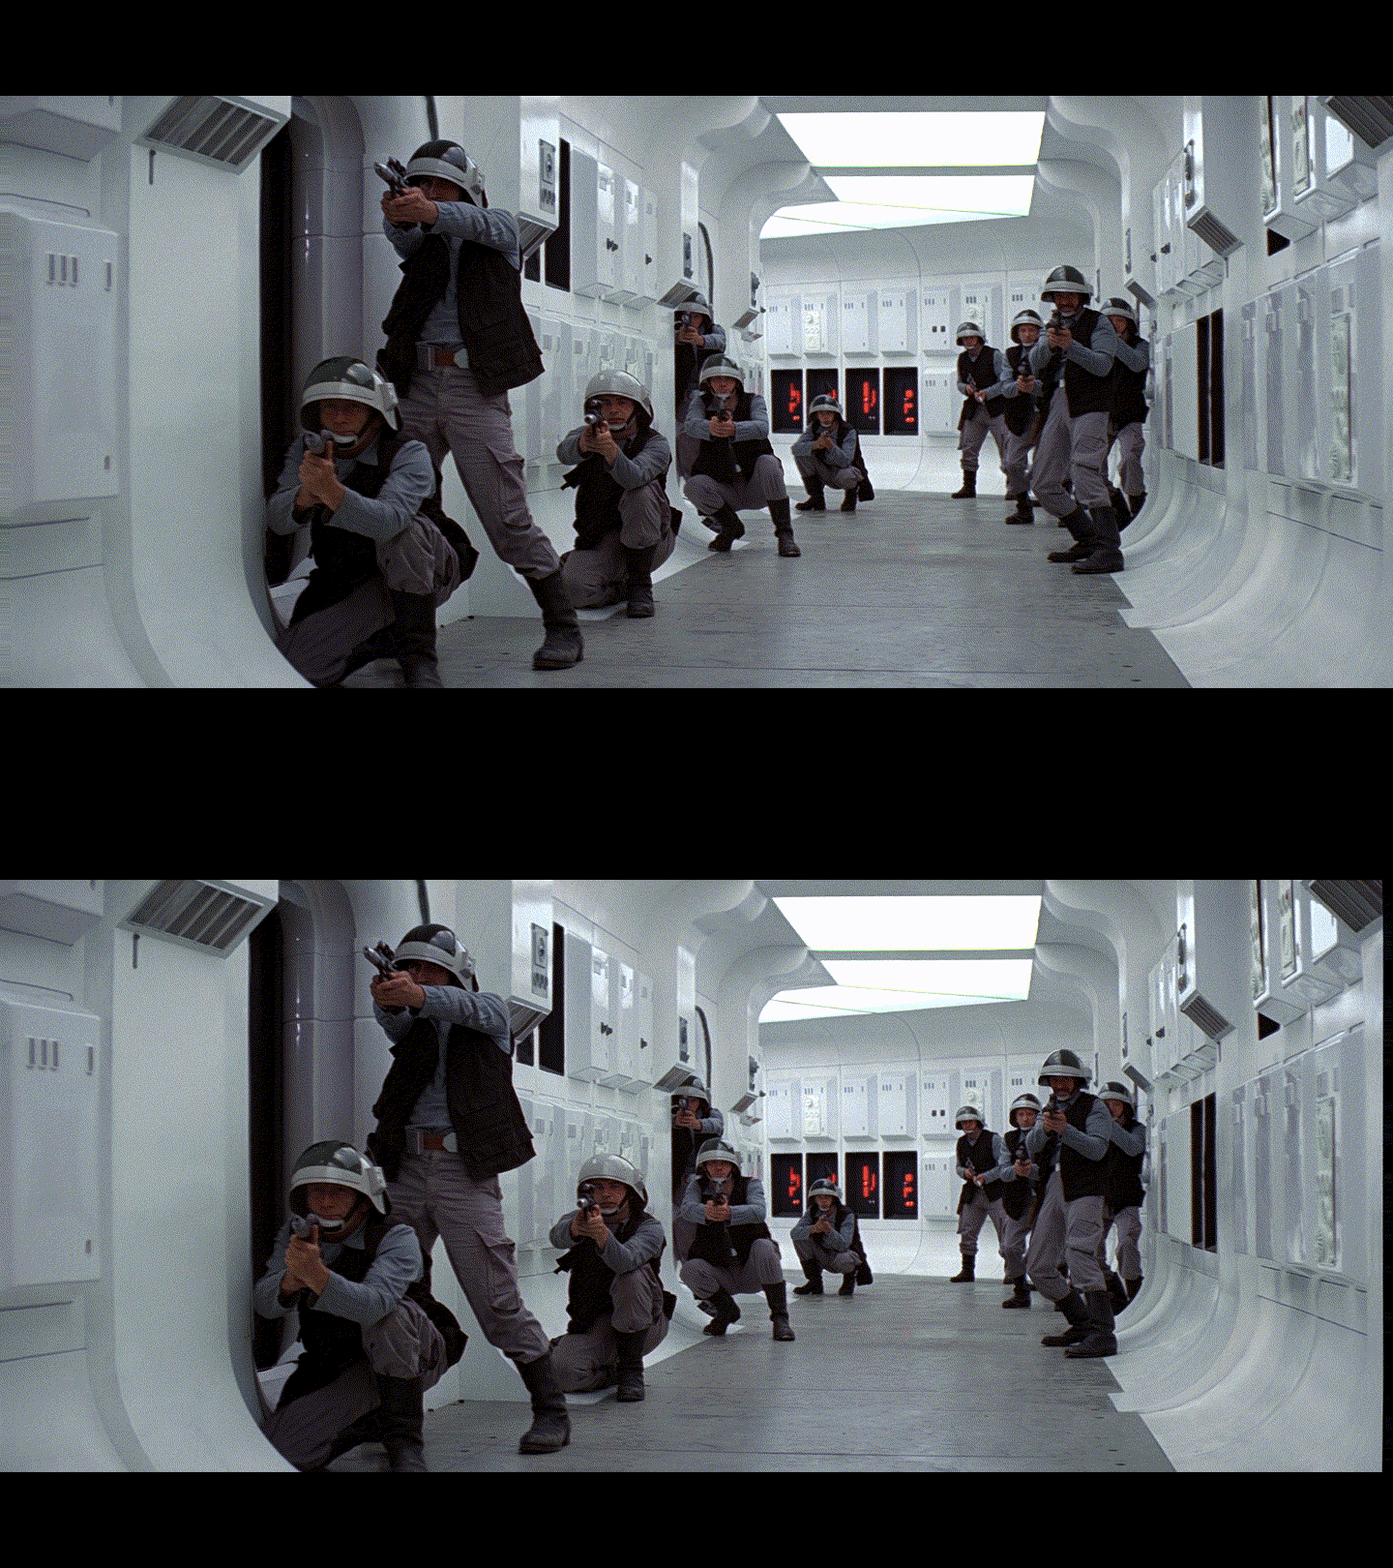 The rebels cannot believe that they are now in 3D
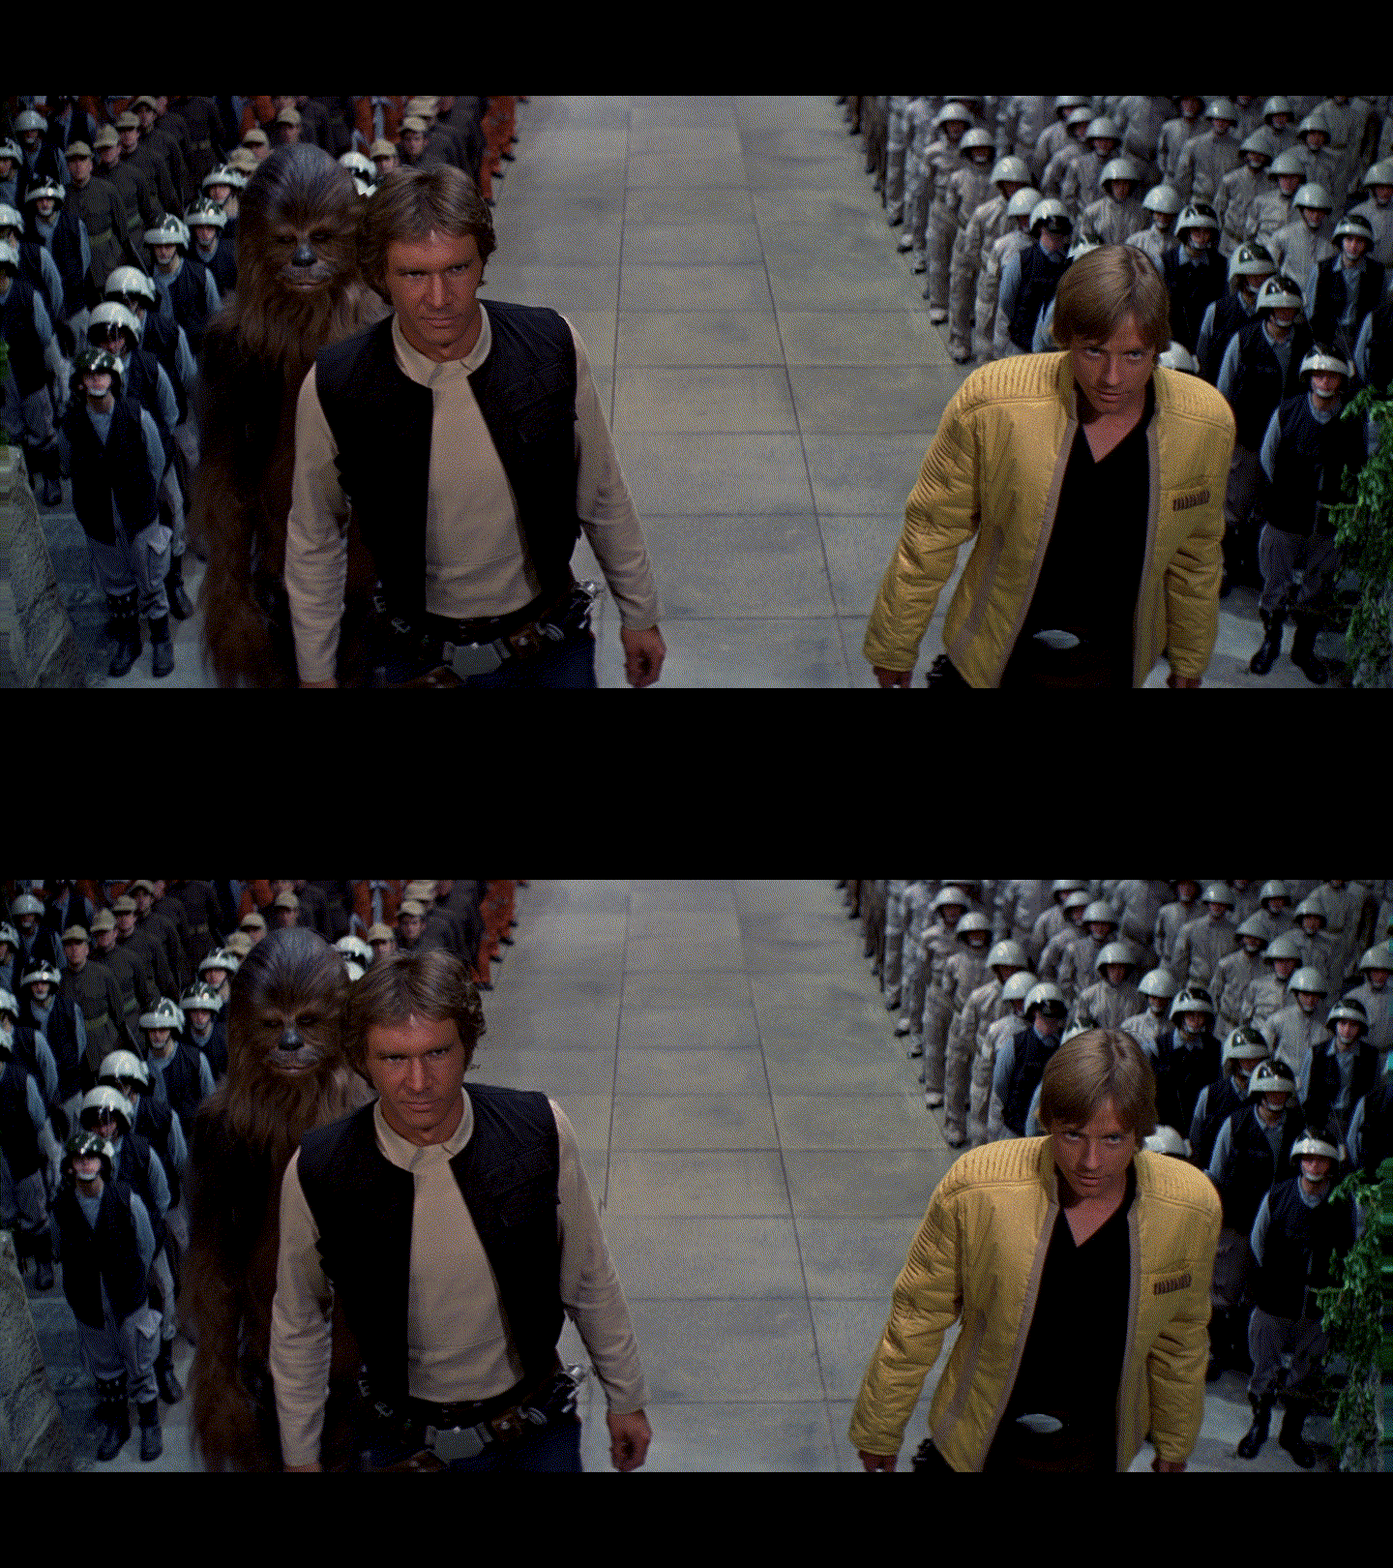 Han, Luke and Chewie are thrilled
Other images can be viewed on my Google Drive. There are source frames, depth maps, including color ones, and 3D GIFs for clarity.
Now we can proceed to processing the main material.
Stage 1: extracting frames from source video
Full frame extraction to PNG format requires sufficient disk space. For example, in our case, a FullHD movie, approximately 2 hours long, with a frame rate of 23.976 (24000/1001), has ~194000 frames, with a total volume of approximately ~430GB in PNG format.
Looking ahead, there are ways to reduce the required disk space. Instead of extracting all frames at once, we can extract them in ranges - for example, frames from 0 to 10000, then from 10001 to 20000, and so on. I will write about this in another article (UPD: Done. Script and description at the link).
We can also extract source frames in JPG format. I do not recommend this option, I tested it, the final image is noticeably worse, even if extracting JPG at the highest quality. However, after processing (before final encoding into 3D video), it is quite acceptable to save output files in JPG format, otherwise too much disk space will be required. For example, in the case of full 3D pairs, we would need 430x2 = ~860GB for output 3D frames in PNG format.
So, extract frames using the command:
ffmpeg -i sw4.mkv "/home/user/sw4frames/file_%06d.png"
Here:
“-i sw4.mkv” - source file
“/home/user/sw4frames/” - path where the frames will be extracted; the folder must be created in advance
“file_%06d.png” - file mask, where %06d is a 6-digit counter starting from 000000; the files will be like “file_000000.png”, “file_000001.png”, etc.
A variant of the same command, but using CUDA (depending on the system, it will most likely be faster):
ffmpeg -hwaccel cuda -i sw4.mkv "/home/user/sw4frames/file_%06d.png"
Stage 2: creating 3D frames
Now we can proceed to creating 3D frames. Below is a script that does the following:
- sequentially loads each frame from the source folder
- creates a depth map for each frame
- passes the depth map + the source frame to the function for creating a 3D frame via parallax, creates a 3D version of the frame
- deletes the source file and saves the 3D frame to a JPG file
Code:
import os
from concurrent.futures import ThreadPoolExecutor, wait, FIRST_COMPLETED
from multiprocessing import Value
import cv2
import torch
import numpy as np

from depth_anything_v2.dpt import DepthAnythingV2


# GENERAL OPTIONS
# Path to the folder with depth generation models
depth_models_path = "/home/user/DepthAnythingV2/models"

# Folder with source frames
frames_path = "/home/user/sw4frames"

# Get the name of the source frames folder to create a folder for 3D frames
frames_path_name = os.path.basename(os.path.normpath(frames_path))
images3d_path = os.path.join(os.path.dirname(frames_path), f"{frames_path_name}_3d")
os.makedirs(images3d_path, exist_ok=True)

# List of source frames in the directory
all_frames = [
    os.path.join(frames_path, file_name)
    for file_name in os.listdir(frames_path)
    if os.path.isfile(os.path.join(frames_path, file_name))
]

frame_counter = Value('i', 0) # Counter for naming frames

chunk_size = 1000  # Number of files per thread
max_threads = 3 # Maximum streams

# Computing device
device = torch.device('cuda')

# 3D OPTIONS
PARALLAX_SCALE = 15  # Recommended 10 to 20
PARALLAX_METHOD = 1  # 1 or 2
INPAINT_RADIUS  = 2  # For PARALLAX_METHOD = 2 only, recommended 2 to 5, optimum value 2-3
INTERPOLATION_TYPE = cv2.INTER_LINEAR  # INTER_NEAREST, INTER_AREA, INTER_LINEAR, INTER_CUBIC, INTER_LANCZOS4
TYPE3D = "FOU"  # HSBS, FSBS, HOU, FOU
LEFT_RIGHT = "LEFT"  # LEFT or RIGHT

# 0 - if there's no need to change frame size
new_width  = 0
new_height = 0

depth_models_config = {
        'vits': {'encoder': 'vits', 'features': 64, 'out_channels': [48, 96, 192, 384]},
        'vitb': {'encoder': 'vitb', 'features': 128, 'out_channels': [96, 192, 384, 768]},
        'vitl': {'encoder': 'vitl', 'features': 256, 'out_channels': [256, 512, 1024, 1024]}
}

# Selecting the DepthAnythingV2 model: vits - Small, vitb - Base, vitl - Large
encoder = "vitl" # vits, vitb, vitl

model_depth_current = os.path.join(depth_models_path, f'depth_anything_v2_{encoder}.pth')
model_depth = DepthAnythingV2(**depth_models_config[encoder])
model_depth.load_state_dict(torch.load(model_depth_current, weights_only=True, map_location=device))
model_depth = model_depth.to(device).eval()


def image_size_correction(current_height, current_width, left_image, right_image):
    ''' Image size correction if new_width and new_height are set '''

    # Calculate offsets for centering
    top = (new_height - current_height) // 2
    left = (new_width - current_width) // 2

    # Create a black canvas of the desired size
    new_left_image  = np.zeros((new_height, new_width, 3), dtype=np.uint8)
    new_right_image = np.zeros((new_height, new_width, 3), dtype=np.uint8)

    # Placing the image on a black background
    new_left_image[top:top + current_height, left:left + current_width] = left_image
    new_right_image[top:top + current_height, left:left + current_width] = right_image

    return new_left_image, new_right_image

def depth_processing(image):
    ''' Creating a depth map for an image '''

    # Depth calculation
    with torch.no_grad():
        depth = model_depth.infer_image(image)

    # Normalization
    depth_normalized = depth / depth.max()

    return depth_normalized

def image3d_processing_method1(image, depth, height, width):
    ''' The function of creating a stereo pair based on the source image and depth map.
        Method1: faster, contours smoother, but may be less accurate
    '''

    # Creating parallax
    parallax = depth * PARALLAX_SCALE

    # Pixel coordinates
    x, y = np.meshgrid(np.arange(width, dtype=np.float32), np.arange(height, dtype=np.float32))

    # Calculation of offsets
    shift_left  = np.clip(x - parallax, 0, width - 1)
    shift_right = np.clip(x + parallax, 0, width - 1)

    # Applying offsets with cv2.remap
    left_image  = cv2.remap(image, shift_left,  y, interpolation=INTERPOLATION_TYPE)
    right_image = cv2.remap(image, shift_right, y, interpolation=INTERPOLATION_TYPE)

    return left_image, right_image

def image3d_processing_method2(image, depth, height, width):
    ''' The function of creating a stereo pair based on the source image and depth map.
        Method2: slightly slower than the first method, but can be more accurate
    '''

    # Calculating the value for parallax
    parallax = depth * PARALLAX_SCALE

    # Parallax rounding and conversion to int32
    shift = np.round(parallax).astype(np.int32)

    # Grid coordinates
    y, x = np.indices((height, width), dtype=np.int32)

    # Image preparation
    left_image  = np.zeros_like(image)
    right_image = np.zeros_like(image)

    # Left image shaping by offset coordinates
    x_src_left = x - shift
    valid_left = (x_src_left >= 0) & (x_src_left < width)
    left_image[y[valid_left], x[valid_left]] = image[y[valid_left], x_src_left[valid_left]]

    # Right image shaping by offset coordinates
    x_src_right = x + shift
    valid_right = (x_src_right >= 0) & (x_src_right < width)
    right_image[y[valid_right], x[valid_right]] = image[y[valid_right], x_src_right[valid_right]]

    # Missing pixel masks for inpainting
    mask_left  = (~valid_left).astype(np.uint8) * 255
    mask_right = (~valid_right).astype(np.uint8) * 255

    # Filling voids via inpainting
    left_image  = cv2.inpaint(left_image,  mask_left,  INPAINT_RADIUS, cv2.INPAINT_TELEA)
    right_image = cv2.inpaint(right_image, mask_right, INPAINT_RADIUS, cv2.INPAINT_TELEA)

    return left_image, right_image

def image3d_combining(left_image, right_image, height, width):
    ''' Combining stereo pair images into a single 3D image '''

    # Images size correction if new_width and new_height are set
    if new_width and new_height:
        left_image, right_image = image_size_correction(height, width, left_image, right_image)
        # Change the values of the original image sizes to new_height and new_width for correct gluing below
        height = new_height
        width = new_width

    # Image order, left first or right first
    img1, img2 = (left_image, right_image) if LEFT_RIGHT == "LEFT" else (right_image, left_image)

    # Combine left and right images into a common 3D image
    if TYPE3D == "HSBS":  # Narrowing and combining images horizontally
        combined_image = np.hstack((cv2.resize(img1, (width // 2, height), interpolation=cv2.INTER_AREA),
                          cv2.resize(img2, (width // 2, height), interpolation=cv2.INTER_AREA)))

    elif TYPE3D == "HOU":  # Narrowing and combining images vertically
        combined_image = np.vstack((cv2.resize(img1, (width, height // 2), interpolation=cv2.INTER_AREA),
                          cv2.resize(img2, (width, height // 2), interpolation=cv2.INTER_AREA)))

    elif TYPE3D == "FSBS":  # Combining images horizontally
        combined_image = np.hstack((img1, img2))

    elif TYPE3D == "FOU":  # Combining images vertically
        combined_image = np.vstack((img1, img2))

    return combined_image

def extract_frames(start_frame, end_frame):
    ''' Allocating image files to chunks based on chunk_size '''

    frames_to_process = end_frame - start_frame + 1

    with frame_counter.get_lock():
        start_counter = frame_counter.value
        frame_counter.value += frames_to_process

    # List of files based on chunk size
    chunk_files = all_frames[start_frame:end_frame+1]  # end_frame inclusive
    print(f"\n-- FRAMES FOR NEW THREAD --\nFrames {start_frame} - {end_frame}\n")

    return chunk_files

def chunk_processing(extracted_frames, start_frame, end_frame):
    ''' Start processing for each chunk '''

    print(f"\n-- START THE THREAD --\nFrames {start_frame} - {end_frame}\n")

    for frame_path in extracted_frames:

        # Extract the image name to save the 3D image later on
        frame_name = os.path.splitext(os.path.basename(frame_path))[0]

        # Load image
        image = cv2.imread(frame_path)

        # Image size
        height, width = image.shape[:2]

        # Runing depth_processing and get depth map
        depth = depth_processing(image)

        # Runing image3d_processing and getting a stereo pair for the image
        PARALLAX_FUNCTIONS = {
            1: image3d_processing_method1,
            2: image3d_processing_method2,
        }

        if PARALLAX_METHOD in (1, 2):
            left_image, right_image = PARALLAX_FUNCTIONS[PARALLAX_METHOD](image, depth, height, width)
        else:
            print(f"Set the correct {PARALLAX_METHOD}.")

        # Combining stereo pair into a common 3D image
        image3d = image3d_combining(left_image, right_image, height, width)

        # Saving 3D image
        output_image3d_path = os.path.join(images3d_path, f'{frame_name}.jpg')
        cv2.imwrite(output_image3d_path, image3d, [int(cv2.IMWRITE_JPEG_QUALITY), 100])

        # Deleting the source file
        os.remove(frame_path)

    print(f"\n-- THREAD DONE --\nFrames {start_frame} - {end_frame}\n")

def run_processing():
    ''' The main function for starting processing threads '''

    # Total frames in video file
    total_frames = len(all_frames)

    # Threads control
    if isinstance(total_frames, int):
        with ThreadPoolExecutor(max_workers=max_threads) as executor:
            futures = []

            for start_frame in range(0, total_frames, chunk_size):
                end_frame = min(start_frame + chunk_size - 1, total_frames - 1)

                # 1. Extracting frames (waiting for task to complete before starting thread)
                extracted_frames = extract_frames(start_frame, end_frame)

                # 2. Starting thread for extracted frames
                future = executor.submit(chunk_processing, extracted_frames, start_frame, end_frame)
                futures.append(future)

                # 3. If thread count reached >= max_threads, wait for any thread to finish
                if len(futures) >= max_threads:
                    done, not_done = wait(futures, return_when=FIRST_COMPLETED)
                    for f in done:
                        f.result()  # if any thread fails, stop all processing
                    futures = list(not_done)

            # 4. Waiting for threads to complete
            for future in futures:
                future.result()

        print("DONE.")

    else:
        print("First, determine the value of total_frames.")


# START PROCESSING
run_processing()


# Delete model and clear Cuda cache
del model_depth
torch.cuda.empty_cache()
Note: The extract_frames function in this script has nothing to do with “unpacking/extracting”, as one might think from its name, because the frames are already unpacked and located in the “sw4frames/” folder. In this case, it only prepares frame batches for each thread in the amount of chunk_size. The name is preserved for compatibility with the other script, where frame extraction occurs in batches directly from the source video file without the need for preliminary exporting.
The script implements naive-multithreading. Naive, because these are purely preemptive threads that execute the same thing. This is done with the idea that at any given moment each thread can perform different tasks: load a file into memory, save a file to disk, compute a depth map (GPU), do parallax (CPU), etc. And even with such pseudo-multithreading, processing occurs significantly faster. Personally, I found 2–3 threads to be optimal; a larger number of threads does not affect processing speed in any way, but does increase GPU memory usage.
Note: This applies to working with already extracted frames. In the other script, where frames are extracted in batches rather than all at once, pseudo-multithreading works even better, and empirically I found 3–5 threads to be optimal. This will be covered in another article.
Below is a comparison of the script’s performance on a test set of 100 frames with different numbers of threads; the Large model was used everywhere, all other settings were identical:
1 thread (100 files per thread):
First run: 1 minute 20 seconds.
Control run: 1 minute 19 seconds.
Maximum GPU memory usage (here and below - excluding reserved): 2675.17 MB.
2 threads (50 files per thread):
First run: 1 minute 9 seconds.
Control run: 1 minute 9 seconds.
Maximum GPU memory usage: 3994.97 MB.
10 seconds saved via pseudo-multithreading, or a 12.5% speed increase. This may seem minor, but this was only for 100 frames, while the full movie has ~194000 frames the total time saved will be several hours (~5 hours). A rough total processing time estimate is given below.
3 threads (34 + 34 + 32 files per thread):
First run: 1 minute 9 seconds.
Control run: 1 minute 9 seconds.
Maximum GPU memory usage: 5351.92 MB.
Specifically on this test sample, there is no difference between 2 and 3 threads (except for increased video memory usage with 3 threads), but on measurements with larger samples there was a slight increase.
4 threads (25 files per thread):
First run: 1 minute 9 seconds.
Control run: 1 minute 9 seconds.
Maximum video memory usage: 6708.48 MB.
Execution speed does not change further, but video memory usage changes.
For comparison, let’s see how long it takes to process the same test sample with 2 threads for the Base model:
First run: 24.30 seconds.
Control run: 24.47 seconds.
Maximum video memory usage: 2415.44 MB.
And for the Small model:
First run: 11.68 seconds.
Control run: 11.59 seconds.
Maximum video memory usage: 1134.84 MB.
Now we can roughly (very roughly!) estimate how much time it will take to process all 194000 frames.
For the Large model: If it took 59 seconds on 2 threads to process 100 frames, it will take 114460 seconds for 194000 frames, or ~32 hours.
For the Base model: ~13 hours.
For the Small model: ~6 hours.
Stage 3: compiling 3D video
Now we need to compile the final 3D video with the original audio tracks attached.
I use the hevc_nvenc codec - encoding occurs on the GPU, which is significantly faster than the CPU.
Command:
ffmpeg -framerate 24000/1001 -i "/home/user/sw4frames_3d/file_%06d.jpg" -i sw4.mkv -c:v hevc_nvenc -cq 1 -preset p7 -color_range tv -colorspace bt709 -color_primaries bt709 -color_trc bt709 -pix_fmt yuv420p -map 0:v -map 1:a -c:a copy sw4_3d.mkv
Here:
“-framerate 24000/1001” - source video frame rate, 24000/1001 = 23.976 frames per second
“-i “/home/user/sw4frames_3d/file_%06d.jpg”” - folder with 3D frames
“-i sw4.mkv” - source file with audio tracks
“-c:v hevc_nvenc” - NVIDIA GPU encoder (H.265)
“-cq 1 -preset p7” - high video quality
“-colorspace bt709 -color_primaries bt709 -color_trc bt709” - set color parameters according to the BT.709 standard for HD video
“-color_range tv” - pixel color format, yuv420p for maximum compatibility
“-pix_fmt yuv420p” - standard (limited) range for video, as expected by codecs and players, for maximum compatibility and correct colors
“-map 0:v” - specify using the folder with frames specified earlier for video
“-map 1:a -c:a copy” - specify using audio tracks from “-i sw4.mkv” without re-encoding; “-c:a copy” - direct copy
“sw4_3d.mkv” - output file name
Wait for compilation and… enjoy watching.
Other considerations
We processed a FullHD (1920x1080) movie. You can also work with other formats, including 4K UltraHD (3840x2160). I have not yet made full 3D versions in 4K, but I tested working with this resolution and did not notice significant differences in processing time. However, it should be understood that frames at a resolution of 3840x2160 require significantly more disk space, especially in PNG format; here the required size increases by about 4 times compared to 1920x1080 frames.
Speaking of disk usage: since 3D conversion is relatively fast, it is not necessary to store both the original and the 3D version of the movie on disk. You can always synthesize the 3D version, watch it, and delete it, keeping only the original as an archive. The original can even be in 4K, while the 3D version can be synthesized in FullHD for speed. The frame extraction command would be:
ffmpeg -i video4k.mkv -vf "scale=1920:1080" "/home/user/frames_in/file_%06d.png"
Or the other command where only the width is specified (height will be calculated automatically):
ffmpeg -i video4k.mkv -vf "scale=1920:-2" "/home/user/frames_in/file_%06d.png"
If the source video has a high frame rate, for example 60 fps (many YouTube videos), it makes sense to reduce the frame rate to the standard 23.976 (24000/1001). This alone speeds up processing by 2.5x. The frame extraction command would be:
ffmpeg -i video4k.mkv -vf "fps=24000/1001" "/home/user/frames_in/file_%06d.png"
Or a combined command:
ffmpeg -i video4k.mkv -vf "scale=1920:-2,fps=24000/1001" "/home/user/frames_in/file_%06d.png"
Another important thing - Depth-Anything-V2 works just as well with black-and-white images as with color ones. There is no difference in processing. I have already tried adding depth to black-and-white films, and the results are excellent. Personally, I even prefer black-and-white 3D films - depth is perceived differently there, but that is probably a matter of personal taste.
Are there any drawbacks to the method? Yes, but they are minor. If you do not know that you are watching synthesized rather than native 3D, you most likely will not notice anything. In some dynamic scenes, where there is a rapid change of objects, the depth of neighboring frames may change. For example, in the current frame there is a person standing and a motorcycle rushes by nearby, and in the next frame (exactly a frame, not a second) the motorcycle is already gone, only the person remains - the depth of these two frames will likely differ significantly due to the changed scene composition. But again, this is noticeable only if you deliberately look for it.
On the other hand, there are amusing side effects. For example, reflections in mirrors will most likely appear three-dimensional, as will drawings on paper. This does not cause discomfort - on the contrary, it feels like an added layer of “magic,” some kind of interactivity. I made a 3D version of a music festival I once attended, there was a large stand with a top-down map of the venue, showing various objects. In the 3D-video, the entire map became volumetric - it looked very interesting and, surprisingly, quite natural.
Conclusion
So, can you convert any movie to 3D using this approach? Yes - absolutely any movie, and in fact any material, such as YouTube videos. By the way, there are many first-person videos on YouTube (for example, travel vloggers), and they look very good in 3D.
I have a huge list of films I would like to rewatch in 3D. Take, for example, Christopher Nolan’s films - he was opposed to 3D (which is understandable - since 3D equipment significantly complicates and constrains the filming process). Now all his films can be rewatched in high-quality 3D, and given his love for close-ups and his use of light and shadow, the volumetric versions should look spectacular. Kubrick’s films, with his perfectionism in scene composition, ideal geometry, etc. - no comments needed. Other classic films, such as the Back to the Future trilogy, Indiana Jones, and many others, are waiting their turn - everything begs to be rewatched.
I have already watched the original Star Wars trilogy (episodes 4, 5, 6) in 3D. I won’t write about the delight anymore, I think it’s already clear, I’ll just note that these pictures look fresher in 3D, as if the volume modernizes them. Alright, time to finish with the lyrical part.
Additional materials
- Next article with the new script and alternative solutions →
- Related article on the visual comparison of Depth-Anything-V2 models →
- Scripts from the article are available on my GitHub:
https://github.com/peterplv/MakeAnythingStereo3D - Link to Google Drive with examples and 3D GIFs
- Example 3D video in HOU format, suitable for viewing on most 3D TVs
- Example 3D video in FSBS format, suitable for viewing in VR headsets