Upscaling Video DVD to HD Using Neural Networks, Python and FFmpeg
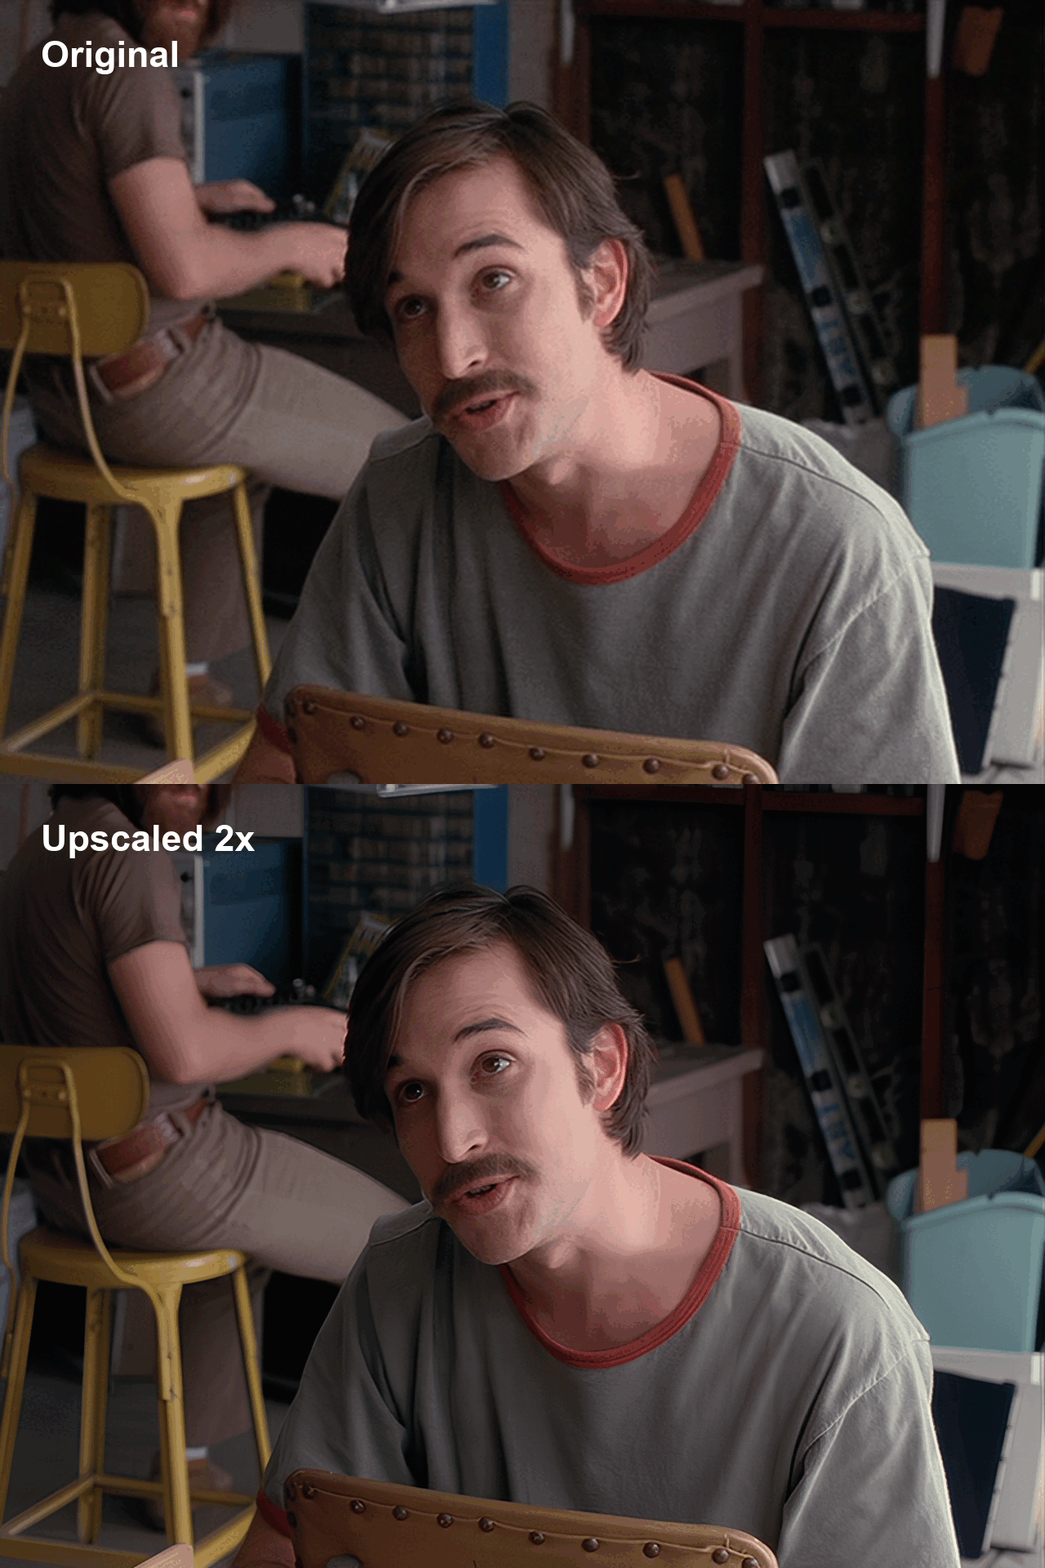
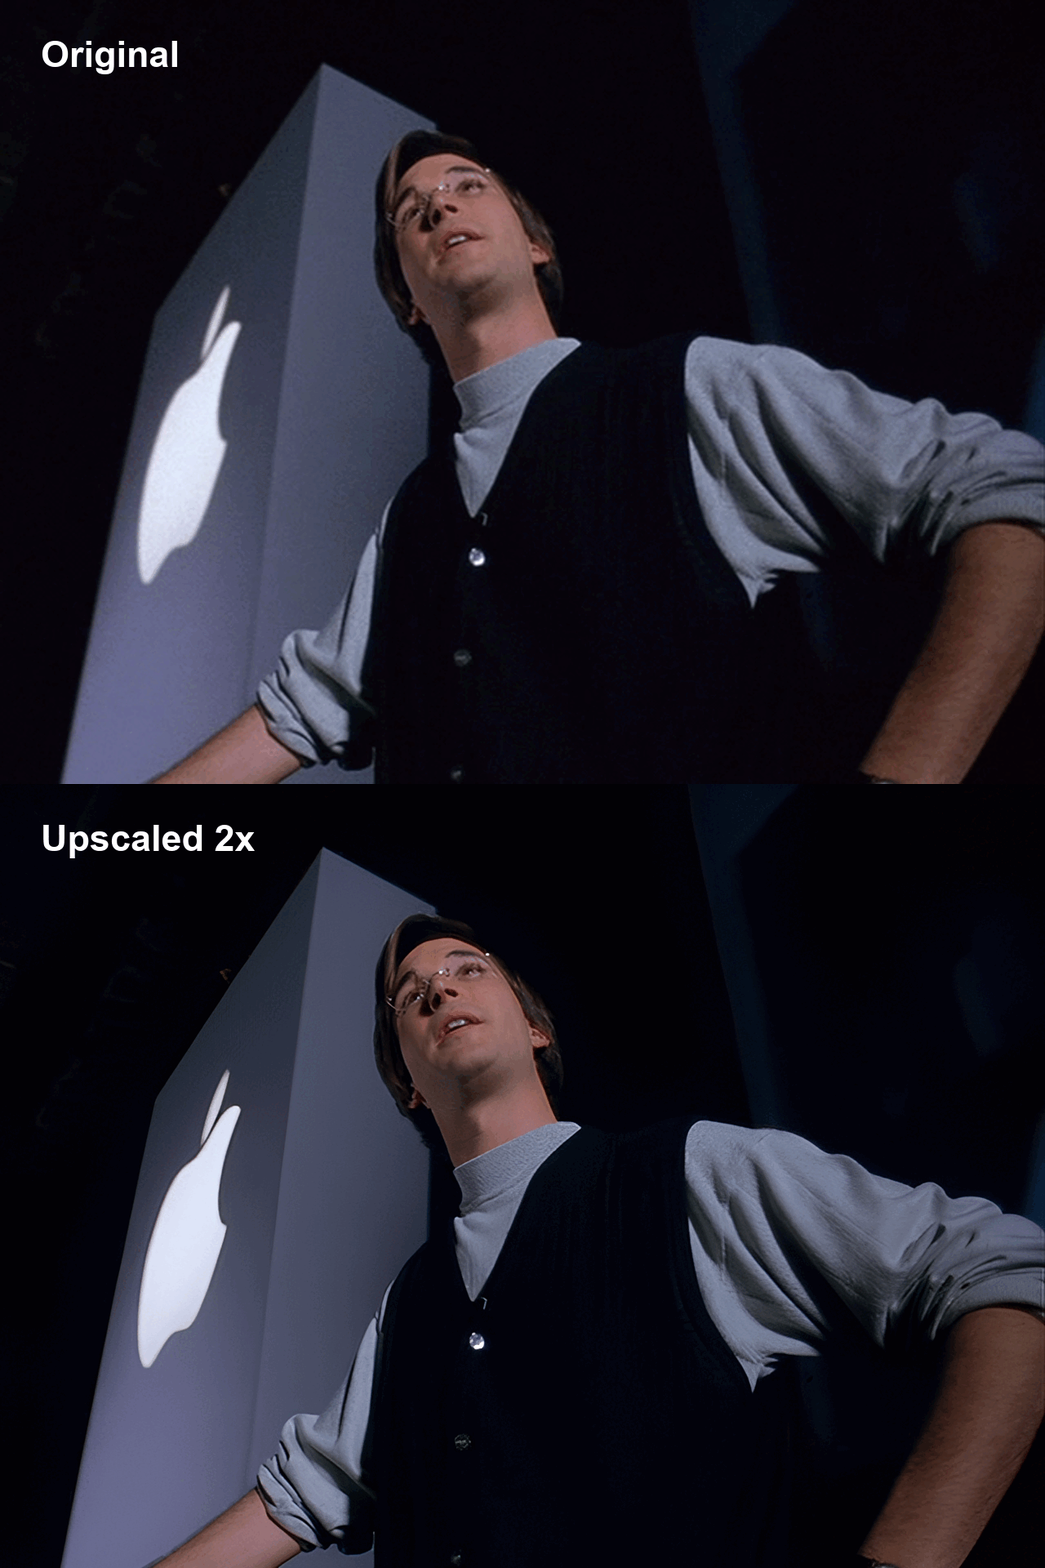 Upscale result of a frame by 2x, before and after
I’ve been interested in image upscaling for a long time, and video upscaling specifically. One of the first tools I came across a few years ago was waifu2x. But that network was better suited for upscaling anime (it seems it was trained on anime images). In other words, waifu2x worked well for relatively simple images without a lot of detail or complex textures.
Then I looked into ESRGAN and Real-ESRGAN. Decent models, quite usable for image upscaling, but the synthetic look is often noticeable, especially in complex scenes like ones with trees. I even tried fine-tuning Real-ESRGAN, but while I was assembling my training dataset, I came across another model - SwinIR. After testing it, I realized it covered my needs, if not completely, then at least 80%. My goal was to upscale a few old movies so that after upscaling the film still looked like a film, not a claymation puppet show. It worked out. That’s what this article is about.
We’ll be upscaling the movie Pirates of Silicon Valley (1999, USA, DVD5). It covers the rise of the home PC and the early days of Apple and Microsoft companies. A pretty interesting film with the rebellious spirit of that era. The main characters are young Steve Jobs, Steve Wozniak, Bill Gates, and other participants in the “home PC revolution”. And of course, we’ll be doing the upscaling on a home PC.
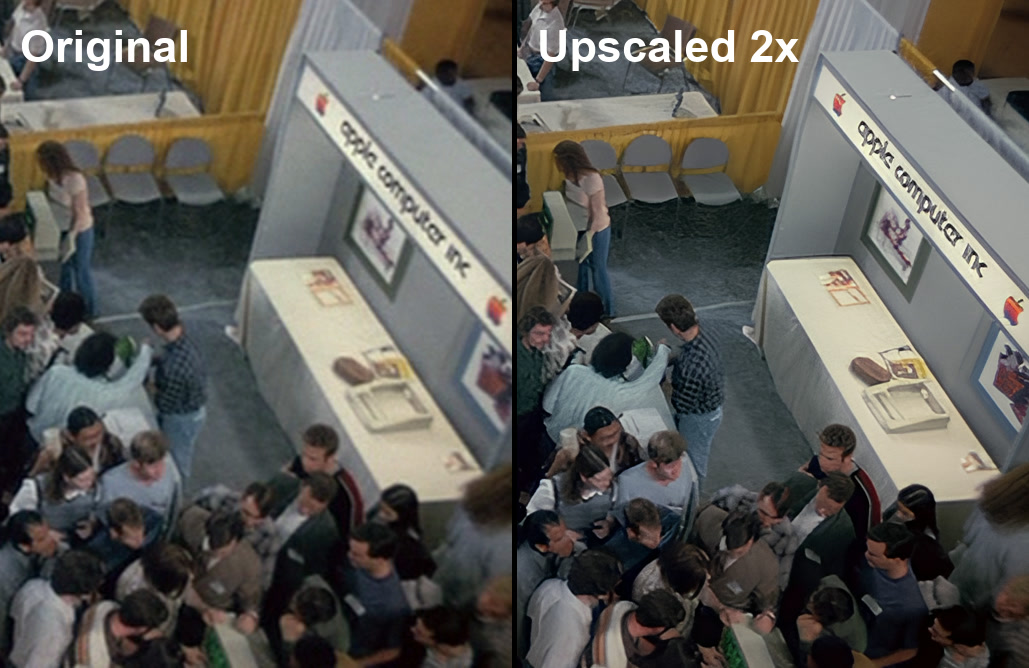
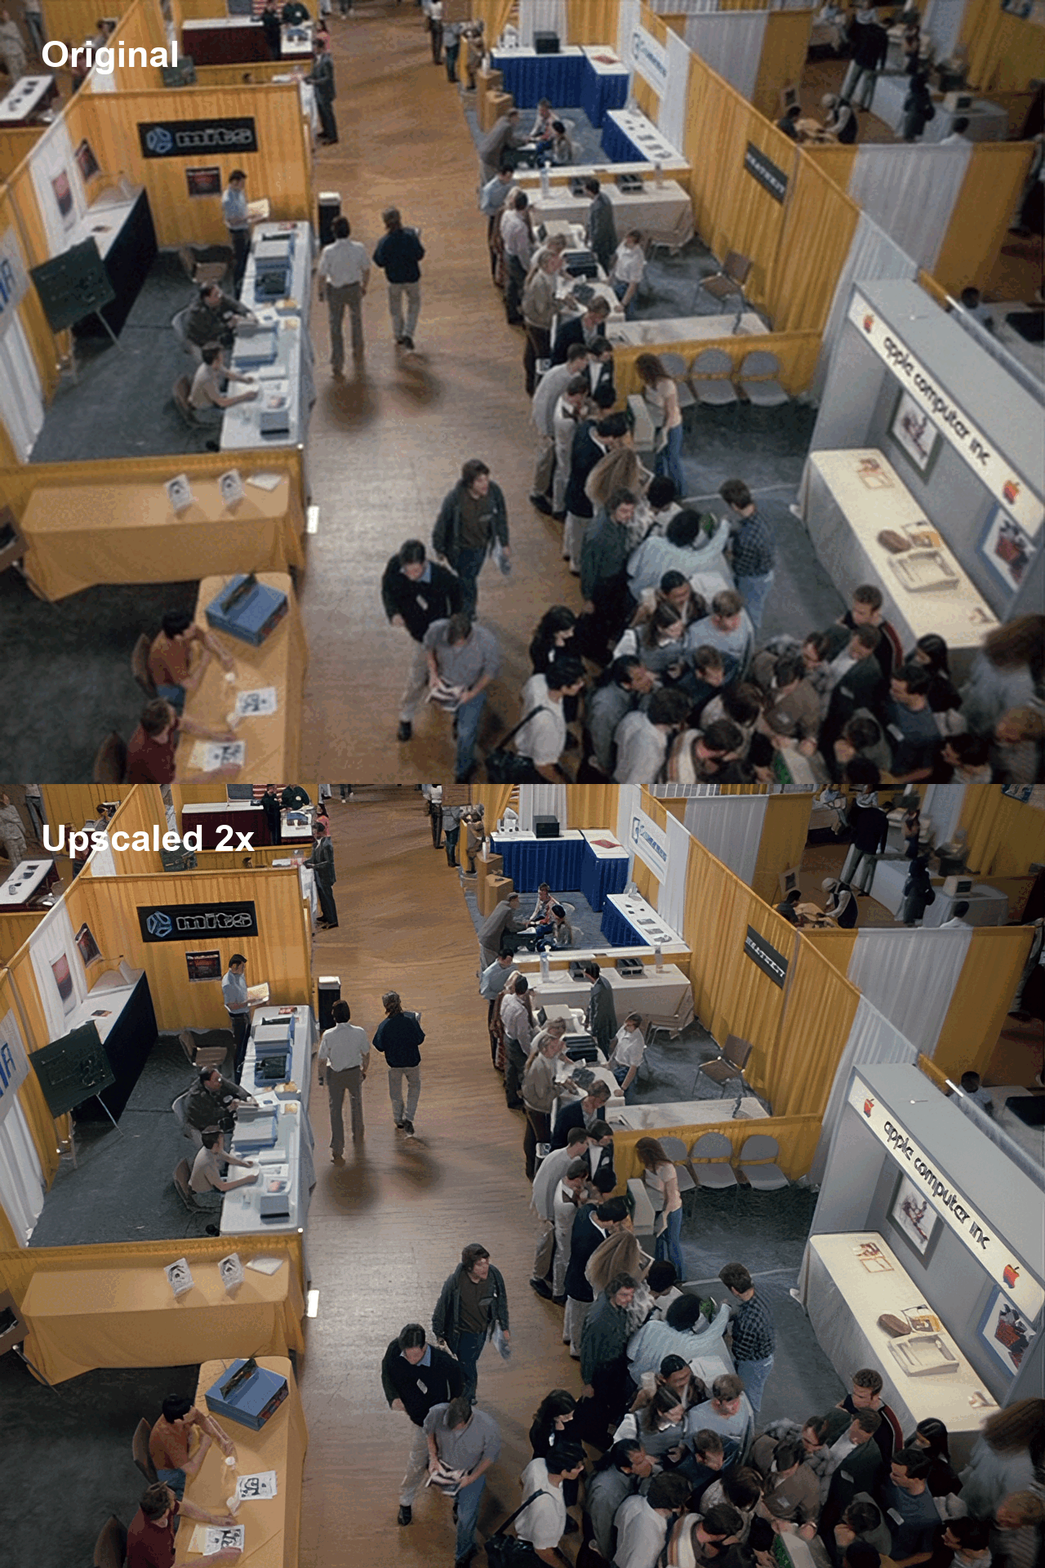
Example of what you can get (recommended to view zoomed in):
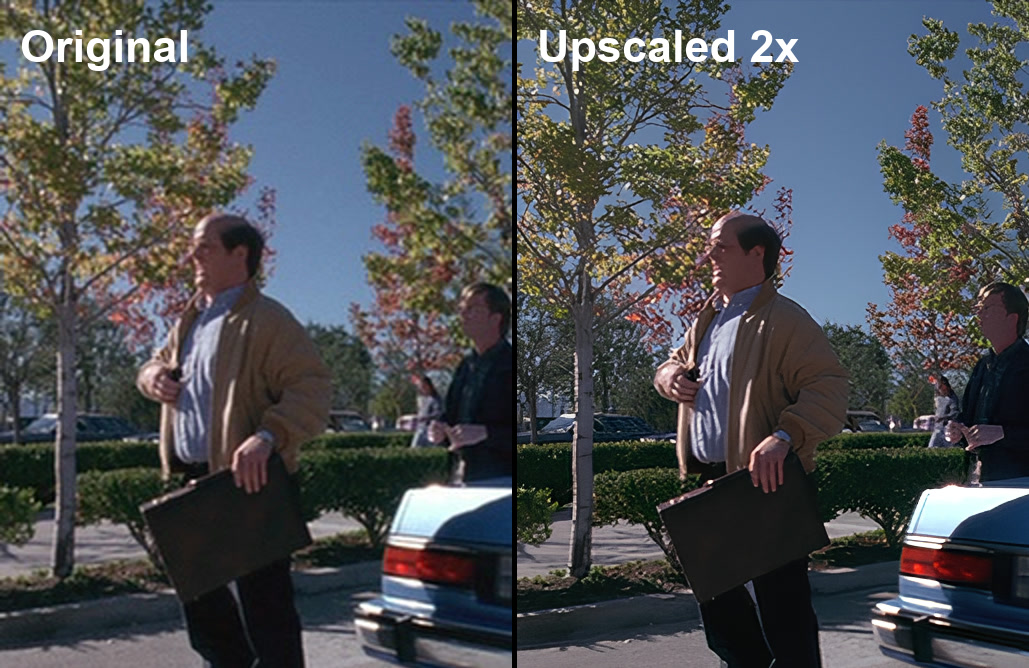 Left: original, right: 2x upscale
Or as an animated GIF:
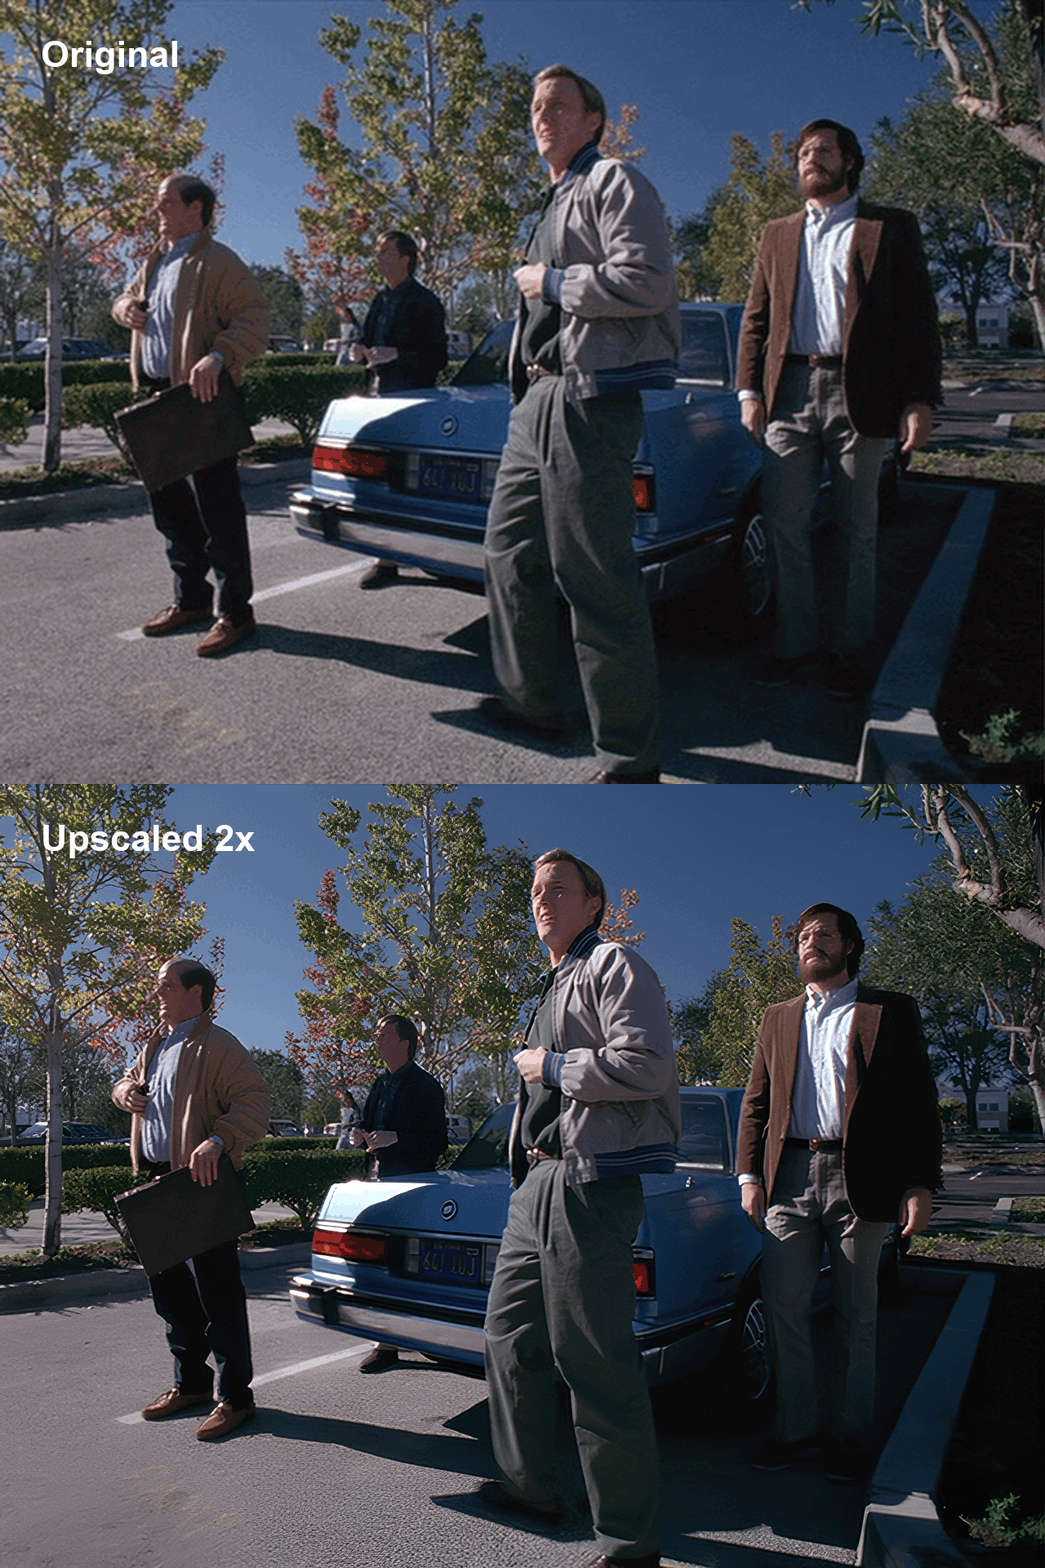 Better viewed zoomed in
Disc specs:
- DVD5, MPEG-2, 720x480 (NTSC)
My setup for this task:
- Gigabyte A520M, AMD Ryzen 5 PRO 3600, 32GB DDR4 3200 MT/s (16+16)
- Gigabyte GeForce RTX 3060 12GB, CUDA Version: 12.5
- Ubuntu 22.04
What you’ll need:
- A PC with a CUDA-capable GPU
- ffmpeg and ffprobe
- Python
- Spandrel library for Python
- One of the SwinIR models
- Around 80 GB of disk space
- Several days of processing time (if running continuously, ~5 days for 2x upscale on a setup similar to mine)
Brief overview of the algorithm:
- Use ffmpeg to extract the movie frame by frame as PNG files
- Upscale each frame
- Use ffmpeg to encode the upscaled frames into an HD version of the movie, attaching the audio tracks from the source material
Let’s get started.
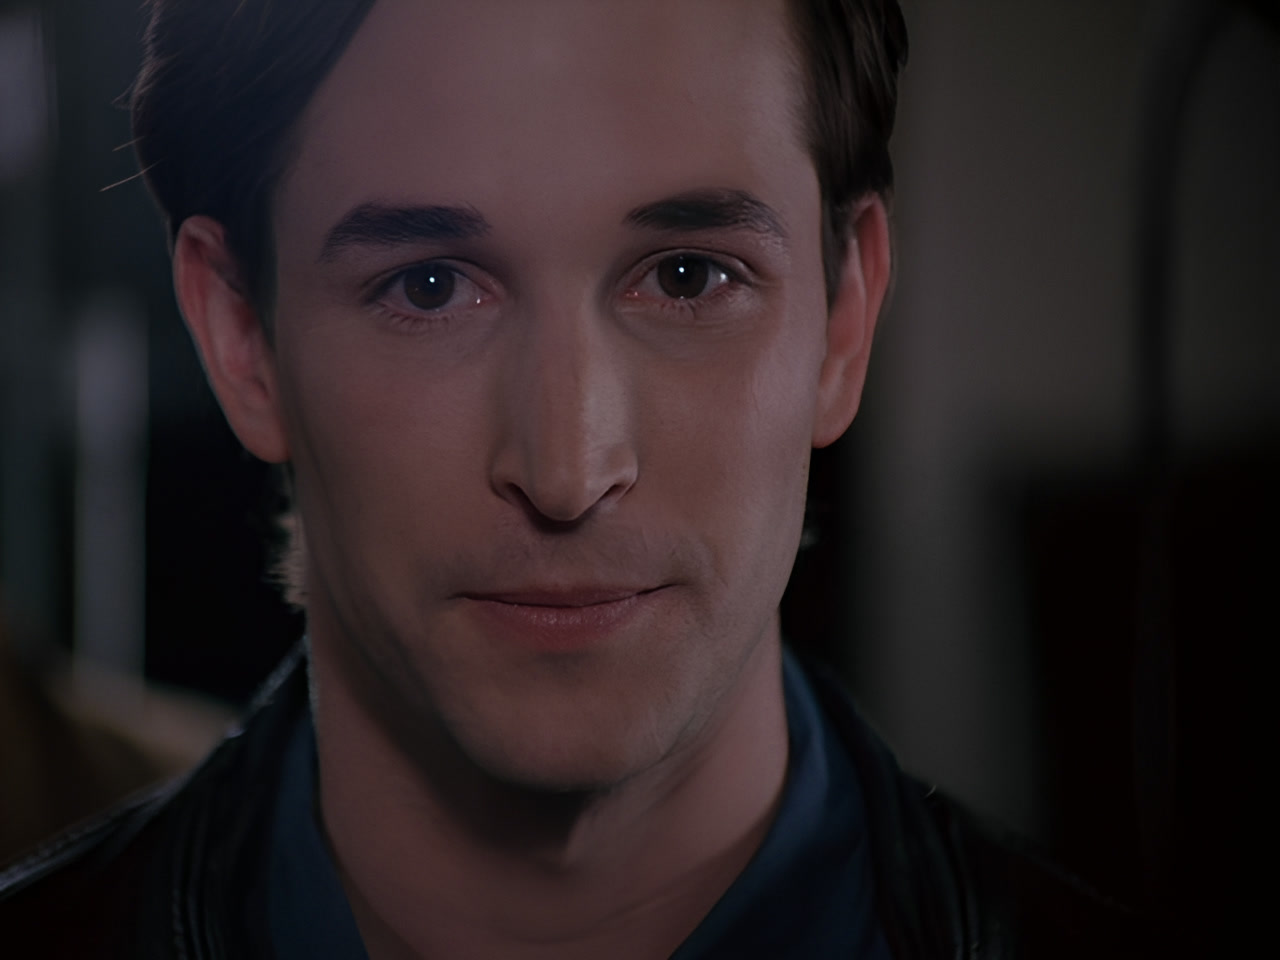 Actor Noah Wyle as Steve Jobs, after upscaling
Software Installing
Installing ffmpeg
Ubuntu:
sudo apt update
sudo apt install ffmpeg
(ffprobe is included when installing ffmpeg)
Windows:
https://www.ffmpeg.org/download.html
Download one of the latest builds and extract the archive, for example to c:\ffmpeg. You need two utilities from the archive: ffmpeg and ffprobe.
You can add the ffmpeg folder to PATH so you can call ffmpeg from the command line in any directory.
Installing Python
Ubuntu:
sudo apt update
sudo apt install python3 python3-pip
Windows:
https://www.python.org/downloads/windows/
Download one of the latest releases for your OS and install it.
For Python, also must be installed PyTorch, Torchvision, Pillow libraries:
pip install torch torchvision Pillow
Installing Spandrel
pip install spandrel
Downloading the model
Available SwinIR models at the link:
https://github.com/JingyunLiang/SwinIR/releases
I tested all SwinIR models. These two performed best:
For 2x upscale: 003_realSR_BSRGAN_DFO_s64w8_SwinIR-M_x2_GAN.pth
For 4x upscale: 003_realSR_BSRGAN_DFOWMFC_s64w8_SwinIR-L_x4_GAN.pth
Download the model and note its path.
I used 2x upscale, so my model was: 003_realSR_BSRGAN_DFO_s64w8_SwinIR-M_x2_GAN.pth
More on time and resource requirements below. Note that 4x upscale takes significantly longer, and the quality improvement over 2x is marginal - and in some cases actually worse.
Stage 1: Extracting the frames
Merging VOBs
My DVD copy has 4 main VOB files:
VTS_01_1.VOB
VTS_01_2.VOB
VTS_01_3.VOB
VTS_01_4.VOB
Let’s merge them.
Linux:
cat VTS_01_1.VOB VTS_01_2.VOB VTS_01_3.VOB VTS_01_4.VOB > video.vob
Windows:
copy /b VTS_01_1.VOB+VTS_01_2.VOB+VTS_01_3.VOB+VTS_01_4.VOB video.vob
From here on we’ll work with the merged video.vob.
Now let’s extract the audio tracks. First, let’s check what’s available:
ffprobe -i video.vob
We see 2 audio tracks:
Stream #0:2[0x80]: Audio: ac3, 48000 Hz, stereo, fltp, 192 kb/s, Start-Time 0.281s
Stream #0:3[0x81]: Audio: ac3, 48000 Hz, stereo, fltp, 192 kb/s, Start-Time 0.281s
The first track is English, the second is Russian, even though it’s not labeled explicitly. Let’s extract them:
ffmpeg -i video.vob -map 0:a:0 -c copy audio_track_eng.ac3 -map 0:a:1 -c copy audio_track_rus.ac3
The “-c copy” parameter tells ffmpeg to extract audio as-is, without re-encoding.
Now we can start extracting the frames.
Frame Extraction
Note: All commands below are for Linux. On Windows they are generally the same, except path separators: Linux uses “/”, Windows uses “\”.
In an ideal case we could run a simple command:
ffmpeg -i video.vob "video_in_png/file_%06d.png"
This would extract all frames at the original count and resolution into the video_in_png folder. But… out of two DVDs I’ve processed so far, both had their quirks. This disc was the most problematic.
First issue: the actual frame rate. I checked the frame rate using several tools and methods. Here’s a short list of FPS values that were reported for this movie:
60000/1001 = 59.94…
29970/1000 = 29.97
119/4 = 29.75
24000/1001 = 23.98…
I even had to open the VOB files in a hex editor and decode byte values by specific signatures (thanks to ChatGPT). That gave me the “definitive” answer of 29.97 fps - which turned out to be wrong (spoiler: either the disc was authored poorly, or I simply don’t fully understand the DVD structure).
Through trial and error I arrived at the actual frame rate:
24000/1001, i.e. ~23.98 fps.
Second issue: the displayed video resolution. ffprobe reports:
Stream #0:1[0x1e0]: Video: mpeg2video (Main), yuv420p(tv, smpte170m, progressive), 720x480 [SAR 32:27 DAR 16:9], 29.75 fps
If you calculate using 720x480 SAR 32:27, the displayed resolution would be ~854x480, which is completely wrong - it would appear too stretched horizontally. ffprobe also reports 16:9, while the actual aspect ratio is 4:3. This is likely not an ffprobe issue but rather a problem with how the disc was authored. Apparently I ended up with a pirated disc that was slapped together carelessly.
Through empirical testing I concluded that the correct frame resolution is 640x480 pixels. All further processing is based on these values.
Note: There’s a possibility the correct displayed resolution was 720x540 (original 720x480, with pixels stretched vertically to 540 for correct proportions). It’s hard to say for certain - I don’t trust the metadata on this disc. In this example, I settled on 640x480 resolution.
I won’t dwell on this too long - it’s a story worth its own article, and I hope this was a rare edge case.
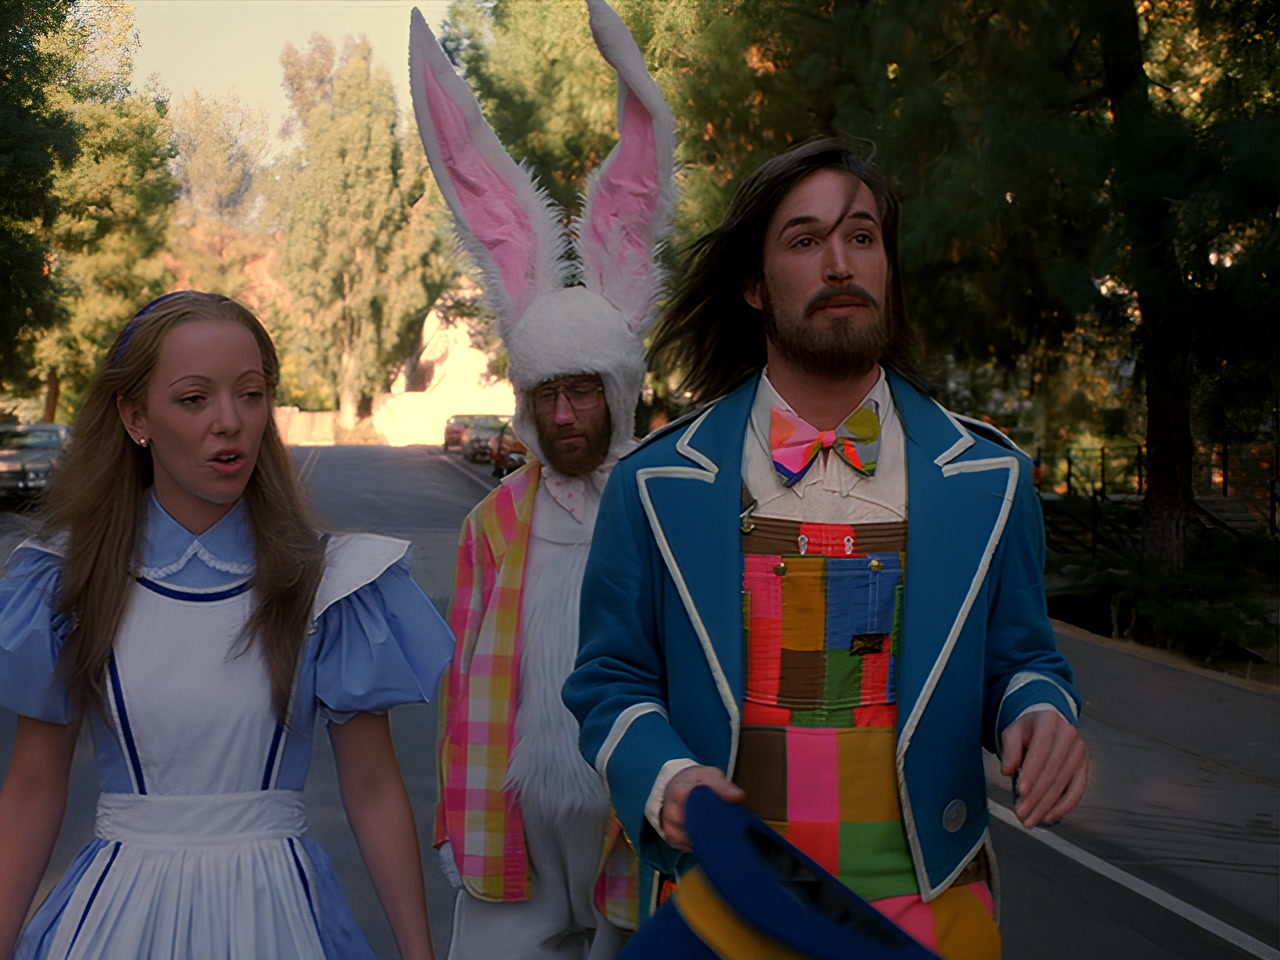 Upscaled image
Final command for frame extraction:
ffmpeg -i video.vob -r 24000/1001 -vf "scale=640:480:flags=lanczos" "/home/user/frames_orig/file_%06d.png"
Here:
“-i video.vob” - the merged source file
“-r 24000/1001” - frame rate of ~23.98 fps
“-vf “scale=640:480:flags=lanczos”” - output filter: resize to 640x480 using Lanczos interpolation, which smooths out artifacts from any resizing while preserving image sharpness
“/home/user/frames_orig” - directory for the extracted frames; must be created beforehand
“file_%06d.png” - PNG format, %06d mask - a 6-digit counter starting from 000000, resulting in files like file_000000.png, file_000001.png and so on.
The same command with GPU acceleration (CUDA), which is usually faster:
ffmpeg -hwaccel cuda -i video.vob -r 24000/1001 -vf "scale=640:480:flags=lanczos" "/home/user/frames_orig/file_%06d.png"
As a reminder, if there were no issues with this particular disc, the command would be simpler:
ffmpeg -i video.vob -vf "scale=640:480:flags=lanczos" "/home/user/frames_orig/file_%06d.png"
Because of the frame rate issue, we had to explicitly set the input frame rate. Without it, every 3rd–5th frame would be a duplicate of the previous one. The total extracted frame count would be 174,000, while the actual count is 139,202 (or 139,235 by another estimate - but let’s not go down that rabbit hole).
For reference, the other DVD I upscaled had the following video stream info:
Stream #0:0: Video: mpeg2video (Main), yuv420p(tv, top first), 720x576 [SAR 64:45 DAR 16:9], 25 fps, 25 tbr, 1k tbn
That metadata was accurate. Based on the source resolution 720x576 with SAR 64:45, the displayed resolution was 1024x576 16:9 (720 x (64/45) = 1024). I wanted to upscale 2x to FullHD, so the source frame needed to be 960x540 (multiply by 2 gives 1920x1080). Both 1024x576 and 960x540 are 16:9, so the aspect ratio is preserved. Frame extraction command:
ffmpeg -i video_in.mkv -vf scale=960:540:flags=lanczos "/home/user/frames_orig/file_%06d.png"
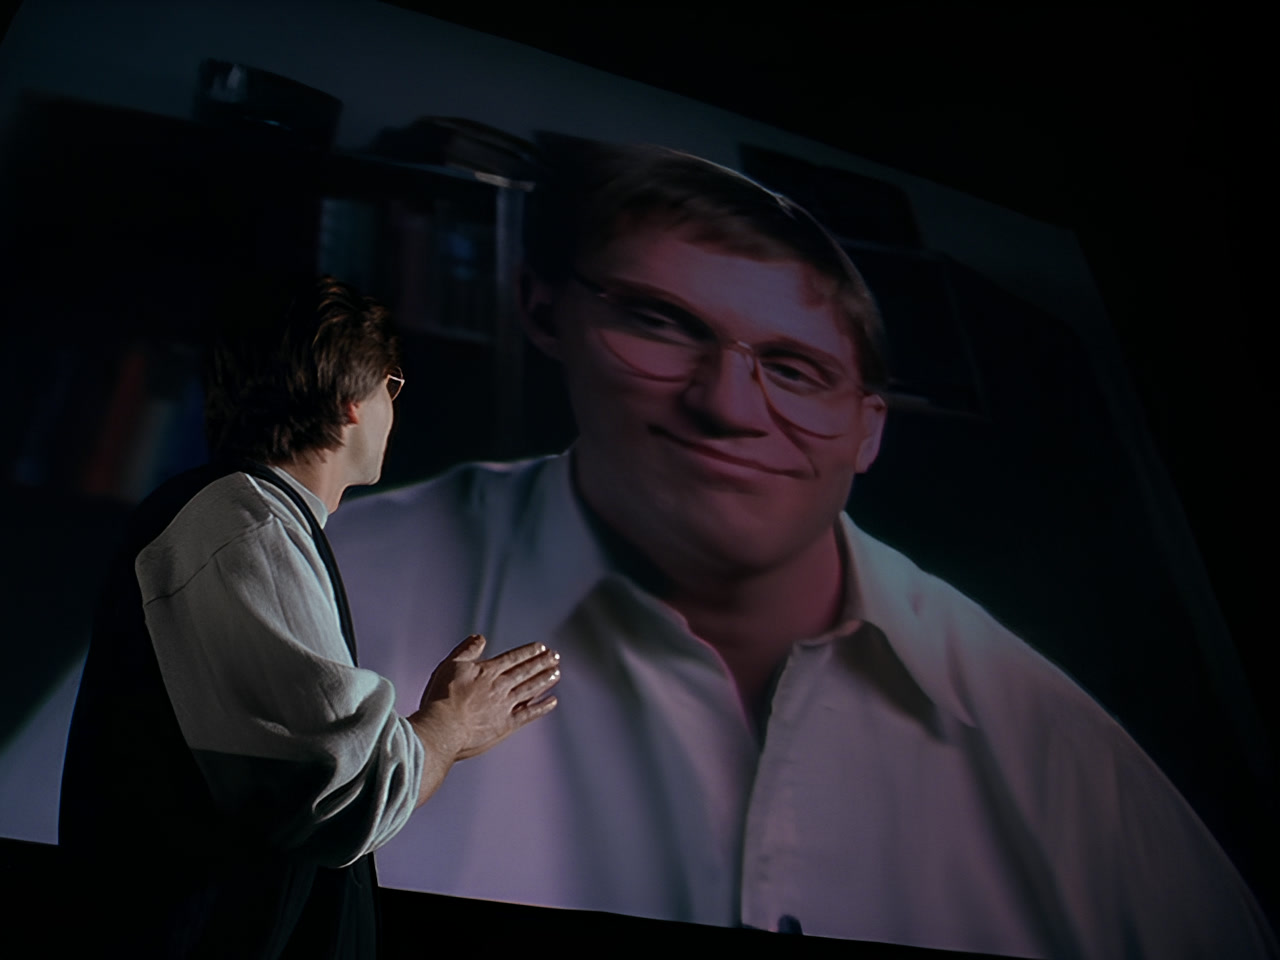 Bill Gates played by actor Michael Anthony Hall
Stage 2: Upscaling frames
Now we can start upscaling the frames. This is a lengthy process - depending on the number of frames and their resolution, it can take several days. I usually do it in iterations, batches of 10,000 frames. You can split the main frames folder into subfolders of 10,000 files each, or modify the script below to work on a range of files (just be careful not to mix up the order, or you’ll get audio/video desync).
Example commands for splitting the main folder into subfolders of 10,000 files:
Commands:
Linux:
i=1; for file in all_frames/*; do mkdir -p "frames_((i/10000+1))file" "frames_$((i/10000+1))"; ((i++)); done
Windows (PowerShell):
i=1; Get-ChildItem all_frames | ForEach-Object { $d=([math]::Floor(($i-1)/10000)+1)"; if (!(Test-Path $d)) {New-Item -ItemType Directory -Path $d | Out-Null}; Move-Item $_.FullName $d; $i++ }
I won’t spend too much time on how exactly to split the process into parts - it’s a matter of preference.
Main script:
import os
import torch
from PIL import Image
import torchvision.transforms as transforms
from spandrel import ImageModelDescriptor, ModelLoader


# OPTIONS
# Folder with source images
images_path = "/home/user/frames_in"

# Folder for saving results
output_path = "/home/user/frames_upscaled"
os.makedirs(output_path, exist_ok=True) # Create folder if missing

# Output image format
OUTPUT_FORMAT = "JPG"  # PNG, JPG

# List of source images in the directory
all_files = sorted(
    f for f in os.listdir(images_path)
    if os.path.isfile(os.path.join(images_path, f))
)

# Model path
model_path = "/home/user/models/003_realSR_BSRGAN_DFO_s64w8_SwinIR-M_x2_GAN.pth"

BATCH_SIZE = 2  # Batch size
batch_images = []  # Images in current batch

# Use torch.cuda.empty_cache() (True/False); sometimes helps fit images into a batch
CLEAN_CACHE = False

# Model loading
model = ModelLoader().load_from_file(model_path)
assert isinstance(model, ImageModelDescriptor)
model.cuda().eval()


def save_image(image_name, output_tensor):
    ''' Tensor to image conversion and saving to file according to the specified format '''

    output_image = transforms.ToPILImage()(output_tensor.cpu().clamp(0, 1))
    output_image_path = os.path.join(output_path, f"{image_name}.{OUTPUT_FORMAT.lower()}")

    fmt = OUTPUT_FORMAT.upper()

    if fmt == "PNG":
        output_image.save(output_image_path, format="PNG")
    elif fmt == "JPG":
        output_image.save(output_image_path, format="JPEG", quality=100)
    else:
        raise ValueError(f"Format error: {OUTPUT_FORMAT!r}")


# START PROCESSING
for idx, image_in in enumerate(all_files):
    image_path = os.path.join(images_path, image_in)
    image_name = os.path.splitext(image_in)[0]

    image = Image.open(image_path).convert("RGB")
    input_tensor = transforms.ToTensor()(image).unsqueeze(0).cuda()

    batch_images.append({'image_name': image_name, 'input_tensor': input_tensor})

    # Process the batch if the batch is full or this is the last image
    if len(batch_images) == BATCH_SIZE or idx == len(all_files) - 1:
        try:
            # Clear CUDA memory if CLEAN_CACHE = True (sometimes helps fit images into a batch)
            if CLEAN_CACHE: torch.cuda.empty_cache()

            # Check available GPU memory before merging images into a batch
            required_memory = sum(item['input_tensor'].element_size() * item['input_tensor'].nelement() for item in batch_images)
            free_memory = torch.cuda.memory_reserved(0) - torch.cuda.memory_allocated(0)
            if free_memory < required_memory:
                raise RuntimeError("CUDA out of memory")

            batch_tensor = torch.cat([item['input_tensor'] for item in batch_images], dim=0)

            # Send image batch to model
            with torch.no_grad():
                output_tensor = model(batch_tensor)

            # Save processed images
            for i, item in enumerate(batch_images):
                image_name = item['image_name']
                save_image(image_name, output_tensor[i])

        except RuntimeError as e:
            # CUDA out-of-memory error
            if "CUDA out of memory" in str(e):
                print("Out-of-memory error, process images one by one...")

                for item in batch_images:
                    image_name = item['image_name']
                    single_tensor = item['input_tensor']

                    with torch.no_grad():
                        output_tensor = model(single_tensor)
                    save_image(image_name, output_tensor[0])

            else:
                raise

        except Exception as e:  # Any other error
            print(f"Ошибка:\n{e}")

        finally:  # Clear batch
            batch_images.clear()


print("DONE.")


# Delete model and clear Cuda cache
del model
torch.cuda.empty_cache()
About some parameters
batch_size = 2
The batch size passed to the model - how many images to process at once. I use 2: it gives a significant speed improvement over 1, uses memory efficiently, and increasing it further in my case gives almost no additional speed gain while memory consumption increases noticeably.
For frames at 640x480 on my RTX 3060 12GB, the maximum batch size is 3 - anything higher runs out of VRAM. For 960x540 frames, the maximum is 2.
Benchmark for processing 320x240 frames with different batch sizes, 2x upscale:
Comparison:
1 batch:
Execution time: 1 minute 40 seconds
Peak memory used: 849.29 MB
Peak memory including reserved: 982.00 MB
2 batches:
Execution time: 1 minute 14 seconds
Peak memory used: 1612.66 MB
Peak memory including reserved: 1840.00 MB
3 batches:
Execution time: 1 minute 13 seconds
Peak memory used: 2365.52 MB
Peak memory including reserved: 2712.00 MB
4 batches:
Execution time: 1 minute 12 seconds
Peak memory used: 3122.71 MB
Peak memory including reserved: 3570.00 MB
6 batches:
Execution time: 1 minute 12 seconds
Peak memory used: 4640.16 MB
Peak memory including reserved: 5328.00 MB
8 batches:
Execution time: 1 minute 12 seconds
Peak memory used: 6153.86 MB
Peak memory including reserved: 7046.00 MB
10 batches:
Execution time: 1 minute 12 seconds
Peak memory used: 7674.44 MB
Peak memory including reserved: 8778.00 MB
12 batches:
Execution time: 1 minute 12 seconds
Peak memory used: 9183.08 MB
Peak memory including reserved: 10538.00 MB
As you can see, the speed gain is noticeable only when going from 1 to 2 batches. Above 4 batches, processing time no longer decreases. Results may differ on other hardware.
output_format = “JPG” # PNG, JPG
The format for saving upscaled frames. I save the output images as JPG, since upscaled PNG files take up too much disk space. The source frames are extracted by ffmpeg as PNG.
clean_cache = False # True or False
Whether to clear the CUDA cache before checking available GPU memory. To be honest, this is a trick to fit frames into batches in certain cases. Only with this trick was I able to fit 2 frames per batch when processing another disc where the input frame resolution was 960x540.
Other parameters should be self-explanatory.
Start the script and wait a few days for it to finish.
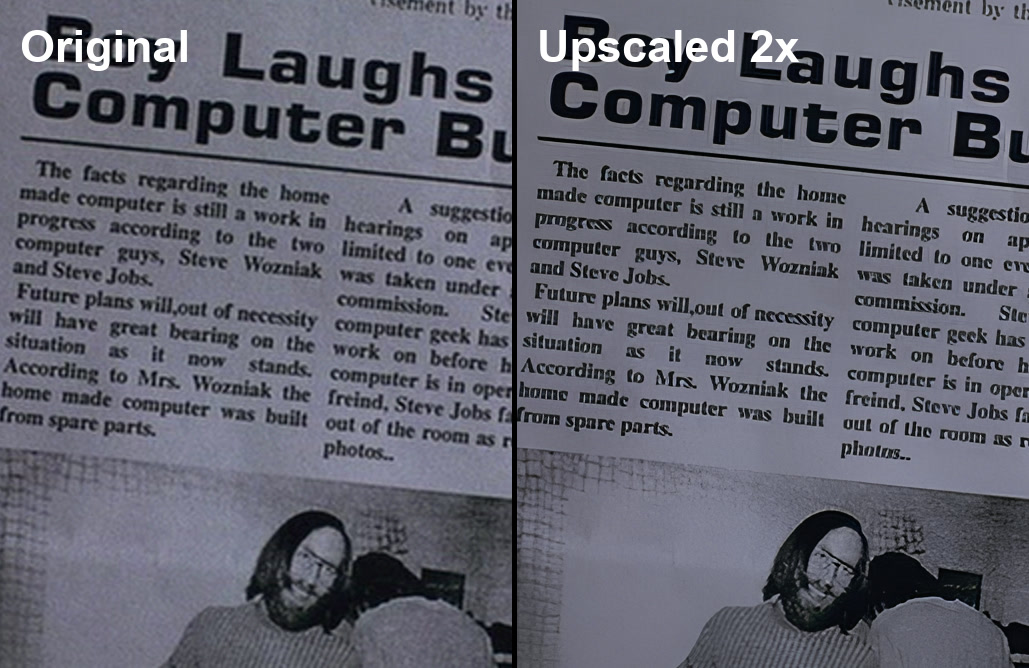
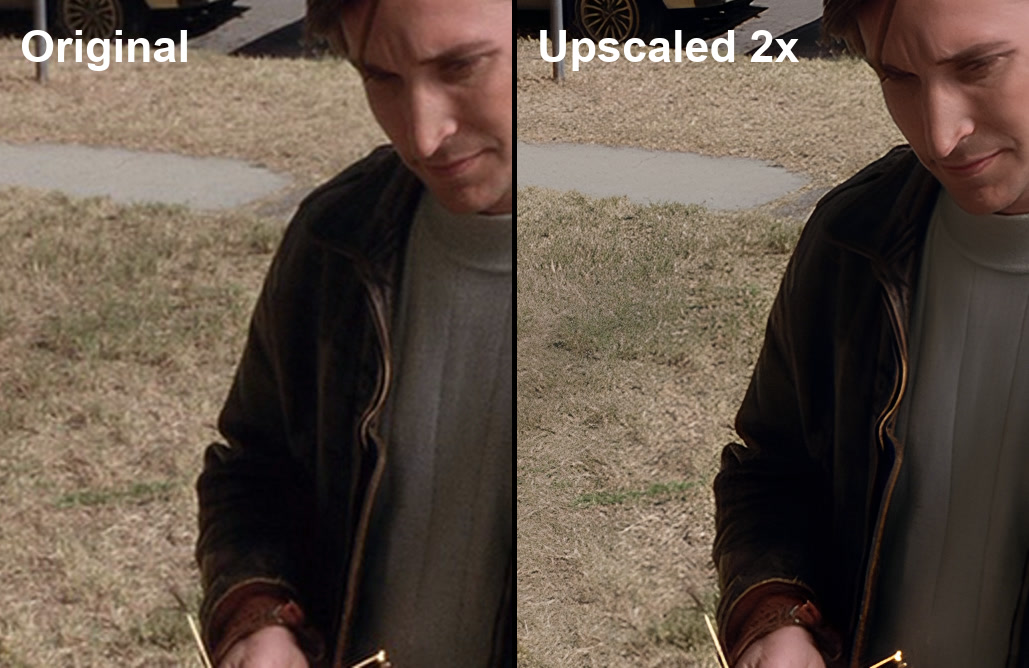
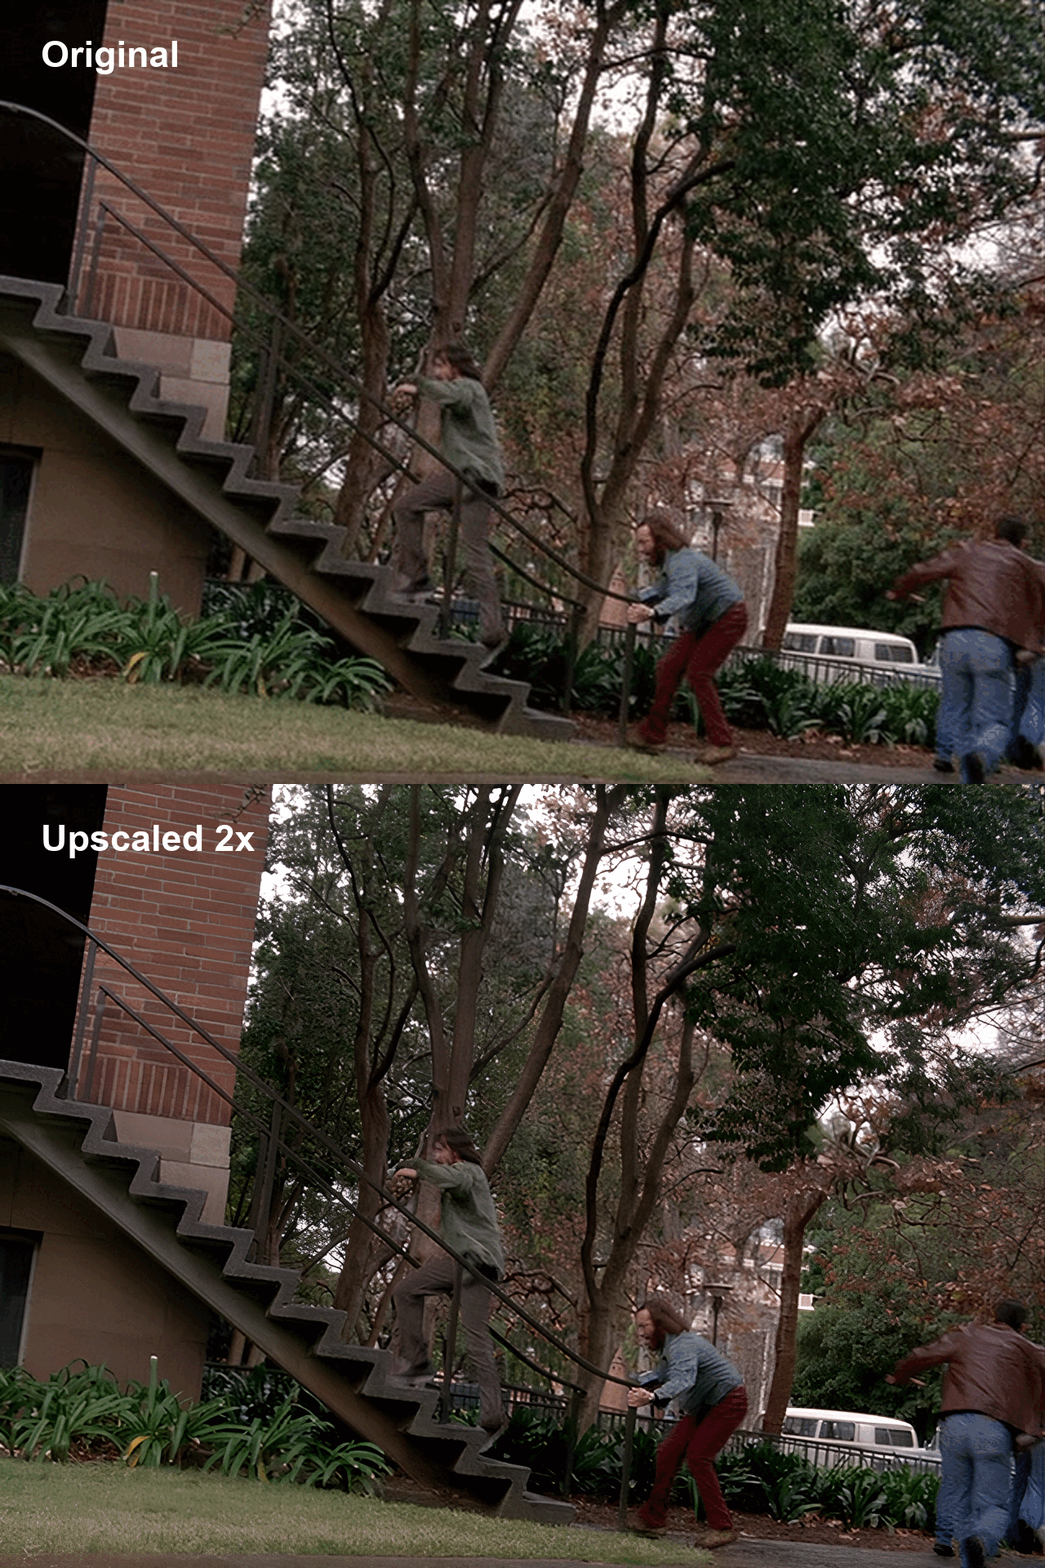
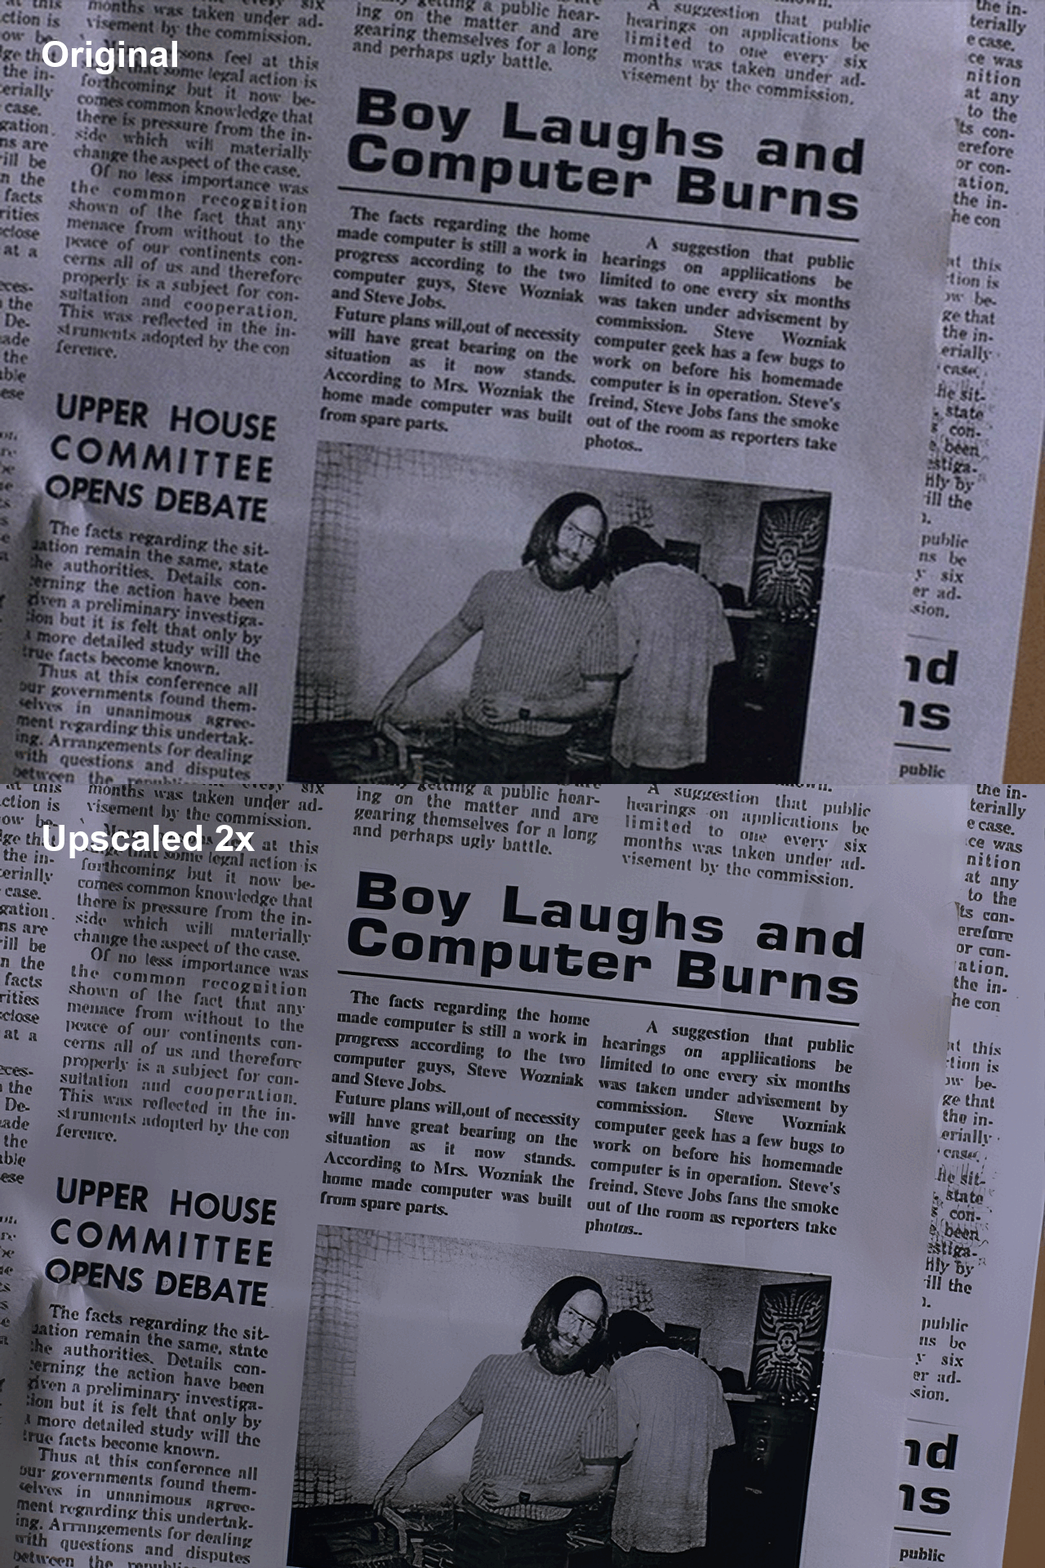
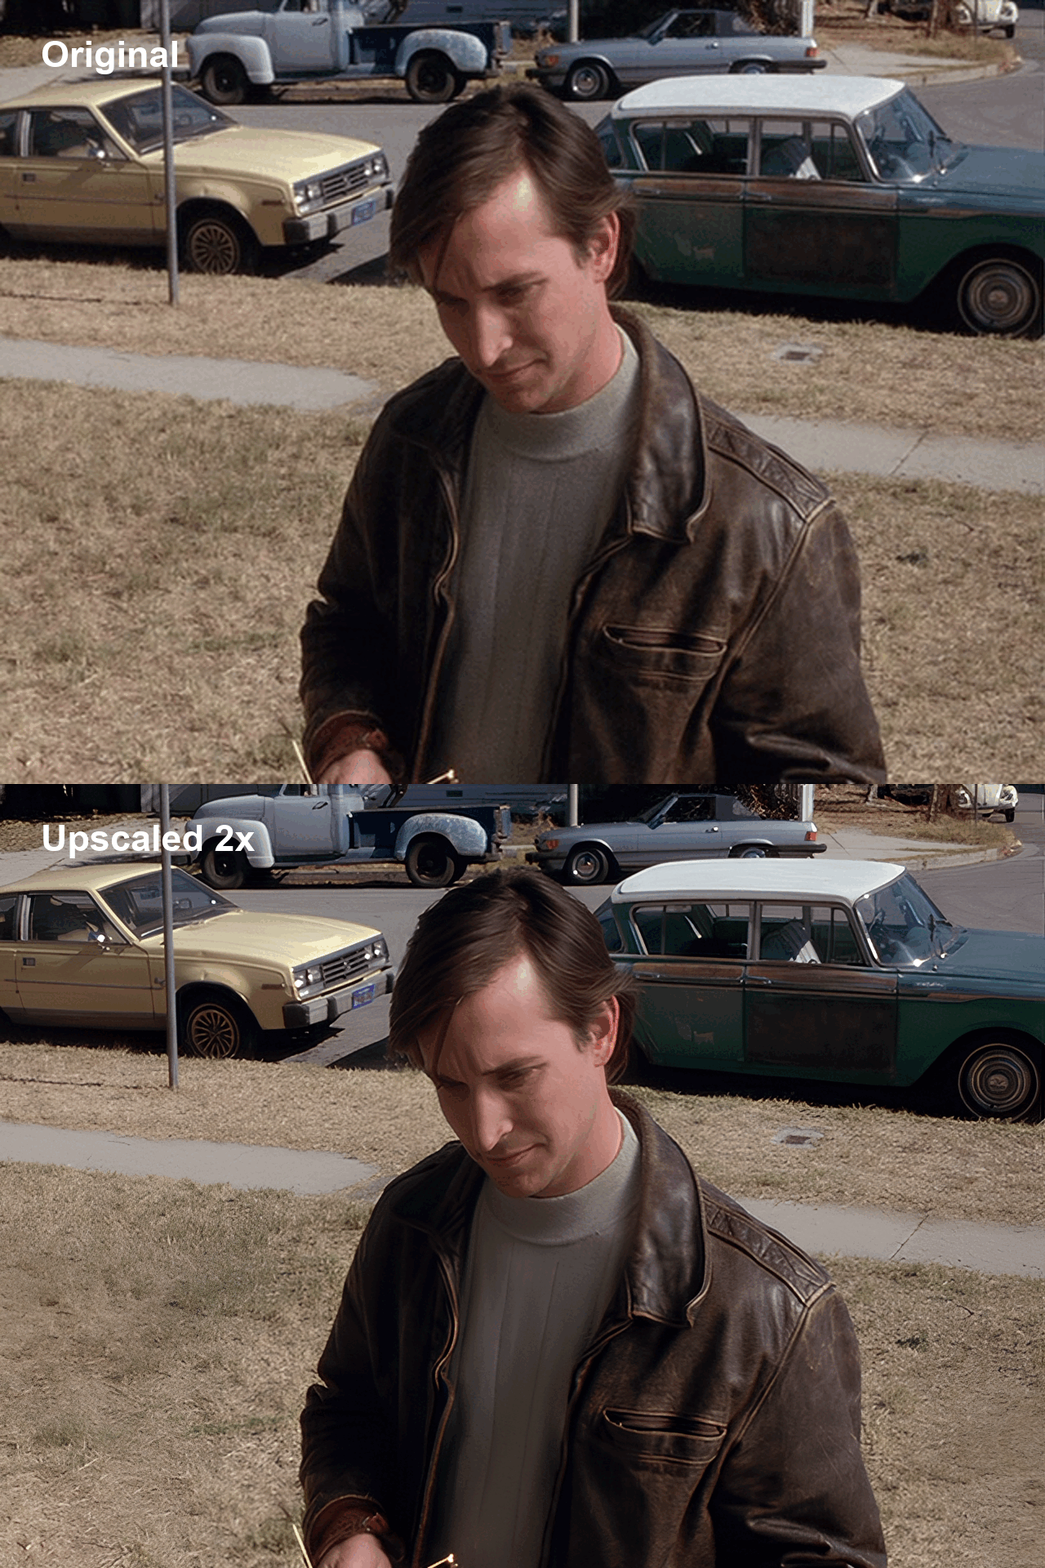
Before / After Examples
(recommended to view zoomed in)
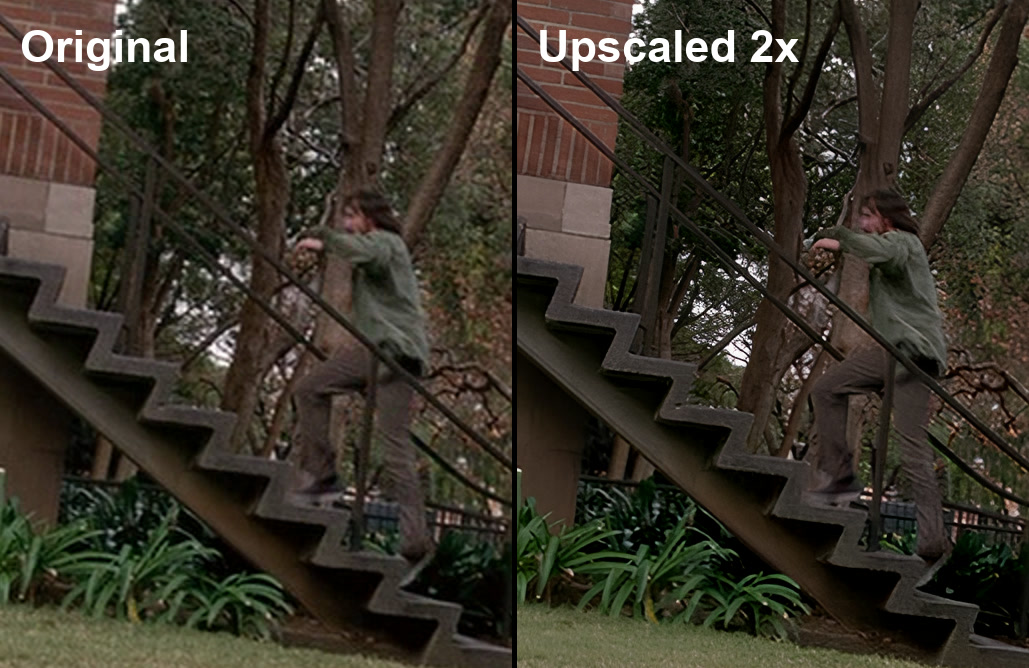 Left: original, right: 2x upscale
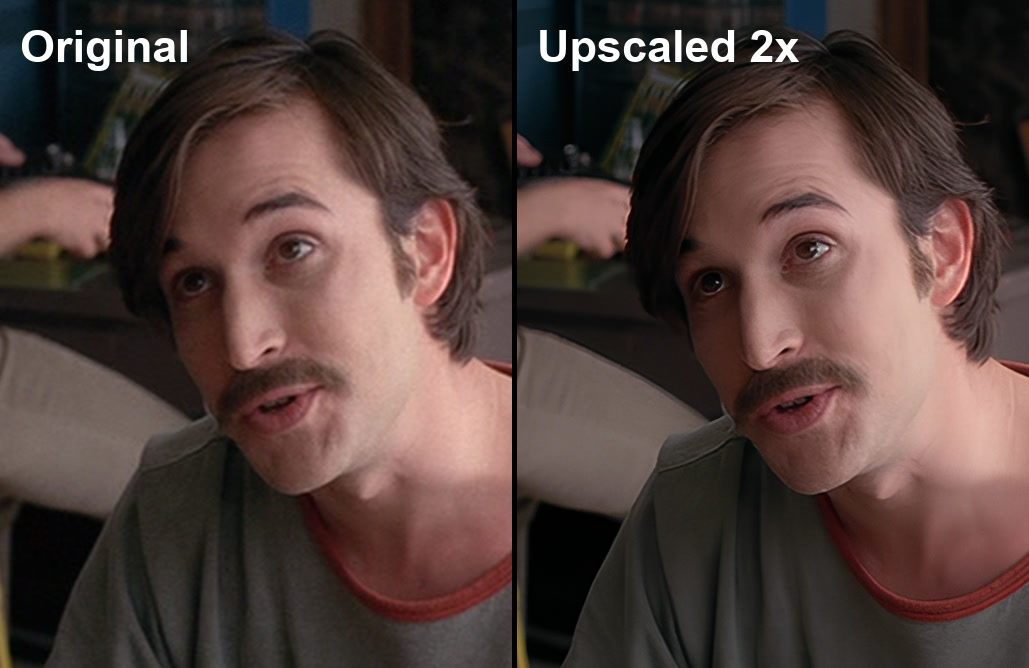 Left: original, right: 2x upscale
 Left: original, right: 2x upscale
 Left: original, right: 2x upscale
 Left: original, right: 2x upscale
Or for example, animated GIFs at a higher resolution (recommended to view enlarged):
Comparison in GIFs:
 Before and after
 Before and after
 Before and after
 Before and after
 Before and after
Stage 3: Final Step - Encoding the Video
Once all frames have been upscaled, all that’s left is to encode the final video.
Command:
ffmpeg -r 24000/1001 -i "/home/user/frames_upscaled/file_%06d.jpg" -i "/home/user/audio_track_eng.ac3" -i "/home/user/audio_track_rus.ac3" -c:v hevc_nvenc -b:v 10M -minrate 5M -maxrate 15M -bufsize 30M -preset p7 -colorspace bt709 -color_primaries bt709 -color_trc bt709 -color_range tv -pix_fmt yuv420p -map 0:v -map 1:a -map 2:a -metadata:s:a:0 title="English" -metadata:s:a:0 language=eng -metadata:s:a:1 title="Russian" -metadata:s:a:1 language=rus -c:a copy -disposition:a:0 default video_hd.mkv
Here:
“-r 24000/1001” - frame rate of ~23.98 fps
“-i /home/user/frames_upscaled/file_%06d.jpg - directory with upscaled frames
“-i “/home/user/audio_track_eng.ac3” -i “/home/user/audio_track_rus.ac3”” - attach audio tracks
“-c:v hevc_nvenc” - video codec
“-b:v 10M -minrate 5M -maxrate 15M” - variable bitrate: average 10 Mbps, minimum 5 Mbps, maximum 15 Mbps
“-bufsize 30M” - buffer size for variable bitrate; recommended to set at 2x maxrate (2x15M=30M), or omit to let ffmpeg decide
“-preset p7” - preset 7 for hevc_nvenc, high quality
“-colorspace smpte170m -color_primaries smpte170m -color_trc smpte170m” - set color parameters according to BT.601 NTSC from source
“-color_range tv” - standard (limited) range for video, expected by codecs and players, maximum compatibility and correct colors
“-pix_fmt yuv420p” - pixel color format, yuv420p for maximum compatibility
“-map 0:v -map 1:a -map 2:a” - stream mapping: video from frames, audio track 1, audio track 2
“-metadata:s:a:0 title=”English” … language=eng …” - write language metadata for audio tracks
“-c:a copy” - copy audio without re-encoding
“-disposition:a:0 default” - set audio_track_eng.ac3 as default
“video_hd.mkv” - output filename in MKV container
Wait for encoding to finish and you’re done.
Conclusion
We upscaled the movie using the SwinIR model. You can try any other compatible model - the Spandrel library supports many architectures. There’s also a site https://openmodeldb.info with hundreds of models on various architectures, mostly fine-tunes of base models.
Warning: If you’re using PyTorch below version 2.6, it is strongly recommended to load .pth/.bin model files from unknown authors with flag weights_only=True. This is because binary model files can contain embedded malicious code that may execute arbitrarily during deserialization (i.e., when the model is loaded). Setting weights_only=True tells PyTorch to load only the model weights. Starting with PyTorch 2.6, the default value of this flag is True if not explicitly specified.
Overall, from the original 640x480 we got a 1280x960 (4:3) video. This is not a standard HD resolution (1280x720 16:9) or FullHD (1920x1080 16:9), but then again, the source material wasn’t standard either.
Links to before/after frame samples and a before/after video clip are in the Additional Materials section below. Overall the quality is quite decent - it genuinely looks like proper HD.
Observed drawbacks: Grass and trees don’t look very realistic - it’s often apparent that the network reconstructed them with some creative liberty. Occasionally you can spot synthetic-looking artifacts in specific details or objects, but it’s not frequent and only noticeable if you look closely. In general, the blurrier the source image or individual objects within it, the worse the upscale result - synthetic artifacts will be more apparent.
In general, normal well-authored DVDs upscale well, where the original detail is good. Heavily compressed video with low detail and a soft/blurry picture upscales poorly. But again, if the source wasn’t heavily compressed, the upscale will most likely produce good results.
Additional Materials
- Script from the article is available on my GitHub:
https://github.com/peterplv/PythonNeiroUpscaler - Before/after frame samples on my Google Drive. There are also examples of 4x upscaled images
- Video example: original and upscaled