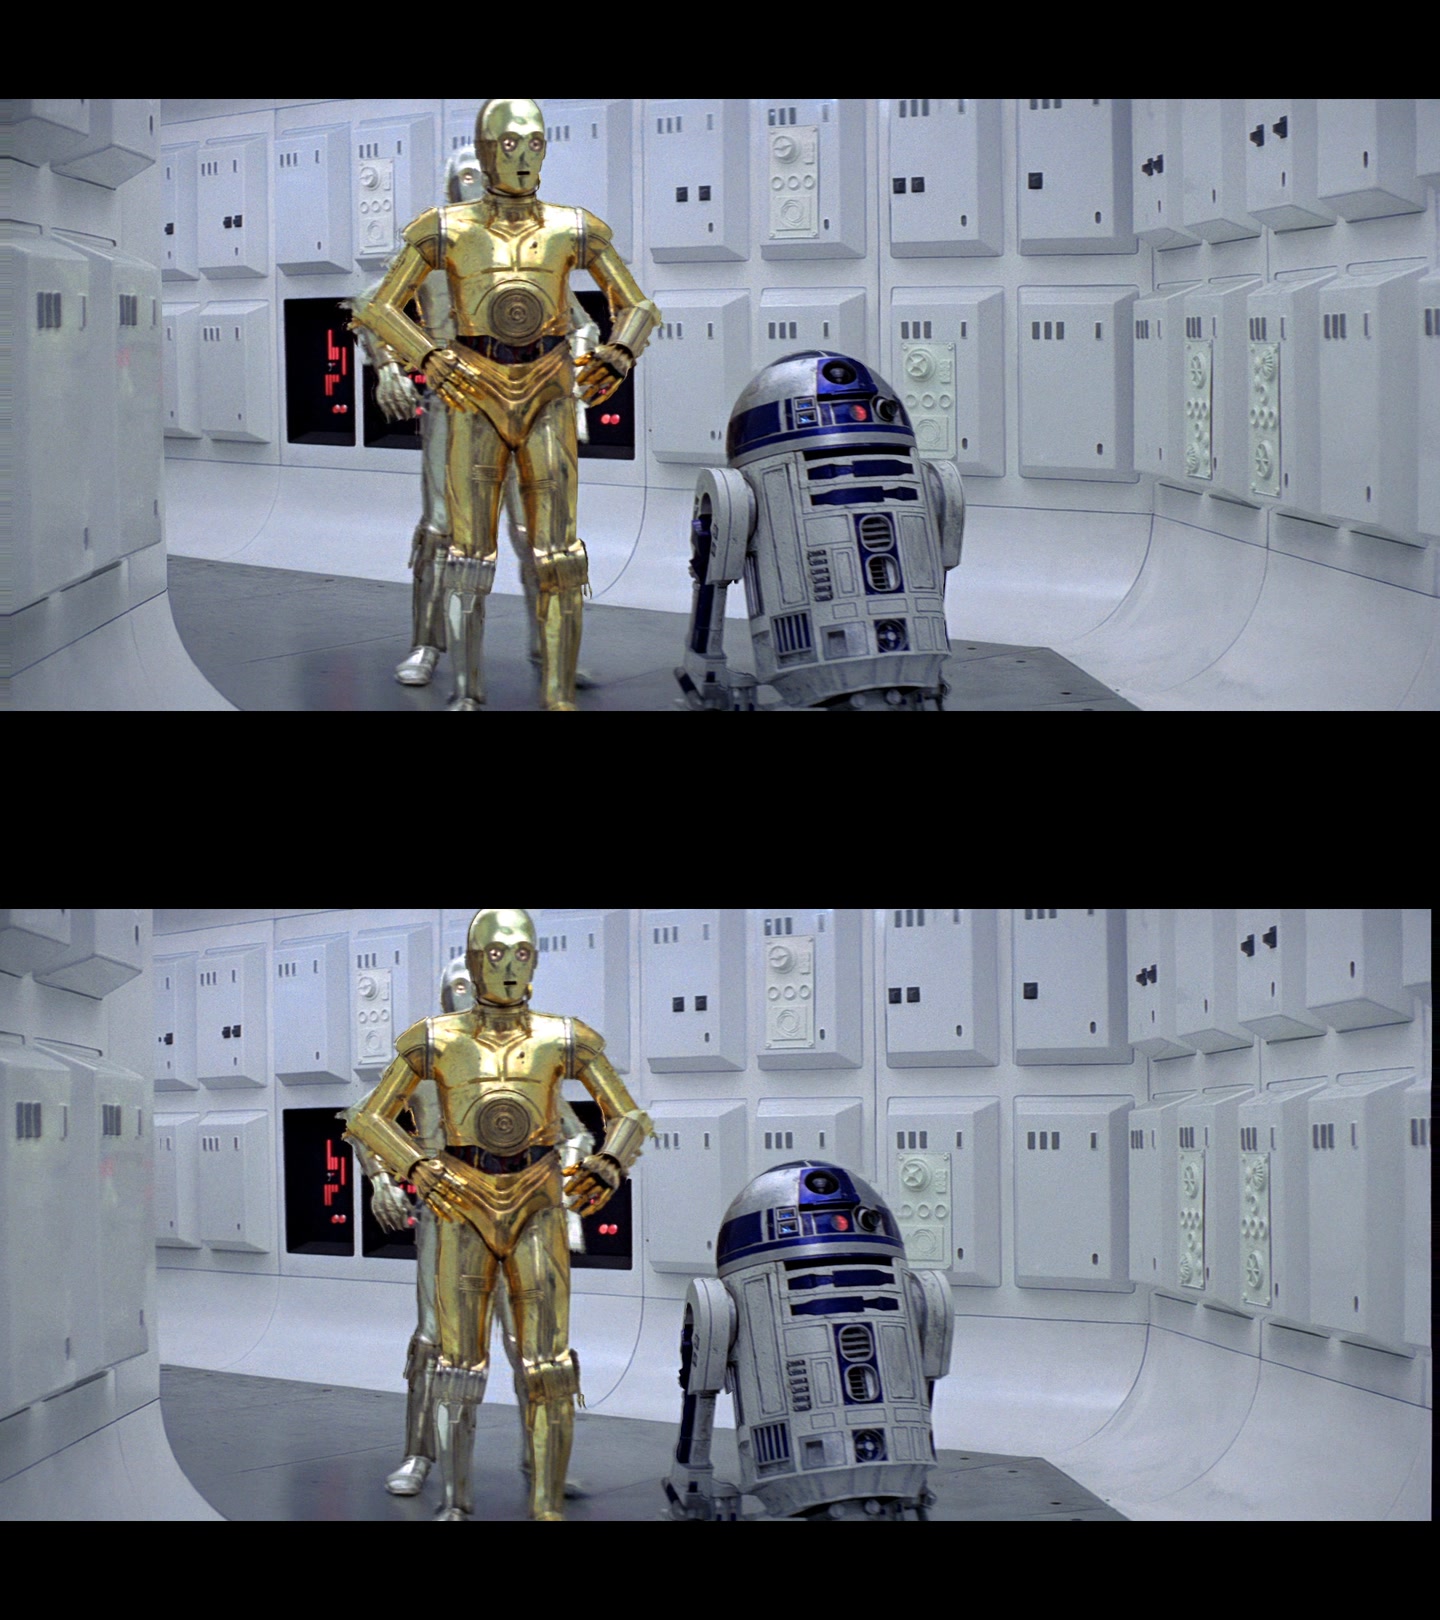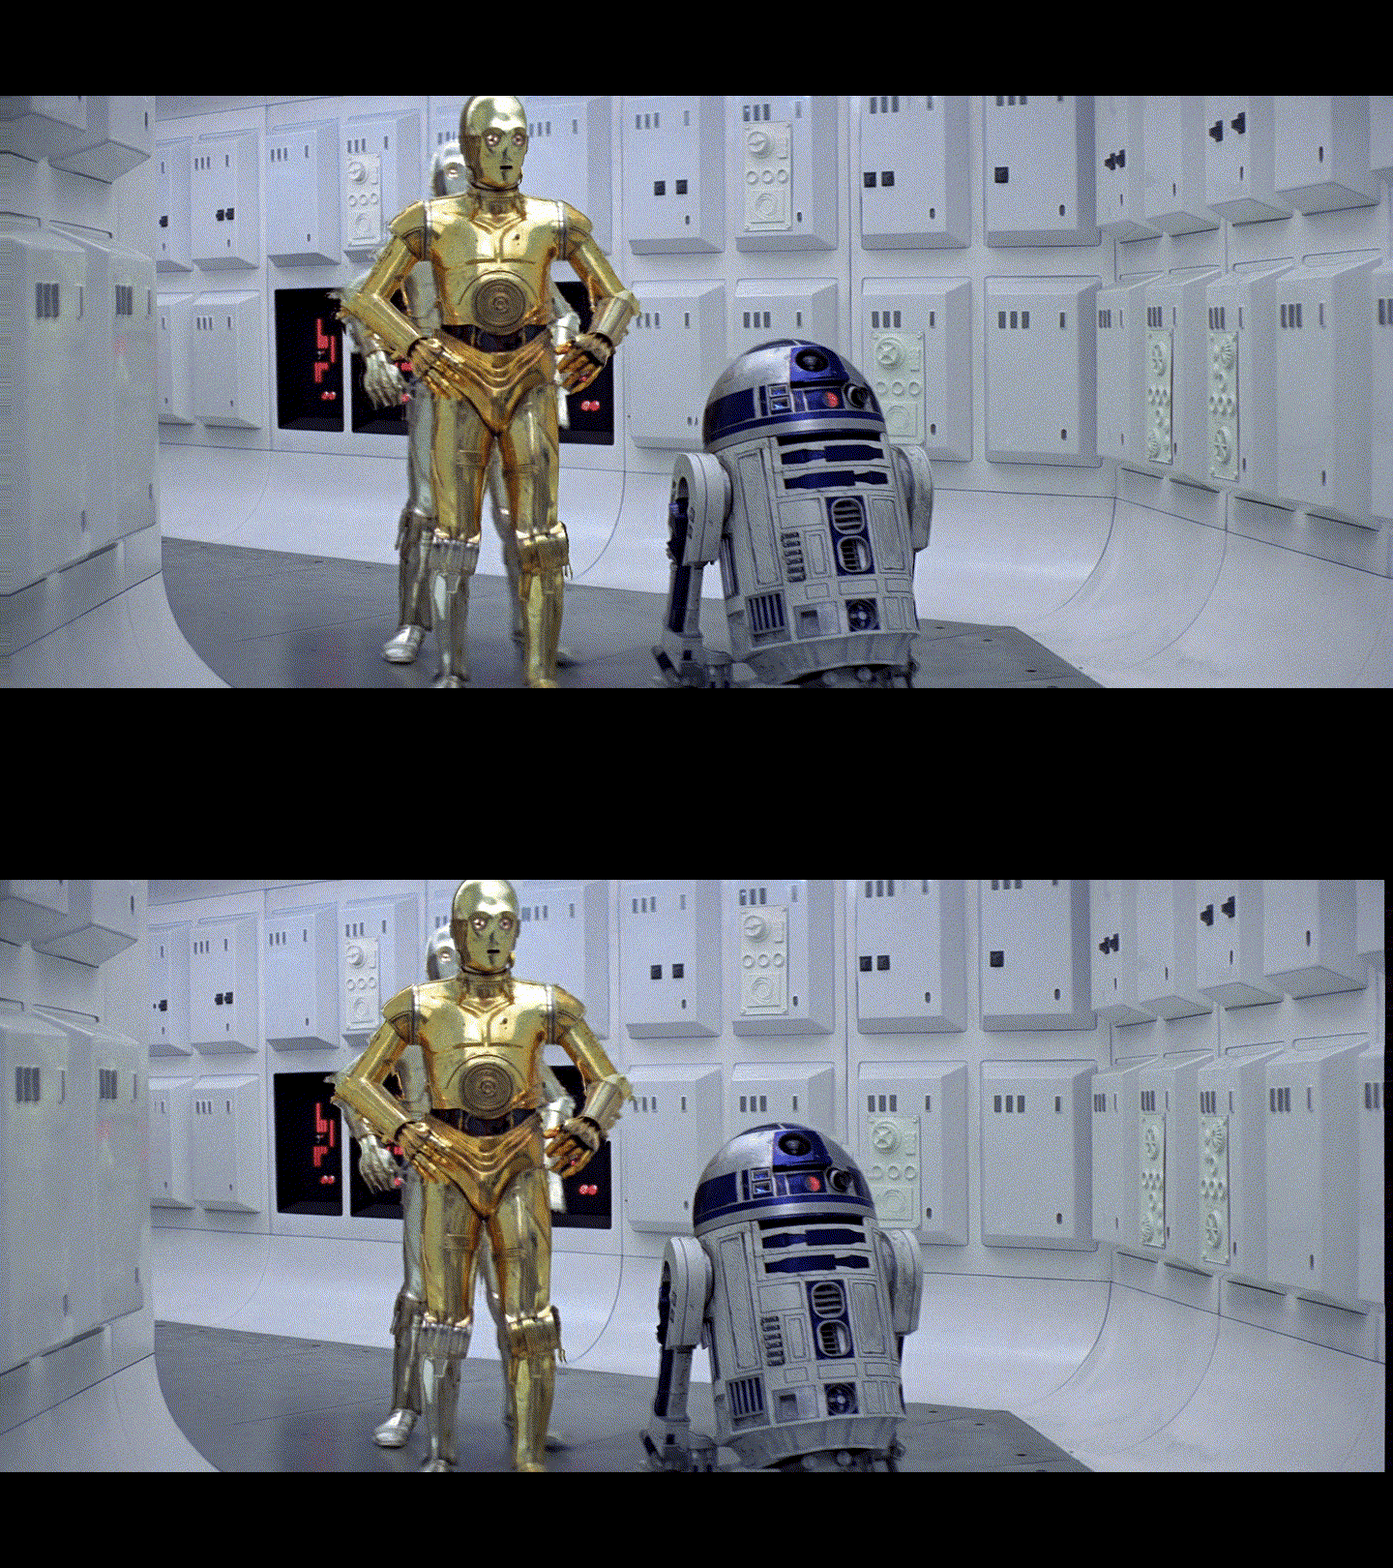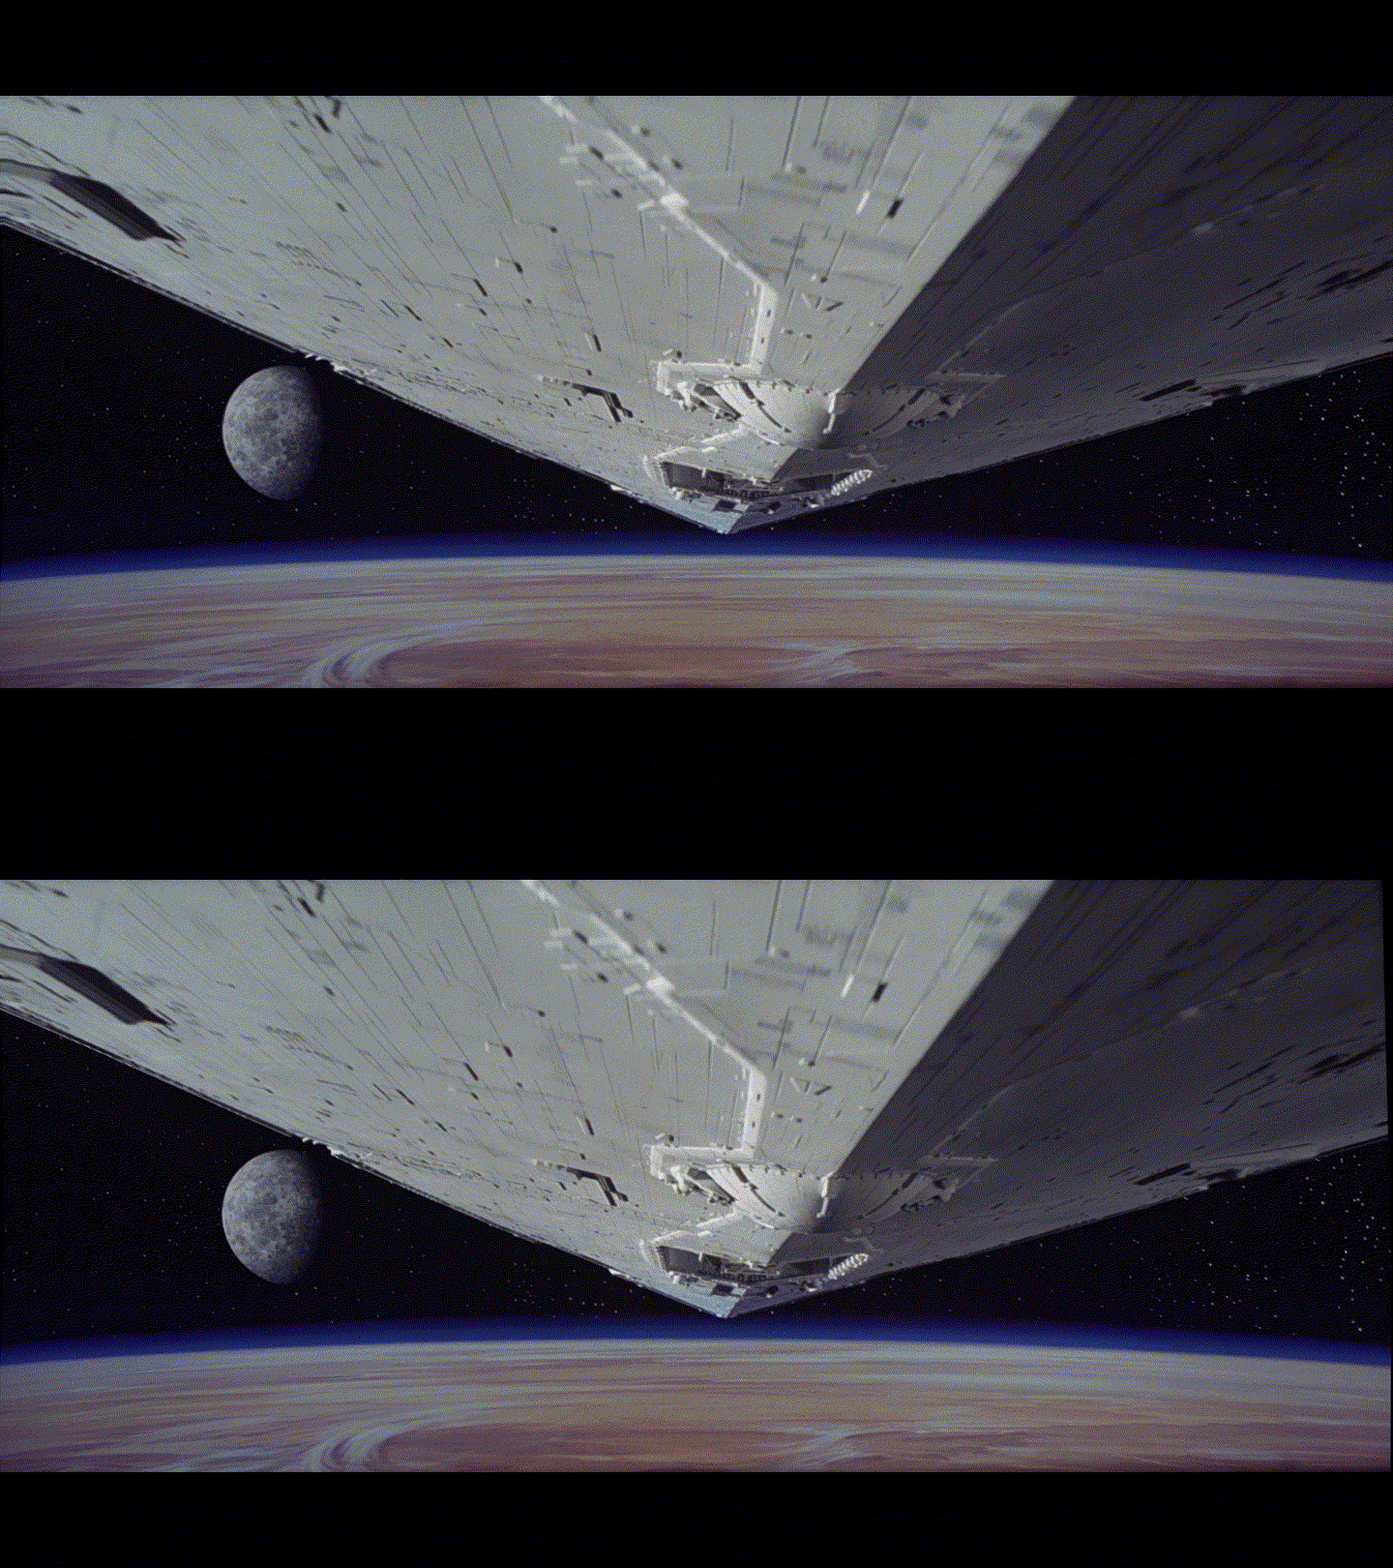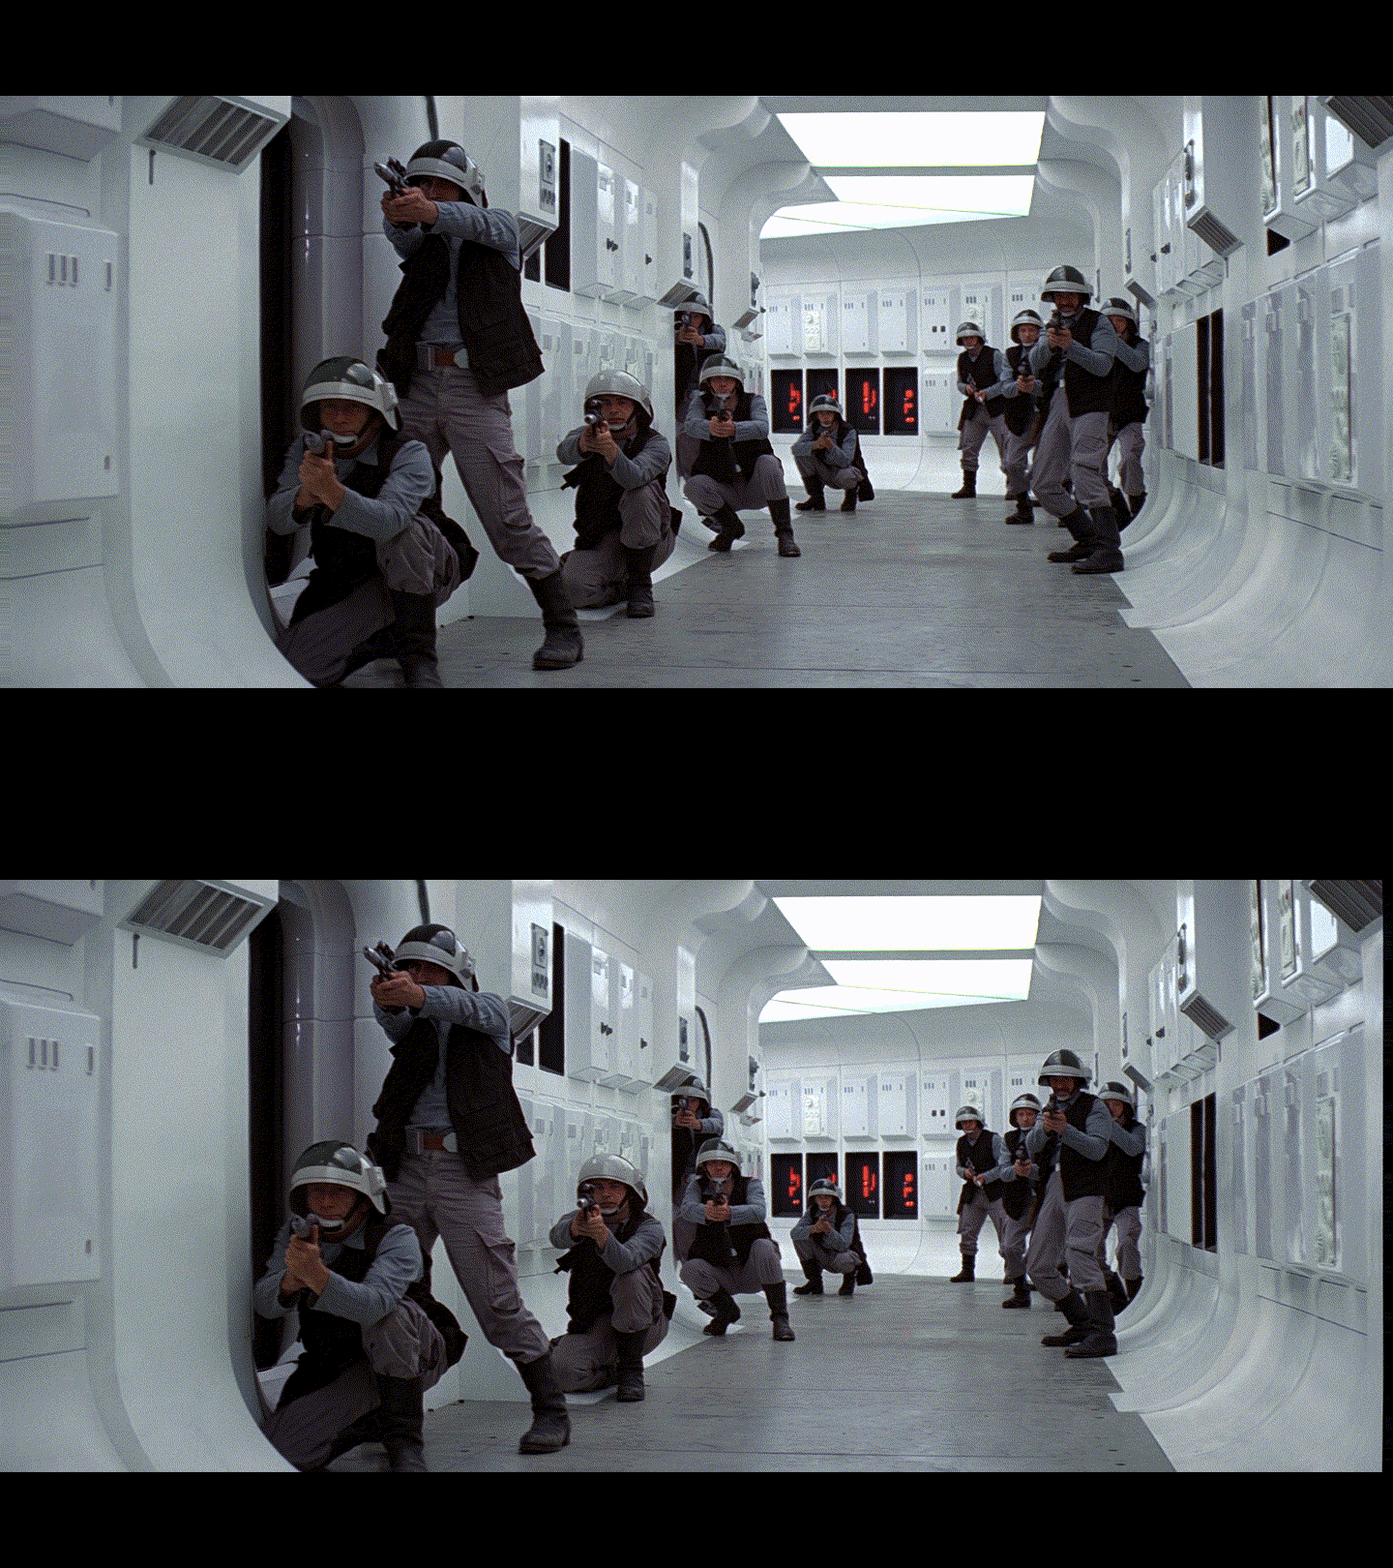
<?xml version="1.0" encoding="utf-8"?><feed xmlns="http://www.w3.org/2005/Atom" ><generator uri="https://jekyllrb.com/" version="3.10.0">Jekyll</generator><link href="https://peterplv.github.io/feed.xml" rel="self" type="application/atom+xml" /><link href="https://peterplv.github.io/" rel="alternate" type="text/html" /><updated>2026-05-21T18:10:40+03:00</updated><id>https://peterplv.github.io/feed.xml</id><title type="html">peterplv</title><subtitle>AI first</subtitle><entry><title type="html">Upscaling Video DVD to HD Using Neural Networks, Python and FFmpeg</title><link href="https://peterplv.github.io/2026/04/28/upscale-video-dvd-to-hd" rel="alternate" type="text/html" title="Upscaling Video DVD to HD Using Neural Networks, Python and FFmpeg" /><published>2026-04-28T12:22:00+03:00</published><updated>2026-04-28T12:22:00+03:00</updated><id>https://peterplv.github.io/2026/04/28/upscale-video-dvd-to-hd</id><content type="html" xml:base="https://peterplv.github.io/2026/04/28/upscale-video-dvd-to-hd"><![CDATA[<p><img src="/assets/images/2026-04-28-upscale-video-dvd-to-hd/steve_jobs_noah_wyle_title.gif" alt="Noah Wyle as Steve Jobs upscaled" />
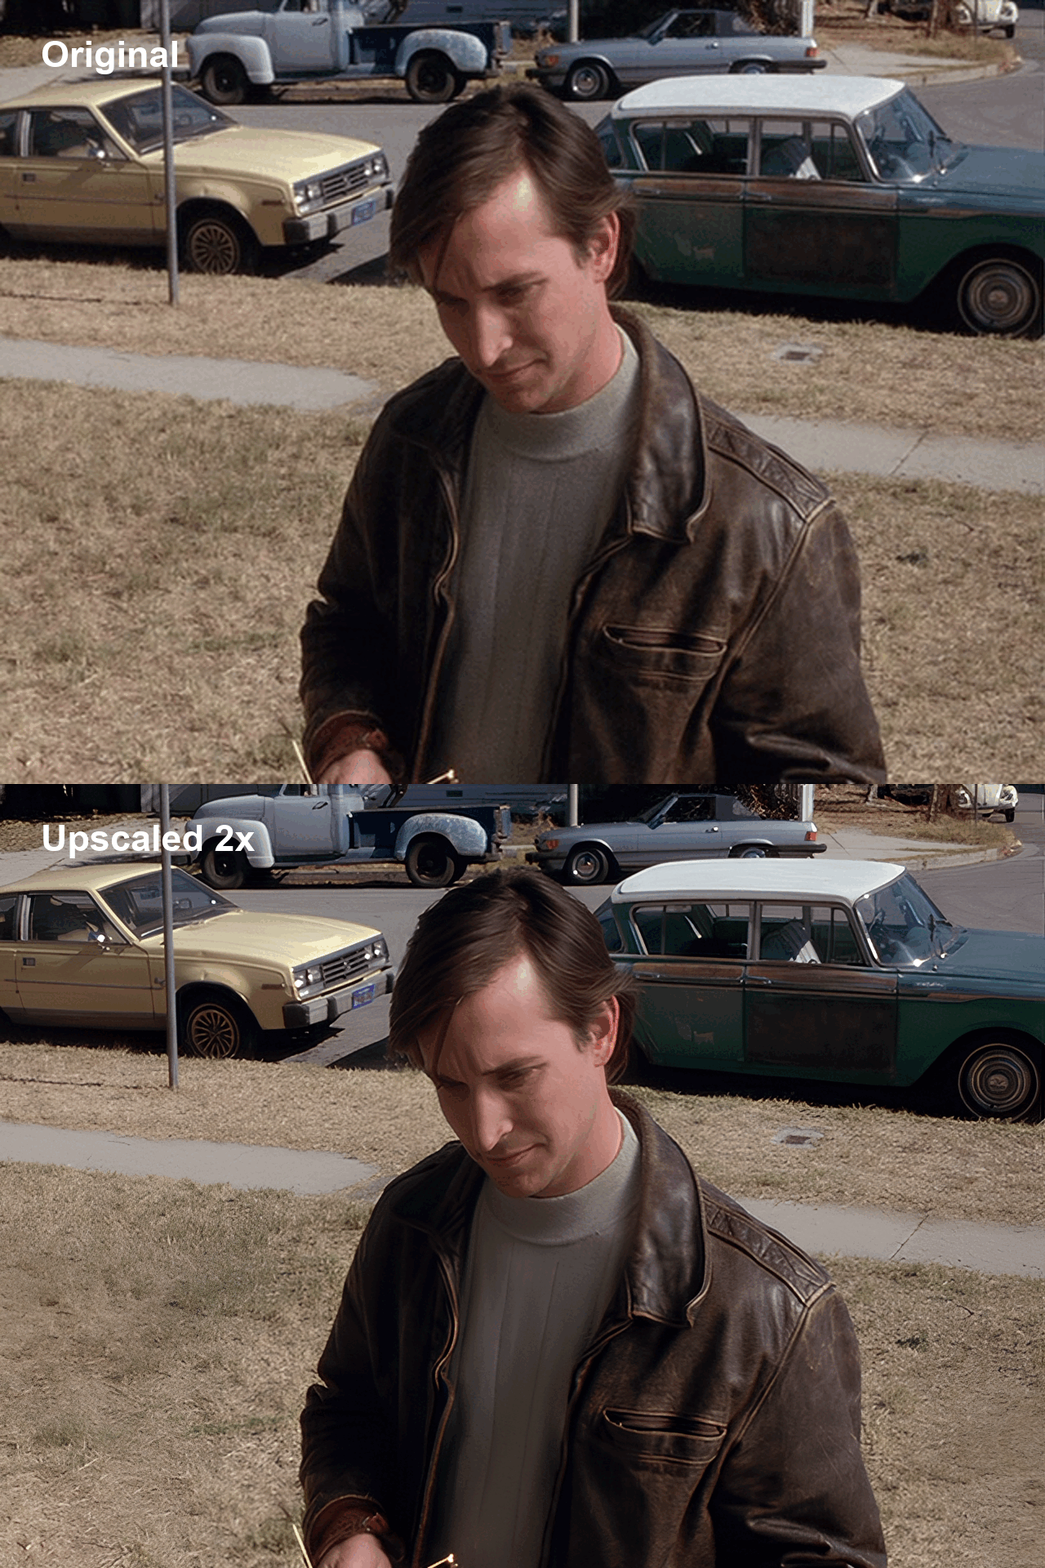
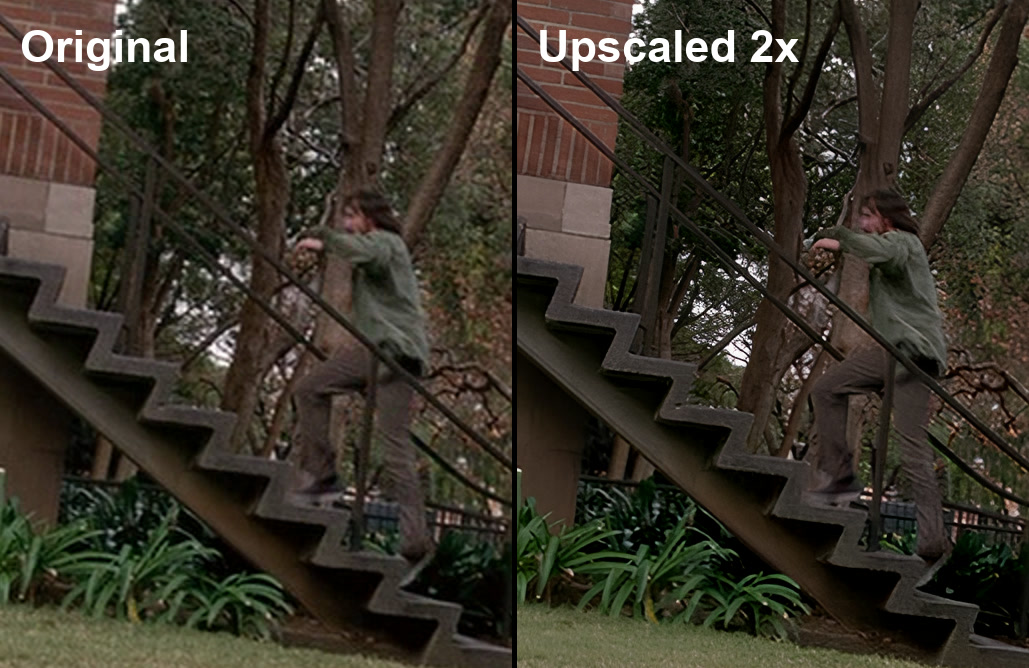
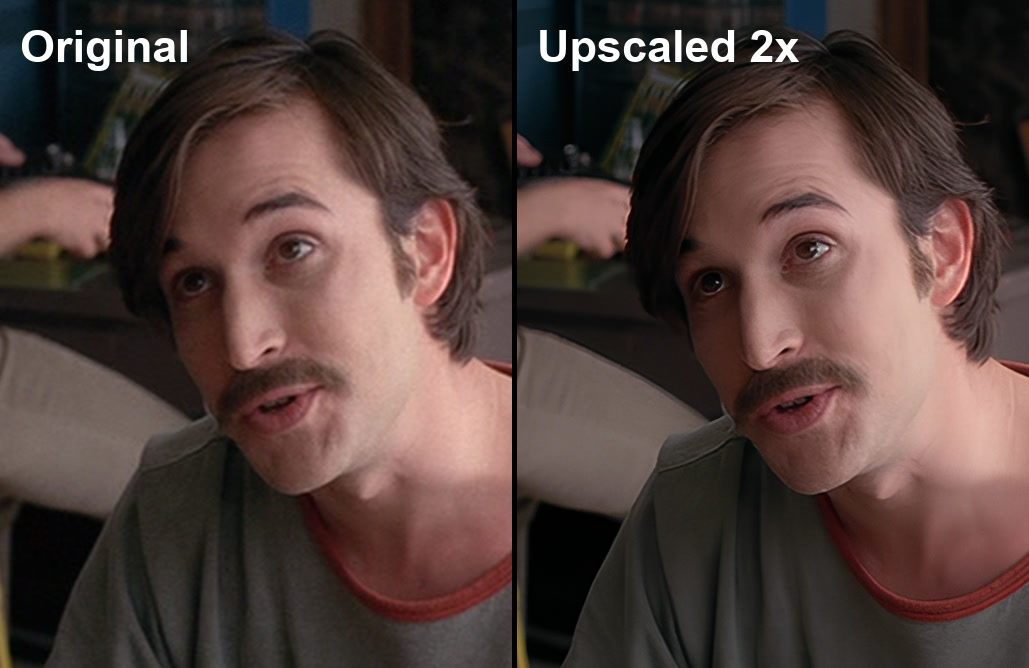
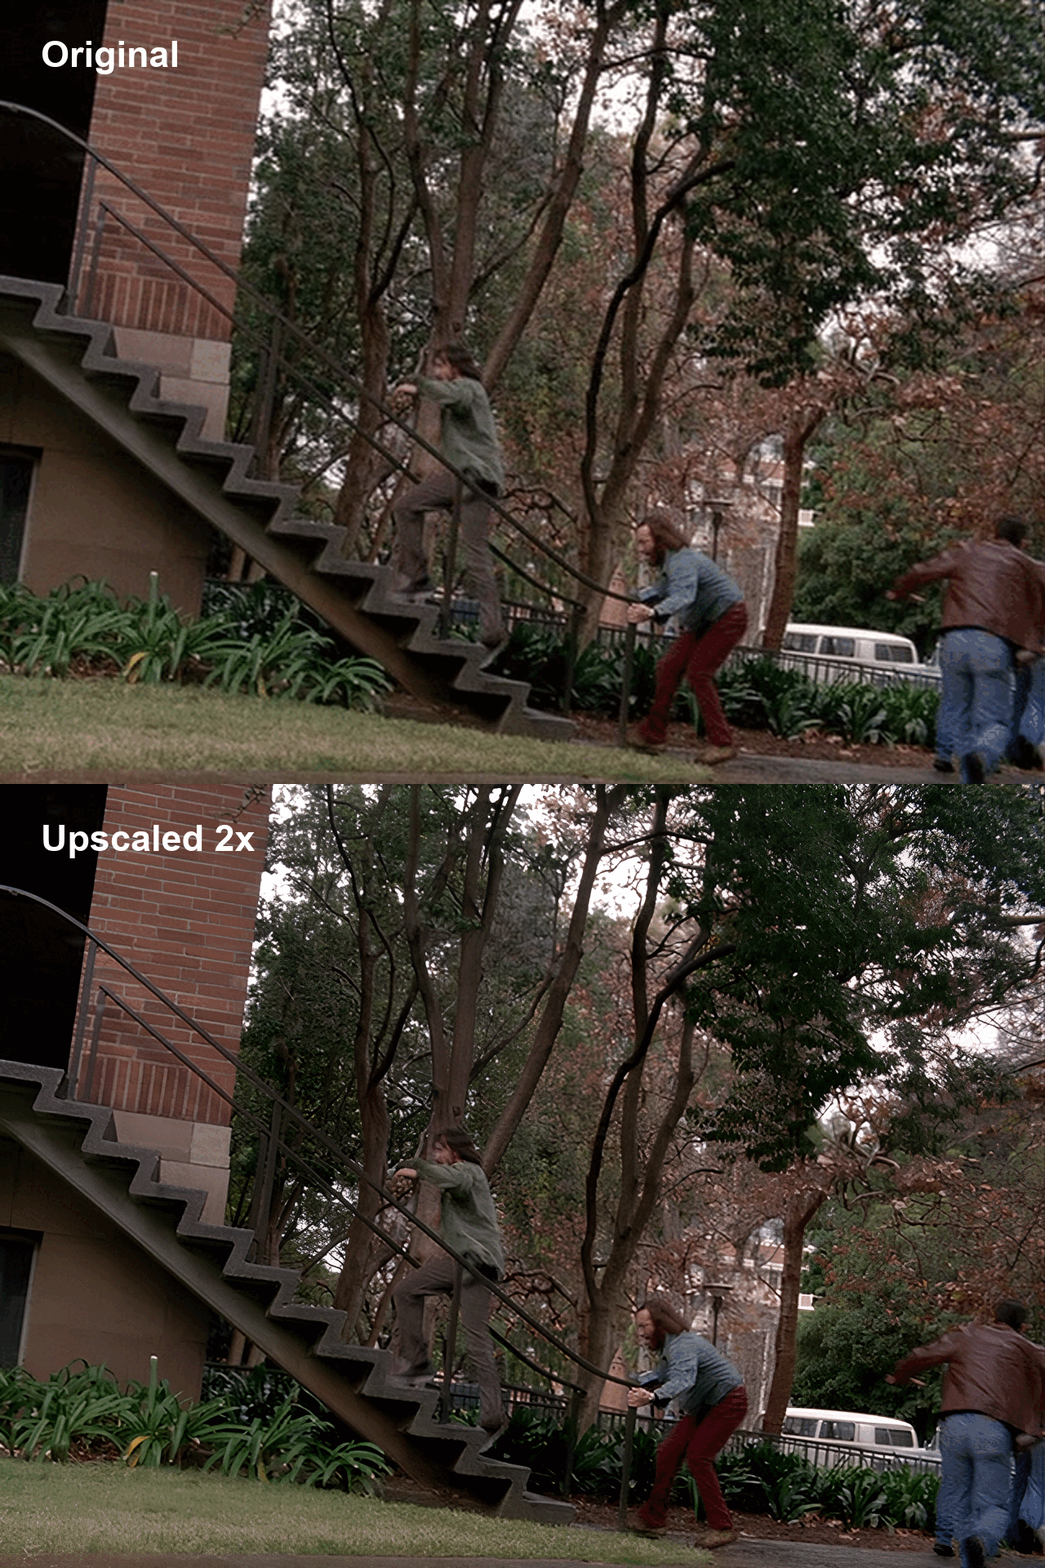
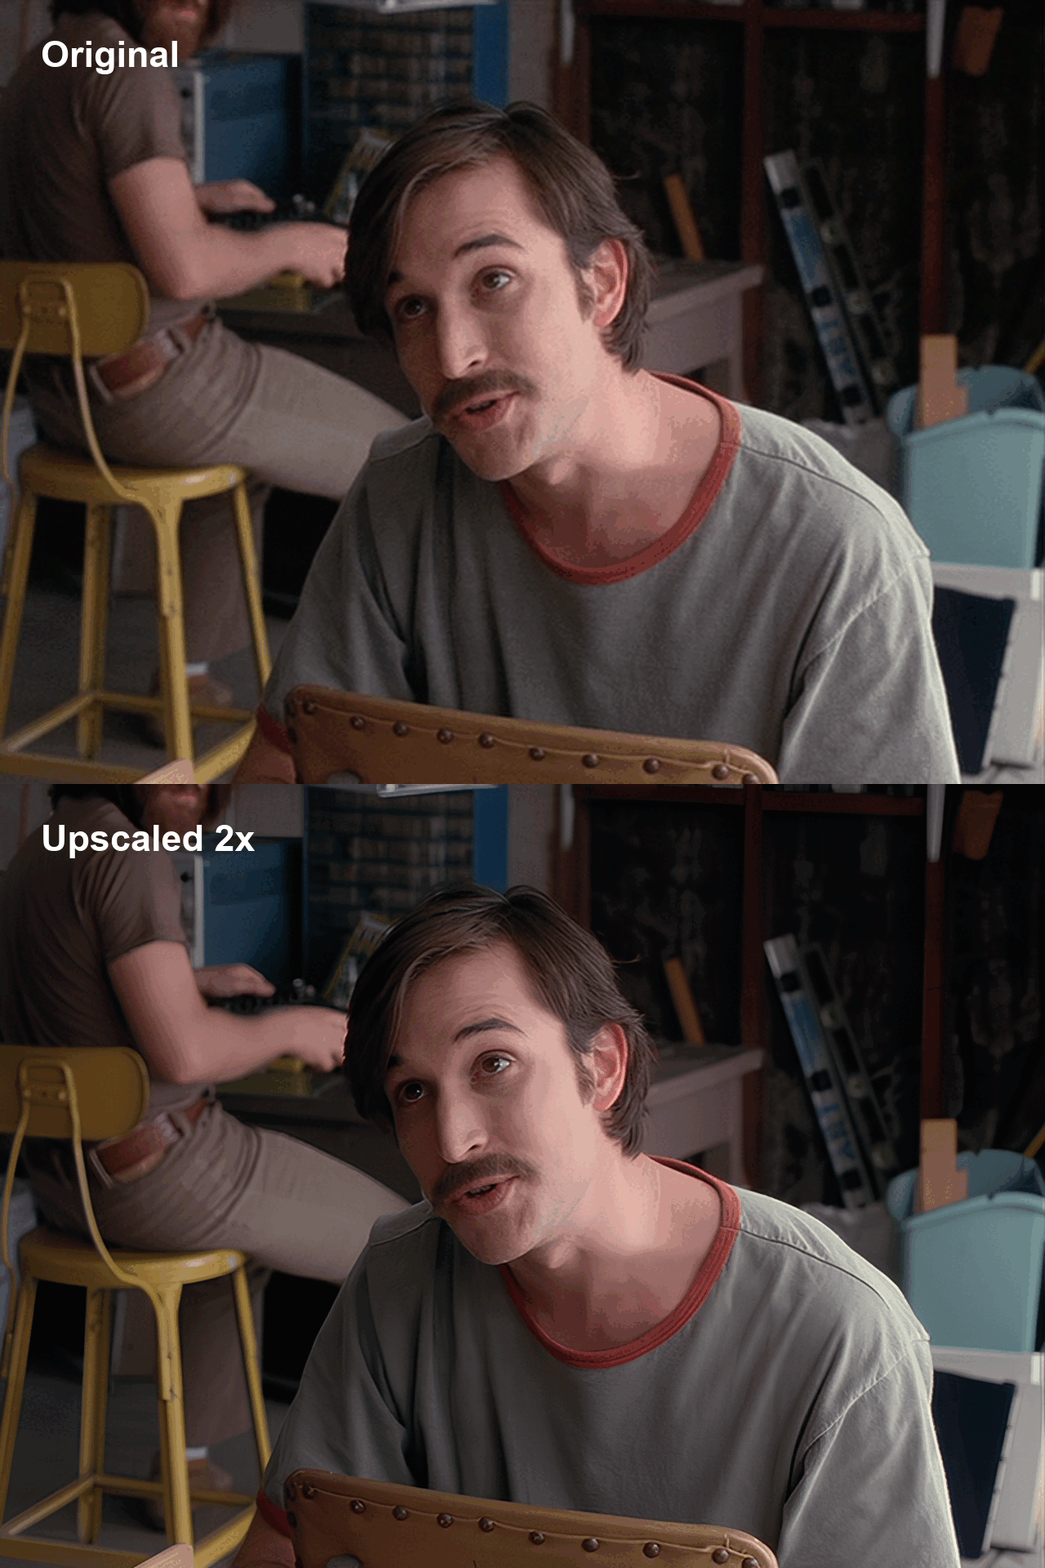
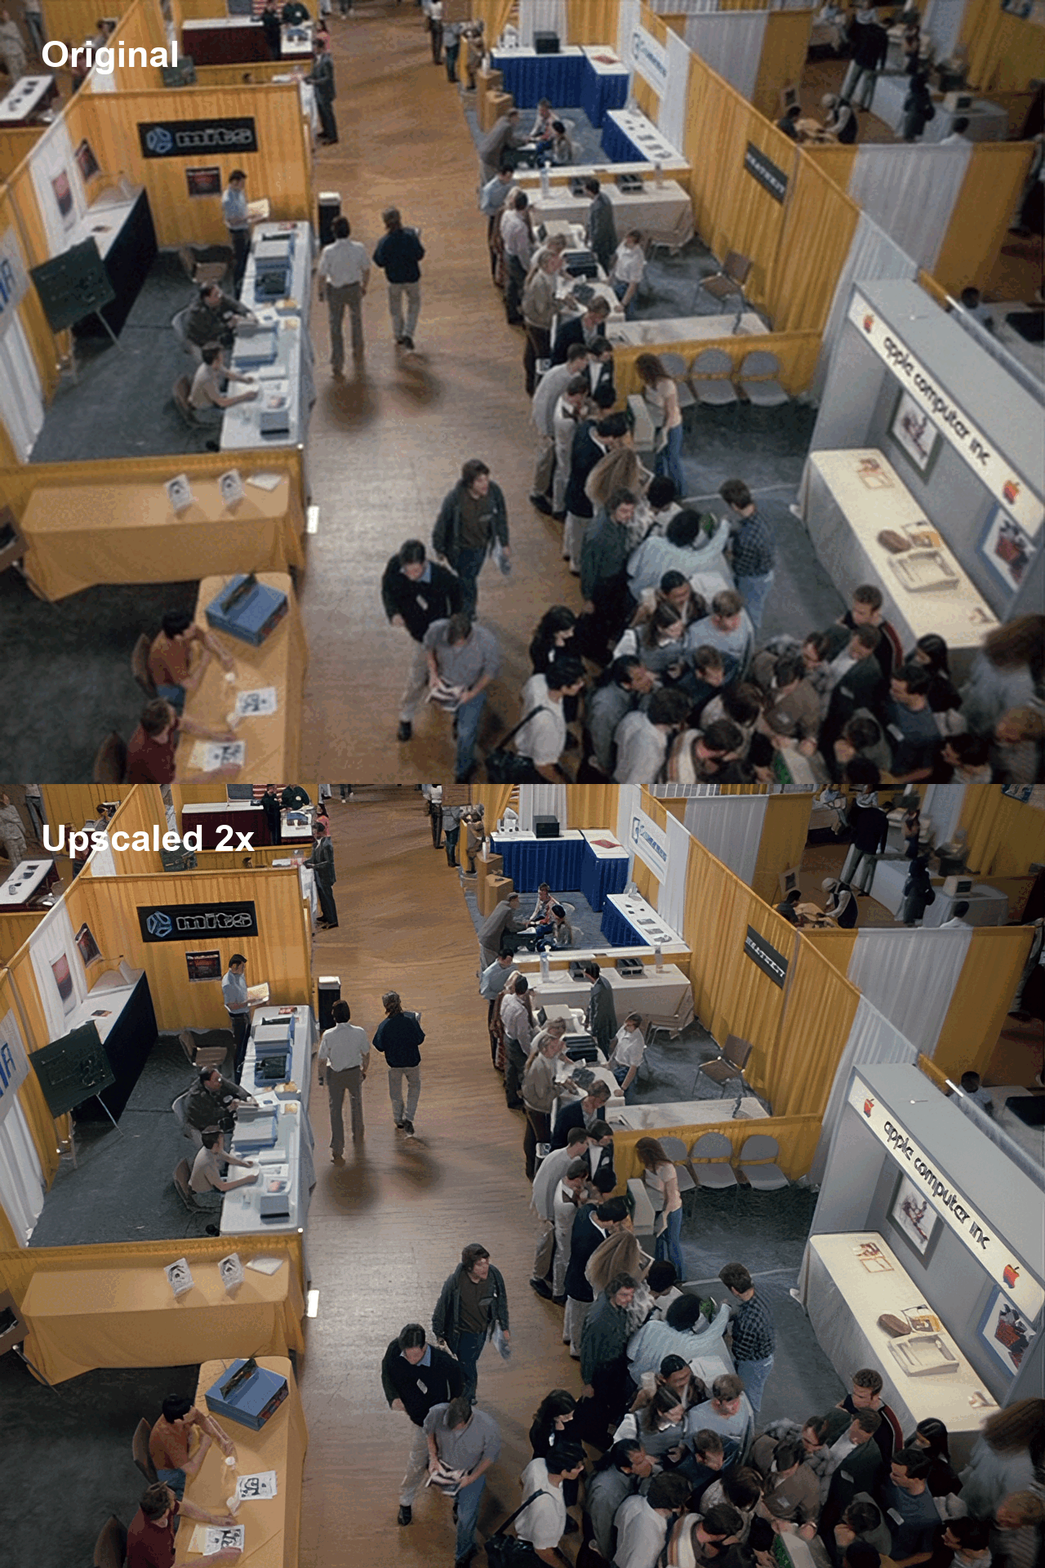
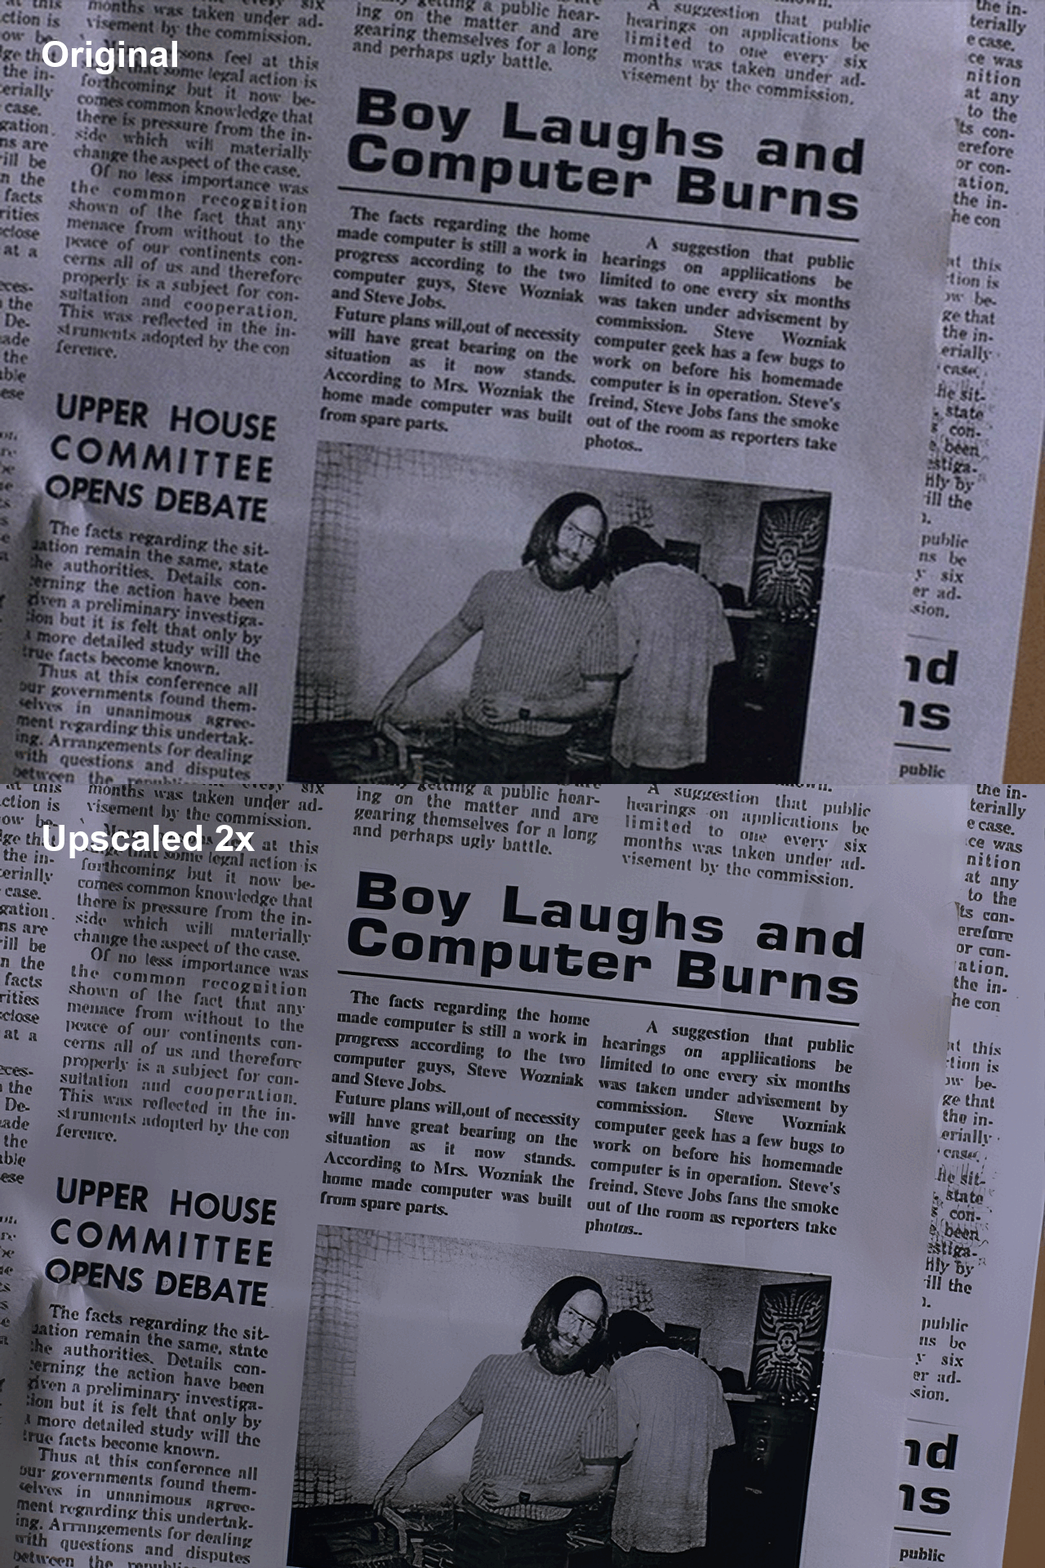
<em>Upscale result of a frame by 2x, before and after</em>
<br />
<br />
I’ve been interested in image upscaling for a long time, and video upscaling specifically. One of the first tools I came across a few years ago was <a href="https://github.com/nagadomi/waifu2x">waifu2x</a>. But that network was better suited for upscaling anime (it seems it was trained on anime images). In other words, waifu2x worked well for relatively simple images without a lot of detail or complex textures.</p>

<p>Then I looked into <a href="https://github.com/xinntao/ESRGAN">ESRGAN</a> and <a href="https://github.com/xinntao/Real-ESRGAN">Real-ESRGAN</a>. Decent models, quite usable for image upscaling, but the synthetic look is often noticeable, especially in complex scenes like ones with trees. I even tried <a href="https://github.com/xinntao/Real-ESRGAN/blob/master/docs/Training.md">fine-tuning Real-ESRGAN</a>, but while I was assembling my training dataset, I came across another model - <a href="https://github.com/JingyunLiang/SwinIR">SwinIR</a>. After testing it, I realized it covered my needs, if not completely, then at least 80%. My goal was to upscale a few old movies so that after upscaling the film still looked like a film, not a claymation puppet show. It worked out. That’s what this article is about.</p>

<p>We’ll be upscaling the movie <strong>Pirates of Silicon Valley</strong> (1999, USA, DVD5). It covers the rise of the home PC and the early days of Apple and Microsoft companies. A pretty interesting film with the rebellious spirit of that era. The main characters are young Steve Jobs, Steve Wozniak, Bill Gates, and other participants in the “home PC revolution”. And of course, we’ll be doing the upscaling on a home PC.</p>

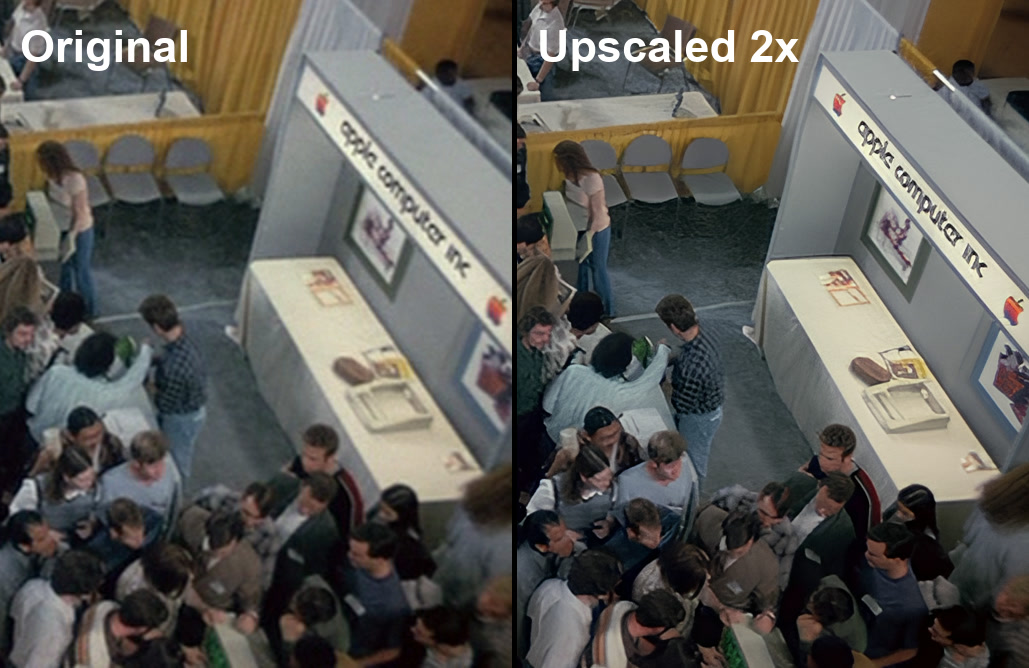
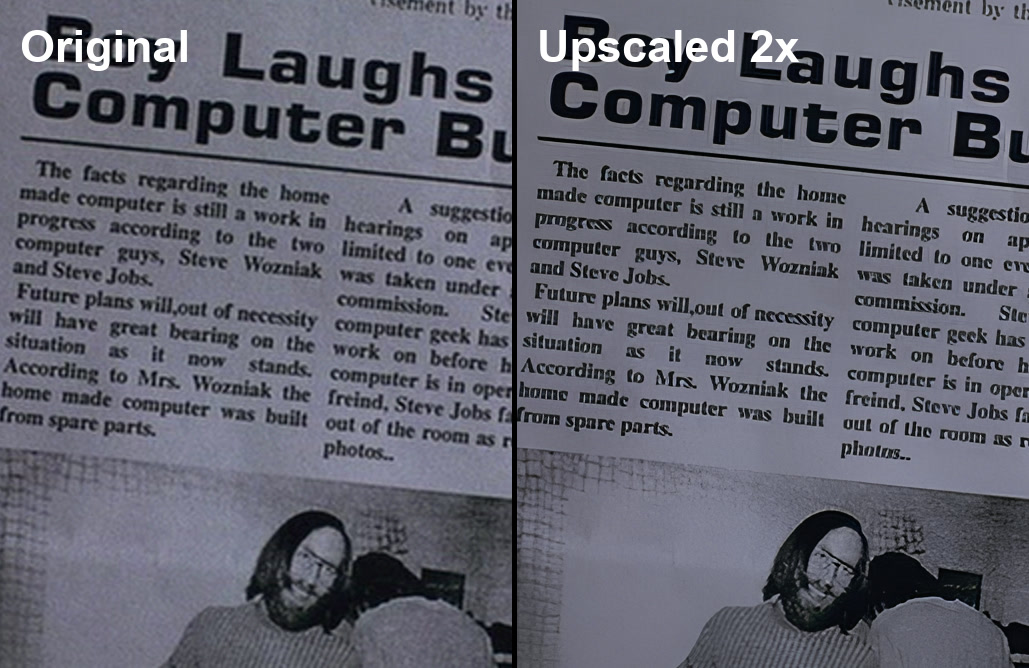
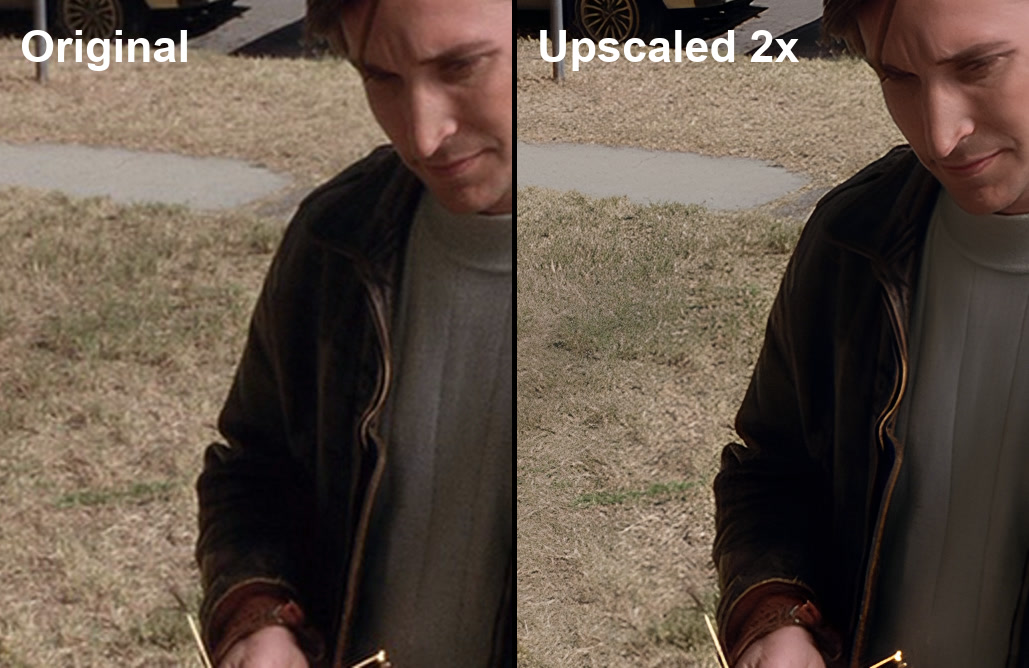
<p>Example of what you can get (recommended to view zoomed in):
<br />
<br />
<img src="/assets/images/2026-04-28-upscale-video-dvd-to-hd/pirates_silicon_valley_upscaled_120705.jpg" alt="Pirates Silicon Valley in HD" />
<em>Left: original, right: 2x upscale</em>
<br />
<br />
Or as an animated GIF:
<img src="/assets/images/2026-04-28-upscale-video-dvd-to-hd/pirates_silicon_valley_hd_120705.gif" alt="Pirates Silicon Valley in HD" />
<em>Better viewed zoomed in</em>
<br />
<br />
Disc specs:</p>
<ul>
  <li>DVD5, MPEG-2, 720x480 (NTSC)</li>
</ul>

<p>My setup for this task:</p>
<ul>
  <li>Gigabyte A520M, AMD Ryzen 5 PRO 3600, 32GB DDR4 3200 MT/s (16+16)</li>
  <li>Gigabyte GeForce RTX 3060 12GB, CUDA Version: 12.5</li>
  <li>Ubuntu 22.04</li>
</ul>

<p>What you’ll need:</p>
<ul>
  <li>A PC with a CUDA-capable GPU</li>
  <li><a href="https://www.ffmpeg.org/">ffmpeg and ffprobe</a></li>
  <li>Python</li>
  <li>Spandrel library for Python</li>
  <li>One of the SwinIR models</li>
  <li>Around 80 GB of disk space</li>
  <li>Several days of processing time (if running continuously, ~5 days for 2x upscale on a setup similar to mine)</li>
</ul>

<p>Brief overview of the algorithm:</p>
<ul>
  <li>Use ffmpeg to extract the movie frame by frame as PNG files</li>
  <li>Upscale each frame</li>
  <li>Use ffmpeg to encode the upscaled frames into an HD version of the movie, attaching the audio tracks from the source material</li>
</ul>

<p>Let’s get started.</p>

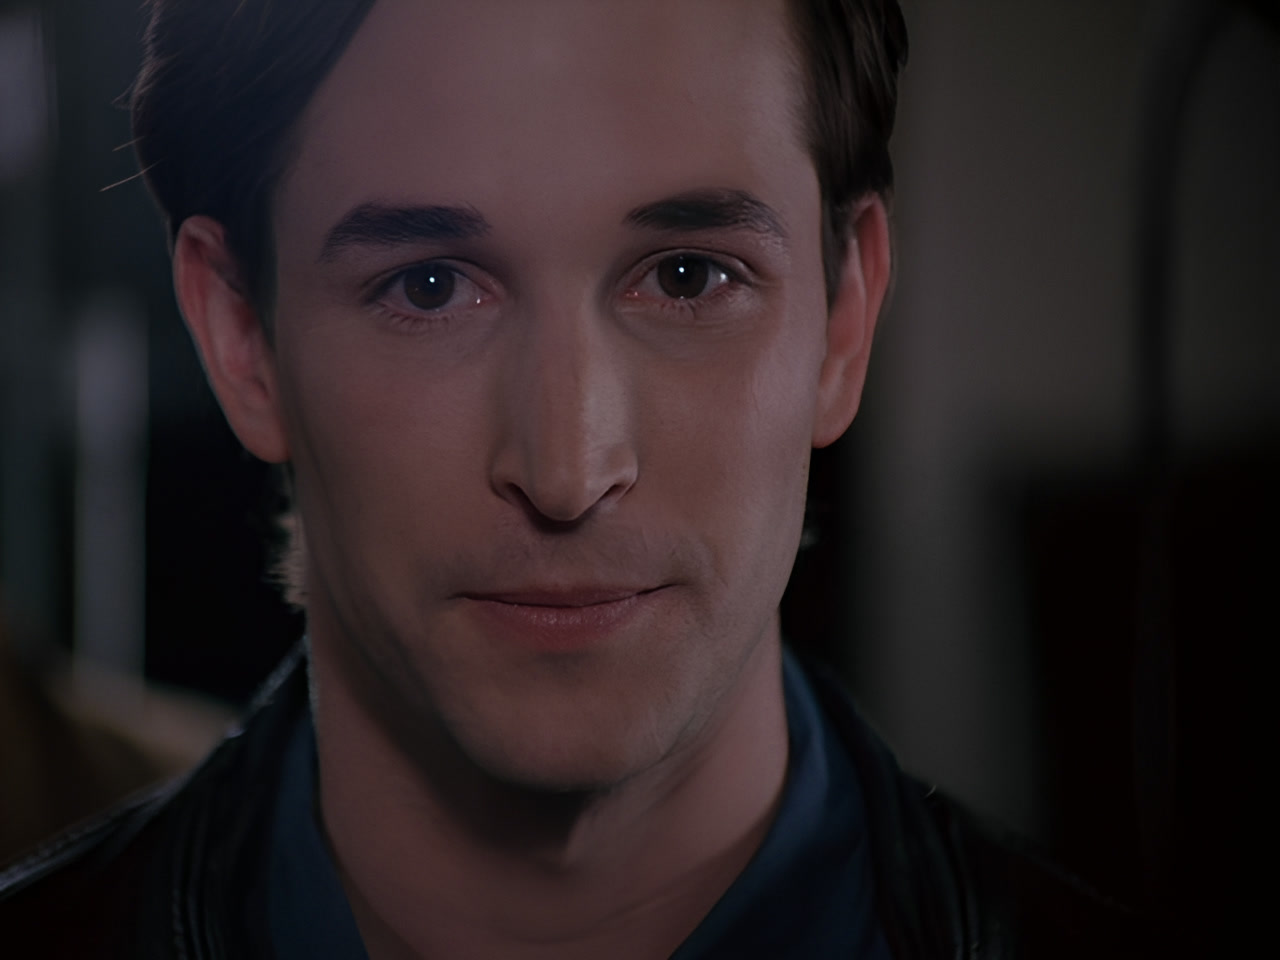
<p><img src="/assets/images/2026-04-28-upscale-video-dvd-to-hd/steve_jobs_noah_wyle.jpg" alt="Actor Noah Wyle as Steve Jobs, after upscaling" />
<em>Actor Noah Wyle as Steve Jobs, after upscaling</em>
<br />
<br /></p>
<h2 id="software-installing">Software Installing</h2>

<h3 id="installing-ffmpeg">Installing ffmpeg</h3>

<p>Ubuntu:</p>
<div class="language-bash highlighter-rouge"><div class="highlight"><pre class="highlight"><code><span class="nb">sudo </span>apt update
<span class="nb">sudo </span>apt <span class="nb">install </span>ffmpeg
</code></pre></div></div>
<p>(ffprobe is included when installing ffmpeg)
<br />
<br />
Windows:<br />
<a href="https://www.ffmpeg.org/download.html">https://www.ffmpeg.org/download.html</a></p>

<p>Download one of the latest builds and extract the archive, for example to c:\ffmpeg. You need two utilities from the archive: ffmpeg and ffprobe.
You can add the ffmpeg folder to PATH so you can call ffmpeg from the command line in any directory.
<br />
<br /></p>
<h3 id="installing-python">Installing Python</h3>

<p>Ubuntu:</p>
<div class="language-bash highlighter-rouge"><div class="highlight"><pre class="highlight"><code><span class="nb">sudo </span>apt update
<span class="nb">sudo </span>apt <span class="nb">install </span>python3 python3-pip
</code></pre></div></div>
<p><br />
Windows:<br />
<a href="https://www.python.org/downloads/windows/">https://www.python.org/downloads/windows/</a></p>

<p>Download one of the latest releases for your OS and install it.</p>

<p>For Python, also must be installed <strong>PyTorch</strong>, <strong>Torchvision</strong>, <strong>Pillow</strong> libraries:</p>
<div class="language-bash highlighter-rouge"><div class="highlight"><pre class="highlight"><code>pip <span class="nb">install </span>torch torchvision Pillow
</code></pre></div></div>
<p><br /></p>
<h3 id="installing-spandrel">Installing Spandrel</h3>

<div class="language-bash highlighter-rouge"><div class="highlight"><pre class="highlight"><code>pip <span class="nb">install </span>spandrel
</code></pre></div></div>

<p><strong>Downloading the model</strong><br />
Available SwinIR models at the link:
<a href="https://github.com/JingyunLiang/SwinIR/releases">https://github.com/JingyunLiang/SwinIR/releases</a></p>

<p>I tested all SwinIR models. These two performed best:<br />
<strong>For 2x upscale: 003_realSR_BSRGAN_DFO_s64w8_SwinIR-M_x2_GAN.pth</strong><br />
<strong>For 4x upscale: 003_realSR_BSRGAN_DFOWMFC_s64w8_SwinIR-L_x4_GAN.pth</strong></p>

<p>Download the model and note its path.</p>

<p>I used 2x upscale, so my model was: <strong>003_realSR_BSRGAN_DFO_s64w8_SwinIR-M_x2_GAN.pth</strong></p>

<p>More on time and resource requirements below. Note that 4x upscale takes significantly longer, and the quality improvement over 2x is marginal - and in some cases actually worse.
<br />
<br /></p>
<h2 id="stage-1-extracting-the-frames">Stage 1: Extracting the frames</h2>

<h3 id="merging-vobs">Merging VOBs</h3>

<p>My DVD copy has 4 main VOB files:
VTS_01_1.VOB<br />
VTS_01_2.VOB<br />
VTS_01_3.VOB<br />
VTS_01_4.VOB</p>

<p>Let’s merge them.</p>

<p>Linux:</p>
<div class="language-bash highlighter-rouge"><div class="highlight"><pre class="highlight"><code><span class="nb">cat </span>VTS_01_1.VOB VTS_01_2.VOB VTS_01_3.VOB VTS_01_4.VOB <span class="o">&gt;</span> video.vob
</code></pre></div></div>

<p>Windows:</p>
<div class="language-bash highlighter-rouge"><div class="highlight"><pre class="highlight"><code>copy /b VTS_01_1.VOB+VTS_01_2.VOB+VTS_01_3.VOB+VTS_01_4.VOB video.vob
</code></pre></div></div>

<p>From here on we’ll work with the merged <strong>video.vob</strong>.</p>

<p>Now let’s extract the audio tracks. First, let’s check what’s available:</p>
<div class="language-bash highlighter-rouge"><div class="highlight"><pre class="highlight"><code>ffprobe <span class="nt">-i</span> video.vob
</code></pre></div></div>

<p>We see 2 audio tracks:</p>
<div class="language-bash highlighter-rouge"><div class="highlight"><pre class="highlight"><code>Stream <span class="c">#0:2[0x80]: Audio: ac3, 48000 Hz, stereo, fltp, 192 kb/s, Start-Time 0.281s</span>
Stream <span class="c">#0:3[0x81]: Audio: ac3, 48000 Hz, stereo, fltp, 192 kb/s, Start-Time 0.281s</span>
</code></pre></div></div>

<p>The first track is English, the second is Russian, even though it’s not labeled explicitly. Let’s extract them:</p>
<div class="language-bash highlighter-rouge"><div class="highlight"><pre class="highlight"><code>ffmpeg <span class="nt">-i</span> video.vob <span class="nt">-map</span> 0:a:0 <span class="nt">-c</span> copy audio_track_eng.ac3 <span class="nt">-map</span> 0:a:1 <span class="nt">-c</span> copy audio_track_rus.ac3
</code></pre></div></div>

<p>The “-c copy” parameter tells ffmpeg to extract audio as-is, without re-encoding.</p>

<p>Now we can start extracting the frames.
<br /></p>
<h3 id="frame-extraction">Frame Extraction</h3>

<blockquote>
  <p><u>Note</u>:
All commands below are for Linux. On Windows they are generally the same, except path separators: Linux uses “/”, Windows uses “\”.</p>
</blockquote>

<p>In an ideal case we could run a simple command:</p>
<div class="language-bash highlighter-rouge"><div class="highlight"><pre class="highlight"><code>ffmpeg <span class="nt">-i</span> video.vob <span class="s2">"video_in_png/file_%06d.png"</span>
</code></pre></div></div>

<p>This would extract all frames at the original count and resolution into the video_in_png folder. But… out of two DVDs I’ve processed so far, both had their quirks. This disc was the most problematic.</p>

<p>First issue: the actual frame rate. I checked the frame rate using several tools and methods. Here’s a short list of FPS values that were reported for this movie:<br />
60000/1001 = 59.94…<br />
29970/1000 = 29.97<br />
119/4      = 29.75<br />
24000/1001 = 23.98…</p>

<p>I even had to open the VOB files in a hex editor and decode byte values by specific signatures (thanks to ChatGPT). That gave me the “definitive” answer of 29.97 fps - which turned out to be wrong (spoiler: either the disc was authored poorly, or I simply don’t fully understand the DVD structure).</p>

<p>Through trial and error I arrived at the actual frame rate:<br />
24000/1001, i.e. ~23.98 fps.</p>

<p>Second issue: the displayed video resolution. ffprobe reports:</p>
<div class="language-bash highlighter-rouge"><div class="highlight"><pre class="highlight"><code>Stream <span class="c">#0:1[0x1e0]: Video: mpeg2video (Main), yuv420p(tv, smpte170m, progressive), 720x480 [SAR 32:27 DAR 16:9], 29.75 fps</span>
</code></pre></div></div>

<p>If you calculate using 720x480 SAR 32:27, the displayed resolution would be ~854x480, which is completely wrong - it would appear too stretched horizontally. ffprobe also reports 16:9, while the actual aspect ratio is 4:3. This is likely not an ffprobe issue but rather a problem with how the disc was authored. Apparently I ended up with a pirated disc that was slapped together carelessly.</p>

<p>Through empirical testing I concluded that the correct frame resolution is 640x480 pixels. All further processing is based on these values.</p>

<blockquote>
  <p><u>Note</u>:
There’s a possibility the correct displayed resolution was 720x540 (original 720x480, with pixels stretched vertically to 540 for correct proportions). It’s hard to say for certain - I don’t trust the metadata on this disc. In this example, I settled on 640x480 resolution.</p>
</blockquote>

<p>I won’t dwell on this too long - it’s a story worth its own article, and I hope this was a rare edge case.
<br />
<br />
<img src="/assets/images/2026-04-28-upscale-video-dvd-to-hd/pirates_silicon_valley_fullhd.jpg" alt="Pirates Silicon Valley in HD" />
<em>Upscaled image</em>
<br />
<br />
Final command for frame extraction:</p>
<div class="language-bash highlighter-rouge"><div class="highlight"><pre class="highlight"><code>ffmpeg <span class="nt">-i</span> video.vob <span class="nt">-r</span> 24000/1001 <span class="nt">-vf</span> <span class="s2">"scale=640:480:flags=lanczos"</span> <span class="s2">"/home/user/frames_orig/file_%06d.png"</span>
</code></pre></div></div>

<p><u>Here:</u><br />
“-i video.vob” - the merged source file<br />
“-r 24000/1001” - frame rate of ~23.98 fps<br />
“-vf “scale=640:480:flags=lanczos”” - output filter: resize to 640x480 using Lanczos interpolation, which smooths out artifacts from any resizing while preserving image sharpness<br />
“/home/user/frames_orig” - directory for the extracted frames; must be created beforehand<br />
“file_%06d.png” - PNG format, %06d mask - a 6-digit counter starting from 000000, resulting in files like file_000000.png, file_000001.png and so on.</p>

<p>The same command with GPU acceleration (CUDA), which is usually faster:</p>
<div class="language-bash highlighter-rouge"><div class="highlight"><pre class="highlight"><code>ffmpeg <span class="nt">-hwaccel</span> cuda <span class="nt">-i</span> video.vob <span class="nt">-r</span> 24000/1001 <span class="nt">-vf</span> <span class="s2">"scale=640:480:flags=lanczos"</span> <span class="s2">"/home/user/frames_orig/file_%06d.png"</span>
</code></pre></div></div>

<p>As a reminder, if there were no issues with this particular disc, the command would be simpler:</p>
<div class="language-bash highlighter-rouge"><div class="highlight"><pre class="highlight"><code>ffmpeg <span class="nt">-i</span> video.vob <span class="nt">-vf</span> <span class="s2">"scale=640:480:flags=lanczos"</span> <span class="s2">"/home/user/frames_orig/file_%06d.png"</span>
</code></pre></div></div>

<p>Because of the frame rate issue, we had to explicitly set the input frame rate. Without it, every 3rd–5th frame would be a duplicate of the previous one. The total extracted frame count would be 174,000, while the actual count is 139,202 (or 139,235 by another estimate - but let’s not go down that rabbit hole).</p>

<p>For reference, the other DVD I upscaled had the following video stream info:</p>
<div class="language-bash highlighter-rouge"><div class="highlight"><pre class="highlight"><code>Stream <span class="c">#0:0: Video: mpeg2video (Main), yuv420p(tv, top first), 720x576 [SAR 64:45 DAR 16:9], 25 fps, 25 tbr, 1k tbn</span>
</code></pre></div></div>

<p>That metadata was accurate. Based on the source resolution 720x576 with SAR 64:45, the displayed resolution was 1024x576 16:9 (720 x (64/45) = 1024). I wanted to upscale 2x to FullHD, so the source frame needed to be 960x540 (multiply by 2 gives 1920x1080). Both 1024x576 and 960x540 are 16:9, so the aspect ratio is preserved. Frame extraction command:</p>
<div class="language-bash highlighter-rouge"><div class="highlight"><pre class="highlight"><code>ffmpeg <span class="nt">-i</span> video_in.mkv <span class="nt">-vf</span> <span class="nv">scale</span><span class="o">=</span>960:540:flags<span class="o">=</span>lanczos <span class="s2">"/home/user/frames_orig/file_%06d.png"</span>
</code></pre></div></div>
<p><br />
<img src="/assets/images/2026-04-28-upscale-video-dvd-to-hd/bill_gates_michael_anthony.jpg" alt="Bill Gates played by actor Michael Anthony Hall" />
<em>Bill Gates played by actor Michael Anthony Hall</em>
<br />
<br /></p>
<h2 id="stage-2-upscaling-frames">Stage 2: Upscaling frames</h2>
<p>Now we can start upscaling the frames. This is a lengthy process - depending on the number of frames and their resolution, it can take several days. I usually do it in iterations, batches of 10,000 frames. You can split the main frames folder into subfolders of 10,000 files each, or modify the script below to work on a range of files (just be careful not to mix up the order, or you’ll get audio/video desync).</p>

<p>Example commands for splitting the main folder into subfolders of 10,000 files:</p>
<details>
  <summary>Commands:</summary>
  <p>Linux:</p>
  <div class="language-bash highlighter-rouge"><div class="highlight"><pre class="highlight"><code><span class="nv">i</span><span class="o">=</span>1<span class="p">;</span> <span class="k">for </span>file <span class="k">in </span>all_frames/<span class="k">*</span><span class="p">;</span> <span class="k">do </span><span class="nb">mkdir</span> <span class="nt">-p</span> <span class="s2">"frames_((i/10000+1))file"</span> <span class="s2">"frames_</span><span class="k">$((</span>i/10000+1<span class="k">))</span><span class="s2">"</span><span class="p">;</span> <span class="o">((</span>i++<span class="o">))</span><span class="p">;</span> <span class="k">done</span>
</code></pre></div>  </div>

  <p>Windows (PowerShell):</p>
  <div class="language-bash highlighter-rouge"><div class="highlight"><pre class="highlight"><code><span class="nv">i</span><span class="o">=</span>1<span class="p">;</span> Get-ChildItem all_frames | ForEach-Object <span class="o">{</span> <span class="nv">$d</span><span class="o">=([</span>math]::Floor<span class="o">((</span><span class="nv">$i</span><span class="nt">-1</span><span class="o">)</span>/10000<span class="o">)</span>+1<span class="o">)</span><span class="s2">"; if (!(Test-Path </span><span class="nv">$d</span><span class="s2">)) {New-Item -ItemType Directory -Path </span><span class="nv">$d</span><span class="s2"> | Out-Null}; Move-Item </span><span class="nv">$_</span><span class="s2">.FullName </span><span class="nv">$d</span><span class="s2">; </span><span class="nv">$i</span><span class="s2">++ }
</span></code></pre></div>  </div>
</details>
<p><br /></p>

<p>I won’t spend too much time on how exactly to split the process into parts - it’s a matter of preference.
<br />
<br /></p>
<details>
  <summary>Main script:</summary>

  <div class="language-python highlighter-rouge"><div class="highlight"><pre class="highlight"><code><span class="kn">import</span> <span class="nn">os</span>
<span class="kn">import</span> <span class="nn">torch</span>
<span class="kn">from</span> <span class="nn">PIL</span> <span class="kn">import</span> <span class="n">Image</span>
<span class="kn">import</span> <span class="nn">torchvision.transforms</span> <span class="k">as</span> <span class="n">transforms</span>
<span class="kn">from</span> <span class="nn">spandrel</span> <span class="kn">import</span> <span class="n">ImageModelDescriptor</span><span class="p">,</span> <span class="n">ModelLoader</span>


<span class="c1"># OPTIONS
# Folder with source images
</span><span class="n">images_path</span> <span class="o">=</span> <span class="s">"/home/user/frames_in"</span>

<span class="c1"># Folder for saving results
</span><span class="n">output_path</span> <span class="o">=</span> <span class="s">"/home/user/frames_upscaled"</span>
<span class="n">os</span><span class="p">.</span><span class="n">makedirs</span><span class="p">(</span><span class="n">output_path</span><span class="p">,</span> <span class="n">exist_ok</span><span class="o">=</span><span class="bp">True</span><span class="p">)</span> <span class="c1"># Create folder if missing
</span>
<span class="c1"># Output image format
</span><span class="n">OUTPUT_FORMAT</span> <span class="o">=</span> <span class="s">"JPG"</span>  <span class="c1"># PNG, JPG
</span>
<span class="c1"># List of source images in the directory
</span><span class="n">all_files</span> <span class="o">=</span> <span class="nb">sorted</span><span class="p">(</span>
    <span class="n">f</span> <span class="k">for</span> <span class="n">f</span> <span class="ow">in</span> <span class="n">os</span><span class="p">.</span><span class="n">listdir</span><span class="p">(</span><span class="n">images_path</span><span class="p">)</span>
    <span class="k">if</span> <span class="n">os</span><span class="p">.</span><span class="n">path</span><span class="p">.</span><span class="n">isfile</span><span class="p">(</span><span class="n">os</span><span class="p">.</span><span class="n">path</span><span class="p">.</span><span class="n">join</span><span class="p">(</span><span class="n">images_path</span><span class="p">,</span> <span class="n">f</span><span class="p">))</span>
<span class="p">)</span>

<span class="c1"># Model path
</span><span class="n">model_path</span> <span class="o">=</span> <span class="s">"/home/user/models/003_realSR_BSRGAN_DFO_s64w8_SwinIR-M_x2_GAN.pth"</span>

<span class="n">BATCH_SIZE</span> <span class="o">=</span> <span class="mi">2</span>  <span class="c1"># Batch size
</span><span class="n">batch_images</span> <span class="o">=</span> <span class="p">[]</span>  <span class="c1"># Images in current batch
</span>
<span class="c1"># Use torch.cuda.empty_cache() (True/False); sometimes helps fit images into a batch
</span><span class="n">CLEAN_CACHE</span> <span class="o">=</span> <span class="bp">False</span>

<span class="c1"># Model loading
</span><span class="n">model</span> <span class="o">=</span> <span class="n">ModelLoader</span><span class="p">().</span><span class="n">load_from_file</span><span class="p">(</span><span class="n">model_path</span><span class="p">)</span>
<span class="k">assert</span> <span class="nb">isinstance</span><span class="p">(</span><span class="n">model</span><span class="p">,</span> <span class="n">ImageModelDescriptor</span><span class="p">)</span>
<span class="n">model</span><span class="p">.</span><span class="n">cuda</span><span class="p">().</span><span class="nb">eval</span><span class="p">()</span>


<span class="k">def</span> <span class="nf">save_image</span><span class="p">(</span><span class="n">image_name</span><span class="p">,</span> <span class="n">output_tensor</span><span class="p">):</span>
    <span class="s">''' Tensor to image conversion and saving to file according to the specified format '''</span>
    
    <span class="n">output_image</span> <span class="o">=</span> <span class="n">transforms</span><span class="p">.</span><span class="n">ToPILImage</span><span class="p">()(</span><span class="n">output_tensor</span><span class="p">.</span><span class="n">cpu</span><span class="p">().</span><span class="n">clamp</span><span class="p">(</span><span class="mi">0</span><span class="p">,</span> <span class="mi">1</span><span class="p">))</span>
    <span class="n">output_image_path</span> <span class="o">=</span> <span class="n">os</span><span class="p">.</span><span class="n">path</span><span class="p">.</span><span class="n">join</span><span class="p">(</span><span class="n">output_path</span><span class="p">,</span> <span class="sa">f</span><span class="s">"</span><span class="si">{</span><span class="n">image_name</span><span class="si">}</span><span class="s">.</span><span class="si">{</span><span class="n">OUTPUT_FORMAT</span><span class="p">.</span><span class="n">lower</span><span class="p">()</span><span class="si">}</span><span class="s">"</span><span class="p">)</span>
    
    <span class="n">fmt</span> <span class="o">=</span> <span class="n">OUTPUT_FORMAT</span><span class="p">.</span><span class="n">upper</span><span class="p">()</span>
    
    <span class="k">if</span> <span class="n">fmt</span> <span class="o">==</span> <span class="s">"PNG"</span><span class="p">:</span>
        <span class="n">output_image</span><span class="p">.</span><span class="n">save</span><span class="p">(</span><span class="n">output_image_path</span><span class="p">,</span> <span class="nb">format</span><span class="o">=</span><span class="s">"PNG"</span><span class="p">)</span>
    <span class="k">elif</span> <span class="n">fmt</span> <span class="o">==</span> <span class="s">"JPG"</span><span class="p">:</span>
        <span class="n">output_image</span><span class="p">.</span><span class="n">save</span><span class="p">(</span><span class="n">output_image_path</span><span class="p">,</span> <span class="nb">format</span><span class="o">=</span><span class="s">"JPEG"</span><span class="p">,</span> <span class="n">quality</span><span class="o">=</span><span class="mi">100</span><span class="p">)</span>
    <span class="k">else</span><span class="p">:</span>
        <span class="k">raise</span> <span class="nb">ValueError</span><span class="p">(</span><span class="sa">f</span><span class="s">"Format error: </span><span class="si">{</span><span class="n">OUTPUT_FORMAT</span><span class="si">!r}</span><span class="s">"</span><span class="p">)</span>
        

<span class="c1"># START PROCESSING    
</span><span class="k">for</span> <span class="n">idx</span><span class="p">,</span> <span class="n">image_in</span> <span class="ow">in</span> <span class="nb">enumerate</span><span class="p">(</span><span class="n">all_files</span><span class="p">):</span>
    <span class="n">image_path</span> <span class="o">=</span> <span class="n">os</span><span class="p">.</span><span class="n">path</span><span class="p">.</span><span class="n">join</span><span class="p">(</span><span class="n">images_path</span><span class="p">,</span> <span class="n">image_in</span><span class="p">)</span>
    <span class="n">image_name</span> <span class="o">=</span> <span class="n">os</span><span class="p">.</span><span class="n">path</span><span class="p">.</span><span class="n">splitext</span><span class="p">(</span><span class="n">image_in</span><span class="p">)[</span><span class="mi">0</span><span class="p">]</span>
    
    <span class="n">image</span> <span class="o">=</span> <span class="n">Image</span><span class="p">.</span><span class="nb">open</span><span class="p">(</span><span class="n">image_path</span><span class="p">).</span><span class="n">convert</span><span class="p">(</span><span class="s">"RGB"</span><span class="p">)</span>
    <span class="n">input_tensor</span> <span class="o">=</span> <span class="n">transforms</span><span class="p">.</span><span class="n">ToTensor</span><span class="p">()(</span><span class="n">image</span><span class="p">).</span><span class="n">unsqueeze</span><span class="p">(</span><span class="mi">0</span><span class="p">).</span><span class="n">cuda</span><span class="p">()</span>

    <span class="n">batch_images</span><span class="p">.</span><span class="n">append</span><span class="p">({</span><span class="s">'image_name'</span><span class="p">:</span> <span class="n">image_name</span><span class="p">,</span> <span class="s">'input_tensor'</span><span class="p">:</span> <span class="n">input_tensor</span><span class="p">})</span>
    
    <span class="c1"># Process the batch if the batch is full or this is the last image
</span>    <span class="k">if</span> <span class="nb">len</span><span class="p">(</span><span class="n">batch_images</span><span class="p">)</span> <span class="o">==</span> <span class="n">BATCH_SIZE</span> <span class="ow">or</span> <span class="n">idx</span> <span class="o">==</span> <span class="nb">len</span><span class="p">(</span><span class="n">all_files</span><span class="p">)</span> <span class="o">-</span> <span class="mi">1</span><span class="p">:</span>
        <span class="k">try</span><span class="p">:</span>
            <span class="c1"># Clear CUDA memory if CLEAN_CACHE = True (sometimes helps fit images into a batch)
</span>            <span class="k">if</span> <span class="n">CLEAN_CACHE</span><span class="p">:</span> <span class="n">torch</span><span class="p">.</span><span class="n">cuda</span><span class="p">.</span><span class="n">empty_cache</span><span class="p">()</span>
            
            <span class="c1"># Check available GPU memory before merging images into a batch
</span>            <span class="n">required_memory</span> <span class="o">=</span> <span class="nb">sum</span><span class="p">(</span><span class="n">item</span><span class="p">[</span><span class="s">'input_tensor'</span><span class="p">].</span><span class="n">element_size</span><span class="p">()</span> <span class="o">*</span> <span class="n">item</span><span class="p">[</span><span class="s">'input_tensor'</span><span class="p">].</span><span class="n">nelement</span><span class="p">()</span> <span class="k">for</span> <span class="n">item</span> <span class="ow">in</span> <span class="n">batch_images</span><span class="p">)</span>
            <span class="n">free_memory</span> <span class="o">=</span> <span class="n">torch</span><span class="p">.</span><span class="n">cuda</span><span class="p">.</span><span class="n">memory_reserved</span><span class="p">(</span><span class="mi">0</span><span class="p">)</span> <span class="o">-</span> <span class="n">torch</span><span class="p">.</span><span class="n">cuda</span><span class="p">.</span><span class="n">memory_allocated</span><span class="p">(</span><span class="mi">0</span><span class="p">)</span>
            <span class="k">if</span> <span class="n">free_memory</span> <span class="o">&lt;</span> <span class="n">required_memory</span><span class="p">:</span>
                <span class="k">raise</span> <span class="nb">RuntimeError</span><span class="p">(</span><span class="s">"CUDA out of memory"</span><span class="p">)</span>
    
            <span class="n">batch_tensor</span> <span class="o">=</span> <span class="n">torch</span><span class="p">.</span><span class="n">cat</span><span class="p">([</span><span class="n">item</span><span class="p">[</span><span class="s">'input_tensor'</span><span class="p">]</span> <span class="k">for</span> <span class="n">item</span> <span class="ow">in</span> <span class="n">batch_images</span><span class="p">],</span> <span class="n">dim</span><span class="o">=</span><span class="mi">0</span><span class="p">)</span>
            
            <span class="c1"># Send image batch to model
</span>            <span class="k">with</span> <span class="n">torch</span><span class="p">.</span><span class="n">no_grad</span><span class="p">():</span>
                <span class="n">output_tensor</span> <span class="o">=</span> <span class="n">model</span><span class="p">(</span><span class="n">batch_tensor</span><span class="p">)</span>

            <span class="c1"># Save processed images
</span>            <span class="k">for</span> <span class="n">i</span><span class="p">,</span> <span class="n">item</span> <span class="ow">in</span> <span class="nb">enumerate</span><span class="p">(</span><span class="n">batch_images</span><span class="p">):</span>
                <span class="n">image_name</span> <span class="o">=</span> <span class="n">item</span><span class="p">[</span><span class="s">'image_name'</span><span class="p">]</span>
                <span class="n">save_image</span><span class="p">(</span><span class="n">image_name</span><span class="p">,</span> <span class="n">output_tensor</span><span class="p">[</span><span class="n">i</span><span class="p">])</span>
                
        <span class="k">except</span> <span class="nb">RuntimeError</span> <span class="k">as</span> <span class="n">e</span><span class="p">:</span>
            <span class="c1"># CUDA out-of-memory error
</span>            <span class="k">if</span> <span class="s">"CUDA out of memory"</span> <span class="ow">in</span> <span class="nb">str</span><span class="p">(</span><span class="n">e</span><span class="p">):</span>
                <span class="k">print</span><span class="p">(</span><span class="s">"Out-of-memory error, process images one by one..."</span><span class="p">)</span>
            
                <span class="k">for</span> <span class="n">item</span> <span class="ow">in</span> <span class="n">batch_images</span><span class="p">:</span>
                    <span class="n">image_name</span> <span class="o">=</span> <span class="n">item</span><span class="p">[</span><span class="s">'image_name'</span><span class="p">]</span>
                    <span class="n">single_tensor</span> <span class="o">=</span> <span class="n">item</span><span class="p">[</span><span class="s">'input_tensor'</span><span class="p">]</span>
                
                    <span class="k">with</span> <span class="n">torch</span><span class="p">.</span><span class="n">no_grad</span><span class="p">():</span>
                        <span class="n">output_tensor</span> <span class="o">=</span> <span class="n">model</span><span class="p">(</span><span class="n">single_tensor</span><span class="p">)</span>
                    <span class="n">save_image</span><span class="p">(</span><span class="n">image_name</span><span class="p">,</span> <span class="n">output_tensor</span><span class="p">[</span><span class="mi">0</span><span class="p">])</span>
                    
            <span class="k">else</span><span class="p">:</span>
                <span class="k">raise</span>
                
        <span class="k">except</span> <span class="nb">Exception</span> <span class="k">as</span> <span class="n">e</span><span class="p">:</span>  <span class="c1"># Any other error
</span>            <span class="k">print</span><span class="p">(</span><span class="sa">f</span><span class="s">"Ошибка:</span><span class="se">\n</span><span class="si">{</span><span class="n">e</span><span class="si">}</span><span class="s">"</span><span class="p">)</span>
        
        <span class="k">finally</span><span class="p">:</span>  <span class="c1"># Clear batch
</span>            <span class="n">batch_images</span><span class="p">.</span><span class="n">clear</span><span class="p">()</span>


<span class="k">print</span><span class="p">(</span><span class="s">"DONE."</span><span class="p">)</span>


<span class="c1"># Delete model and clear Cuda cache
</span><span class="k">del</span> <span class="n">model</span>
<span class="n">torch</span><span class="p">.</span><span class="n">cuda</span><span class="p">.</span><span class="n">empty_cache</span><span class="p">()</span>
</code></pre></div>  </div>
</details>
<p><br /></p>
<h3 id="about-some-parameters">About some parameters</h3>

<p><strong>batch_size = 2</strong><br />
The batch size passed to the model - how many images to process at once. I use 2: it gives a significant speed improvement over 1, uses memory efficiently, and increasing it further in my case gives almost no additional speed gain while memory consumption increases noticeably.</p>

<p>For frames at 640x480 on my RTX 3060 12GB, the maximum batch size is 3 - anything higher runs out of VRAM. For 960x540 frames, the maximum is 2.</p>

<p>Benchmark for processing 320x240 frames with different batch sizes, 2x upscale:</p>
<details>
  <summary>Comparison:</summary>
  <p>1 batch:<br />
Execution time: 1 minute 40 seconds<br />
Peak memory used: 849.29 MB<br />
Peak memory including reserved: 982.00 MB</p>

  <p>2 batches: 
Execution time: 1 minute 14 seconds<br />
Peak memory used: 1612.66 MB<br />
Peak memory including reserved: 1840.00 MB</p>

  <p>3 batches:<br />
Execution time: 1 minute 13 seconds<br />
Peak memory used: 2365.52 MB<br />
Peak memory including reserved: 2712.00 MB</p>

  <p>4 batches:<br />
Execution time: 1 minute 12 seconds<br />
Peak memory used: 3122.71 MB<br />
Peak memory including reserved: 3570.00 MB</p>

  <p>6 batches:<br />
Execution time: 1 minute 12 seconds<br />
Peak memory used: 4640.16 MB<br />
Peak memory including reserved: 5328.00 MB</p>

  <p>8 batches:<br />
Execution time: 1 minute 12 seconds<br />
Peak memory used: 6153.86 MB<br />
Peak memory including reserved: 7046.00 MB</p>

  <p>10 batches:<br />
Execution time: 1 minute 12 seconds<br />
Peak memory used: 7674.44 MB<br />
Peak memory including reserved: 8778.00 MB</p>

  <p>12 batches:<br />
Execution time: 1 minute 12 seconds<br />
Peak memory used: 9183.08 MB<br />
Peak memory including reserved: 10538.00 MB</p>
</details>
<p><br />
As you can see, the speed gain is noticeable only when going from 1 to 2 batches. Above 4 batches, processing time no longer decreases. Results may differ on other hardware.</p>

<p><strong>output_format = “JPG” # PNG, JPG</strong><br />
The format for saving upscaled frames. I save the output images as JPG, since upscaled PNG files take up too much disk space. The source frames are extracted by ffmpeg as PNG.</p>

<p><strong>clean_cache = False # True or False</strong><br />
Whether to clear the CUDA cache before checking available GPU memory. To be honest, this is a trick to fit frames into batches in certain cases. Only with this trick was I able to fit 2 frames per batch when processing another disc where the input frame resolution was 960x540.</p>

<p>Other parameters should be self-explanatory.</p>

<p>Start the script and wait a few days for it to finish.
<br />
<br /></p>
<h2 id="before--after-examples">Before / After Examples</h2>
<p>(recommended to view zoomed in)
<br />
<br />
<img src="/assets/images/2026-04-28-upscale-video-dvd-to-hd/pirates_silicon_valley_upscaled_008929.jpg" alt="Pirates Silicon Valley in HD" />
<em>Left: original, right: 2x upscale</em>
<br />
<br />
<img src="/assets/images/2026-04-28-upscale-video-dvd-to-hd/pirates_silicon_valley_upscaled_045954.jpg" alt="Pirates Silicon Valley in HD" />
<em>Left: original, right: 2x upscale</em>
<br />
<br />
<img src="/assets/images/2026-04-28-upscale-video-dvd-to-hd/pirates_silicon_valley_upscaled_071801.jpg" alt="Pirates Silicon Valley in HD" />
<em>Left: original, right: 2x upscale</em>
<br />
<br />
<img src="/assets/images/2026-04-28-upscale-video-dvd-to-hd/pirates_silicon_valley_upscaled_013324.jpg" alt="Pirates Silicon Valley in HD" />
<em>Left: original, right: 2x upscale</em>
<br />
<br />
<img src="/assets/images/2026-04-28-upscale-video-dvd-to-hd/pirates_silicon_valley_upscaled_144987.jpg" alt="Pirates Silicon Valley in HD" />
<em>Left: original, right: 2x upscale</em>
<br />
<br />
Or for example, animated GIFs at a higher resolution (recommended to view enlarged):</p>
<details>
  <summary>Comparison in GIFs:</summary>
  <p><img src="/assets/images/2026-04-28-upscale-video-dvd-to-hd/pirates_silicon_valley_hd_008929.gif" alt="Pirates Silicon Valley in HD" />
<em>Before and after</em>
<br />
<br />
<img src="/assets/images/2026-04-28-upscale-video-dvd-to-hd/pirates_silicon_valley_hd_045954.gif" alt="Pirates Silicon Valley in HD" />
<em>Before and after</em>
<br />
<br />
<img src="/assets/images/2026-04-28-upscale-video-dvd-to-hd/pirates_silicon_valley_hd_071801.gif" alt="Pirates Silicon Valley in HD" />
<em>Before and after</em>
<br />
<br />
<img src="/assets/images/2026-04-28-upscale-video-dvd-to-hd/pirates_silicon_valley_hd_013324.gif" alt="Pirates Silicon Valley in HD" />
<em>Before and after</em>
<br />
<br />
<img src="/assets/images/2026-04-28-upscale-video-dvd-to-hd/pirates_silicon_valley_hd_144987.gif" alt="Pirates Silicon Valley in HD" />
<em>Before and after</em></p>
</details>
<p><br /></p>
<h2 id="stage-3-final-step---encoding-the-video">Stage 3: Final Step - Encoding the Video</h2>
<p>Once all frames have been upscaled, all that’s left is to encode the final video.</p>

<p>Command:</p>
<div class="language-bash highlighter-rouge"><div class="highlight"><pre class="highlight"><code>ffmpeg <span class="nt">-r</span> 24000/1001 <span class="nt">-i</span> <span class="s2">"/home/user/frames_upscaled/file_%06d.jpg"</span> <span class="nt">-i</span> <span class="s2">"/home/user/audio_track_eng.ac3"</span> <span class="nt">-i</span> <span class="s2">"/home/user/audio_track_rus.ac3"</span> <span class="nt">-c</span>:v hevc_nvenc <span class="nt">-b</span>:v 10M <span class="nt">-minrate</span> 5M <span class="nt">-maxrate</span> 15M <span class="nt">-bufsize</span> 30M <span class="nt">-preset</span> p7 <span class="nt">-colorspace</span> bt709 <span class="nt">-color_primaries</span> bt709 <span class="nt">-color_trc</span> bt709 <span class="nt">-color_range</span> tv <span class="nt">-pix_fmt</span> yuv420p <span class="nt">-map</span> 0:v <span class="nt">-map</span> 1:a <span class="nt">-map</span> 2:a <span class="nt">-metadata</span>:s:a:0 <span class="nv">title</span><span class="o">=</span><span class="s2">"English"</span> <span class="nt">-metadata</span>:s:a:0 <span class="nv">language</span><span class="o">=</span>eng <span class="nt">-metadata</span>:s:a:1 <span class="nv">title</span><span class="o">=</span><span class="s2">"Russian"</span> <span class="nt">-metadata</span>:s:a:1 <span class="nv">language</span><span class="o">=</span>rus <span class="nt">-c</span>:a copy <span class="nt">-disposition</span>:a:0 default video_hd.mkv
</code></pre></div></div>

<p><u>Here:</u><br />
“-r 24000/1001” - frame rate of ~23.98 fps<br />
“-i /home/user/frames_upscaled/file_%06d.jpg - directory with upscaled frames<br />
“-i “/home/user/audio_track_eng.ac3” -i “/home/user/audio_track_rus.ac3”” - attach audio tracks<br />
“-c:v hevc_nvenc” - video codec<br />
“-b:v 10M -minrate 5M -maxrate 15M” - variable bitrate: average 10 Mbps, minimum 5 Mbps, maximum 15 Mbps<br />
“-bufsize 30M” - buffer size for variable bitrate; recommended to set at 2x maxrate (2x15M=30M), or omit to let ffmpeg decide<br />
“-preset p7” - preset 7 for hevc_nvenc, high quality<br />
“-colorspace smpte170m -color_primaries smpte170m -color_trc smpte170m” - set color parameters according to BT.601 NTSC from source<br />
“-color_range tv” - standard (limited) range for video, expected by codecs and players, maximum compatibility and correct colors<br />
“-pix_fmt yuv420p” - pixel color format, yuv420p for maximum compatibility<br />
“-map 0:v -map 1:a -map 2:a” - stream mapping: video from frames, audio track 1, audio track 2<br />
“-metadata:s:a:0 title=”English” … language=eng …” - write language metadata for audio tracks<br />
“-c:a copy” - copy audio without re-encoding<br />
“-disposition:a:0 default” - set audio_track_eng.ac3 as default<br />
“video_hd.mkv” - output filename in MKV container</p>

<p>Wait for encoding to finish and you’re done.
<br />
<br /></p>
<h2 id="conclusion">Conclusion</h2>
<p>We upscaled the movie using the SwinIR model. You can try any other compatible model - the Spandrel library supports many architectures. There’s also a site <a href="https://openmodeldb.info/">https://openmodeldb.info</a> with hundreds of models on various architectures, mostly fine-tunes of base models.</p>

<blockquote>
  <p><u>Warning</u>:
If you’re using PyTorch below version 2.6, it is strongly recommended to load .pth/.bin model files from unknown authors with flag <strong>weights_only=True</strong>. This is because binary model files can contain embedded malicious code that may execute arbitrarily during deserialization (i.e., when the model is loaded). Setting <strong>weights_only=True</strong> tells PyTorch to load only the model weights. Starting with <strong>PyTorch 2.6</strong>, the default value of this flag is True if not explicitly specified.</p>
</blockquote>

<p><br />
Overall, from the original <strong>640x480</strong> we got a <strong>1280x960</strong> (4:3) video. This is not a standard HD resolution (1280x720 16:9) or FullHD (1920x1080 16:9), but then again, the source material wasn’t standard either.</p>

<p>Links to before/after frame samples and a before/after video clip are in the Additional Materials section below. Overall the quality is quite decent - it genuinely looks like proper HD.</p>

<p>Observed drawbacks: Grass and trees don’t look very realistic - it’s often apparent that the network reconstructed them with some creative liberty. Occasionally you can spot synthetic-looking artifacts in specific details or objects, but it’s not frequent and only noticeable if you look closely. In general, the blurrier the source image or individual objects within it, the worse the upscale result - synthetic artifacts will be more apparent.</p>

<p>In general, normal well-authored DVDs upscale well, where the original detail is good. Heavily compressed video with low detail and a soft/blurry picture upscales poorly. But again, if the source wasn’t heavily compressed, the upscale will most likely produce good results.
<br />
<br /></p>
<h2 id="additional-materials">Additional Materials</h2>
<ul>
  <li>Script from the article is available on my GitHub:<br />
<a href="https://github.com/peterplv/PythonNeiroUpscaler">https://github.com/peterplv/PythonNeiroUpscaler</a></li>
  <li>Before/after frame samples on my <a href="https://drive.google.com/drive/folders/12w6gSglfkN729GKMh3YTdsuhD6bGDotn">Google Drive</a>. There are also examples of 4x upscaled images</li>
  <li>Video example: <a href="https://drive.google.com/file/d/1V4kmpTviV6dJ0K3UUsgcU9bA5EGT4kIs/view">original</a> and <a href="https://drive.google.com/file/d/1f_rKmmLI99T7HzJlyXinUEoT0rvbsMaR/view">upscaled</a></li>
</ul>]]></content><author><name></name></author><summary type="html"><![CDATA[Upscale result of a frame by 2x, before and after I’ve been interested in image upscaling for a long time, and video upscaling specifically. One of the first tools I came across a few years ago was waifu2x. But that network was better suited for upscaling anime (it seems it was trained on anime images). In other words, waifu2x worked well for relatively simple images without a lot of detail or complex textures. Then I looked into ESRGAN and Real-ESRGAN. Decent models, quite usable for image upscaling, but the synthetic look is often noticeable, especially in complex scenes like ones with trees. I even tried fine-tuning Real-ESRGAN, but while I was assembling my training dataset, I came across another model - SwinIR. After testing it, I realized it covered my needs, if not completely, then at least 80%. My goal was to upscale a few old movies so that after upscaling the film still looked like a film, not a claymation puppet show. It worked out. That’s what this article is about. We’ll be upscaling the movie Pirates of Silicon Valley (1999, USA, DVD5). It covers the rise of the home PC and the early days of Apple and Microsoft companies. A pretty interesting film with the rebellious spirit of that era. The main characters are young Steve Jobs, Steve Wozniak, Bill Gates, and other participants in the “home PC revolution”. And of course, we’ll be doing the upscaling on a home PC. Example of what you can get (recommended to view zoomed in): Left: original, right: 2x upscale Or as an animated GIF: Better viewed zoomed in Disc specs: DVD5, MPEG-2, 720x480 (NTSC) My setup for this task: Gigabyte A520M, AMD Ryzen 5 PRO 3600, 32GB DDR4 3200 MT/s (16+16) Gigabyte GeForce RTX 3060 12GB, CUDA Version: 12.5 Ubuntu 22.04 What you’ll need: A PC with a CUDA-capable GPU ffmpeg and ffprobe Python Spandrel library for Python One of the SwinIR models Around 80 GB of disk space Several days of processing time (if running continuously, ~5 days for 2x upscale on a setup similar to mine) Brief overview of the algorithm: Use ffmpeg to extract the movie frame by frame as PNG files Upscale each frame Use ffmpeg to encode the upscaled frames into an HD version of the movie, attaching the audio tracks from the source material Let’s get started. Actor Noah Wyle as Steve Jobs, after upscaling Software Installing Installing ffmpeg Ubuntu: sudo apt update sudo apt install ffmpeg (ffprobe is included when installing ffmpeg) Windows: https://www.ffmpeg.org/download.html Download one of the latest builds and extract the archive, for example to c:\ffmpeg. You need two utilities from the archive: ffmpeg and ffprobe. You can add the ffmpeg folder to PATH so you can call ffmpeg from the command line in any directory. Installing Python Ubuntu: sudo apt update sudo apt install python3 python3-pip Windows: https://www.python.org/downloads/windows/ Download one of the latest releases for your OS and install it. For Python, also must be installed PyTorch, Torchvision, Pillow libraries: pip install torch torchvision Pillow Installing Spandrel pip install spandrel Downloading the model Available SwinIR models at the link: https://github.com/JingyunLiang/SwinIR/releases I tested all SwinIR models. These two performed best: For 2x upscale: 003_realSR_BSRGAN_DFO_s64w8_SwinIR-M_x2_GAN.pth For 4x upscale: 003_realSR_BSRGAN_DFOWMFC_s64w8_SwinIR-L_x4_GAN.pth Download the model and note its path. I used 2x upscale, so my model was: 003_realSR_BSRGAN_DFO_s64w8_SwinIR-M_x2_GAN.pth More on time and resource requirements below. Note that 4x upscale takes significantly longer, and the quality improvement over 2x is marginal - and in some cases actually worse. Stage 1: Extracting the frames Merging VOBs My DVD copy has 4 main VOB files: VTS_01_1.VOB VTS_01_2.VOB VTS_01_3.VOB VTS_01_4.VOB Let’s merge them. Linux: cat VTS_01_1.VOB VTS_01_2.VOB VTS_01_3.VOB VTS_01_4.VOB &gt; video.vob Windows: copy /b VTS_01_1.VOB+VTS_01_2.VOB+VTS_01_3.VOB+VTS_01_4.VOB video.vob From here on we’ll work with the merged video.vob. Now let’s extract the audio tracks. First, let’s check what’s available: ffprobe -i video.vob We see 2 audio tracks: Stream #0:2[0x80]: Audio: ac3, 48000 Hz, stereo, fltp, 192 kb/s, Start-Time 0.281s Stream #0:3[0x81]: Audio: ac3, 48000 Hz, stereo, fltp, 192 kb/s, Start-Time 0.281s The first track is English, the second is Russian, even though it’s not labeled explicitly. Let’s extract them: ffmpeg -i video.vob -map 0:a:0 -c copy audio_track_eng.ac3 -map 0:a:1 -c copy audio_track_rus.ac3 The “-c copy” parameter tells ffmpeg to extract audio as-is, without re-encoding. Now we can start extracting the frames. Frame Extraction Note: All commands below are for Linux. On Windows they are generally the same, except path separators: Linux uses “/”, Windows uses “\”. In an ideal case we could run a simple command: ffmpeg -i video.vob "video_in_png/file_%06d.png" This would extract all frames at the original count and resolution into the video_in_png folder. But… out of two DVDs I’ve processed so far, both had their quirks. This disc was the most problematic. First issue: the actual frame rate. I checked the frame rate using several tools and methods. Here’s a short list of FPS values that were reported for this movie: 60000/1001 = 59.94… 29970/1000 = 29.97 119/4 = 29.75 24000/1001 = 23.98… I even had to open the VOB files in a hex editor and decode byte values by specific signatures (thanks to ChatGPT). That gave me the “definitive” answer of 29.97 fps - which turned out to be wrong (spoiler: either the disc was authored poorly, or I simply don’t fully understand the DVD structure). Through trial and error I arrived at the actual frame rate: 24000/1001, i.e. ~23.98 fps. Second issue: the displayed video resolution. ffprobe reports: Stream #0:1[0x1e0]: Video: mpeg2video (Main), yuv420p(tv, smpte170m, progressive), 720x480 [SAR 32:27 DAR 16:9], 29.75 fps If you calculate using 720x480 SAR 32:27, the displayed resolution would be ~854x480, which is completely wrong - it would appear too stretched horizontally. ffprobe also reports 16:9, while the actual aspect ratio is 4:3. This is likely not an ffprobe issue but rather a problem with how the disc was authored. Apparently I ended up with a pirated disc that was slapped together carelessly. Through empirical testing I concluded that the correct frame resolution is 640x480 pixels. All further processing is based on these values. Note: There’s a possibility the correct displayed resolution was 720x540 (original 720x480, with pixels stretched vertically to 540 for correct proportions). It’s hard to say for certain - I don’t trust the metadata on this disc. In this example, I settled on 640x480 resolution. I won’t dwell on this too long - it’s a story worth its own article, and I hope this was a rare edge case. Upscaled image Final command for frame extraction: ffmpeg -i video.vob -r 24000/1001 -vf "scale=640:480:flags=lanczos" "/home/user/frames_orig/file_%06d.png" Here: “-i video.vob” - the merged source file “-r 24000/1001” - frame rate of ~23.98 fps “-vf “scale=640:480:flags=lanczos”” - output filter: resize to 640x480 using Lanczos interpolation, which smooths out artifacts from any resizing while preserving image sharpness “/home/user/frames_orig” - directory for the extracted frames; must be created beforehand “file_%06d.png” - PNG format, %06d mask - a 6-digit counter starting from 000000, resulting in files like file_000000.png, file_000001.png and so on. The same command with GPU acceleration (CUDA), which is usually faster: ffmpeg -hwaccel cuda -i video.vob -r 24000/1001 -vf "scale=640:480:flags=lanczos" "/home/user/frames_orig/file_%06d.png" As a reminder, if there were no issues with this particular disc, the command would be simpler: ffmpeg -i video.vob -vf "scale=640:480:flags=lanczos" "/home/user/frames_orig/file_%06d.png" Because of the frame rate issue, we had to explicitly set the input frame rate. Without it, every 3rd–5th frame would be a duplicate of the previous one. The total extracted frame count would be 174,000, while the actual count is 139,202 (or 139,235 by another estimate - but let’s not go down that rabbit hole). For reference, the other DVD I upscaled had the following video stream info: Stream #0:0: Video: mpeg2video (Main), yuv420p(tv, top first), 720x576 [SAR 64:45 DAR 16:9], 25 fps, 25 tbr, 1k tbn That metadata was accurate. Based on the source resolution 720x576 with SAR 64:45, the displayed resolution was 1024x576 16:9 (720 x (64/45) = 1024). I wanted to upscale 2x to FullHD, so the source frame needed to be 960x540 (multiply by 2 gives 1920x1080). Both 1024x576 and 960x540 are 16:9, so the aspect ratio is preserved. Frame extraction command: ffmpeg -i video_in.mkv -vf scale=960:540:flags=lanczos "/home/user/frames_orig/file_%06d.png" Bill Gates played by actor Michael Anthony Hall Stage 2: Upscaling frames Now we can start upscaling the frames. This is a lengthy process - depending on the number of frames and their resolution, it can take several days. I usually do it in iterations, batches of 10,000 frames. You can split the main frames folder into subfolders of 10,000 files each, or modify the script below to work on a range of files (just be careful not to mix up the order, or you’ll get audio/video desync). Example commands for splitting the main folder into subfolders of 10,000 files: Commands: Linux: i=1; for file in all_frames/*; do mkdir -p "frames_((i/10000+1))file" "frames_$((i/10000+1))"; ((i++)); done Windows (PowerShell): i=1; Get-ChildItem all_frames | ForEach-Object { $d=([math]::Floor(($i-1)/10000)+1)"; if (!(Test-Path $d)) {New-Item -ItemType Directory -Path $d | Out-Null}; Move-Item $_.FullName $d; $i++ } I won’t spend too much time on how exactly to split the process into parts - it’s a matter of preference. Main script: import os import torch from PIL import Image import torchvision.transforms as transforms from spandrel import ImageModelDescriptor, ModelLoader # OPTIONS # Folder with source images images_path = "/home/user/frames_in" # Folder for saving results output_path = "/home/user/frames_upscaled" os.makedirs(output_path, exist_ok=True) # Create folder if missing # Output image format OUTPUT_FORMAT = "JPG" # PNG, JPG # List of source images in the directory all_files = sorted( f for f in os.listdir(images_path) if os.path.isfile(os.path.join(images_path, f)) ) # Model path model_path = "/home/user/models/003_realSR_BSRGAN_DFO_s64w8_SwinIR-M_x2_GAN.pth" BATCH_SIZE = 2 # Batch size batch_images = [] # Images in current batch # Use torch.cuda.empty_cache() (True/False); sometimes helps fit images into a batch CLEAN_CACHE = False # Model loading model = ModelLoader().load_from_file(model_path) assert isinstance(model, ImageModelDescriptor) model.cuda().eval() def save_image(image_name, output_tensor): ''' Tensor to image conversion and saving to file according to the specified format ''' output_image = transforms.ToPILImage()(output_tensor.cpu().clamp(0, 1)) output_image_path = os.path.join(output_path, f"{image_name}.{OUTPUT_FORMAT.lower()}") fmt = OUTPUT_FORMAT.upper() if fmt == "PNG": output_image.save(output_image_path, format="PNG") elif fmt == "JPG": output_image.save(output_image_path, format="JPEG", quality=100) else: raise ValueError(f"Format error: {OUTPUT_FORMAT!r}") # START PROCESSING for idx, image_in in enumerate(all_files): image_path = os.path.join(images_path, image_in) image_name = os.path.splitext(image_in)[0] image = Image.open(image_path).convert("RGB") input_tensor = transforms.ToTensor()(image).unsqueeze(0).cuda() batch_images.append({'image_name': image_name, 'input_tensor': input_tensor}) # Process the batch if the batch is full or this is the last image if len(batch_images) == BATCH_SIZE or idx == len(all_files) - 1: try: # Clear CUDA memory if CLEAN_CACHE = True (sometimes helps fit images into a batch) if CLEAN_CACHE: torch.cuda.empty_cache() # Check available GPU memory before merging images into a batch required_memory = sum(item['input_tensor'].element_size() * item['input_tensor'].nelement() for item in batch_images) free_memory = torch.cuda.memory_reserved(0) - torch.cuda.memory_allocated(0) if free_memory &lt; required_memory: raise RuntimeError("CUDA out of memory") batch_tensor = torch.cat([item['input_tensor'] for item in batch_images], dim=0) # Send image batch to model with torch.no_grad(): output_tensor = model(batch_tensor) # Save processed images for i, item in enumerate(batch_images): image_name = item['image_name'] save_image(image_name, output_tensor[i]) except RuntimeError as e: # CUDA out-of-memory error if "CUDA out of memory" in str(e): print("Out-of-memory error, process images one by one...") for item in batch_images: image_name = item['image_name'] single_tensor = item['input_tensor'] with torch.no_grad(): output_tensor = model(single_tensor) save_image(image_name, output_tensor[0]) else: raise except Exception as e: # Any other error print(f"Ошибка:\n{e}") finally: # Clear batch batch_images.clear() print("DONE.") # Delete model and clear Cuda cache del model torch.cuda.empty_cache() About some parameters batch_size = 2 The batch size passed to the model - how many images to process at once. I use 2: it gives a significant speed improvement over 1, uses memory efficiently, and increasing it further in my case gives almost no additional speed gain while memory consumption increases noticeably. For frames at 640x480 on my RTX 3060 12GB, the maximum batch size is 3 - anything higher runs out of VRAM. For 960x540 frames, the maximum is 2. Benchmark for processing 320x240 frames with different batch sizes, 2x upscale: Comparison: 1 batch: Execution time: 1 minute 40 seconds Peak memory used: 849.29 MB Peak memory including reserved: 982.00 MB 2 batches: Execution time: 1 minute 14 seconds Peak memory used: 1612.66 MB Peak memory including reserved: 1840.00 MB 3 batches: Execution time: 1 minute 13 seconds Peak memory used: 2365.52 MB Peak memory including reserved: 2712.00 MB 4 batches: Execution time: 1 minute 12 seconds Peak memory used: 3122.71 MB Peak memory including reserved: 3570.00 MB 6 batches: Execution time: 1 minute 12 seconds Peak memory used: 4640.16 MB Peak memory including reserved: 5328.00 MB 8 batches: Execution time: 1 minute 12 seconds Peak memory used: 6153.86 MB Peak memory including reserved: 7046.00 MB 10 batches: Execution time: 1 minute 12 seconds Peak memory used: 7674.44 MB Peak memory including reserved: 8778.00 MB 12 batches: Execution time: 1 minute 12 seconds Peak memory used: 9183.08 MB Peak memory including reserved: 10538.00 MB As you can see, the speed gain is noticeable only when going from 1 to 2 batches. Above 4 batches, processing time no longer decreases. Results may differ on other hardware. output_format = “JPG” # PNG, JPG The format for saving upscaled frames. I save the output images as JPG, since upscaled PNG files take up too much disk space. The source frames are extracted by ffmpeg as PNG. clean_cache = False # True or False Whether to clear the CUDA cache before checking available GPU memory. To be honest, this is a trick to fit frames into batches in certain cases. Only with this trick was I able to fit 2 frames per batch when processing another disc where the input frame resolution was 960x540. Other parameters should be self-explanatory. Start the script and wait a few days for it to finish. Before / After Examples (recommended to view zoomed in) Left: original, right: 2x upscale Left: original, right: 2x upscale Left: original, right: 2x upscale Left: original, right: 2x upscale Left: original, right: 2x upscale Or for example, animated GIFs at a higher resolution (recommended to view enlarged): Comparison in GIFs: Before and after Before and after Before and after Before and after Before and after Stage 3: Final Step - Encoding the Video Once all frames have been upscaled, all that’s left is to encode the final video. Command: ffmpeg -r 24000/1001 -i "/home/user/frames_upscaled/file_%06d.jpg" -i "/home/user/audio_track_eng.ac3" -i "/home/user/audio_track_rus.ac3" -c:v hevc_nvenc -b:v 10M -minrate 5M -maxrate 15M -bufsize 30M -preset p7 -colorspace bt709 -color_primaries bt709 -color_trc bt709 -color_range tv -pix_fmt yuv420p -map 0:v -map 1:a -map 2:a -metadata:s:a:0 title="English" -metadata:s:a:0 language=eng -metadata:s:a:1 title="Russian" -metadata:s:a:1 language=rus -c:a copy -disposition:a:0 default video_hd.mkv Here: “-r 24000/1001” - frame rate of ~23.98 fps “-i /home/user/frames_upscaled/file_%06d.jpg - directory with upscaled frames “-i “/home/user/audio_track_eng.ac3” -i “/home/user/audio_track_rus.ac3”” - attach audio tracks “-c:v hevc_nvenc” - video codec “-b:v 10M -minrate 5M -maxrate 15M” - variable bitrate: average 10 Mbps, minimum 5 Mbps, maximum 15 Mbps “-bufsize 30M” - buffer size for variable bitrate; recommended to set at 2x maxrate (2x15M=30M), or omit to let ffmpeg decide “-preset p7” - preset 7 for hevc_nvenc, high quality “-colorspace smpte170m -color_primaries smpte170m -color_trc smpte170m” - set color parameters according to BT.601 NTSC from source “-color_range tv” - standard (limited) range for video, expected by codecs and players, maximum compatibility and correct colors “-pix_fmt yuv420p” - pixel color format, yuv420p for maximum compatibility “-map 0:v -map 1:a -map 2:a” - stream mapping: video from frames, audio track 1, audio track 2 “-metadata:s:a:0 title=”English” … language=eng …” - write language metadata for audio tracks “-c:a copy” - copy audio without re-encoding “-disposition:a:0 default” - set audio_track_eng.ac3 as default “video_hd.mkv” - output filename in MKV container Wait for encoding to finish and you’re done. Conclusion We upscaled the movie using the SwinIR model. You can try any other compatible model - the Spandrel library supports many architectures. There’s also a site https://openmodeldb.info with hundreds of models on various architectures, mostly fine-tunes of base models. Warning: If you’re using PyTorch below version 2.6, it is strongly recommended to load .pth/.bin model files from unknown authors with flag weights_only=True. This is because binary model files can contain embedded malicious code that may execute arbitrarily during deserialization (i.e., when the model is loaded). Setting weights_only=True tells PyTorch to load only the model weights. Starting with PyTorch 2.6, the default value of this flag is True if not explicitly specified. Overall, from the original 640x480 we got a 1280x960 (4:3) video. This is not a standard HD resolution (1280x720 16:9) or FullHD (1920x1080 16:9), but then again, the source material wasn’t standard either. Links to before/after frame samples and a before/after video clip are in the Additional Materials section below. Overall the quality is quite decent - it genuinely looks like proper HD. Observed drawbacks: Grass and trees don’t look very realistic - it’s often apparent that the network reconstructed them with some creative liberty. Occasionally you can spot synthetic-looking artifacts in specific details or objects, but it’s not frequent and only noticeable if you look closely. In general, the blurrier the source image or individual objects within it, the worse the upscale result - synthetic artifacts will be more apparent. In general, normal well-authored DVDs upscale well, where the original detail is good. Heavily compressed video with low detail and a soft/blurry picture upscales poorly. But again, if the source wasn’t heavily compressed, the upscale will most likely produce good results. Additional Materials Script from the article is available on my GitHub: https://github.com/peterplv/PythonNeiroUpscaler Before/after frame samples on my Google Drive. There are also examples of 4x upscaled images Video example: original and upscaled]]></summary></entry><entry><title type="html">Visual Comparison of Depth-Anything-V2 Depth Map Generation Models (Large, Base, Small)</title><link href="https://peterplv.github.io/2026/01/16/depth-anything2-colors" rel="alternate" type="text/html" title="Visual Comparison of Depth-Anything-V2 Depth Map Generation Models (Large, Base, Small)" /><published>2026-01-16T15:00:00+03:00</published><updated>2026-01-16T15:00:00+03:00</updated><id>https://peterplv.github.io/2026/01/16/depth-anything2-colors</id><content type="html" xml:base="https://peterplv.github.io/2026/01/16/depth-anything2-colors"><![CDATA[<p><img src="/assets/images/2026-01-16-depth-anything2-colors/starwars4_stormtrooper_title.jpg" alt="Starwars4 stormtrooper" />
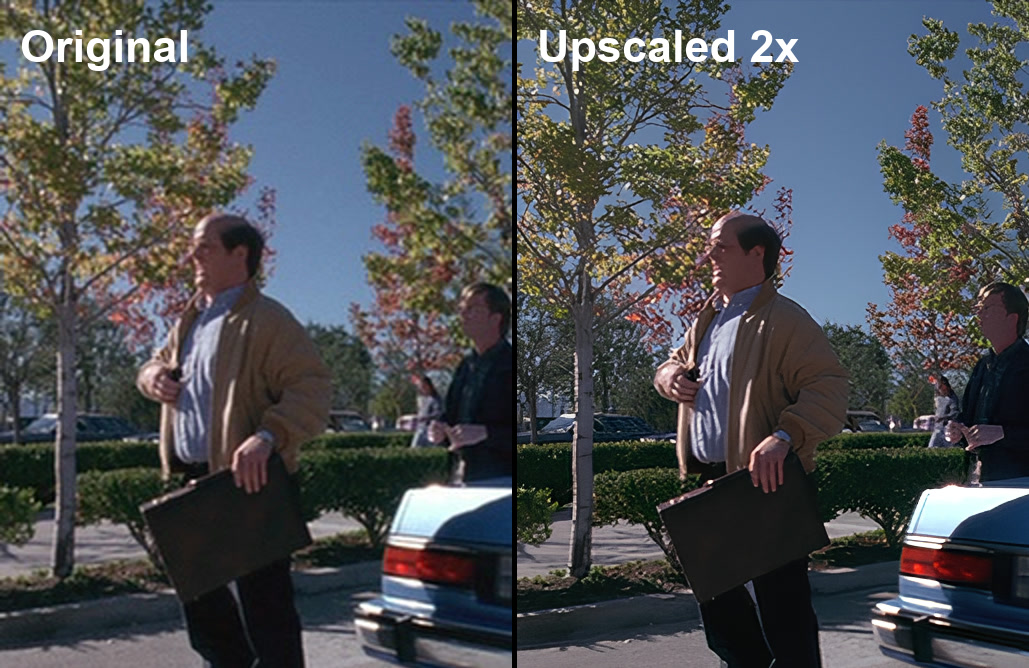
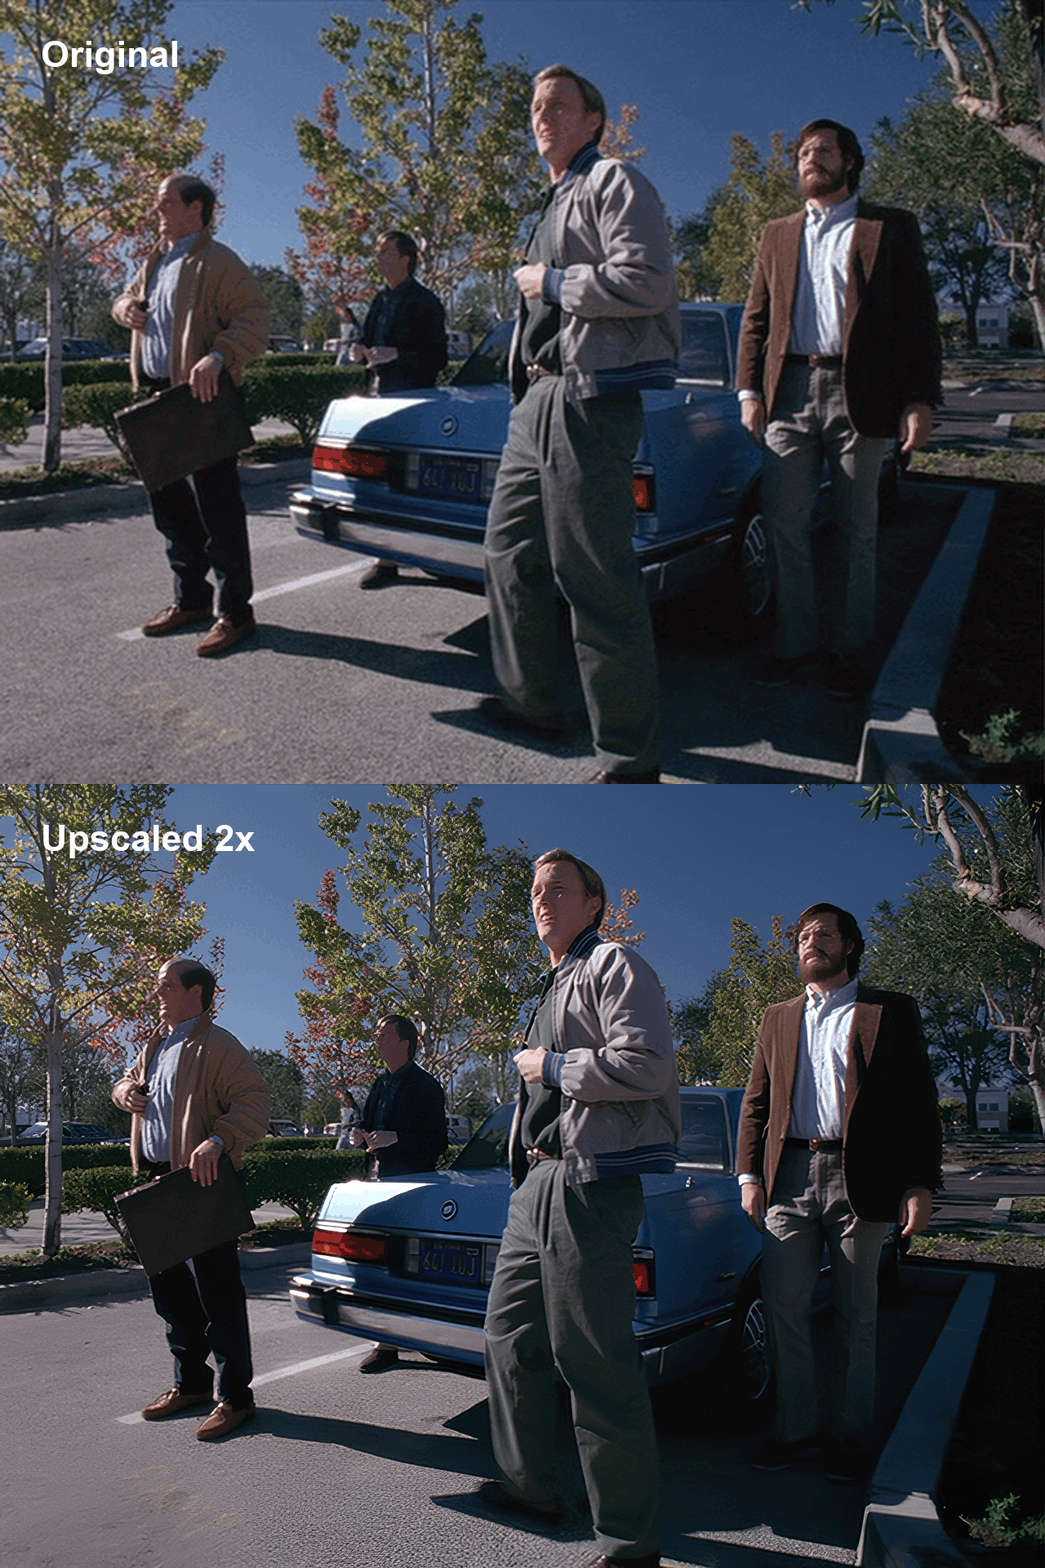
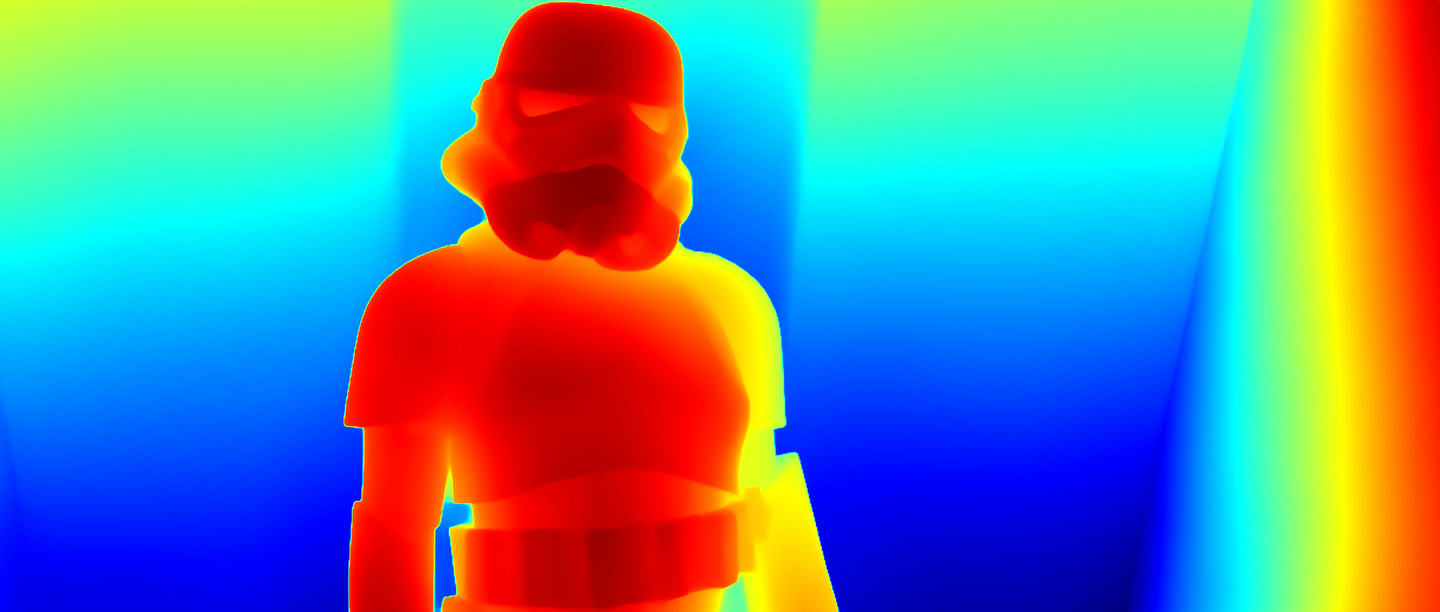
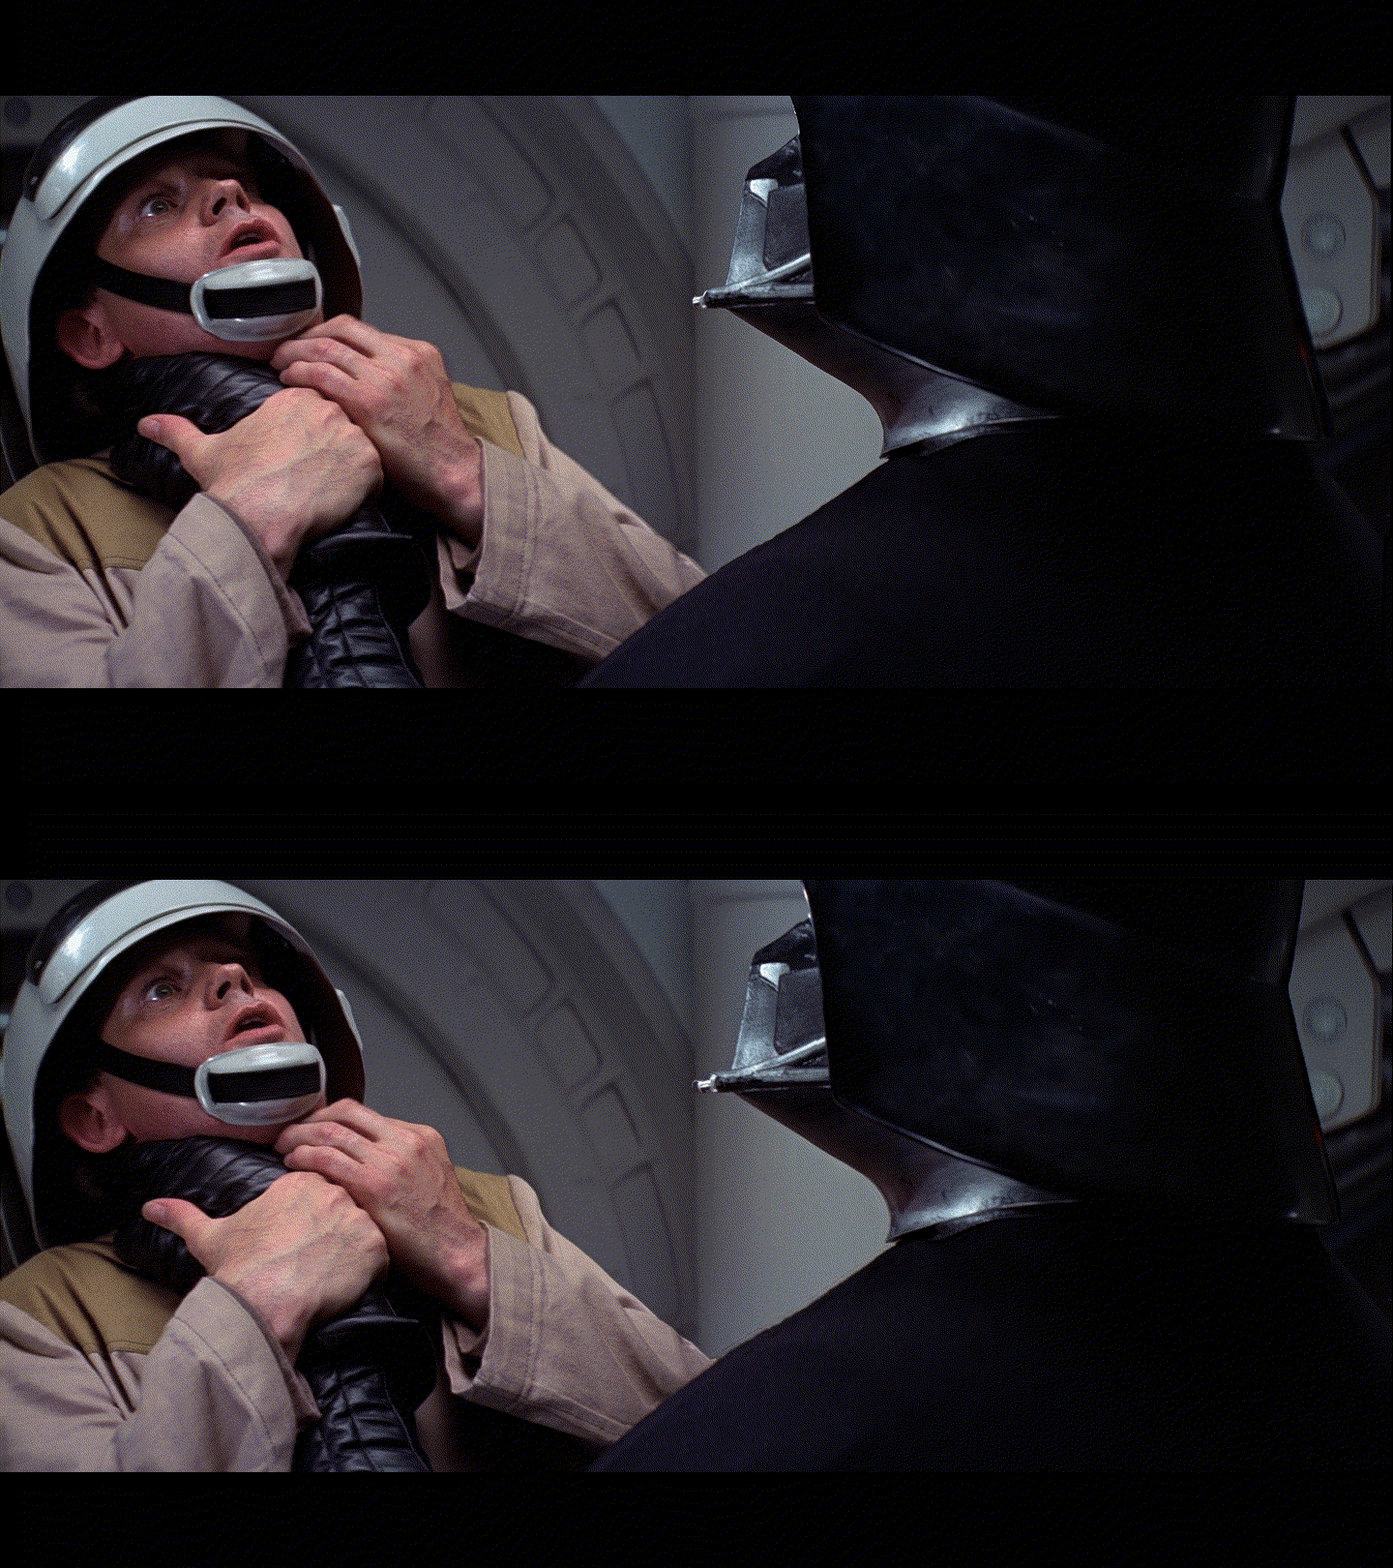
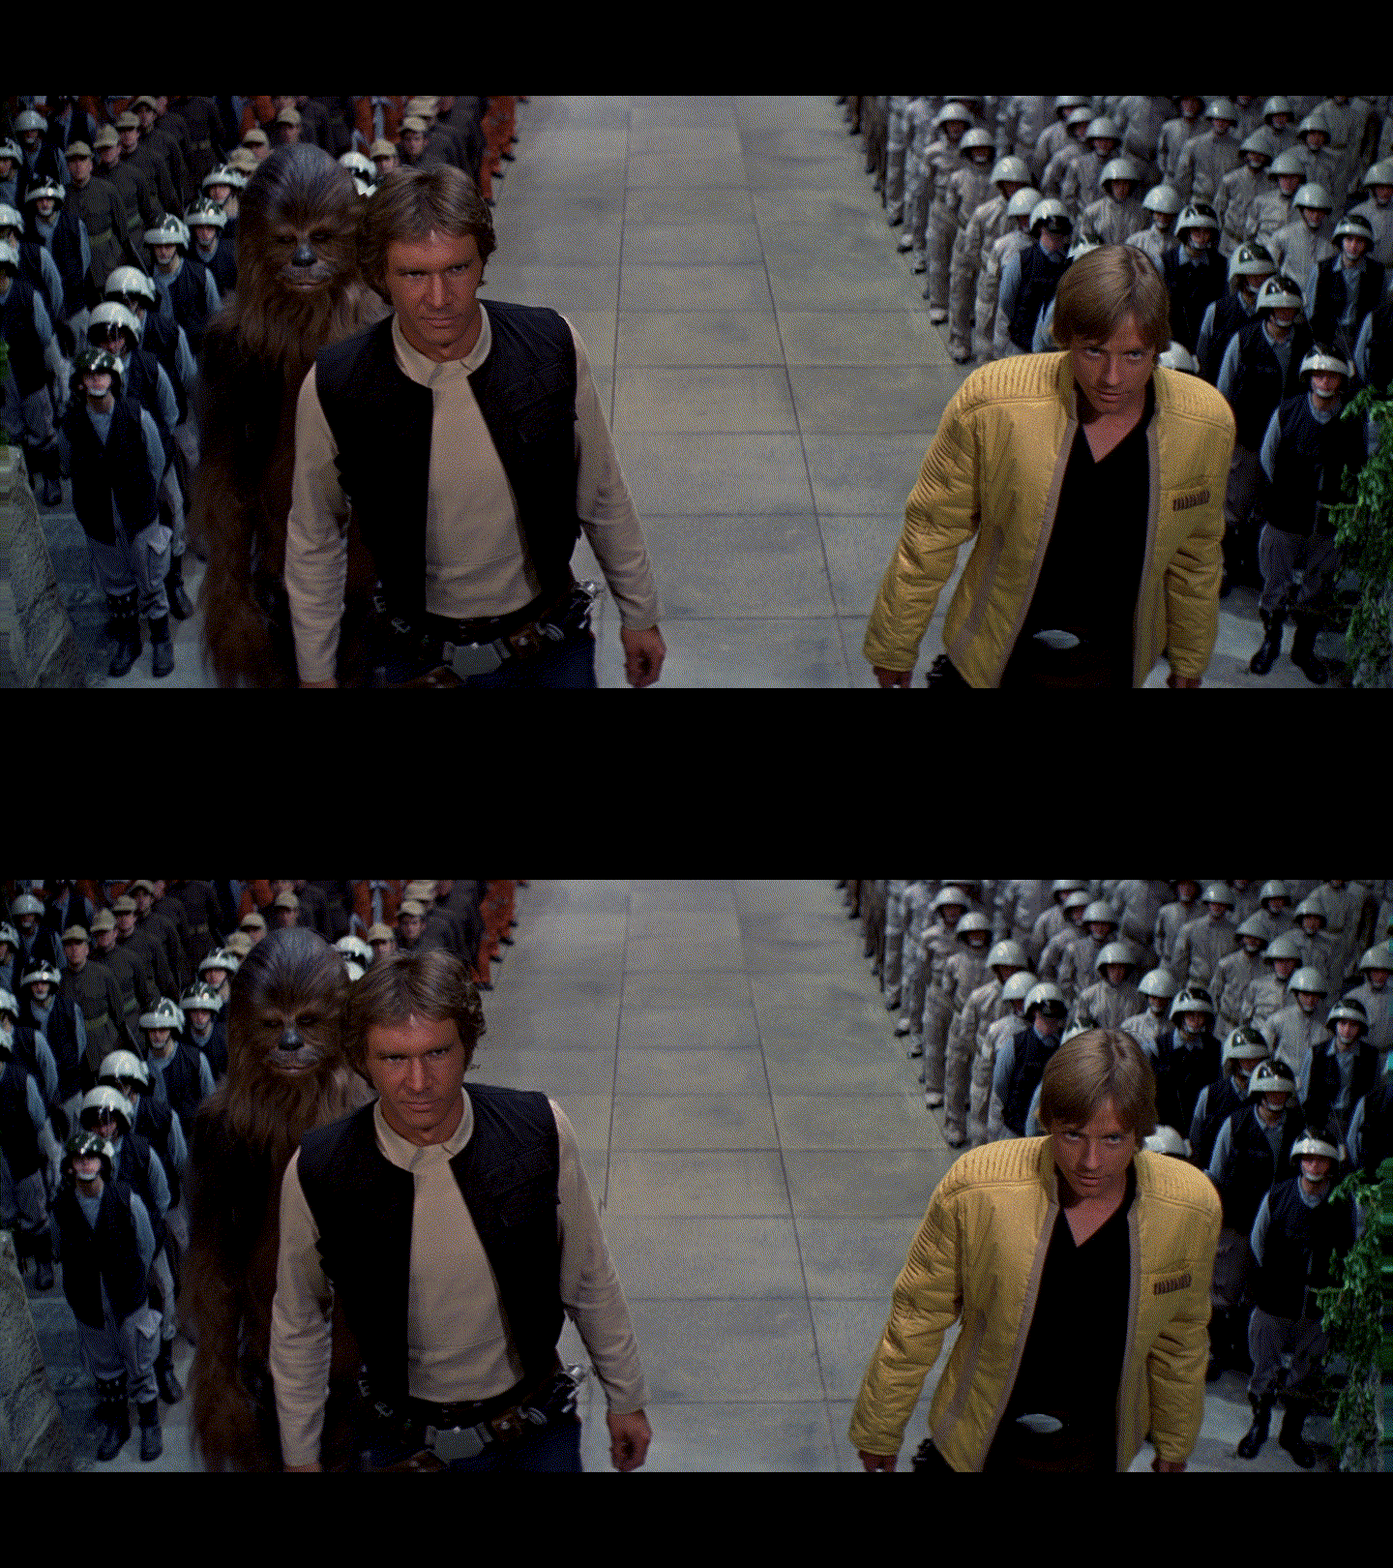
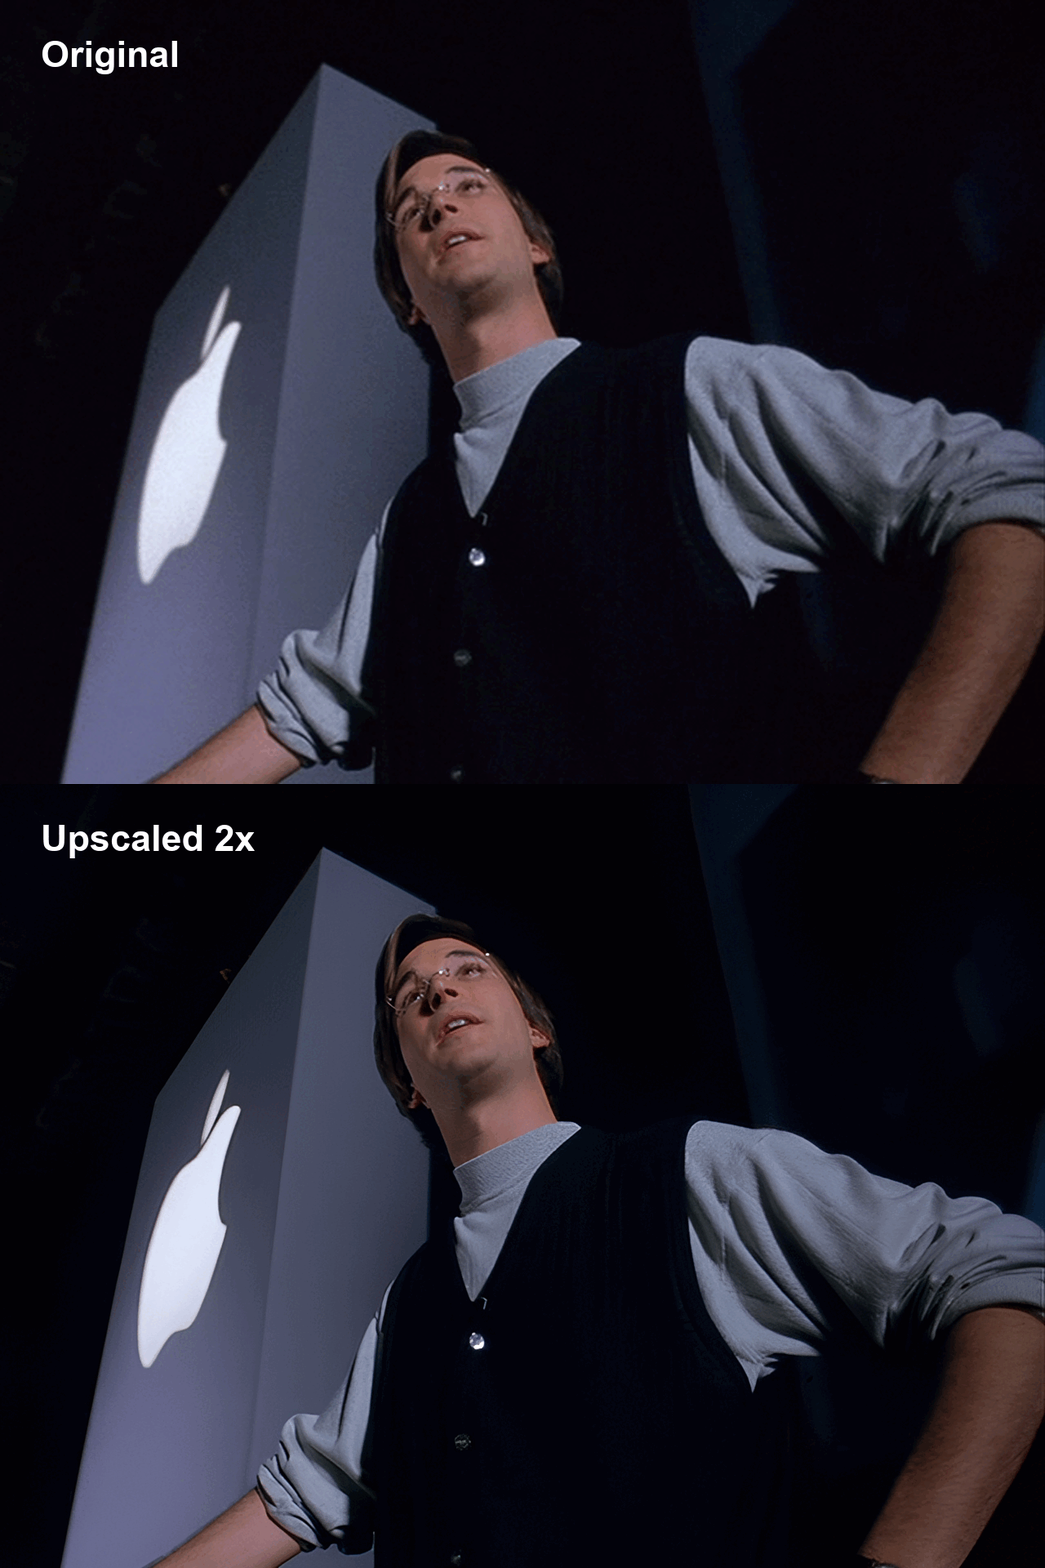
<em>Let’s see what we have here</em>
<br />
<br /></p>

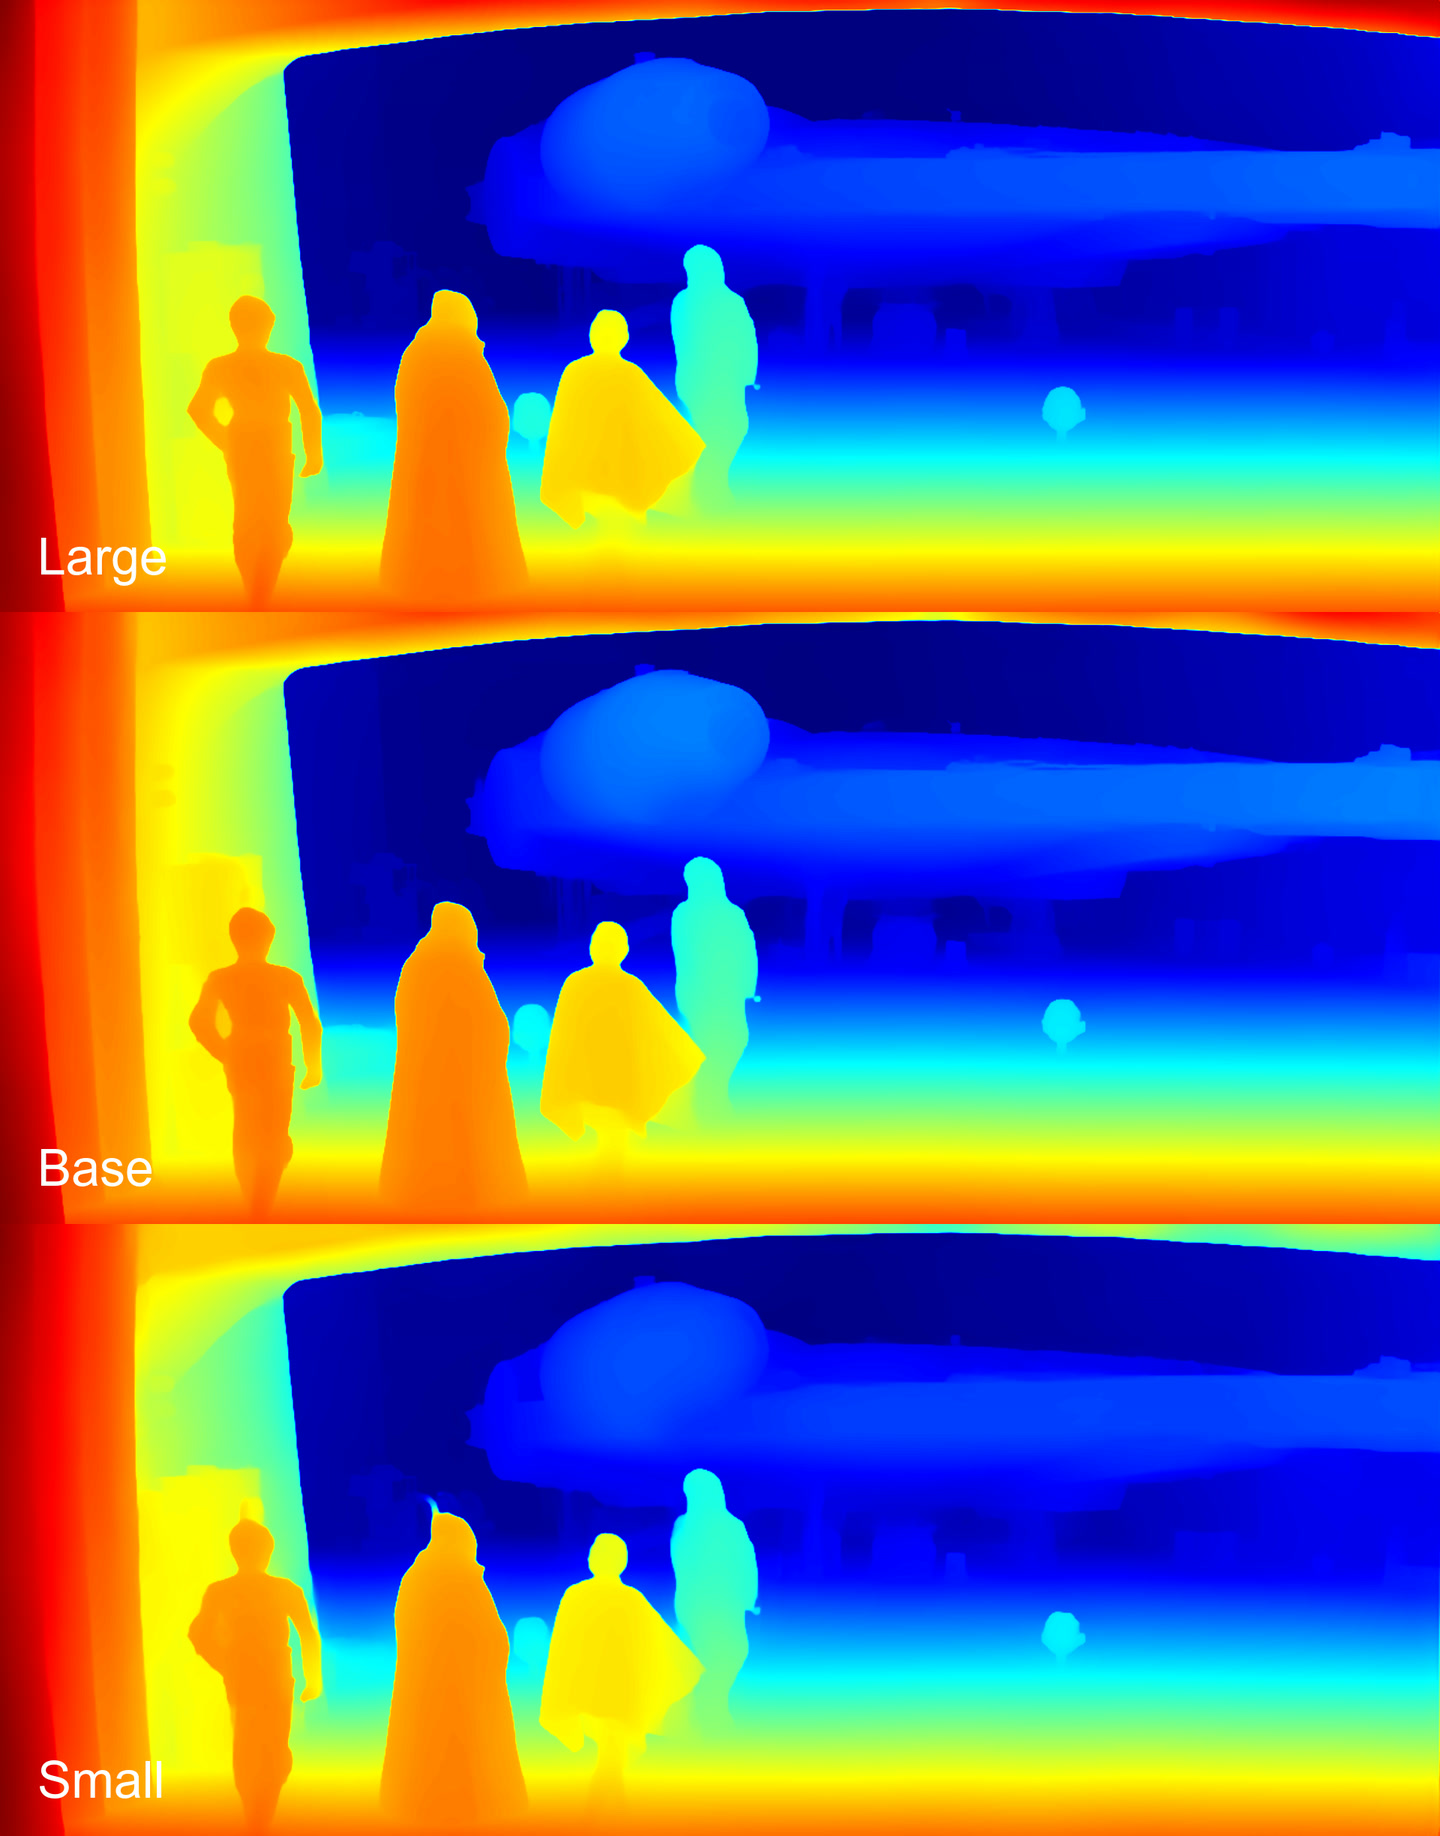
<p>This article reviews the <a href="https://github.com/DepthAnything/Depth-Anything-V2#pre-trained-models">Depth-Anything-V2 models</a> and serves as a companion to the article on <a href="https://habr.com/ru/articles/897860">how to create stereoscopic 3D video from any source 2D</a>. Here we’ll compare the quality of depth maps obtained from all available models - Large, Base, and Small. There will be many images and minimal text.</p>

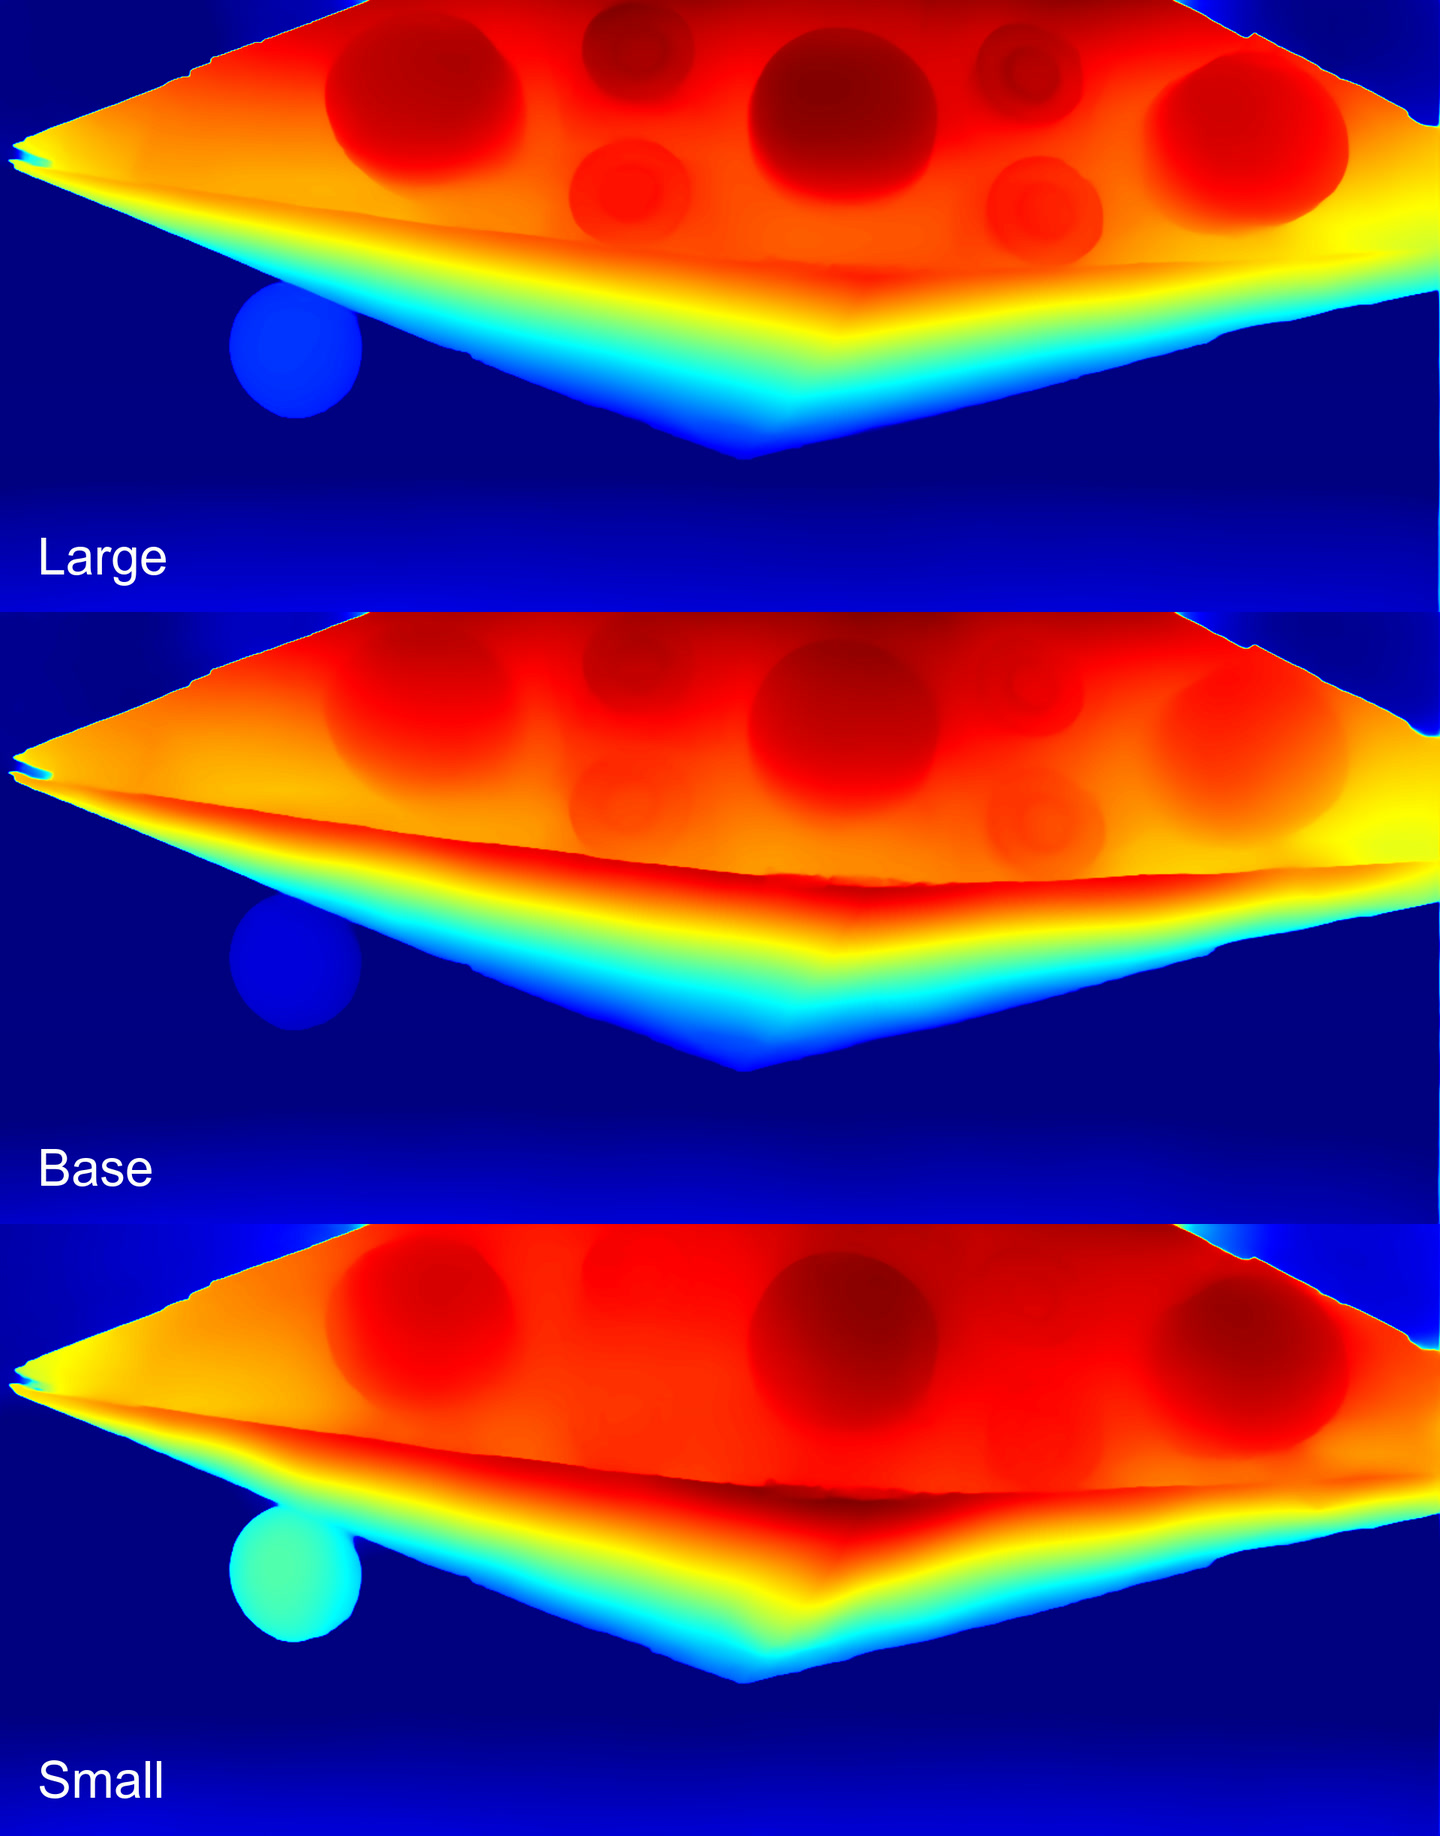
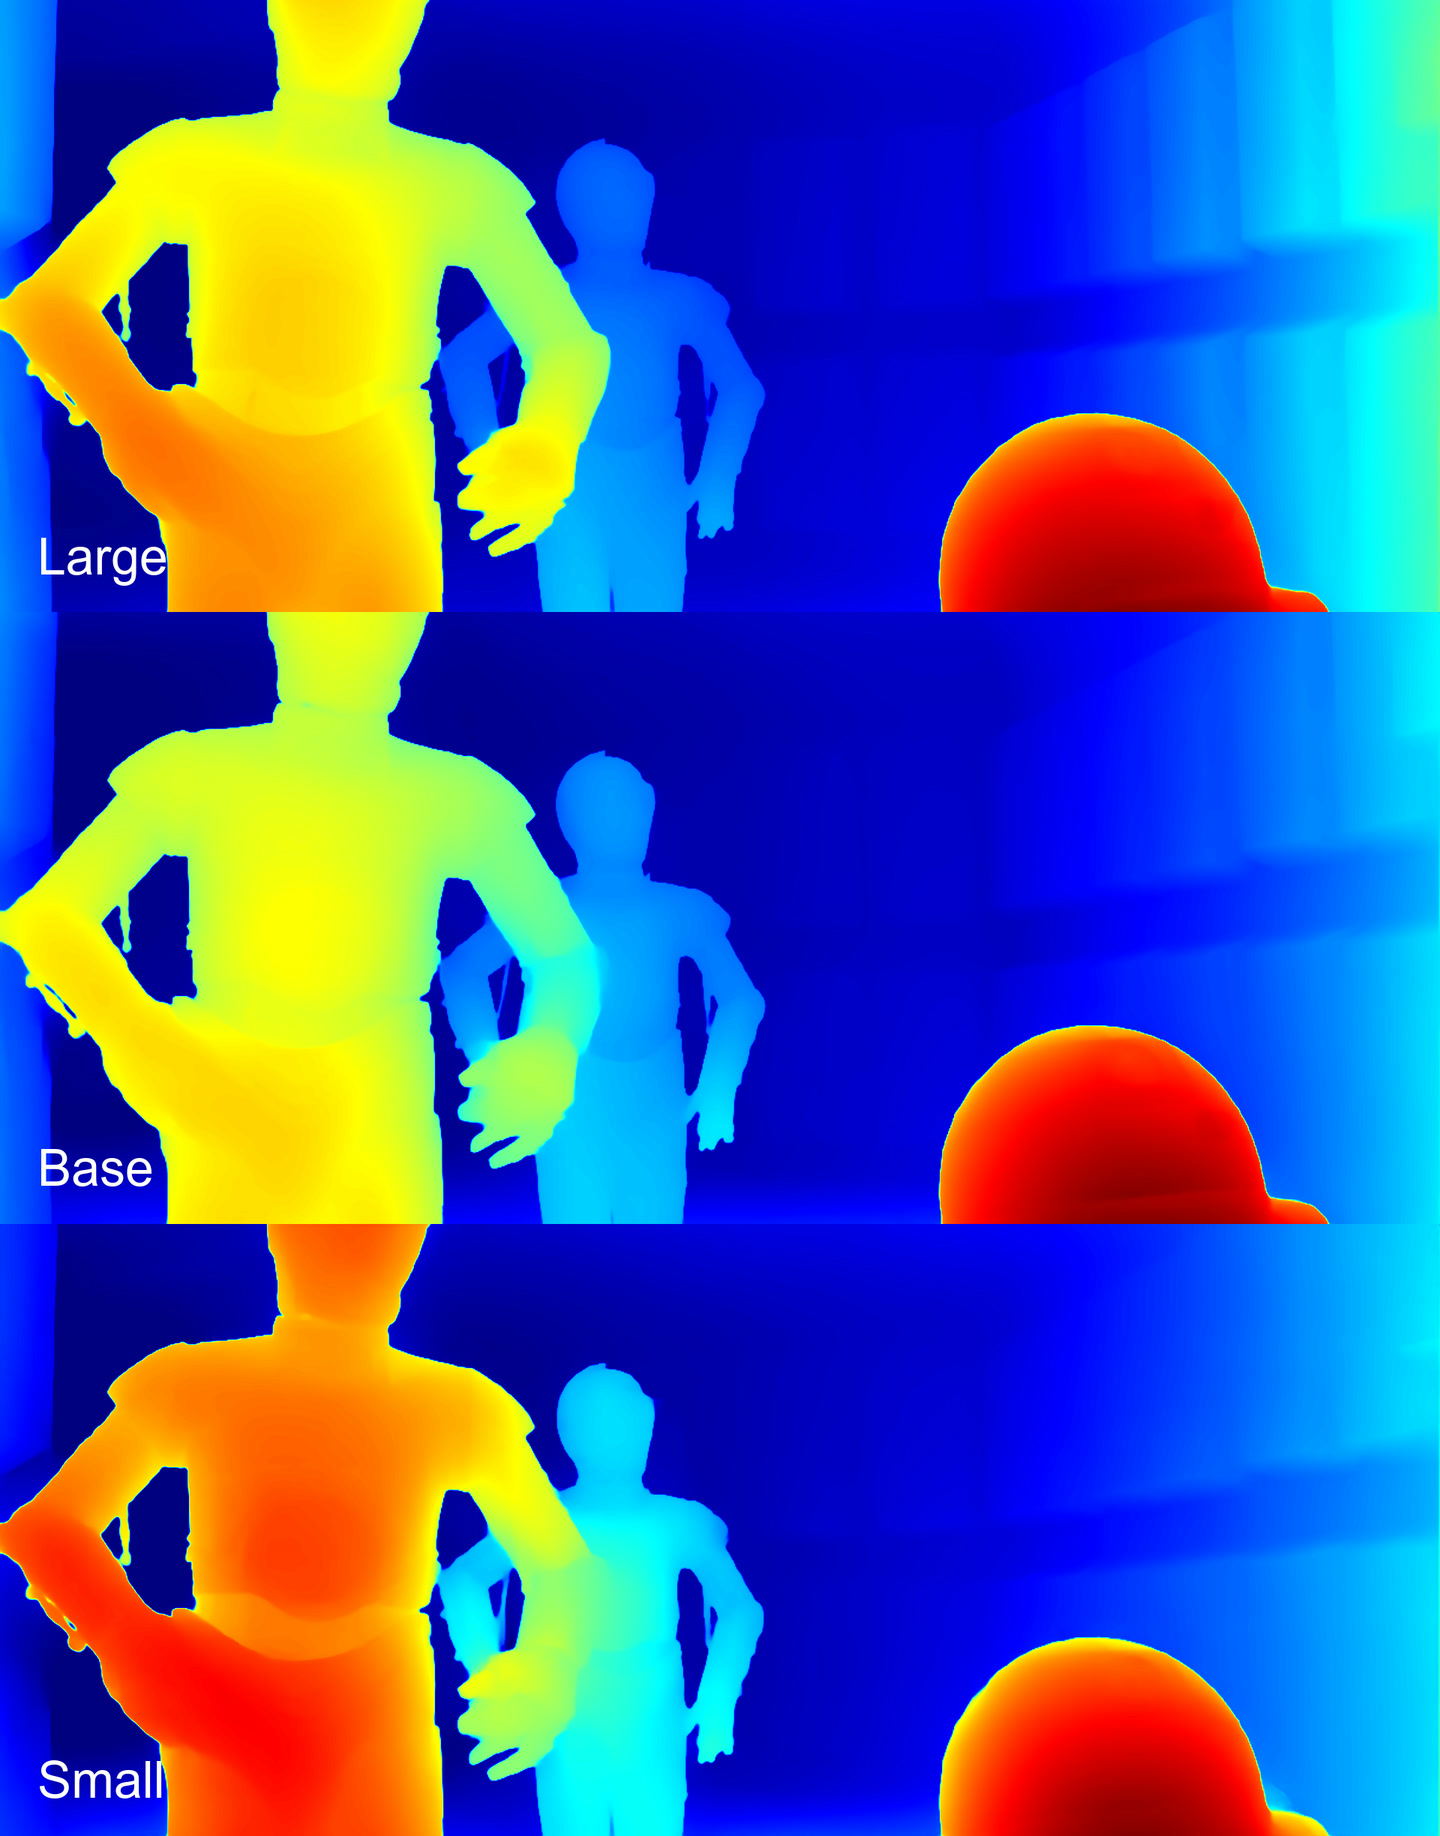
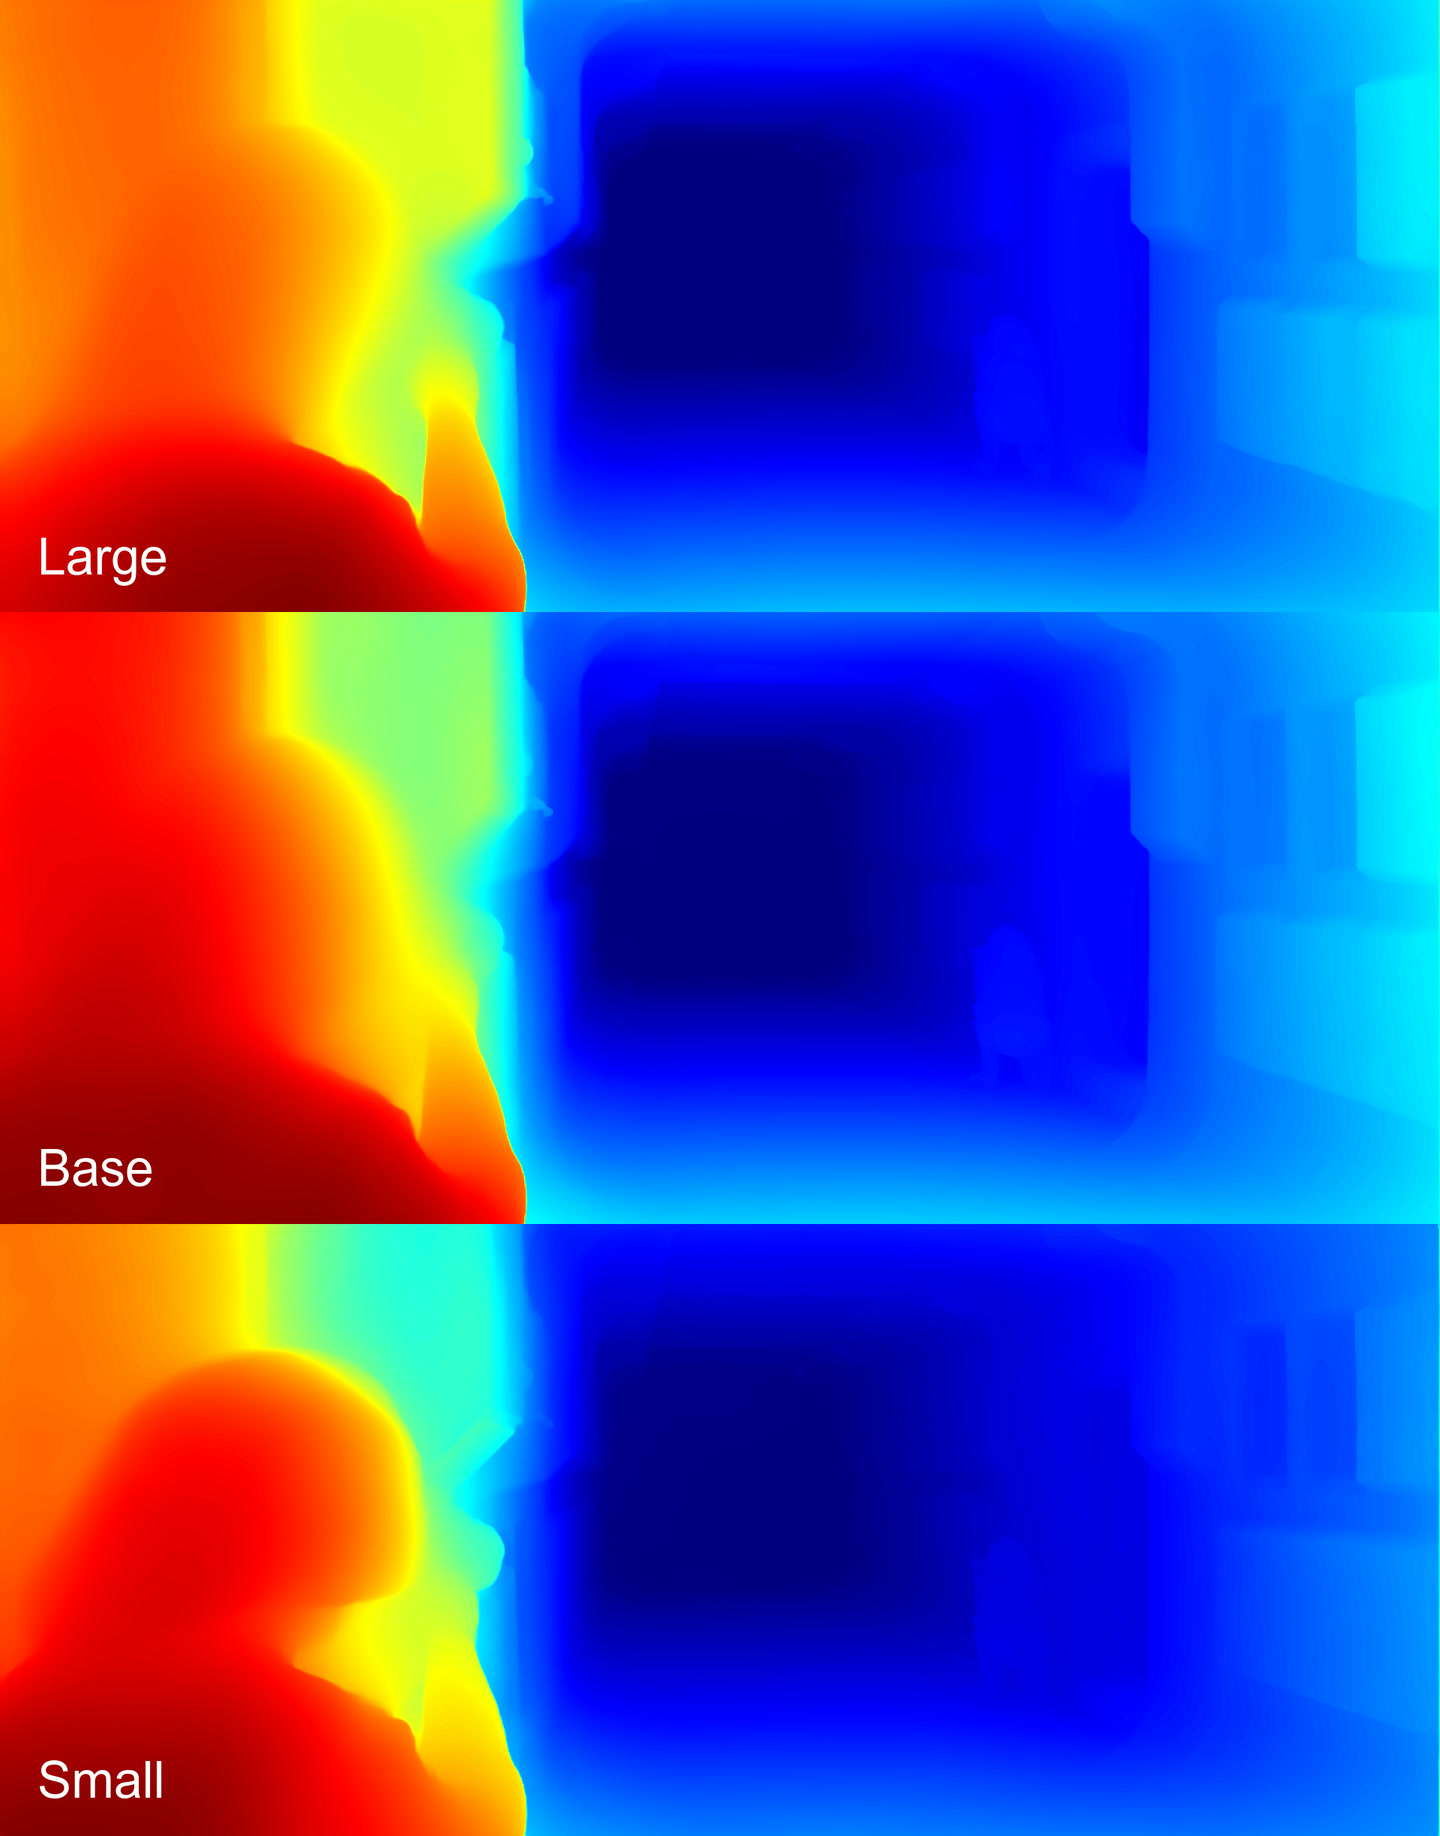
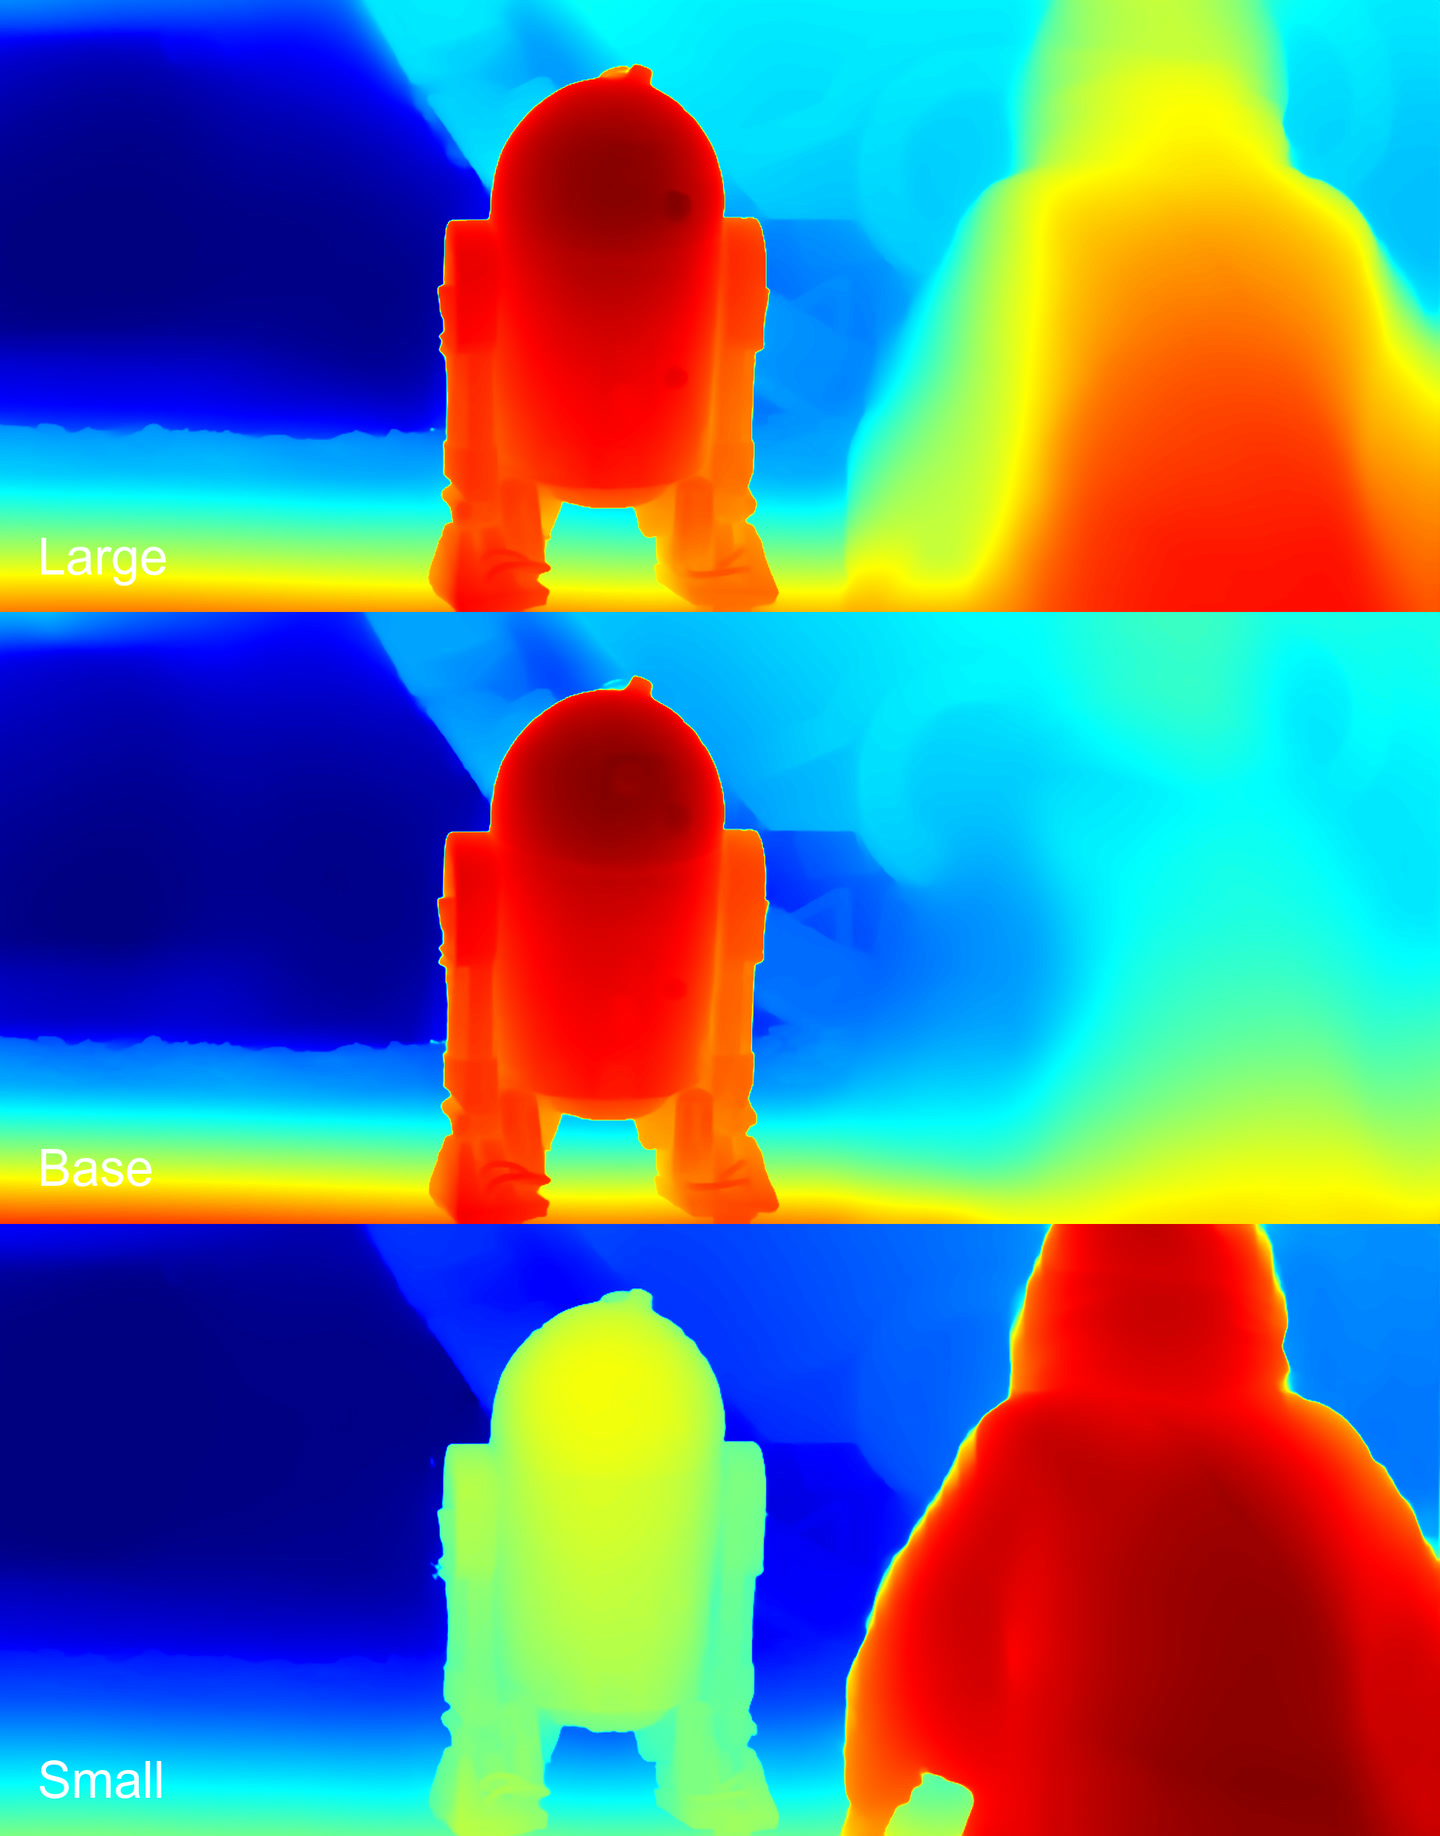
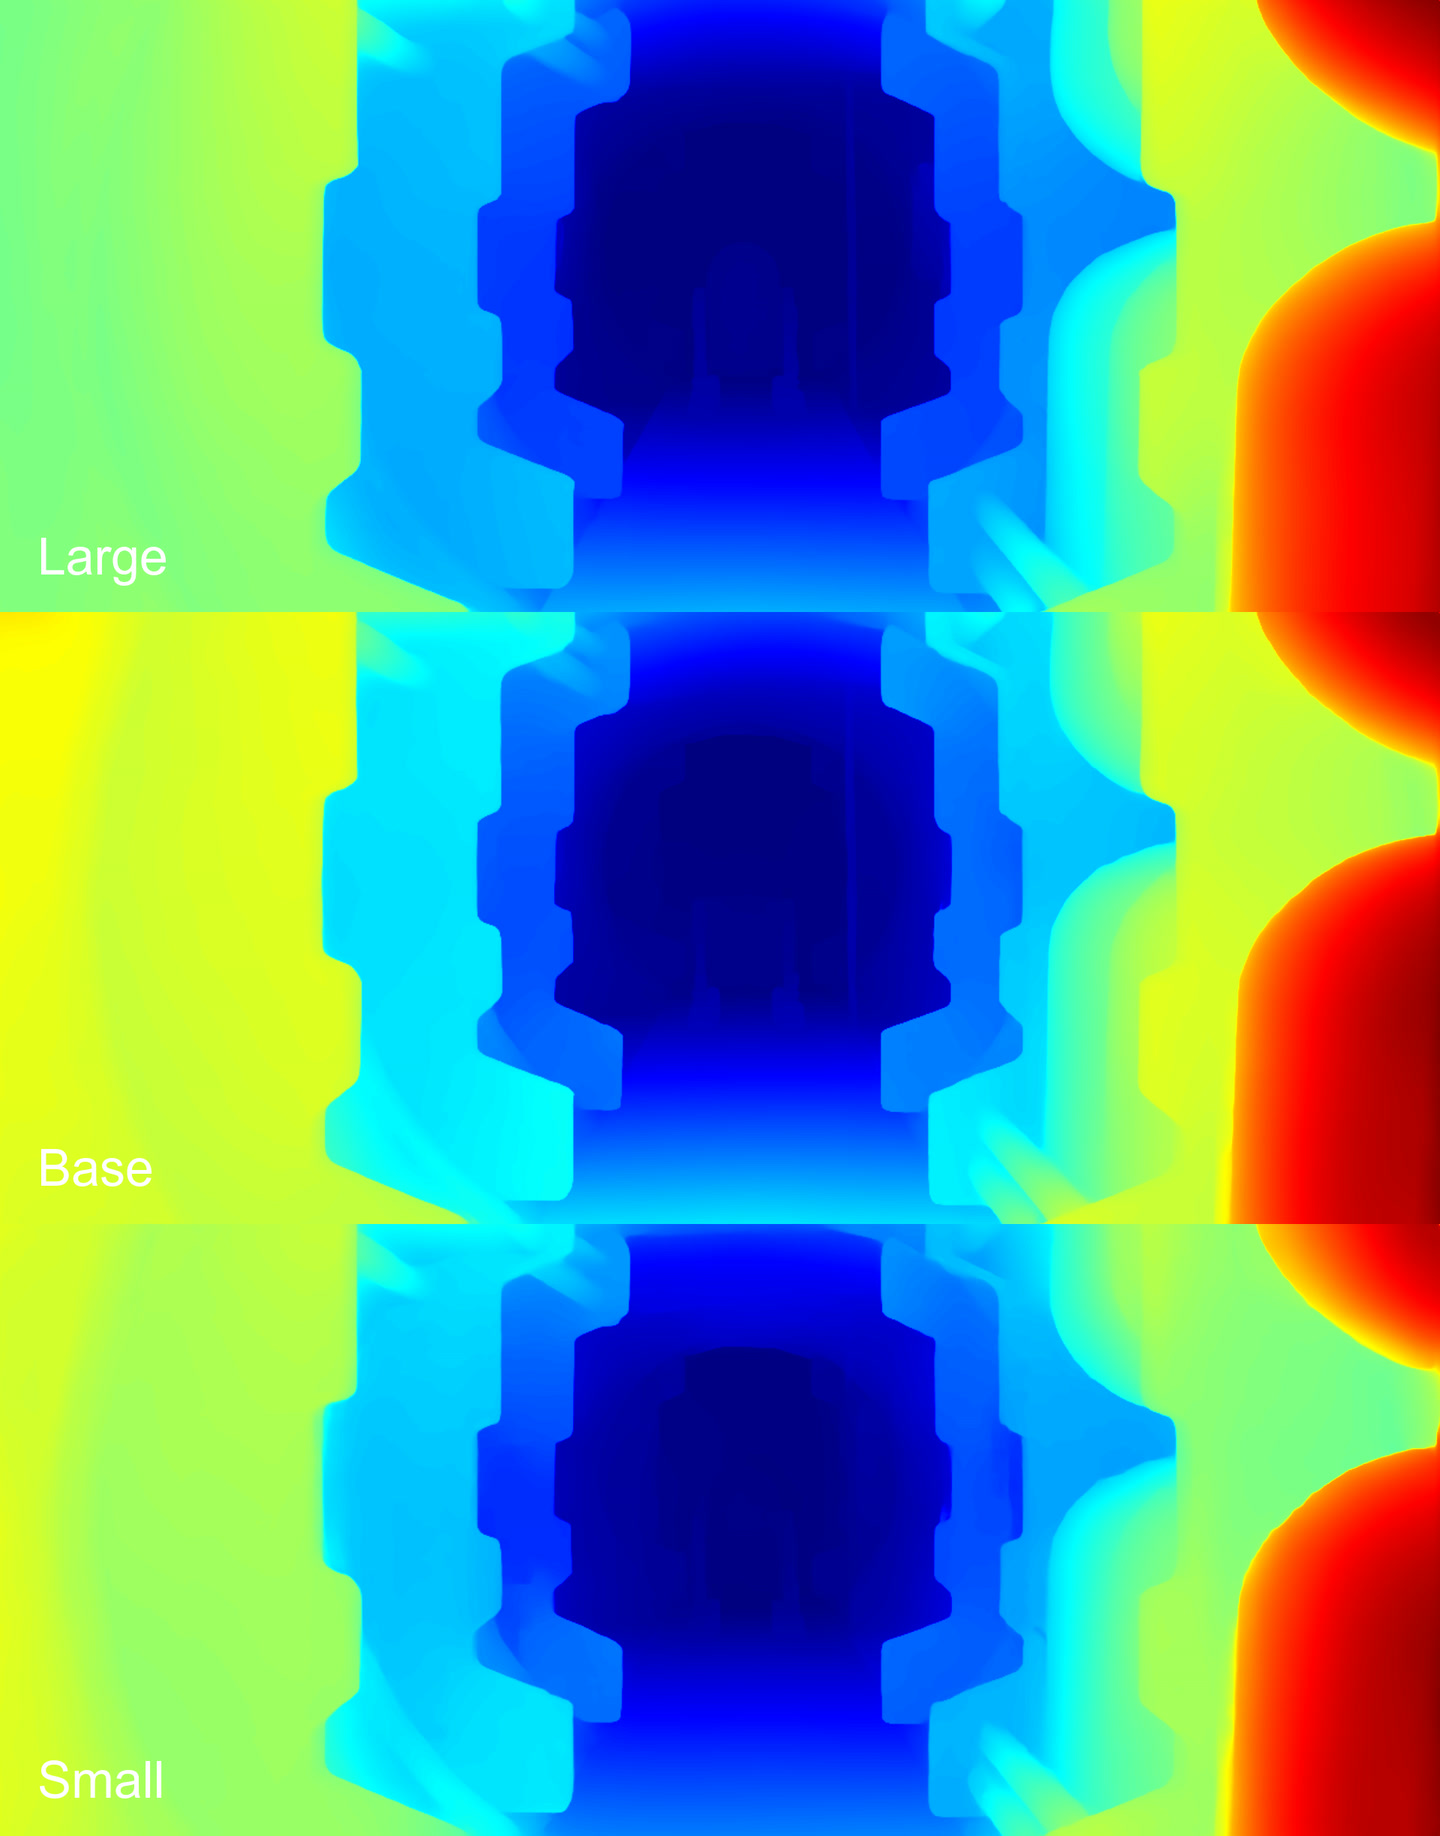
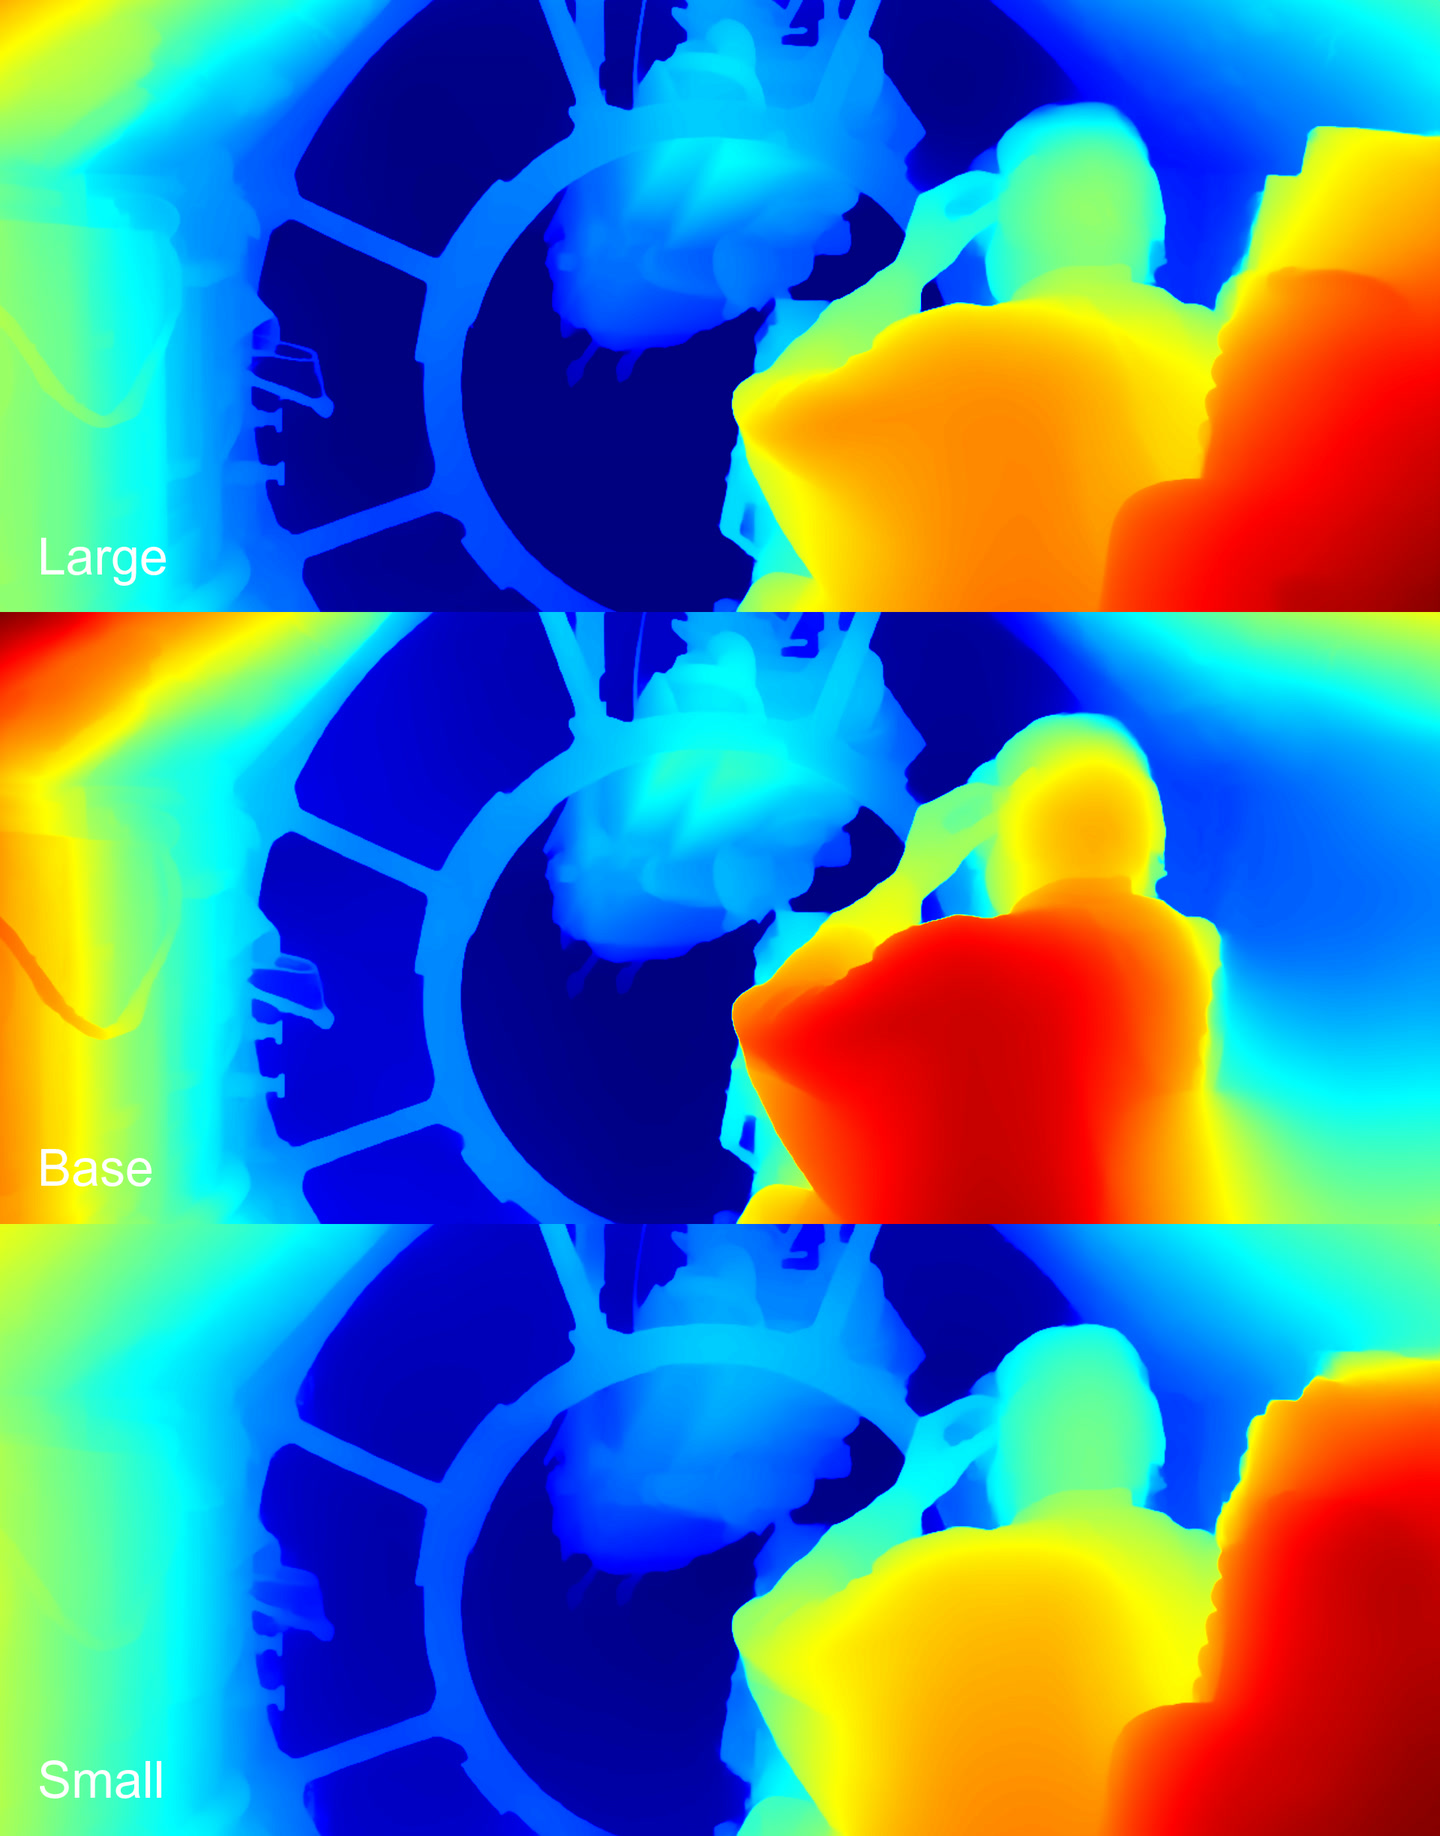
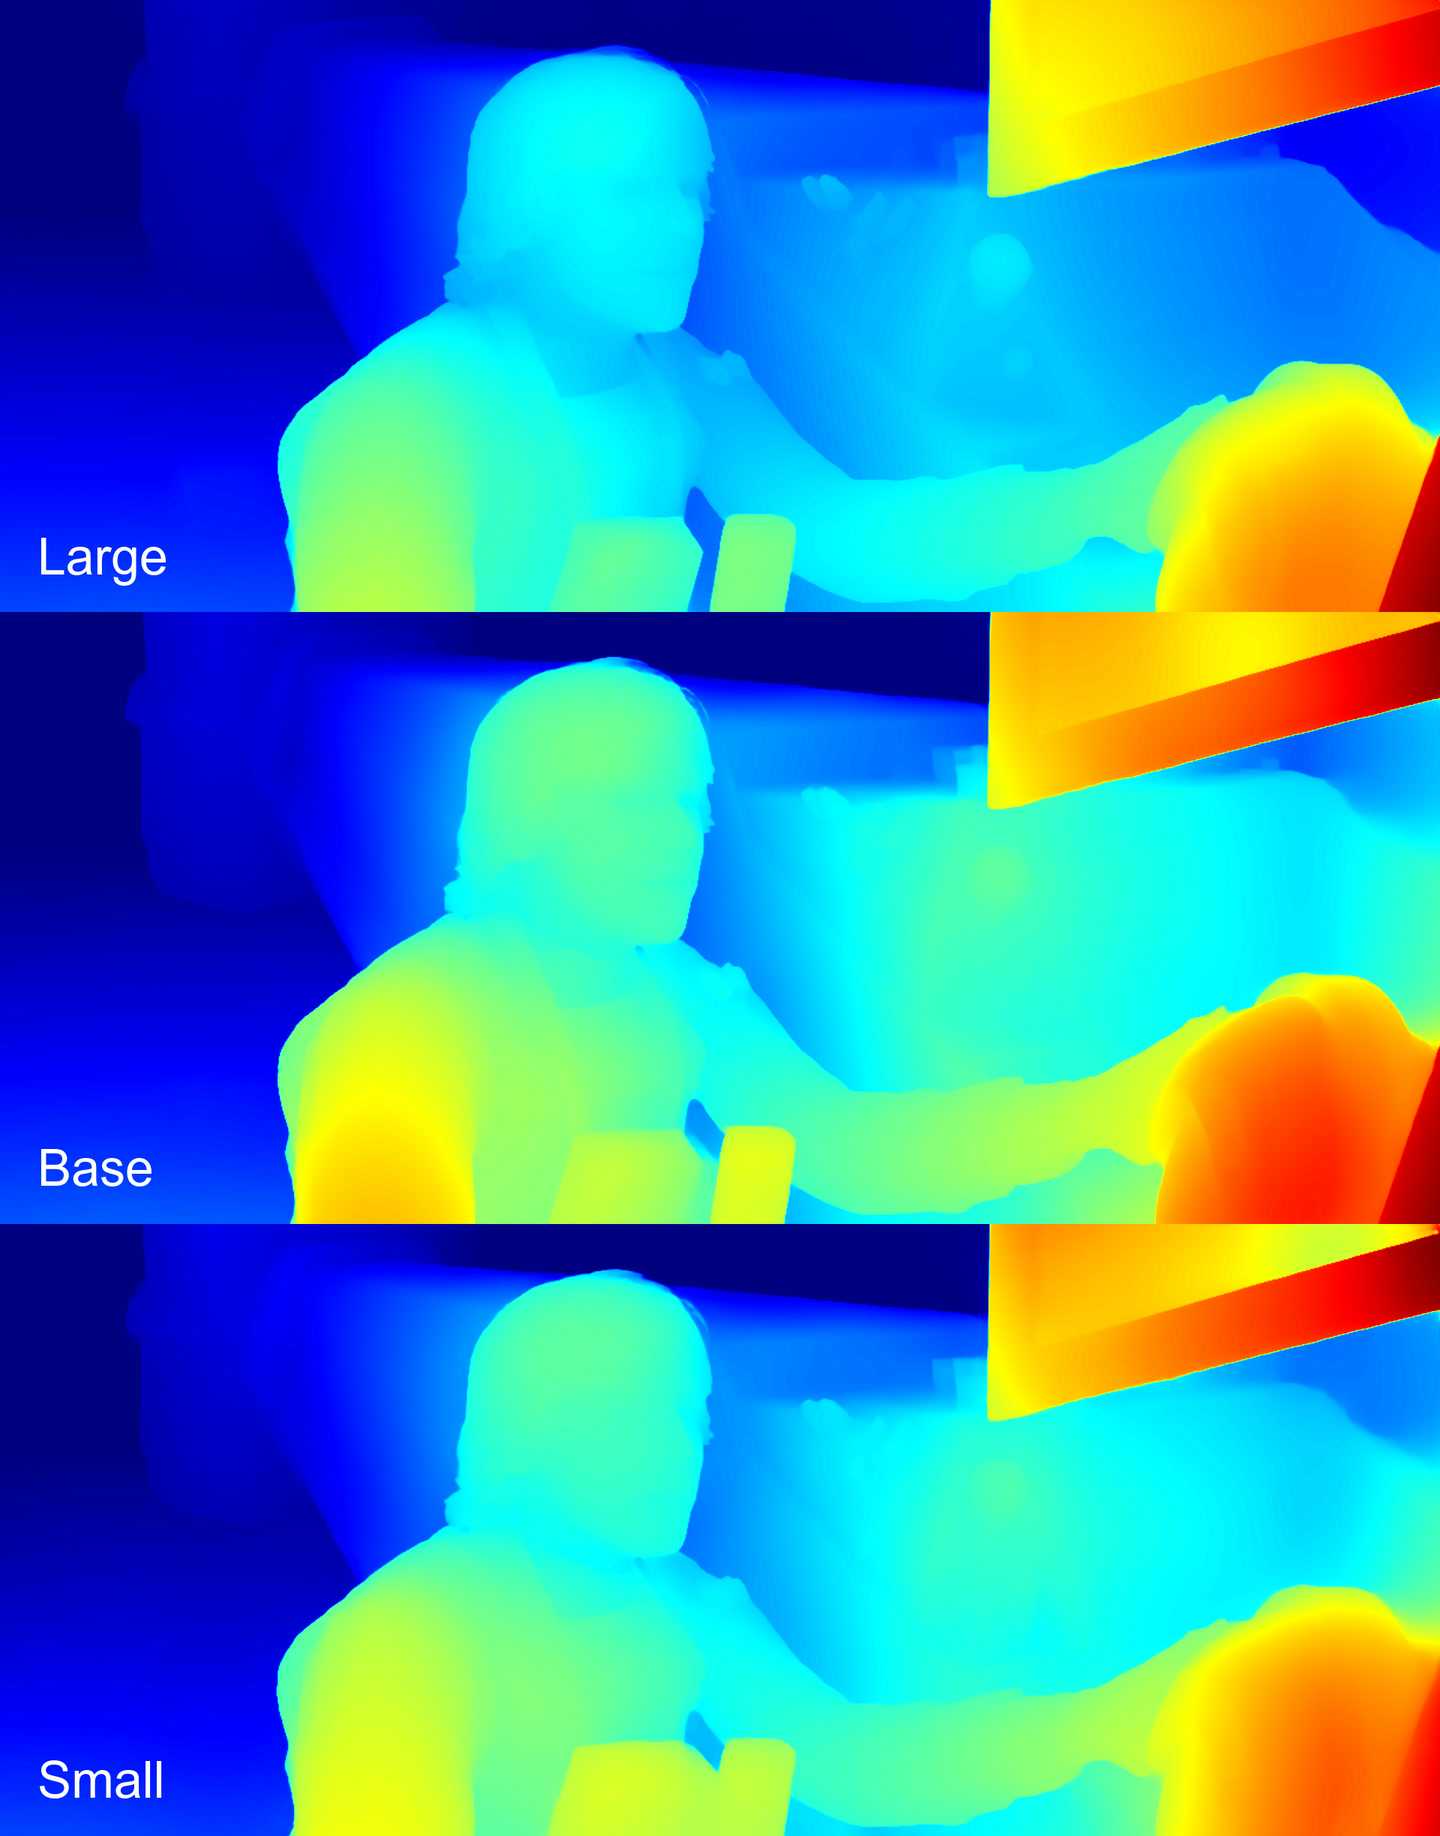
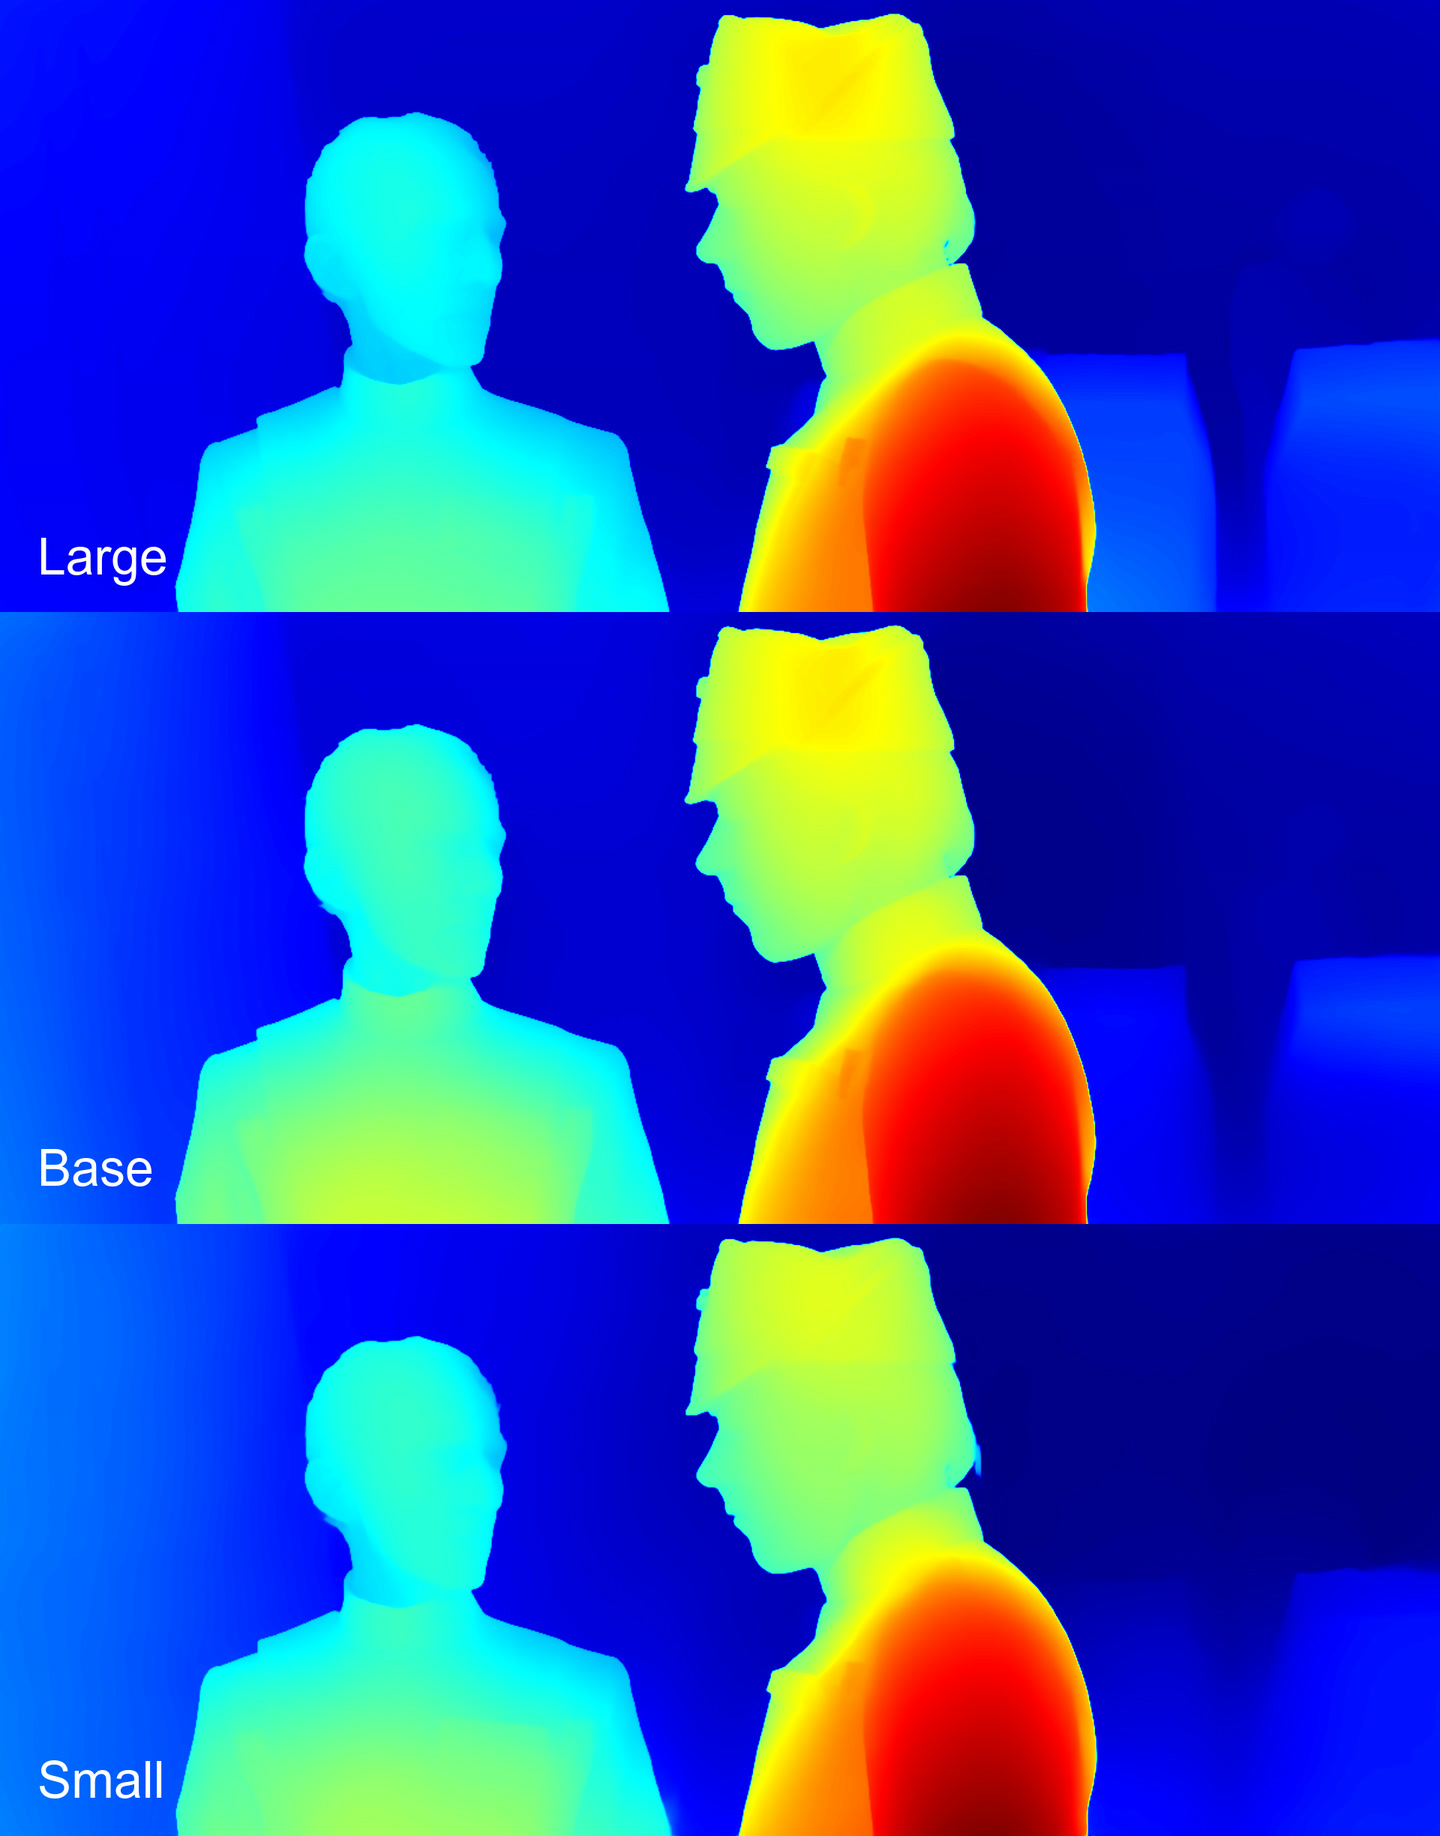
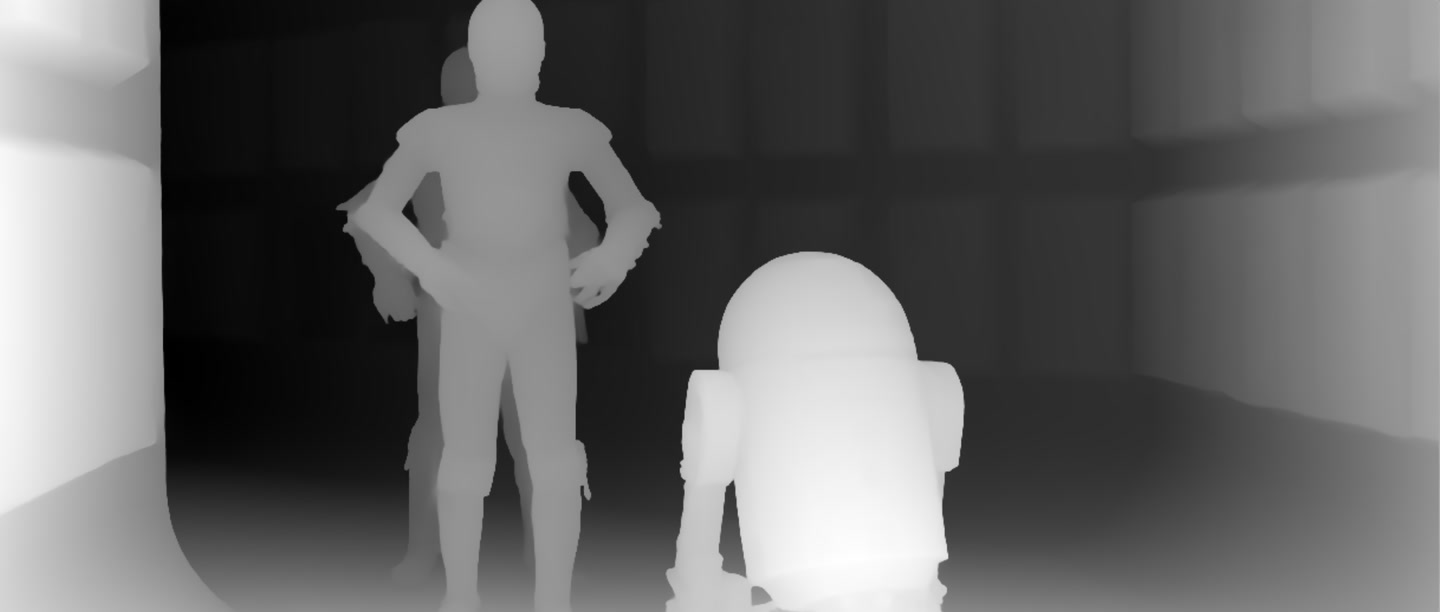
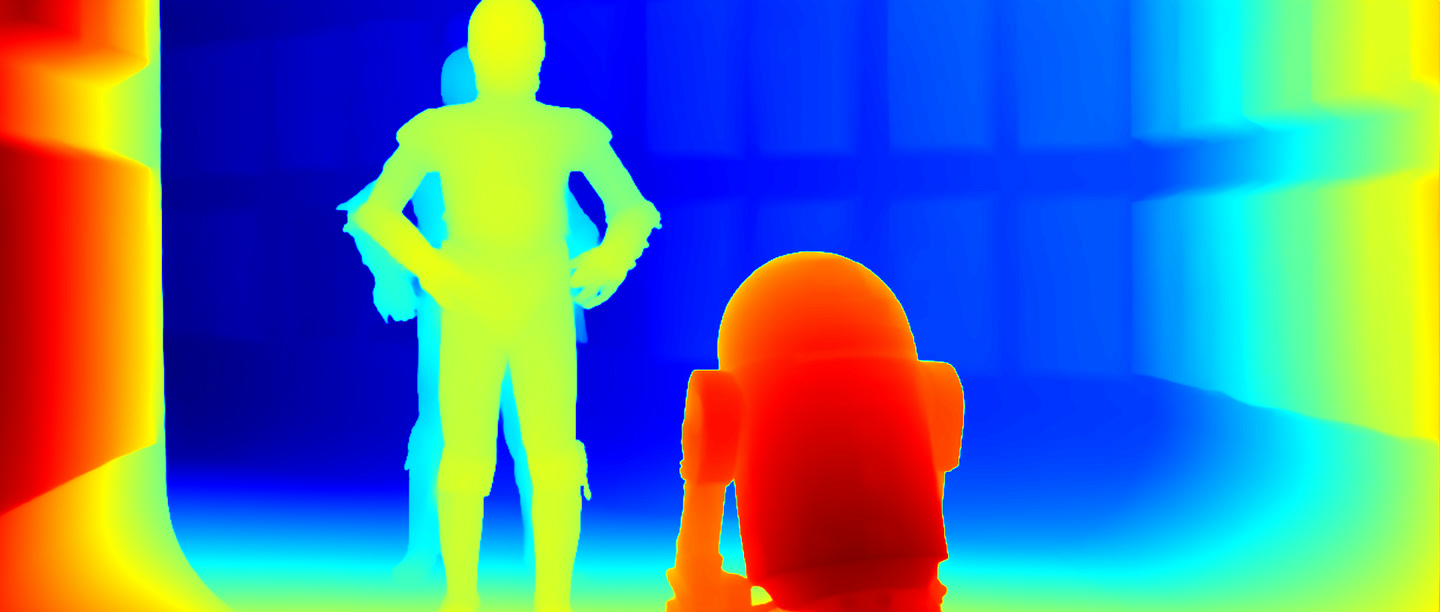
<p>For clarity, the depth maps are colorized (COLORMAP_JET). The scale ranges from dark red (near objects) to dark blue (far objects).</p>

<p>Brief overview of the models:</p>
<ul>
  <li><strong>Large</strong>: 335.3M parameters, size ~1280MB.</li>
  <li><strong>Base</strong>: 97.5M parameters, size ~372MB.</li>
  <li><strong>Small</strong>: 24.8M parameters, size ~95MB.</li>
</ul>

<p>The <a href="https://github.com/DepthAnything/Depth-Anything-V2#pre-trained-models">Depth-Anything-V2 page</a> also mentions a <strong>Giant</strong> model with 1.3B parameters, but it’s not yet available for download.</p>

<p>As a reminder from the main article, here’s a speed comparison for processing a test set of <strong>100 frames</strong> for each model (running in 2 threads):</p>
<ul>
  <li>The <strong>Large</strong>: 1 minute 9 seconds, maximum VRAM usage (excluding reserved memory, here and throughout): 3994.97 MB.</li>
  <li>The <strong>Base</strong>: 24.47 seconds, maximum VRAM usage: 2415.44 MB.</li>
  <li>The <strong>Small</strong>: 11.59 seconds, maximum VRAM usage: 1134.84 MB.</li>
</ul>

<p>Let’s take the following as axioms:</p>
<ul>
  <li>The <strong>Large</strong> model generally works more accurately, sees more objects and details, and defines object contours more sharply.</li>
  <li>The <strong>Base</strong> model is on average worse than Large, but often not significantly. It usually sees fewer objects and details.</li>
  <li>The <strong>Small</strong> model sees the fewest details and doesn’t define object contours clearly.</li>
</ul>

<p>Now let’s look at examples.</p>

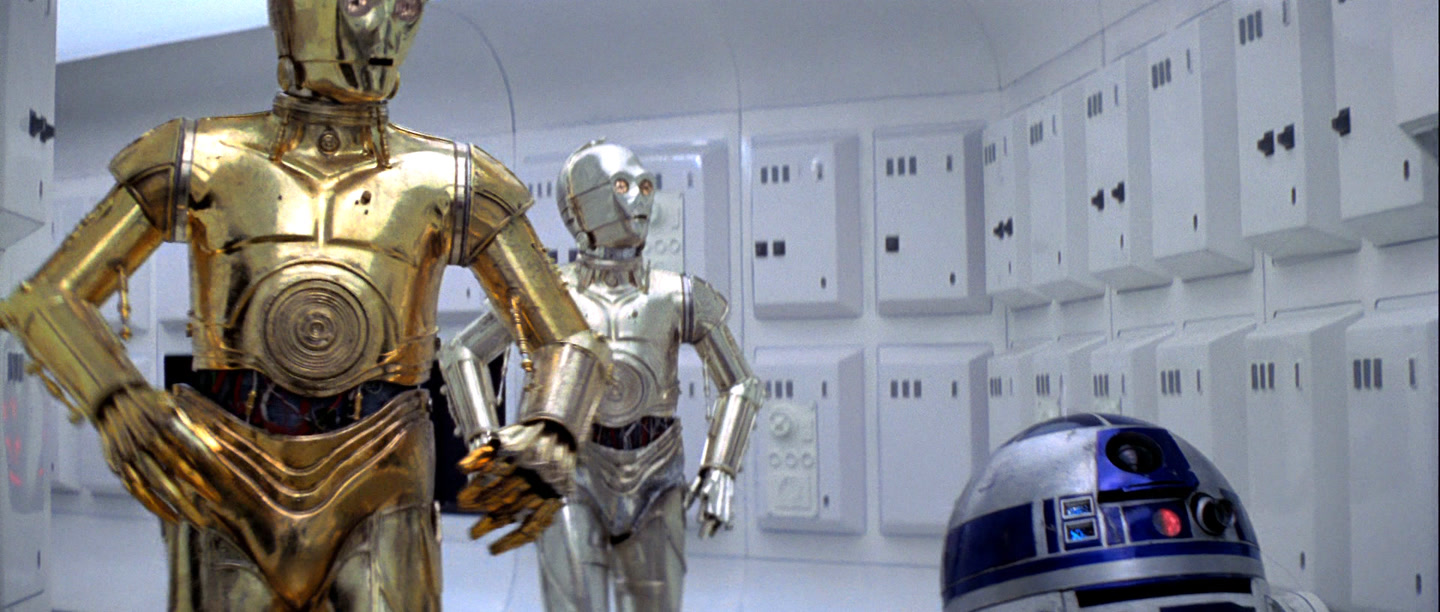
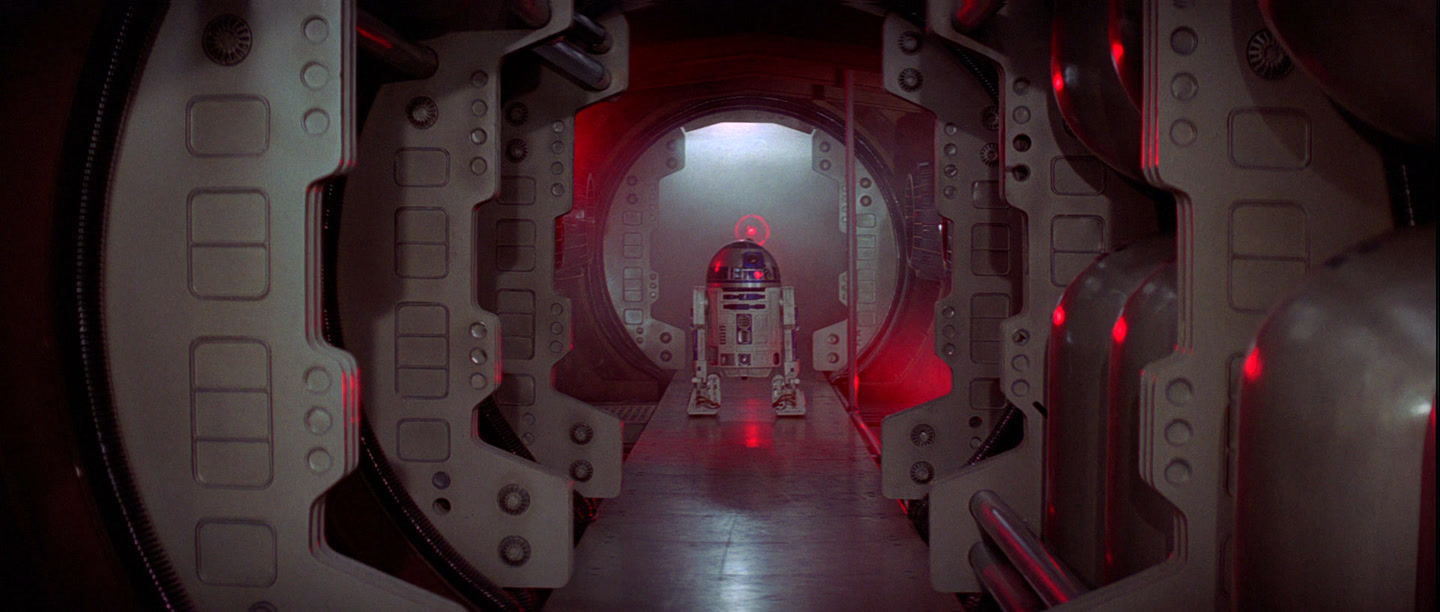
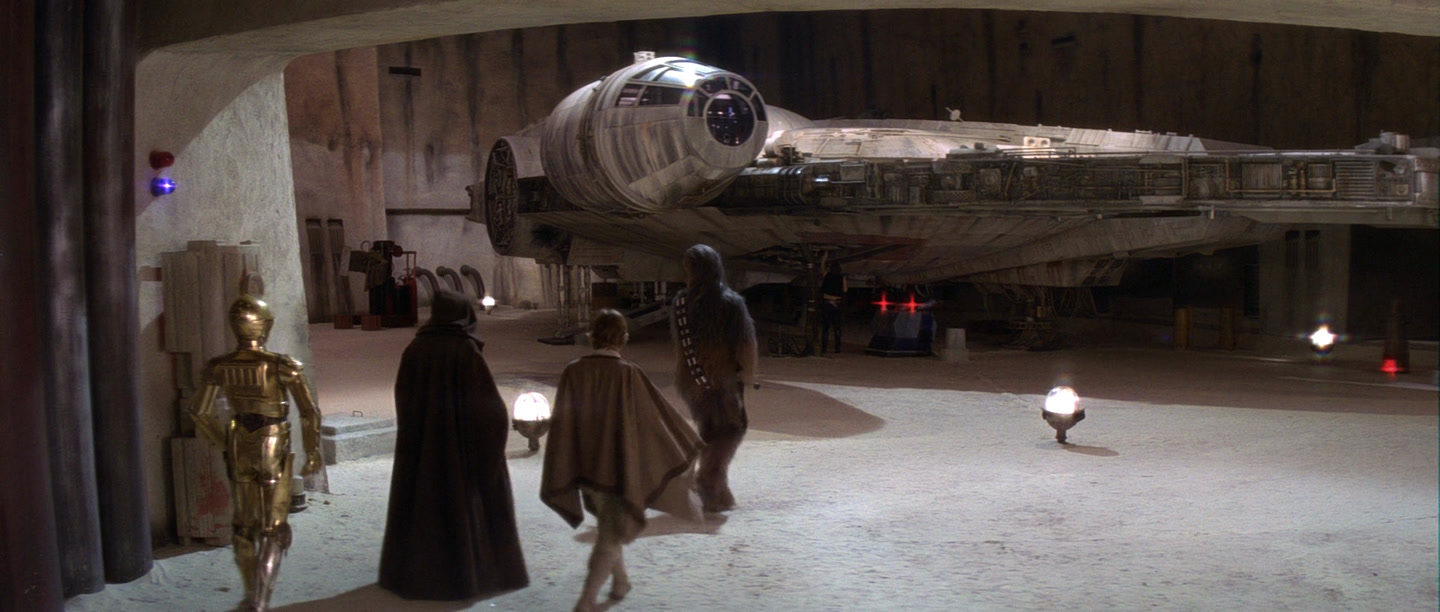
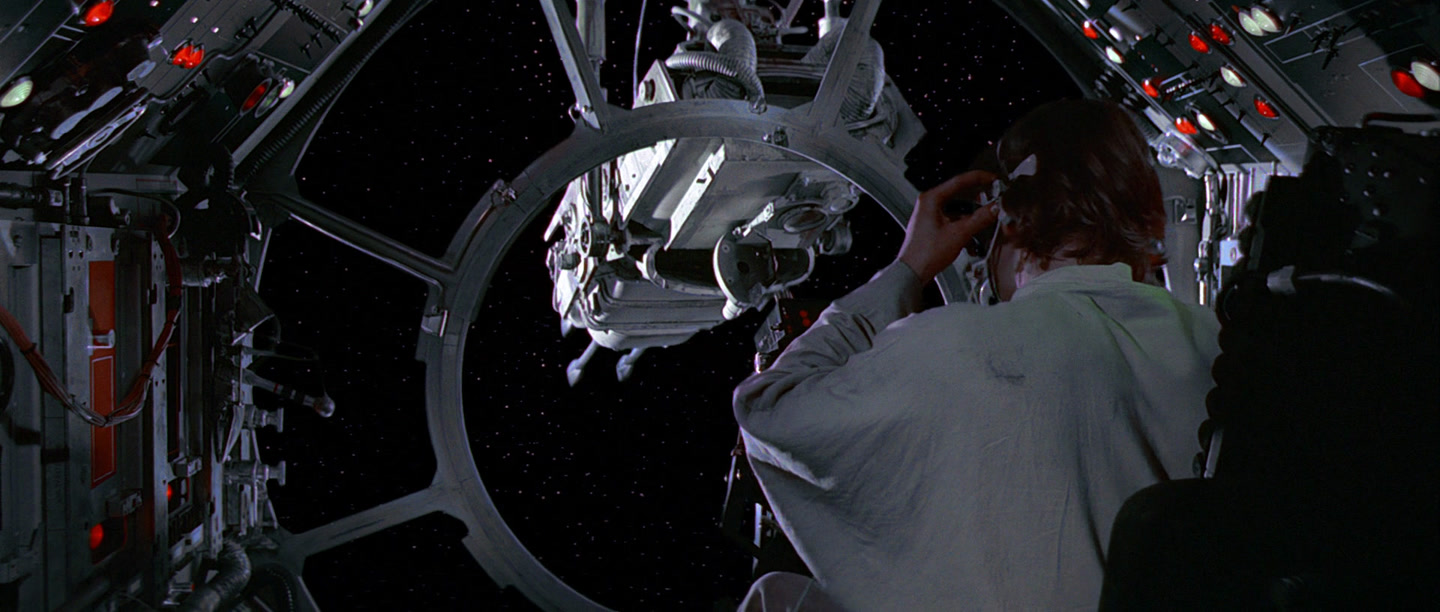
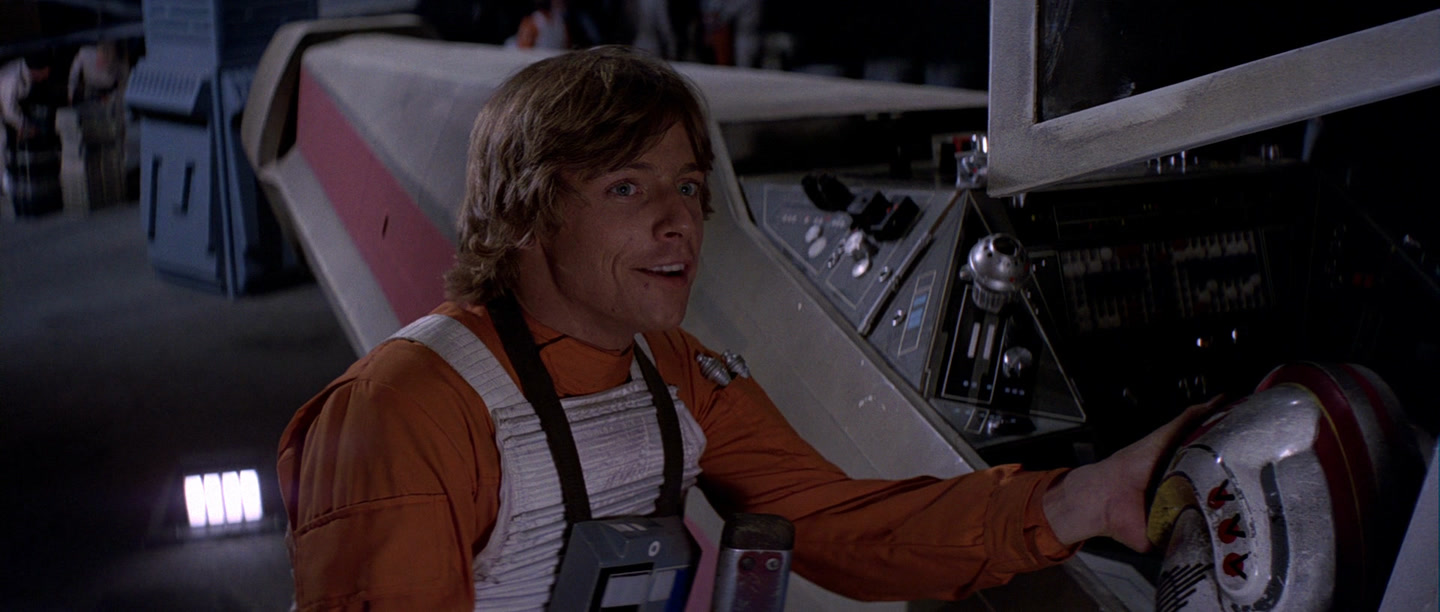
<p><img src="/assets/images/2026-01-16-depth-anything2-colors/starwars4_spaceship.jpg" alt="Starwars4 spaceship" />
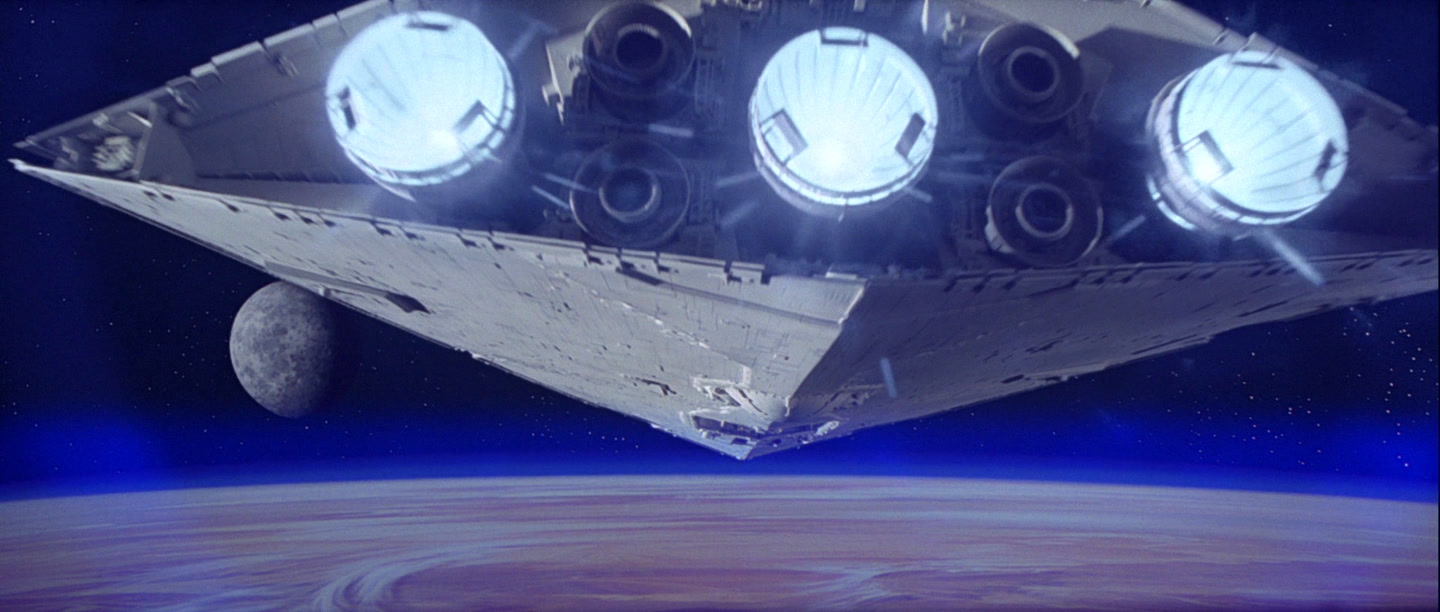
<em>Source image</em>
<br />
<br />
<img src="/assets/images/2026-01-16-depth-anything2-colors/starwars4_spaceship_depths.jpg" alt="Starwars4 spaceship depths" />
<em>Depth maps</em>
<br />
<br />
Overall, both the <strong>Large</strong> and the <strong>Base</strong> identified the objects and their depth well. The engines are visible in greater detail on the <strong>Large</strong> model. However, the <strong>Small</strong> model poorly distinguished the engines and incorrectly associated the satellite with the ship, even though the satellite was clearly located farther away.</p>

<p>Next image:</p>

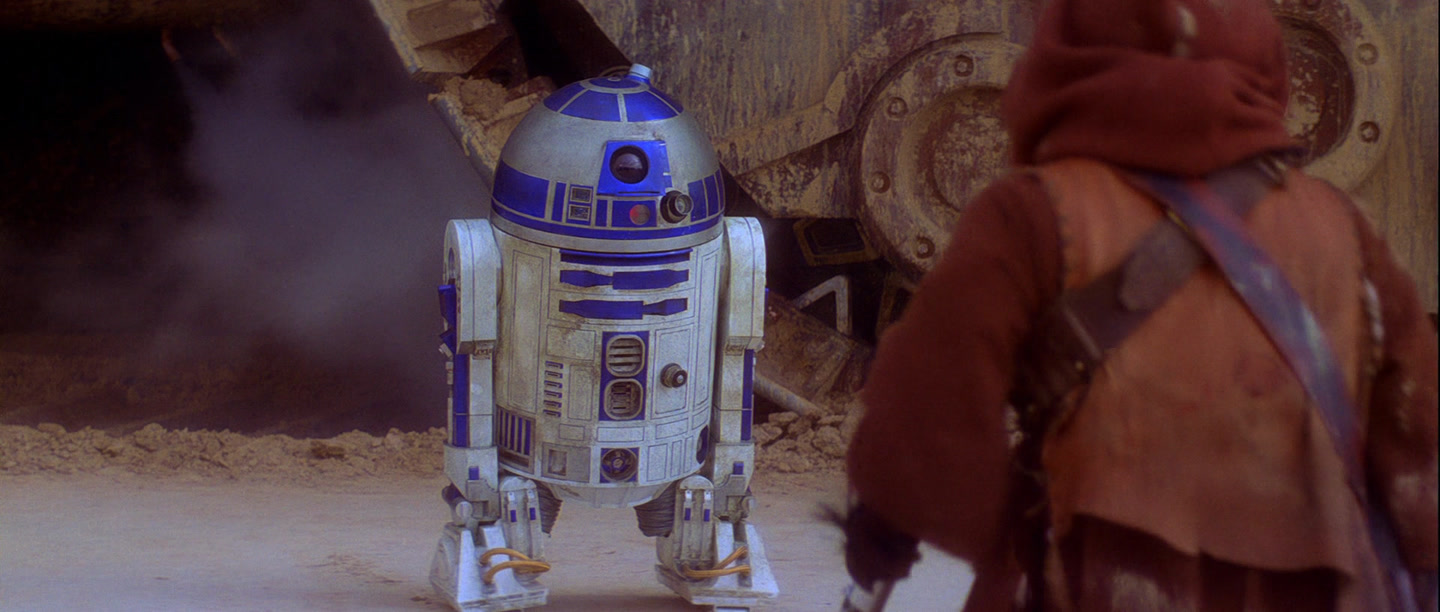
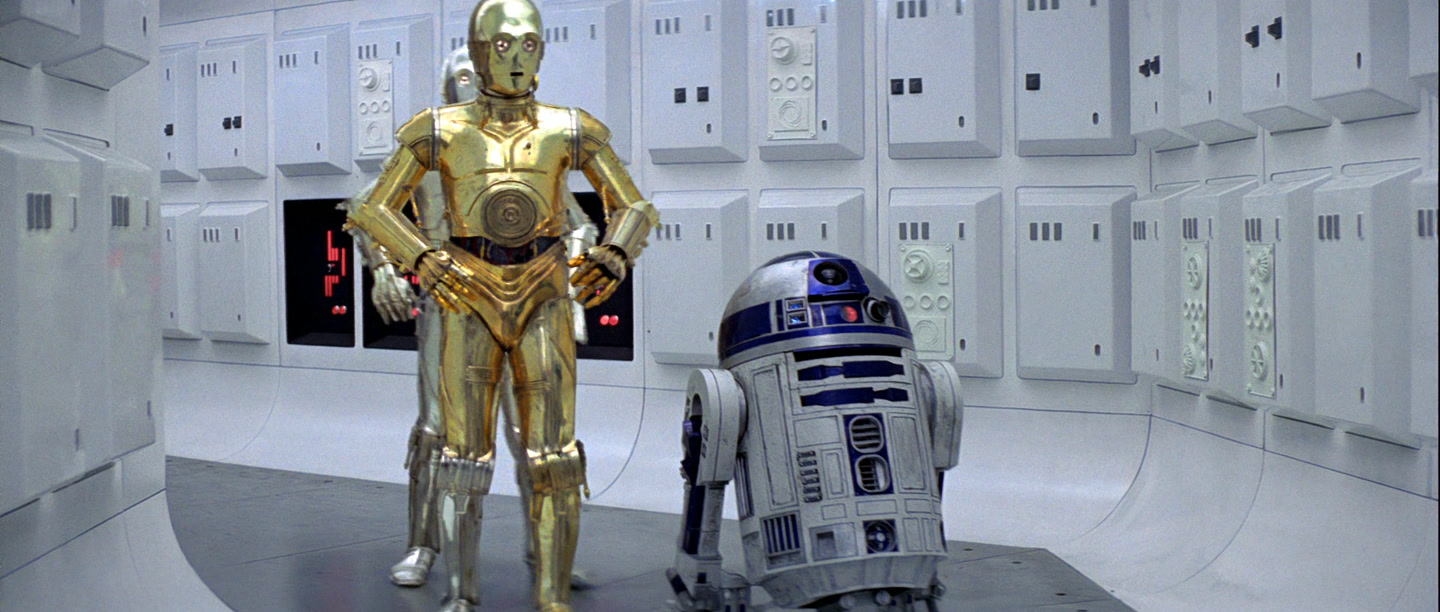
<p><img src="/assets/images/2026-01-16-depth-anything2-colors/starwars4_droids.jpg" alt="Starwars4 droids" />
<em>Source image</em>
<br />
<br />
<img src="/assets/images/2026-01-16-depth-anything2-colors/starwars4_droids_depths.jpg" alt="Starwars4 droids depths" />
<em>Depth maps</em>
<br />
<br />
Overall, all models performed well. On the <strong>Large</strong> and the <strong>Base</strong>, R2-D2 (the droid on the right) is closer to the camera, while on the <strong>Small</strong> he’s level with his friend on the left. It’s difficult to judge from this frame which is correct. The <strong>Large</strong> model better perceived the wall structure, with nearly all blocks clearly defined.</p>

<p>Next image:</p>

<p><img src="/assets/images/2026-01-16-depth-anything2-colors/starwars4_floor.jpg" alt="Starwars4 floor" />
<em>Source image</em>
<br />
<br />
<img src="/assets/images/2026-01-16-depth-anything2-colors/starwars4_floor_depths.jpg" alt="Starwars4 floor depths" />
<em>Depth maps</em>
<br />
<br />
The <strong>Large</strong> and the <strong>Base</strong> models performed almost identically, and both poorly defined the character on the left. However, the <strong>Small</strong> model accurately identified this character and defined the character on the right more sharply. The <strong>Small</strong> model won here.</p>

<p>Next image:</p>

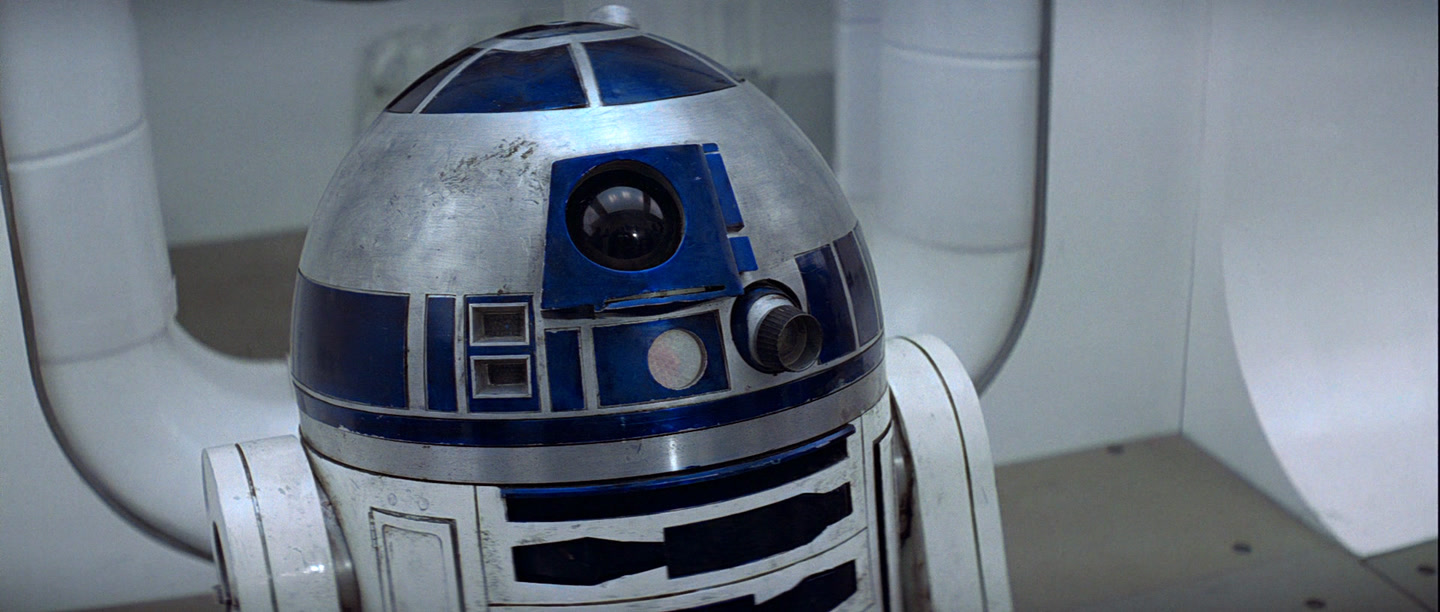
<p><img src="/assets/images/2026-01-16-depth-anything2-colors/starwars4_r2d2.jpg" alt="Starwars4 R2D2" />
<em>Source image</em>
<br />
<br />
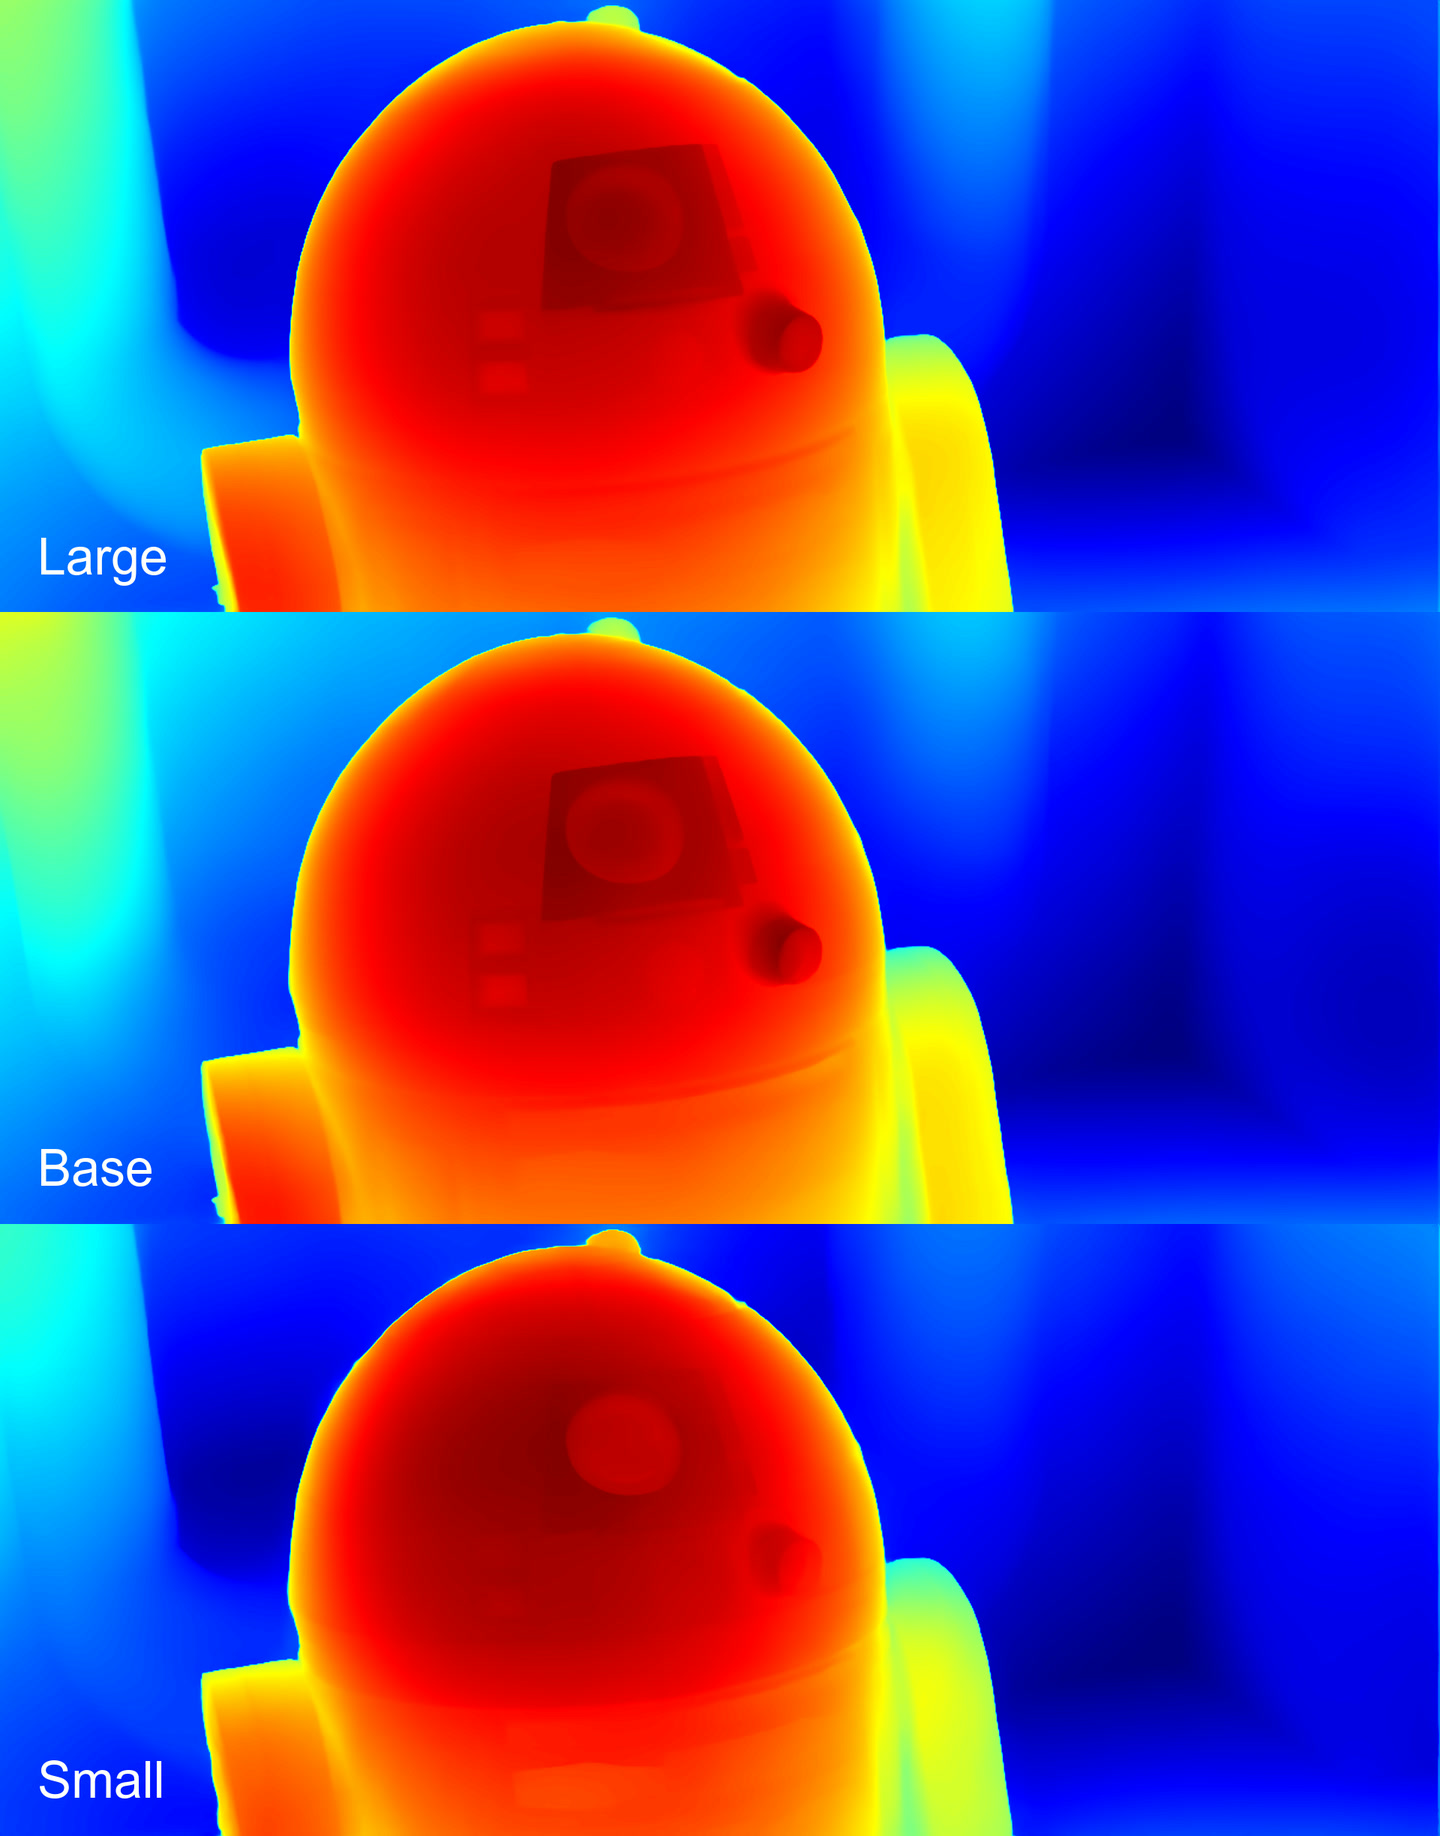
<img src="/assets/images/2026-01-16-depth-anything2-colors/starwars4_r2d2_depths.jpg" alt="Starwars4 R2D2 depths" />
<em>Depth maps</em>
<br />
<br />
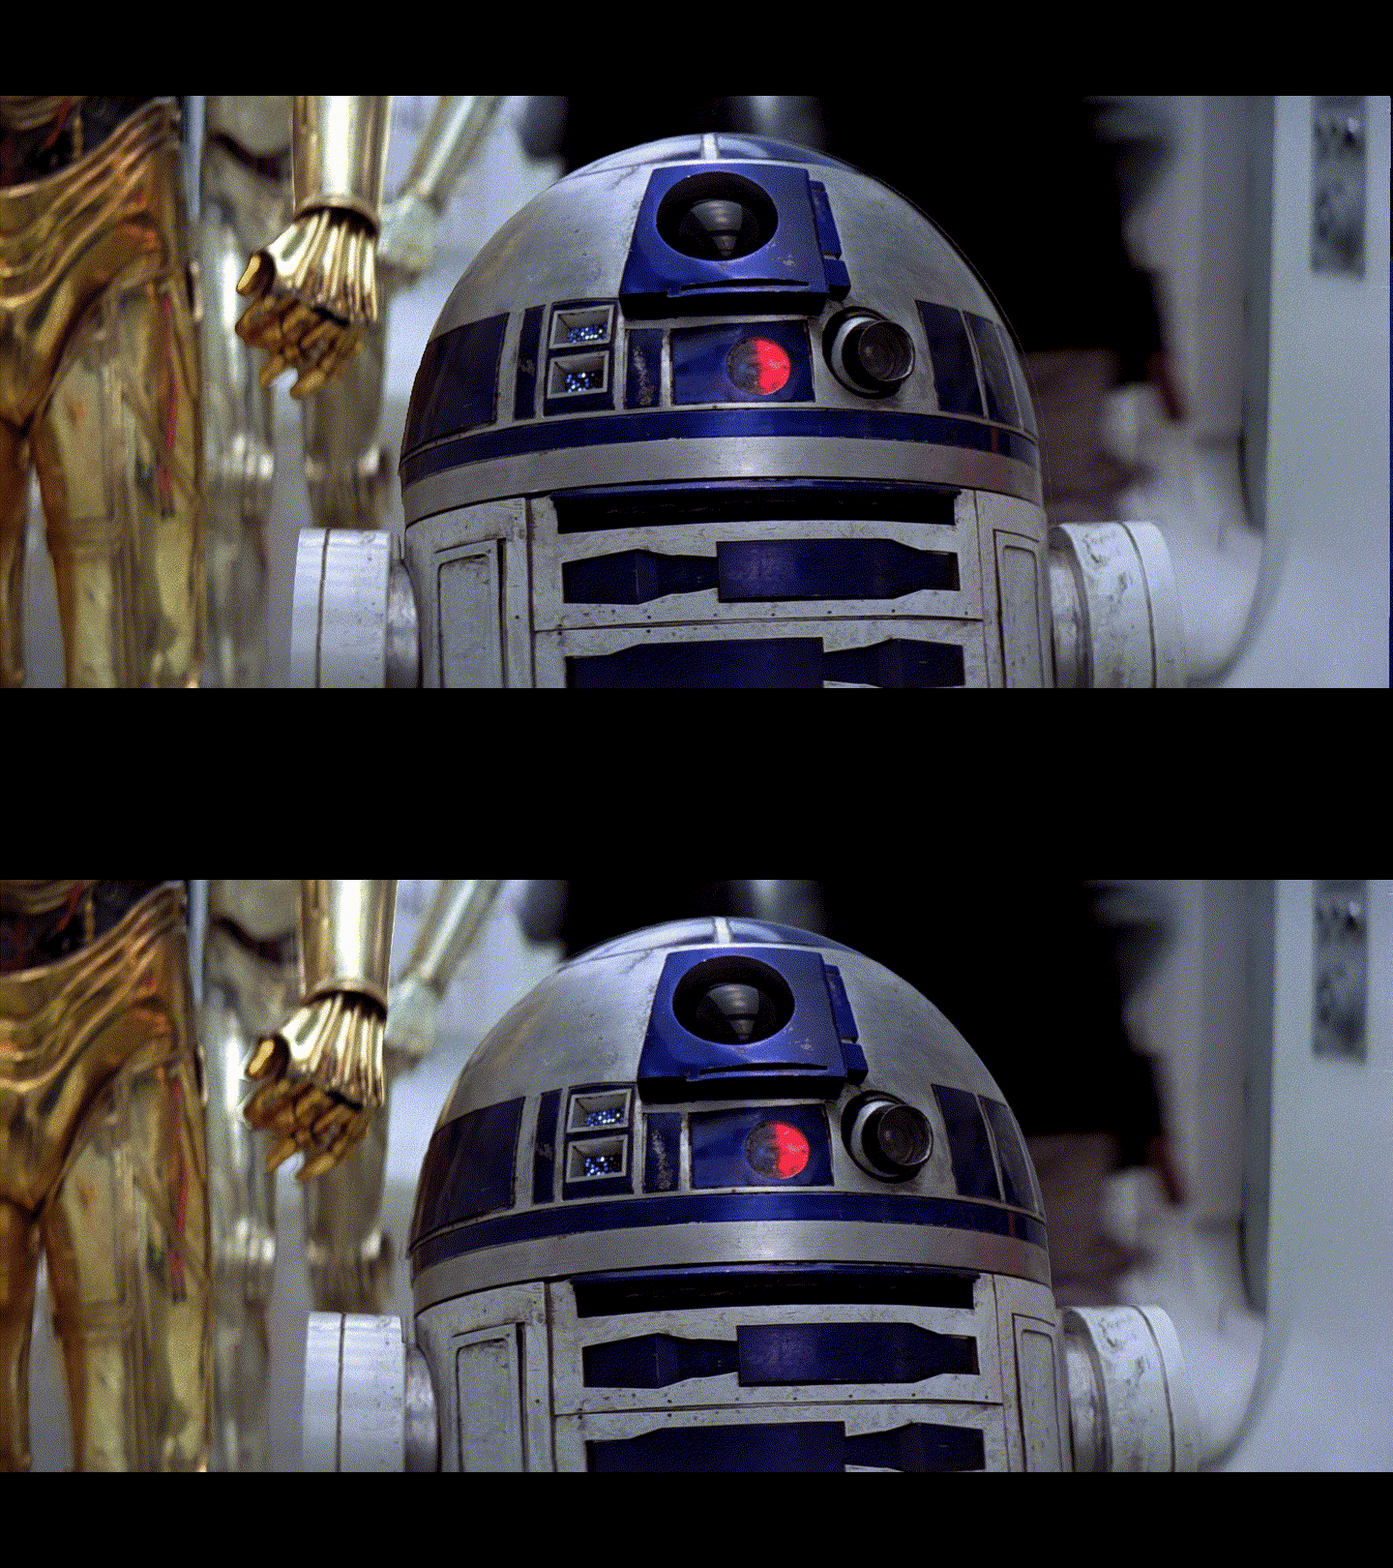
Here it’s strictly by rank - quality drops from the <strong>Large</strong> to the <strong>Small</strong>. However, the difference between the <strong>Large</strong> and the <strong>Base</strong> is not significant.</p>

<p>Next image:</p>

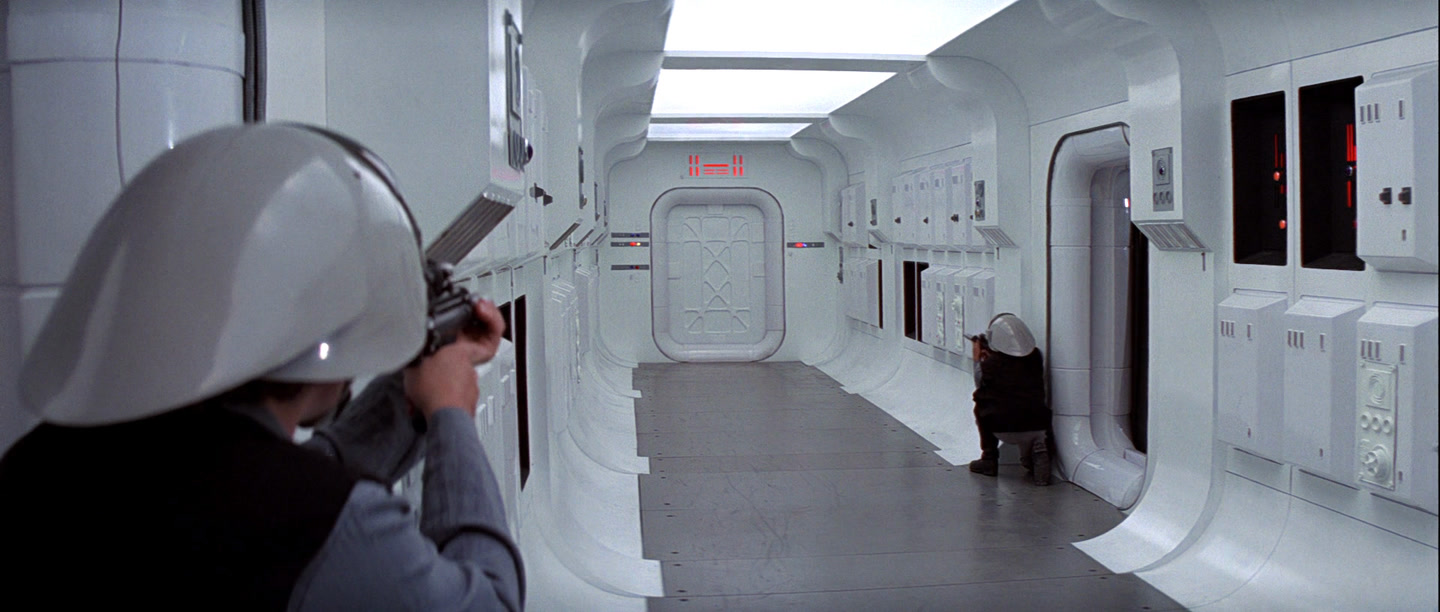
<p><img src="/assets/images/2026-01-16-depth-anything2-colors/starwars4_rebel.jpg" alt="Starwars4 an rebel" />
<em>Source image</em>
<br />
<br />
<img src="/assets/images/2026-01-16-depth-anything2-colors/starwars4_rebel_depths.jpg" alt="Starwars4 an rebel depths" />
<em>Depth maps</em>
<br />
<br />
The <strong>Large</strong> is the best. The <strong>Base</strong> barely distinguished the characters in the background, even the <strong>Small</strong> model identified them, though not as clearly as the <strong>Large</strong>.</p>

<p>Next image:</p>

<p><img src="/assets/images/2026-01-16-depth-anything2-colors/starwars4_r2d2_jawa.jpg" alt="Starwars4 R2D2 and an jawa" />
<em>Source image</em>
<br />
<br />
<img src="/assets/images/2026-01-16-depth-anything2-colors/starwars4_r2d2_jawa_depths.jpg" alt="Starwars4 R2D2 and an jawa depths" />
<em>Depth maps</em>
<br />
<br />
These results are very strange. The <strong>Base</strong> model failed to detect the character on the right. The <strong>Large</strong> model detected it but estimated its distance as greater than R2-D2 (the droid in the center). Only the <strong>Small</strong> model accurately determined the distances between all objects in the scene. Unfortunately, the <strong>Small</strong> model’s detail is noticeably worse</p>

<p>Next image:</p>

<p><img src="/assets/images/2026-01-16-depth-anything2-colors/starwars4_r2d2_floor.jpg" alt="Starwars4 R2D2 floor" />
<em>Source image</em>
<br />
<br />
<img src="/assets/images/2026-01-16-depth-anything2-colors/starwars4_r2d2_floor_depths.jpg" alt="Starwars4 R2D2 floor depths" />
<em>Depth maps</em>
<br />
<br />
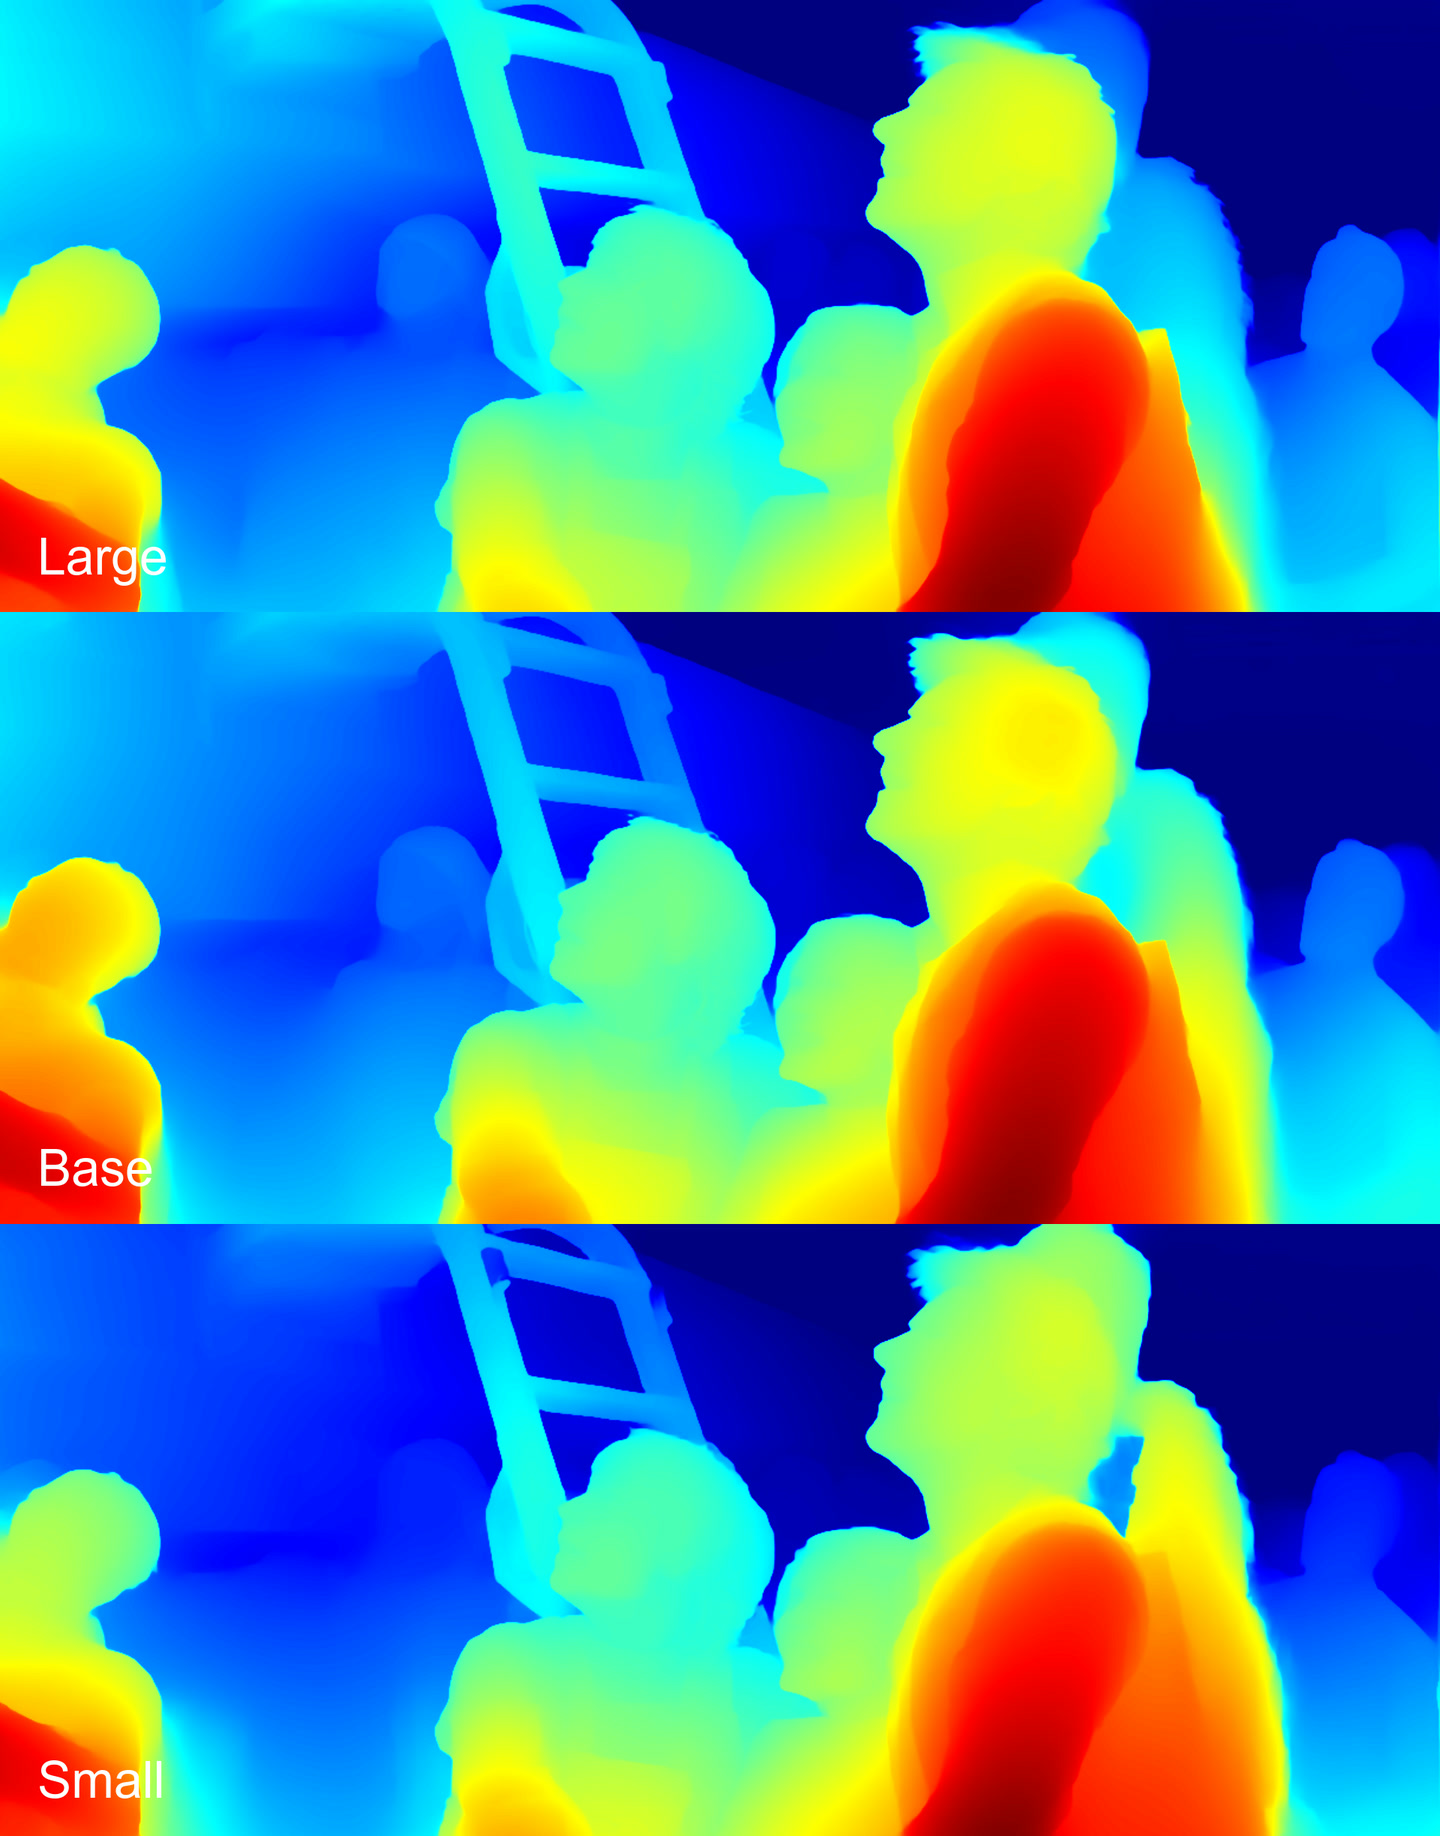
I really like this frame because the depth levels are clearly separated here. All models performed well. But on the <strong>Large</strong> model, our long-suffering R2-D2 is more noticeable. On the <strong>Small</strong> model, you can clearly see the blurry contours of scene elements, which is characteristic of this particular model.</p>

<p>Next image:</p>

<p><img src="/assets/images/2026-01-16-depth-anything2-colors/starwars4_falcon.jpg" alt="Starwars4 Falcon" />
<em>Source image</em>
<br />
<br />
<img src="/assets/images/2026-01-16-depth-anything2-colors/starwars4_falcon_depths.jpg" alt="Starwars4 Falcon depths" />
<em>Depth maps</em>
<br />
<br />
All models performed well. Except that the <strong>Large</strong> model did not clearly define Luke’s legs (the 3rd character from the left), though this happens very rarely with this model.</p>

<p>Next image:</p>

<p><img src="/assets/images/2026-01-16-depth-anything2-colors/starwars4_shipgun.jpg" alt="Starwars4 ship gun" />
<em>Source image</em>
<br />
<br />
<img src="/assets/images/2026-01-16-depth-anything2-colors/starwars4_shipgun_depths.jpg" alt="Starwars4 ship gun depths" />
<em>Depth maps</em>
<br />
<br />
The <strong>Base</strong> model didn’t detect the chair behind the character. The other two defined everything well.</p>

<p>Next image:</p>

<p><img src="/assets/images/2026-01-16-depth-anything2-colors/starwars4_luke.jpg" alt="Starwars4 Luke" />
<em>Source image</em>
<br />
<br />
<img src="/assets/images/2026-01-16-depth-anything2-colors/starwars4_luke_depths.jpg" alt="Starwars4 Luke depths" />
<em>Depth maps</em>
<br />
<br />
The <strong>Base</strong> and the <strong>Small</strong> models performed almost identically. The <strong>Large</strong> model detected more details, as is usually the case, especially noticeable in the character’s face.</p>

<p>Next image:</p>

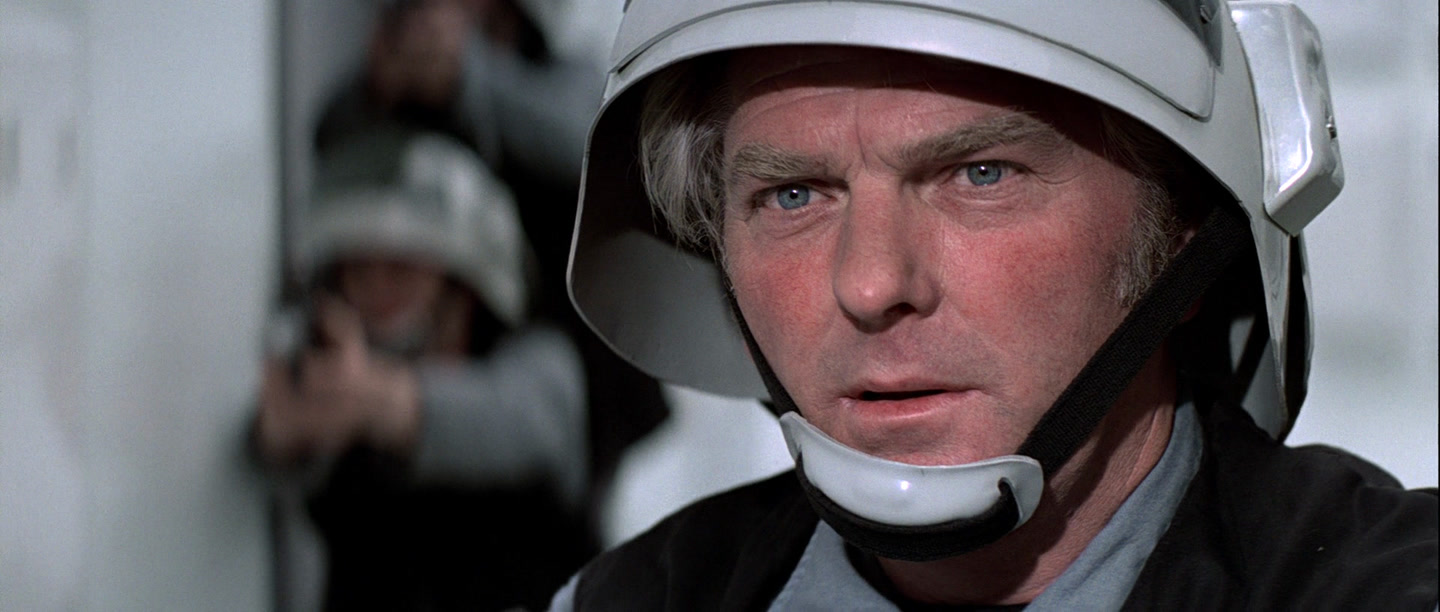
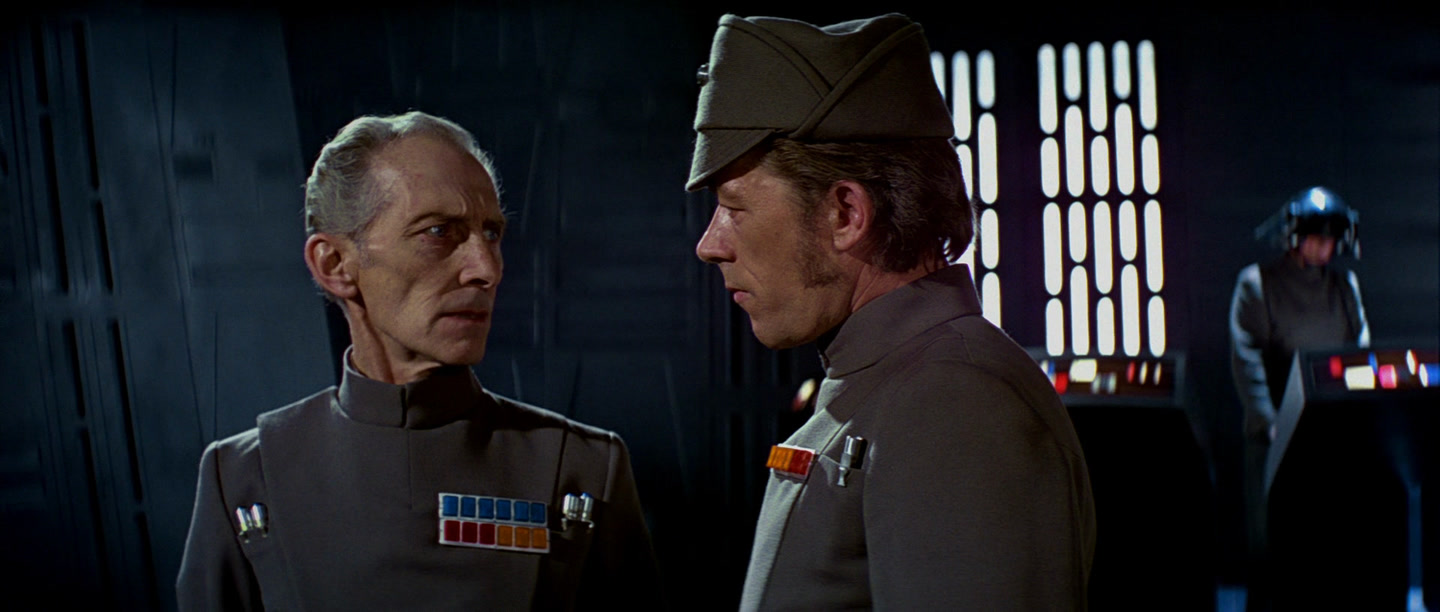
<p><img src="/assets/images/2026-01-16-depth-anything2-colors/starwars4_officers.jpg" alt="Starwars4 officers" />
<em>Source image</em>
<br />
<br />
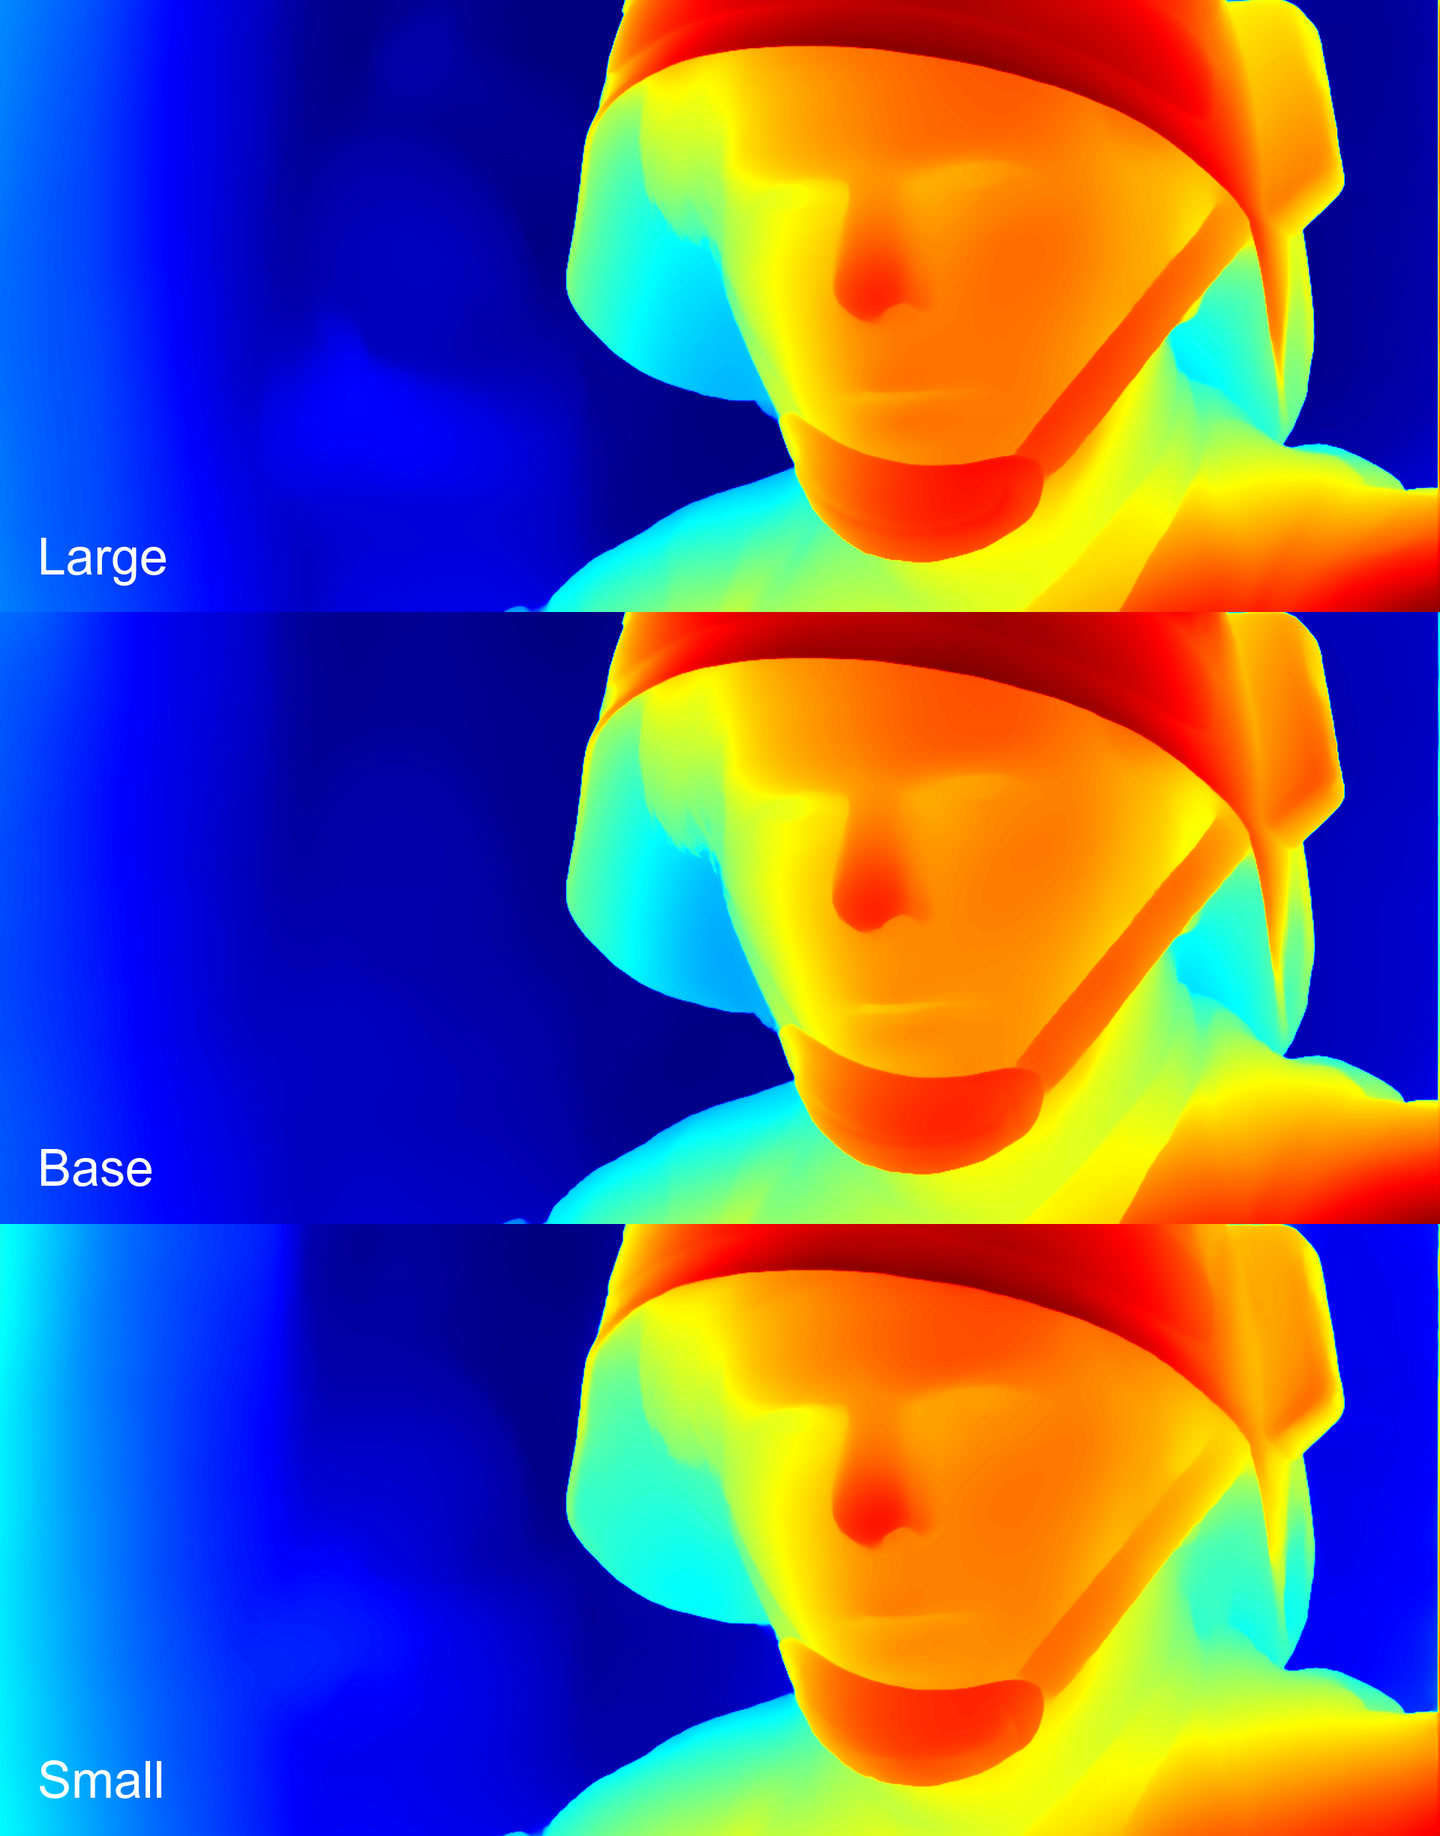
<img src="/assets/images/2026-01-16-depth-anything2-colors/starwars4_officers_depths.jpg" alt="Starwars4 officers depths" />
<em>Depth maps</em>
<br />
<br />
These results are practically identical to the previous frame.</p>

<p>Next image:</p>

<p><img src="/assets/images/2026-01-16-depth-anything2-colors/starwars4_rebels.jpg" alt="Starwars4 rebels" />
<em>Source image</em>
<br />
<br />
<img src="/assets/images/2026-01-16-depth-anything2-colors/starwars4_rebels_depths.jpg" alt="Starwars4 rebels depths" />
<em>Depth maps</em>
<br />
<br />
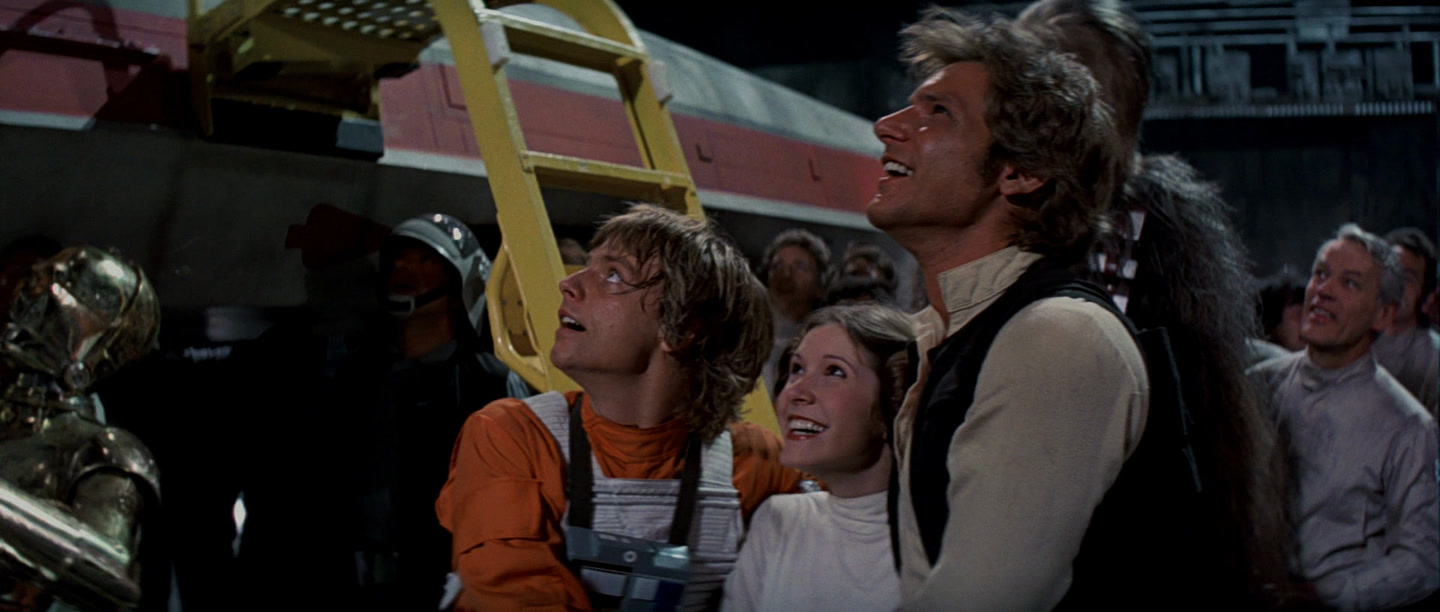
The <strong>Large</strong> and the <strong>Base</strong> models performed well, but for some reason on the <strong>Small</strong> model, Han Solo’s head almost merged into one with Chewbacca. Well, I suppose it’s friendship for the ages.</p>

<p>That’s probably enough.</p>

<h2 id="conclusion">Conclusion</h2>
<p>All Depth-Anything-V2 models are good. The <strong>Large</strong> is more accurate and detect more details, especially in the background. The <strong>Small</strong> is the lightest and fastest model (according to my measurements, about <strong>5 times</strong> faster than the <strong>Large</strong>), but significantly less detailed and poorly defines object contours. The <strong>Base</strong> model doesn’t lag far behind The <strong>Large</strong> in quality, but sometimes makes mistakes with object distances, while being about <strong>2.5 times</strong> faster than the <strong>Large</strong>. Once again, there’s the approximate processing time for a <strong>2-hour</strong> film from the main article:</p>

<p>The <strong>Large</strong> model: ~32 hours.<br />
The <strong>Base</strong> model: ~13 hours.<br />
The <strong>Small</strong> model: ~6 hours.</p>

<p>By the way, why Depth-Anything-V2 specifically? There’s no particular preference, really - it’s just the model that came to hand. More precisely, I first tested the Depth-Anything-V1, and then the Depth-Anything-V2; the latter met my current needs and produced very satisfactory results.
As I wrote above, the Depth-Anything-V2 page also mentions a <strong>Giant</strong> model with <strong>1.3B</strong> parameters. I’ve been waiting for it for several months now and it’s unknown whether it will be released at all. Perhaps by that time, higher quality models from other developers will appear - we’ll keep watching.</p>

<p>Thank you for your attention.</p>

<h2 id="additional-materials">Additional materials</h2>
<ul>
  <li>See the <a href="https://peterplv.github.io/2026/01/13/make-anything-stereo3d">main article</a> about how to use Depth-Anything-V2 to create stereoscopic 3D</li>
  <li>Link to Google Drive with <a href="https://drive.google.com/drive/folders/16iN8W5RkV-THkJDGEe31LObv9GrxyMev">all images</a> from this article</li>
</ul>]]></content><author><name></name></author><summary type="html"><![CDATA[Let’s see what we have here This article reviews the Depth-Anything-V2 models and serves as a companion to the article on how to create stereoscopic 3D video from any source 2D. Here we’ll compare the quality of depth maps obtained from all available models - Large, Base, and Small. There will be many images and minimal text. For clarity, the depth maps are colorized (COLORMAP_JET). The scale ranges from dark red (near objects) to dark blue (far objects). Brief overview of the models: Large: 335.3M parameters, size ~1280MB. Base: 97.5M parameters, size ~372MB. Small: 24.8M parameters, size ~95MB. The Depth-Anything-V2 page also mentions a Giant model with 1.3B parameters, but it’s not yet available for download. As a reminder from the main article, here’s a speed comparison for processing a test set of 100 frames for each model (running in 2 threads): The Large: 1 minute 9 seconds, maximum VRAM usage (excluding reserved memory, here and throughout): 3994.97 MB. The Base: 24.47 seconds, maximum VRAM usage: 2415.44 MB. The Small: 11.59 seconds, maximum VRAM usage: 1134.84 MB. Let’s take the following as axioms: The Large model generally works more accurately, sees more objects and details, and defines object contours more sharply. The Base model is on average worse than Large, but often not significantly. It usually sees fewer objects and details. The Small model sees the fewest details and doesn’t define object contours clearly. Now let’s look at examples. Source image Depth maps Overall, both the Large and the Base identified the objects and their depth well. The engines are visible in greater detail on the Large model. However, the Small model poorly distinguished the engines and incorrectly associated the satellite with the ship, even though the satellite was clearly located farther away. Next image: Source image Depth maps Overall, all models performed well. On the Large and the Base, R2-D2 (the droid on the right) is closer to the camera, while on the Small he’s level with his friend on the left. It’s difficult to judge from this frame which is correct. The Large model better perceived the wall structure, with nearly all blocks clearly defined. Next image: Source image Depth maps The Large and the Base models performed almost identically, and both poorly defined the character on the left. However, the Small model accurately identified this character and defined the character on the right more sharply. The Small model won here. Next image: Source image Depth maps Here it’s strictly by rank - quality drops from the Large to the Small. However, the difference between the Large and the Base is not significant. Next image: Source image Depth maps The Large is the best. The Base barely distinguished the characters in the background, even the Small model identified them, though not as clearly as the Large. Next image: Source image Depth maps These results are very strange. The Base model failed to detect the character on the right. The Large model detected it but estimated its distance as greater than R2-D2 (the droid in the center). Only the Small model accurately determined the distances between all objects in the scene. Unfortunately, the Small model’s detail is noticeably worse Next image: Source image Depth maps I really like this frame because the depth levels are clearly separated here. All models performed well. But on the Large model, our long-suffering R2-D2 is more noticeable. On the Small model, you can clearly see the blurry contours of scene elements, which is characteristic of this particular model. Next image: Source image Depth maps All models performed well. Except that the Large model did not clearly define Luke’s legs (the 3rd character from the left), though this happens very rarely with this model. Next image: Source image Depth maps The Base model didn’t detect the chair behind the character. The other two defined everything well. Next image: Source image Depth maps The Base and the Small models performed almost identically. The Large model detected more details, as is usually the case, especially noticeable in the character’s face. Next image: Source image Depth maps These results are practically identical to the previous frame. Next image: Source image Depth maps The Large and the Base models performed well, but for some reason on the Small model, Han Solo’s head almost merged into one with Chewbacca. Well, I suppose it’s friendship for the ages. That’s probably enough. Conclusion All Depth-Anything-V2 models are good. The Large is more accurate and detect more details, especially in the background. The Small is the lightest and fastest model (according to my measurements, about 5 times faster than the Large), but significantly less detailed and poorly defines object contours. The Base model doesn’t lag far behind The Large in quality, but sometimes makes mistakes with object distances, while being about 2.5 times faster than the Large. Once again, there’s the approximate processing time for a 2-hour film from the main article: The Large model: ~32 hours. The Base model: ~13 hours. The Small model: ~6 hours. By the way, why Depth-Anything-V2 specifically? There’s no particular preference, really - it’s just the model that came to hand. More precisely, I first tested the Depth-Anything-V1, and then the Depth-Anything-V2; the latter met my current needs and produced very satisfactory results. As I wrote above, the Depth-Anything-V2 page also mentions a Giant model with 1.3B parameters. I’ve been waiting for it for several months now and it’s unknown whether it will be released at all. Perhaps by that time, higher quality models from other developers will appear - we’ll keep watching. Thank you for your attention. Additional materials See the main article about how to use Depth-Anything-V2 to create stereoscopic 3D Link to Google Drive with all images from this article]]></summary></entry><entry><title type="html">Converting 2D Video to 3D with Neural Networks and Parallax (Script)</title><link href="https://peterplv.github.io/2026/01/15/stereo3d-script" rel="alternate" type="text/html" title="Converting 2D Video to 3D with Neural Networks and Parallax (Script)" /><published>2026-01-15T17:27:00+03:00</published><updated>2026-01-15T17:27:00+03:00</updated><id>https://peterplv.github.io/2026/01/15/stereo3d-script</id><content type="html" xml:base="https://peterplv.github.io/2026/01/15/stereo3d-script"><![CDATA[<p><img src="/assets/images/2026-01-15-stereo3d-script/starwars4_r2d2_3d_title.gif" alt="R2-D2 in 3D" />
<em>This is the result of the 2D to 3D conversion we will obtain</em>
<br />
<br />
This article is a continuation of the main article:<br />
<a href="https://peterplv.github.io/2026/01/13/make-anything-stereo3d">How to Make 3D Version of Any Movie Using DepthAnythingV2 and Parallax (StarWars4 as Example)</a></p>

<p>I recommend reading the initial article first, as it contains all the key details: the core idea of the algorithm, required libraries, the initial scripts, and a description of their parameters. It also includes examples of processed images and links to finished 3D videos (a StarWars4 clip), including versions for VR. This article is a continuation; it presents an improved script and commentary on it. Below, other solutions that can be used for converting video from 2D to 3D are also discussed.</p>

<details>
  <summary>New script:</summary>

  <div class="language-python highlighter-rouge"><div class="highlight"><pre class="highlight"><code><span class="kn">import</span> <span class="nn">os</span>
<span class="kn">import</span> <span class="nn">subprocess</span>
<span class="kn">from</span> <span class="nn">concurrent.futures</span> <span class="kn">import</span> <span class="n">ThreadPoolExecutor</span><span class="p">,</span> <span class="n">wait</span><span class="p">,</span> <span class="n">FIRST_COMPLETED</span>
<span class="kn">from</span> <span class="nn">multiprocessing</span> <span class="kn">import</span> <span class="n">Value</span>
<span class="kn">import</span> <span class="nn">cv2</span>
<span class="kn">import</span> <span class="nn">torch</span>
<span class="kn">import</span> <span class="nn">numpy</span> <span class="k">as</span> <span class="n">np</span>

<span class="kn">from</span> <span class="nn">depth_anything_v2.dpt</span> <span class="kn">import</span> <span class="n">DepthAnythingV2</span>


<span class="c1"># GENERAL OPTIONS
# Path to the folder with depth generation models
</span><span class="n">depth_models_path</span> <span class="o">=</span> <span class="s">"/home/user/DepthAnythingV2/models"</span>

<span class="c1"># Folder with source frames
</span><span class="n">video_file_path</span> <span class="o">=</span> <span class="s">"/home/user/video.mkv"</span>
<span class="n">video_file_name</span> <span class="o">=</span> <span class="n">os</span><span class="p">.</span><span class="n">path</span><span class="p">.</span><span class="n">splitext</span><span class="p">(</span><span class="n">os</span><span class="p">.</span><span class="n">path</span><span class="p">.</span><span class="n">basename</span><span class="p">(</span><span class="n">video_file_path</span><span class="p">))[</span><span class="mi">0</span><span class="p">]</span>

<span class="c1"># Folder for exporting frames and folder for final 3D frames
</span><span class="n">frames_path</span> <span class="o">=</span> <span class="n">os</span><span class="p">.</span><span class="n">path</span><span class="p">.</span><span class="n">join</span><span class="p">(</span><span class="n">os</span><span class="p">.</span><span class="n">path</span><span class="p">.</span><span class="n">dirname</span><span class="p">(</span><span class="n">video_file_path</span><span class="p">),</span> <span class="sa">f</span><span class="s">"</span><span class="si">{</span><span class="n">video_file_name</span><span class="si">}</span><span class="s">_frames"</span><span class="p">)</span>
<span class="n">images3d_path</span> <span class="o">=</span> <span class="n">os</span><span class="p">.</span><span class="n">path</span><span class="p">.</span><span class="n">join</span><span class="p">(</span><span class="n">os</span><span class="p">.</span><span class="n">path</span><span class="p">.</span><span class="n">dirname</span><span class="p">(</span><span class="n">video_file_path</span><span class="p">),</span> <span class="sa">f</span><span class="s">"</span><span class="si">{</span><span class="n">video_file_name</span><span class="si">}</span><span class="s">_3d"</span><span class="p">)</span>
<span class="n">os</span><span class="p">.</span><span class="n">makedirs</span><span class="p">(</span><span class="n">frames_path</span><span class="p">,</span> <span class="n">exist_ok</span><span class="o">=</span><span class="bp">True</span><span class="p">)</span>
<span class="n">os</span><span class="p">.</span><span class="n">makedirs</span><span class="p">(</span><span class="n">images3d_path</span><span class="p">,</span> <span class="n">exist_ok</span><span class="o">=</span><span class="bp">True</span><span class="p">)</span>

<span class="n">frame_counter</span> <span class="o">=</span> <span class="n">Value</span><span class="p">(</span><span class="s">'i'</span><span class="p">,</span> <span class="mi">0</span><span class="p">)</span> <span class="c1"># Counter for naming frames
</span>
<span class="n">chunk_size</span> <span class="o">=</span> <span class="mi">5000</span>  <span class="c1"># Number of files per thread
</span><span class="n">max_threads</span> <span class="o">=</span> <span class="mi">3</span> <span class="c1"># Maximum streams
</span>
<span class="c1"># Computing device
</span><span class="n">device</span> <span class="o">=</span> <span class="n">torch</span><span class="p">.</span><span class="n">device</span><span class="p">(</span><span class="s">'cuda'</span><span class="p">)</span>

<span class="c1"># 3D OPTIONS
</span><span class="n">PARALLAX_SCALE</span> <span class="o">=</span> <span class="mi">15</span>  <span class="c1"># Recommended 10 to 20
</span><span class="n">PARALLAX_METHOD</span> <span class="o">=</span> <span class="mi">1</span>  <span class="c1"># 1 or 2
</span><span class="n">INPAINT_RADIUS</span>  <span class="o">=</span> <span class="mi">2</span>  <span class="c1"># For PARALLAX_METHOD = 2 only, recommended 2 to 5, optimum value 2-3
</span><span class="n">INTERPOLATION_TYPE</span> <span class="o">=</span> <span class="n">cv2</span><span class="p">.</span><span class="n">INTER_LINEAR</span>  <span class="c1"># INTER_NEAREST, INTER_AREA, INTER_LINEAR, INTER_CUBIC, INTER_LANCZOS4
</span><span class="n">TYPE3D</span> <span class="o">=</span> <span class="s">"FOU"</span>  <span class="c1"># HSBS, FSBS, HOU, FOU
</span><span class="n">LEFT_RIGHT</span> <span class="o">=</span> <span class="s">"LEFT"</span>  <span class="c1"># LEFT or RIGHT
</span>
<span class="c1"># 0 - if there's no need to change frame size
</span><span class="n">new_width</span>  <span class="o">=</span> <span class="mi">1920</span>
<span class="n">new_height</span> <span class="o">=</span> <span class="mi">1080</span>

<span class="n">depth_models_config</span> <span class="o">=</span> <span class="p">{</span>
        <span class="s">'vits'</span><span class="p">:</span> <span class="p">{</span><span class="s">'encoder'</span><span class="p">:</span> <span class="s">'vits'</span><span class="p">,</span> <span class="s">'features'</span><span class="p">:</span> <span class="mi">64</span><span class="p">,</span> <span class="s">'out_channels'</span><span class="p">:</span> <span class="p">[</span><span class="mi">48</span><span class="p">,</span> <span class="mi">96</span><span class="p">,</span> <span class="mi">192</span><span class="p">,</span> <span class="mi">384</span><span class="p">]},</span>
        <span class="s">'vitb'</span><span class="p">:</span> <span class="p">{</span><span class="s">'encoder'</span><span class="p">:</span> <span class="s">'vitb'</span><span class="p">,</span> <span class="s">'features'</span><span class="p">:</span> <span class="mi">128</span><span class="p">,</span> <span class="s">'out_channels'</span><span class="p">:</span> <span class="p">[</span><span class="mi">96</span><span class="p">,</span> <span class="mi">192</span><span class="p">,</span> <span class="mi">384</span><span class="p">,</span> <span class="mi">768</span><span class="p">]},</span>
        <span class="s">'vitl'</span><span class="p">:</span> <span class="p">{</span><span class="s">'encoder'</span><span class="p">:</span> <span class="s">'vitl'</span><span class="p">,</span> <span class="s">'features'</span><span class="p">:</span> <span class="mi">256</span><span class="p">,</span> <span class="s">'out_channels'</span><span class="p">:</span> <span class="p">[</span><span class="mi">256</span><span class="p">,</span> <span class="mi">512</span><span class="p">,</span> <span class="mi">1024</span><span class="p">,</span> <span class="mi">1024</span><span class="p">]}</span>
<span class="p">}</span>

<span class="c1"># Selecting the DepthAnythingV2 model: vits - Small, vitb - Base, vitl - Large
</span><span class="n">encoder</span> <span class="o">=</span> <span class="s">"vitl"</span> <span class="c1"># vits, vitb, vitl
</span>
<span class="n">model_depth_current</span> <span class="o">=</span> <span class="n">os</span><span class="p">.</span><span class="n">path</span><span class="p">.</span><span class="n">join</span><span class="p">(</span><span class="n">depth_models_path</span><span class="p">,</span> <span class="sa">f</span><span class="s">'depth_anything_v2_</span><span class="si">{</span><span class="n">encoder</span><span class="si">}</span><span class="s">.pth'</span><span class="p">)</span>
<span class="n">model_depth</span> <span class="o">=</span> <span class="n">DepthAnythingV2</span><span class="p">(</span><span class="o">**</span><span class="n">depth_models_config</span><span class="p">[</span><span class="n">encoder</span><span class="p">])</span>
<span class="n">model_depth</span><span class="p">.</span><span class="n">load_state_dict</span><span class="p">(</span><span class="n">torch</span><span class="p">.</span><span class="n">load</span><span class="p">(</span><span class="n">model_depth_current</span><span class="p">,</span> <span class="n">weights_only</span><span class="o">=</span><span class="bp">True</span><span class="p">,</span> <span class="n">map_location</span><span class="o">=</span><span class="n">device</span><span class="p">))</span>
<span class="n">model_depth</span> <span class="o">=</span> <span class="n">model_depth</span><span class="p">.</span><span class="n">to</span><span class="p">(</span><span class="n">device</span><span class="p">).</span><span class="nb">eval</span><span class="p">()</span>
 

<span class="k">def</span> <span class="nf">image_size_correction</span><span class="p">(</span><span class="n">current_height</span><span class="p">,</span> <span class="n">current_width</span><span class="p">,</span> <span class="n">left_image</span><span class="p">,</span> <span class="n">right_image</span><span class="p">):</span>
    <span class="s">''' Image size correction if new_width and new_height are set '''</span>
    
    <span class="c1"># Calculate offsets for centering
</span>    <span class="n">top</span> <span class="o">=</span> <span class="p">(</span><span class="n">new_height</span> <span class="o">-</span> <span class="n">current_height</span><span class="p">)</span> <span class="o">//</span> <span class="mi">2</span>
    <span class="n">left</span> <span class="o">=</span> <span class="p">(</span><span class="n">new_width</span> <span class="o">-</span> <span class="n">current_width</span><span class="p">)</span> <span class="o">//</span> <span class="mi">2</span>
    
    <span class="c1"># Create a black canvas of the desired size
</span>    <span class="n">new_left_image</span>  <span class="o">=</span> <span class="n">np</span><span class="p">.</span><span class="n">zeros</span><span class="p">((</span><span class="n">new_height</span><span class="p">,</span> <span class="n">new_width</span><span class="p">,</span> <span class="mi">3</span><span class="p">),</span> <span class="n">dtype</span><span class="o">=</span><span class="n">np</span><span class="p">.</span><span class="n">uint8</span><span class="p">)</span>
    <span class="n">new_right_image</span> <span class="o">=</span> <span class="n">np</span><span class="p">.</span><span class="n">zeros</span><span class="p">((</span><span class="n">new_height</span><span class="p">,</span> <span class="n">new_width</span><span class="p">,</span> <span class="mi">3</span><span class="p">),</span> <span class="n">dtype</span><span class="o">=</span><span class="n">np</span><span class="p">.</span><span class="n">uint8</span><span class="p">)</span>
    
    <span class="c1"># Placing the image on a black background
</span>    <span class="n">new_left_image</span><span class="p">[</span><span class="n">top</span><span class="p">:</span><span class="n">top</span> <span class="o">+</span> <span class="n">current_height</span><span class="p">,</span> <span class="n">left</span><span class="p">:</span><span class="n">left</span> <span class="o">+</span> <span class="n">current_width</span><span class="p">]</span> <span class="o">=</span> <span class="n">left_image</span>
    <span class="n">new_right_image</span><span class="p">[</span><span class="n">top</span><span class="p">:</span><span class="n">top</span> <span class="o">+</span> <span class="n">current_height</span><span class="p">,</span> <span class="n">left</span><span class="p">:</span><span class="n">left</span> <span class="o">+</span> <span class="n">current_width</span><span class="p">]</span> <span class="o">=</span> <span class="n">right_image</span>
    
    <span class="k">return</span> <span class="n">new_left_image</span><span class="p">,</span> <span class="n">new_right_image</span>
            
<span class="k">def</span> <span class="nf">depth_processing</span><span class="p">(</span><span class="n">image</span><span class="p">):</span>
    <span class="s">''' Creating a depth map for an image '''</span>

    <span class="c1"># Depth calculation
</span>    <span class="k">with</span> <span class="n">torch</span><span class="p">.</span><span class="n">no_grad</span><span class="p">():</span>
        <span class="n">depth</span> <span class="o">=</span> <span class="n">model_depth</span><span class="p">.</span><span class="n">infer_image</span><span class="p">(</span><span class="n">image</span><span class="p">)</span>
        
    <span class="c1"># Normalization
</span>    <span class="n">depth_normalized</span> <span class="o">=</span> <span class="n">depth</span> <span class="o">/</span> <span class="n">depth</span><span class="p">.</span><span class="nb">max</span><span class="p">()</span>

    <span class="k">return</span> <span class="n">depth_normalized</span>

<span class="k">def</span> <span class="nf">image3d_processing_method1</span><span class="p">(</span><span class="n">image</span><span class="p">,</span> <span class="n">depth</span><span class="p">,</span> <span class="n">height</span><span class="p">,</span> <span class="n">width</span><span class="p">):</span>
    <span class="s">''' The function of creating a stereo pair based on the source image and depth map.
        Method1: faster, contours smoother, but may be less accurate
    '''</span>
    
    <span class="c1"># Creating parallax
</span>    <span class="n">parallax</span> <span class="o">=</span> <span class="n">depth</span> <span class="o">*</span> <span class="n">PARALLAX_SCALE</span>

    <span class="c1"># Pixel coordinates
</span>    <span class="n">x</span><span class="p">,</span> <span class="n">y</span> <span class="o">=</span> <span class="n">np</span><span class="p">.</span><span class="n">meshgrid</span><span class="p">(</span><span class="n">np</span><span class="p">.</span><span class="n">arange</span><span class="p">(</span><span class="n">width</span><span class="p">,</span> <span class="n">dtype</span><span class="o">=</span><span class="n">np</span><span class="p">.</span><span class="n">float32</span><span class="p">),</span> <span class="n">np</span><span class="p">.</span><span class="n">arange</span><span class="p">(</span><span class="n">height</span><span class="p">,</span> <span class="n">dtype</span><span class="o">=</span><span class="n">np</span><span class="p">.</span><span class="n">float32</span><span class="p">))</span>

    <span class="c1"># Calculation of offsets
</span>    <span class="n">shift_left</span>  <span class="o">=</span> <span class="n">np</span><span class="p">.</span><span class="n">clip</span><span class="p">(</span><span class="n">x</span> <span class="o">-</span> <span class="n">parallax</span><span class="p">,</span> <span class="mi">0</span><span class="p">,</span> <span class="n">width</span> <span class="o">-</span> <span class="mi">1</span><span class="p">)</span>
    <span class="n">shift_right</span> <span class="o">=</span> <span class="n">np</span><span class="p">.</span><span class="n">clip</span><span class="p">(</span><span class="n">x</span> <span class="o">+</span> <span class="n">parallax</span><span class="p">,</span> <span class="mi">0</span><span class="p">,</span> <span class="n">width</span> <span class="o">-</span> <span class="mi">1</span><span class="p">)</span>

    <span class="c1"># Applying offsets with cv2.remap
</span>    <span class="n">left_image</span>  <span class="o">=</span> <span class="n">cv2</span><span class="p">.</span><span class="n">remap</span><span class="p">(</span><span class="n">image</span><span class="p">,</span> <span class="n">shift_left</span><span class="p">,</span>  <span class="n">y</span><span class="p">,</span> <span class="n">interpolation</span><span class="o">=</span><span class="n">INTERPOLATION_TYPE</span><span class="p">)</span>
    <span class="n">right_image</span> <span class="o">=</span> <span class="n">cv2</span><span class="p">.</span><span class="n">remap</span><span class="p">(</span><span class="n">image</span><span class="p">,</span> <span class="n">shift_right</span><span class="p">,</span> <span class="n">y</span><span class="p">,</span> <span class="n">interpolation</span><span class="o">=</span><span class="n">INTERPOLATION_TYPE</span><span class="p">)</span>
    
    <span class="k">return</span> <span class="n">left_image</span><span class="p">,</span> <span class="n">right_image</span>

<span class="k">def</span> <span class="nf">image3d_processing_method2</span><span class="p">(</span><span class="n">image</span><span class="p">,</span> <span class="n">depth</span><span class="p">,</span> <span class="n">height</span><span class="p">,</span> <span class="n">width</span><span class="p">):</span>
    <span class="s">''' The function of creating a stereo pair based on the source image and depth map.
        Method2: slightly slower than the first method, but can be more accurate
    '''</span>
    
    <span class="c1"># Calculating the value for parallax
</span>    <span class="n">parallax</span> <span class="o">=</span> <span class="n">depth</span> <span class="o">*</span> <span class="n">PARALLAX_SCALE</span>
    
    <span class="c1"># Parallax rounding and conversion to int32
</span>    <span class="n">shift</span> <span class="o">=</span> <span class="n">np</span><span class="p">.</span><span class="nb">round</span><span class="p">(</span><span class="n">parallax</span><span class="p">).</span><span class="n">astype</span><span class="p">(</span><span class="n">np</span><span class="p">.</span><span class="n">int32</span><span class="p">)</span>

    <span class="c1"># Grid coordinates
</span>    <span class="n">y</span><span class="p">,</span> <span class="n">x</span> <span class="o">=</span> <span class="n">np</span><span class="p">.</span><span class="n">indices</span><span class="p">((</span><span class="n">height</span><span class="p">,</span> <span class="n">width</span><span class="p">),</span> <span class="n">dtype</span><span class="o">=</span><span class="n">np</span><span class="p">.</span><span class="n">int32</span><span class="p">)</span>

    <span class="c1"># Image preparation
</span>    <span class="n">left_image</span>  <span class="o">=</span> <span class="n">np</span><span class="p">.</span><span class="n">zeros_like</span><span class="p">(</span><span class="n">image</span><span class="p">)</span>
    <span class="n">right_image</span> <span class="o">=</span> <span class="n">np</span><span class="p">.</span><span class="n">zeros_like</span><span class="p">(</span><span class="n">image</span><span class="p">)</span>

    <span class="c1"># Left image shaping by offset coordinates
</span>    <span class="n">x_src_left</span> <span class="o">=</span> <span class="n">x</span> <span class="o">-</span> <span class="n">shift</span>
    <span class="n">valid_left</span> <span class="o">=</span> <span class="p">(</span><span class="n">x_src_left</span> <span class="o">&gt;=</span> <span class="mi">0</span><span class="p">)</span> <span class="o">&amp;</span> <span class="p">(</span><span class="n">x_src_left</span> <span class="o">&lt;</span> <span class="n">width</span><span class="p">)</span>
    <span class="n">left_image</span><span class="p">[</span><span class="n">y</span><span class="p">[</span><span class="n">valid_left</span><span class="p">],</span> <span class="n">x</span><span class="p">[</span><span class="n">valid_left</span><span class="p">]]</span> <span class="o">=</span> <span class="n">image</span><span class="p">[</span><span class="n">y</span><span class="p">[</span><span class="n">valid_left</span><span class="p">],</span> <span class="n">x_src_left</span><span class="p">[</span><span class="n">valid_left</span><span class="p">]]</span>

    <span class="c1"># Right image shaping by offset coordinates
</span>    <span class="n">x_src_right</span> <span class="o">=</span> <span class="n">x</span> <span class="o">+</span> <span class="n">shift</span>
    <span class="n">valid_right</span> <span class="o">=</span> <span class="p">(</span><span class="n">x_src_right</span> <span class="o">&gt;=</span> <span class="mi">0</span><span class="p">)</span> <span class="o">&amp;</span> <span class="p">(</span><span class="n">x_src_right</span> <span class="o">&lt;</span> <span class="n">width</span><span class="p">)</span>
    <span class="n">right_image</span><span class="p">[</span><span class="n">y</span><span class="p">[</span><span class="n">valid_right</span><span class="p">],</span> <span class="n">x</span><span class="p">[</span><span class="n">valid_right</span><span class="p">]]</span> <span class="o">=</span> <span class="n">image</span><span class="p">[</span><span class="n">y</span><span class="p">[</span><span class="n">valid_right</span><span class="p">],</span> <span class="n">x_src_right</span><span class="p">[</span><span class="n">valid_right</span><span class="p">]]</span>
    
    <span class="c1"># Missing pixel masks for inpainting
</span>    <span class="n">mask_left</span>  <span class="o">=</span> <span class="p">(</span><span class="o">~</span><span class="n">valid_left</span><span class="p">).</span><span class="n">astype</span><span class="p">(</span><span class="n">np</span><span class="p">.</span><span class="n">uint8</span><span class="p">)</span> <span class="o">*</span> <span class="mi">255</span>
    <span class="n">mask_right</span> <span class="o">=</span> <span class="p">(</span><span class="o">~</span><span class="n">valid_right</span><span class="p">).</span><span class="n">astype</span><span class="p">(</span><span class="n">np</span><span class="p">.</span><span class="n">uint8</span><span class="p">)</span> <span class="o">*</span> <span class="mi">255</span>

    <span class="c1"># Filling voids via inpainting
</span>    <span class="n">left_image</span>  <span class="o">=</span> <span class="n">cv2</span><span class="p">.</span><span class="n">inpaint</span><span class="p">(</span><span class="n">left_image</span><span class="p">,</span>  <span class="n">mask_left</span><span class="p">,</span>  <span class="n">INPAINT_RADIUS</span><span class="p">,</span> <span class="n">cv2</span><span class="p">.</span><span class="n">INPAINT_TELEA</span><span class="p">)</span>
    <span class="n">right_image</span> <span class="o">=</span> <span class="n">cv2</span><span class="p">.</span><span class="n">inpaint</span><span class="p">(</span><span class="n">right_image</span><span class="p">,</span> <span class="n">mask_right</span><span class="p">,</span> <span class="n">INPAINT_RADIUS</span><span class="p">,</span> <span class="n">cv2</span><span class="p">.</span><span class="n">INPAINT_TELEA</span><span class="p">)</span>

    <span class="k">return</span> <span class="n">left_image</span><span class="p">,</span> <span class="n">right_image</span>
    
<span class="k">def</span> <span class="nf">image3d_combining</span><span class="p">(</span><span class="n">left_image</span><span class="p">,</span> <span class="n">right_image</span><span class="p">,</span> <span class="n">height</span><span class="p">,</span> <span class="n">width</span><span class="p">):</span>   
    <span class="s">''' Combining stereo pair images into a single 3D image '''</span>
    
    <span class="c1"># Images size correction if new_width and new_height are set
</span>    <span class="k">if</span> <span class="n">new_width</span> <span class="ow">and</span> <span class="n">new_height</span><span class="p">:</span>
        <span class="n">left_image</span><span class="p">,</span> <span class="n">right_image</span> <span class="o">=</span> <span class="n">image_size_correction</span><span class="p">(</span><span class="n">height</span><span class="p">,</span> <span class="n">width</span><span class="p">,</span> <span class="n">left_image</span><span class="p">,</span> <span class="n">right_image</span><span class="p">)</span>
        <span class="c1"># Change the values of the original image sizes to new_height and new_width for correct gluing below
</span>        <span class="n">height</span> <span class="o">=</span> <span class="n">new_height</span>
        <span class="n">width</span> <span class="o">=</span> <span class="n">new_width</span>
        
    <span class="c1"># Image order, left first or right first
</span>    <span class="n">img1</span><span class="p">,</span> <span class="n">img2</span> <span class="o">=</span> <span class="p">(</span><span class="n">left_image</span><span class="p">,</span> <span class="n">right_image</span><span class="p">)</span> <span class="k">if</span> <span class="n">LEFT_RIGHT</span> <span class="o">==</span> <span class="s">"LEFT"</span> <span class="k">else</span> <span class="p">(</span><span class="n">right_image</span><span class="p">,</span> <span class="n">left_image</span><span class="p">)</span>
    
    <span class="c1"># Combine left and right images into a common 3D image
</span>    <span class="k">if</span> <span class="n">TYPE3D</span> <span class="o">==</span> <span class="s">"HSBS"</span><span class="p">:</span>  <span class="c1"># Narrowing and combining images horizontally
</span>        <span class="n">combined_image</span> <span class="o">=</span> <span class="n">np</span><span class="p">.</span><span class="n">hstack</span><span class="p">((</span><span class="n">cv2</span><span class="p">.</span><span class="n">resize</span><span class="p">(</span><span class="n">img1</span><span class="p">,</span> <span class="p">(</span><span class="n">width</span> <span class="o">//</span> <span class="mi">2</span><span class="p">,</span> <span class="n">height</span><span class="p">),</span> <span class="n">interpolation</span><span class="o">=</span><span class="n">cv2</span><span class="p">.</span><span class="n">INTER_AREA</span><span class="p">),</span>
                          <span class="n">cv2</span><span class="p">.</span><span class="n">resize</span><span class="p">(</span><span class="n">img2</span><span class="p">,</span> <span class="p">(</span><span class="n">width</span> <span class="o">//</span> <span class="mi">2</span><span class="p">,</span> <span class="n">height</span><span class="p">),</span> <span class="n">interpolation</span><span class="o">=</span><span class="n">cv2</span><span class="p">.</span><span class="n">INTER_AREA</span><span class="p">)))</span>
                          
    <span class="k">elif</span> <span class="n">TYPE3D</span> <span class="o">==</span> <span class="s">"HOU"</span><span class="p">:</span>  <span class="c1"># Narrowing and combining images vertically
</span>        <span class="n">combined_image</span> <span class="o">=</span> <span class="n">np</span><span class="p">.</span><span class="n">vstack</span><span class="p">((</span><span class="n">cv2</span><span class="p">.</span><span class="n">resize</span><span class="p">(</span><span class="n">img1</span><span class="p">,</span> <span class="p">(</span><span class="n">width</span><span class="p">,</span> <span class="n">height</span> <span class="o">//</span> <span class="mi">2</span><span class="p">),</span> <span class="n">interpolation</span><span class="o">=</span><span class="n">cv2</span><span class="p">.</span><span class="n">INTER_AREA</span><span class="p">),</span>
                          <span class="n">cv2</span><span class="p">.</span><span class="n">resize</span><span class="p">(</span><span class="n">img2</span><span class="p">,</span> <span class="p">(</span><span class="n">width</span><span class="p">,</span> <span class="n">height</span> <span class="o">//</span> <span class="mi">2</span><span class="p">),</span> <span class="n">interpolation</span><span class="o">=</span><span class="n">cv2</span><span class="p">.</span><span class="n">INTER_AREA</span><span class="p">)))</span>
                          
    <span class="k">elif</span> <span class="n">TYPE3D</span> <span class="o">==</span> <span class="s">"FSBS"</span><span class="p">:</span>  <span class="c1"># Combining images horizontally
</span>        <span class="n">combined_image</span> <span class="o">=</span> <span class="n">np</span><span class="p">.</span><span class="n">hstack</span><span class="p">((</span><span class="n">img1</span><span class="p">,</span> <span class="n">img2</span><span class="p">))</span>
    
    <span class="k">elif</span> <span class="n">TYPE3D</span> <span class="o">==</span> <span class="s">"FOU"</span><span class="p">:</span>  <span class="c1"># Combining images vertically
</span>        <span class="n">combined_image</span> <span class="o">=</span> <span class="n">np</span><span class="p">.</span><span class="n">vstack</span><span class="p">((</span><span class="n">img1</span><span class="p">,</span> <span class="n">img2</span><span class="p">))</span>
    
    <span class="k">return</span> <span class="n">combined_image</span>

<span class="k">def</span> <span class="nf">get_total_frames</span><span class="p">():</span>
    <span class="s">''' Determining the exact number of frames in a video.
        The first option is tried first, it is faster but rarely works.
        If the first option didn't work, the second one is tried, it takes a long time, but usually works well
    '''</span>
    
    <span class="n">cmd1</span> <span class="o">=</span> <span class="p">[</span><span class="s">"ffprobe"</span><span class="p">,</span> <span class="s">"-v"</span><span class="p">,</span> <span class="s">"error"</span><span class="p">,</span> <span class="s">"-select_streams"</span><span class="p">,</span> <span class="s">"v:0"</span><span class="p">,</span> <span class="s">"-show_entries"</span><span class="p">,</span> <span class="s">"stream=nb_frames"</span><span class="p">,</span>
            <span class="s">"-of"</span><span class="p">,</span> <span class="s">"default=nokey=1:noprint_wrappers=1"</span><span class="p">,</span> <span class="n">video_file_path</span><span class="p">]</span>
    <span class="n">cmd2</span> <span class="o">=</span> <span class="p">[</span><span class="s">"ffprobe"</span><span class="p">,</span> <span class="s">"-v"</span><span class="p">,</span> <span class="s">"error"</span><span class="p">,</span> <span class="s">"-select_streams"</span><span class="p">,</span> <span class="s">"v:0"</span><span class="p">,</span> <span class="s">"-show_entries"</span><span class="p">,</span> <span class="s">"stream=nb_read_frames"</span><span class="p">,</span> <span class="s">"-count_frames"</span><span class="p">,</span>
            <span class="s">"-of"</span><span class="p">,</span> <span class="s">"default=nokey=1:noprint_wrappers=1"</span><span class="p">,</span> <span class="n">video_file_path</span><span class="p">]</span>
    
    <span class="k">try</span><span class="p">:</span>
        <span class="n">result</span> <span class="o">=</span> <span class="n">subprocess</span><span class="p">.</span><span class="n">check_output</span><span class="p">(</span><span class="n">cmd1</span><span class="p">).</span><span class="n">splitlines</span><span class="p">()[</span><span class="mi">0</span><span class="p">].</span><span class="n">decode</span><span class="p">().</span><span class="n">strip</span><span class="p">()</span>
        <span class="k">print</span><span class="p">(</span><span class="sa">f</span><span class="s">"Variant1: </span><span class="si">{</span><span class="n">result</span><span class="si">}</span><span class="s">"</span><span class="p">)</span>
        <span class="k">if</span> <span class="n">result</span> <span class="o">!=</span> <span class="s">"N/A"</span><span class="p">:</span>
            <span class="k">return</span> <span class="nb">int</span><span class="p">(</span><span class="n">result</span><span class="p">)</span>
    <span class="k">except</span> <span class="nb">Exception</span><span class="p">:</span>
        <span class="k">pass</span>

    <span class="k">try</span><span class="p">:</span>
        <span class="n">result</span> <span class="o">=</span> <span class="n">subprocess</span><span class="p">.</span><span class="n">check_output</span><span class="p">(</span><span class="n">cmd2</span><span class="p">).</span><span class="n">splitlines</span><span class="p">()[</span><span class="mi">0</span><span class="p">].</span><span class="n">decode</span><span class="p">().</span><span class="n">strip</span><span class="p">()</span>
        <span class="k">print</span><span class="p">(</span><span class="sa">f</span><span class="s">"Variant2: </span><span class="si">{</span><span class="n">result</span><span class="si">}</span><span class="s">"</span><span class="p">)</span>
        <span class="k">if</span> <span class="n">result</span> <span class="o">!=</span> <span class="s">"N/A"</span><span class="p">:</span>
            <span class="k">return</span> <span class="nb">int</span><span class="p">(</span><span class="n">result</span><span class="p">)</span>
    <span class="k">except</span> <span class="nb">Exception</span><span class="p">:</span>
        <span class="k">pass</span>
        
    <span class="c1"># If both methods fail, return None
</span>    <span class="k">print</span><span class="p">(</span><span class="s">"Error, the number of frames could not be determined."</span><span class="p">)</span>
    
    <span class="k">return</span> <span class="bp">None</span>

<span class="k">def</span> <span class="nf">extract_frames</span><span class="p">(</span><span class="n">start_frame</span><span class="p">,</span> <span class="n">end_frame</span><span class="p">):</span>
    <span class="s">''' Allocating image files to chunks based on chunk_size '''</span>
    
    <span class="n">frames_to_process</span> <span class="o">=</span> <span class="n">end_frame</span> <span class="o">-</span> <span class="n">start_frame</span> <span class="o">+</span> <span class="mi">1</span>
    <span class="n">extracted_frames</span> <span class="o">=</span> <span class="p">[]</span>

    <span class="k">with</span> <span class="n">frame_counter</span><span class="p">.</span><span class="n">get_lock</span><span class="p">():</span>
        <span class="n">start_counter</span> <span class="o">=</span> <span class="n">frame_counter</span><span class="p">.</span><span class="n">value</span>
        <span class="n">frame_counter</span><span class="p">.</span><span class="n">value</span> <span class="o">+=</span> <span class="n">frames_to_process</span>
        
    <span class="k">print</span><span class="p">(</span><span class="sa">f</span><span class="s">"</span><span class="se">\n</span><span class="s">-- EXTRACTING FRAMES --</span><span class="se">\n</span><span class="s">Frames </span><span class="si">{</span><span class="n">start_frame</span><span class="si">}</span><span class="s"> - </span><span class="si">{</span><span class="n">end_frame</span><span class="si">}</span><span class="se">\n</span><span class="s">"</span><span class="p">)</span>

    <span class="k">for</span> <span class="n">chunk_start</span> <span class="ow">in</span> <span class="nb">range</span><span class="p">(</span><span class="n">start_frame</span><span class="p">,</span> <span class="n">end_frame</span> <span class="o">+</span> <span class="mi">1</span><span class="p">,</span> <span class="n">chunk_size</span><span class="p">):</span>
        <span class="n">chunk_end</span> <span class="o">=</span> <span class="nb">min</span><span class="p">(</span><span class="n">chunk_start</span> <span class="o">+</span> <span class="n">chunk_size</span> <span class="o">-</span> <span class="mi">1</span><span class="p">,</span> <span class="n">end_frame</span><span class="p">)</span>
        <span class="n">extract_frames_path</span> <span class="o">=</span> <span class="n">os</span><span class="p">.</span><span class="n">path</span><span class="p">.</span><span class="n">join</span><span class="p">(</span><span class="n">frames_path</span><span class="p">,</span> <span class="sa">f</span><span class="s">"file_%06d.png"</span><span class="p">)</span>

        <span class="n">cmd</span> <span class="o">=</span> <span class="p">[</span>
            <span class="s">"ffmpeg"</span><span class="p">,</span> <span class="s">"-hwaccel"</span><span class="p">,</span> <span class="s">"cuda"</span><span class="p">,</span> <span class="s">"-i"</span><span class="p">,</span> <span class="n">video_file_path</span><span class="p">,</span>
            <span class="s">"-vf"</span><span class="p">,</span> <span class="sa">f</span><span class="s">"select='between(n,</span><span class="si">{</span><span class="n">chunk_start</span><span class="si">}</span><span class="s">,</span><span class="si">{</span><span class="n">chunk_end</span><span class="si">}</span><span class="s">)'"</span><span class="p">,</span>
            <span class="s">"-vsync"</span><span class="p">,</span> <span class="s">"0"</span><span class="p">,</span> <span class="s">"-start_number"</span><span class="p">,</span> <span class="nb">str</span><span class="p">(</span><span class="n">chunk_start</span><span class="p">),</span> <span class="n">extract_frames_path</span>
        <span class="p">]</span>
        <span class="n">subprocess</span><span class="p">.</span><span class="n">run</span><span class="p">(</span><span class="n">cmd</span><span class="p">,</span> <span class="n">check</span><span class="o">=</span><span class="bp">True</span><span class="p">,</span> <span class="n">stdout</span><span class="o">=</span><span class="n">subprocess</span><span class="p">.</span><span class="n">DEVNULL</span><span class="p">)</span>
        <span class="k">print</span><span class="p">(</span><span class="n">cmd</span><span class="p">)</span>

        <span class="k">for</span> <span class="n">i</span> <span class="ow">in</span> <span class="nb">range</span><span class="p">(</span><span class="n">chunk_end</span> <span class="o">-</span> <span class="n">chunk_start</span> <span class="o">+</span> <span class="mi">1</span><span class="p">):</span>
            <span class="n">frame_number</span> <span class="o">=</span> <span class="n">chunk_start</span> <span class="o">+</span> <span class="n">i</span>
            <span class="n">frame_path</span> <span class="o">=</span> <span class="n">extract_frames_path</span> <span class="o">%</span> <span class="n">frame_number</span>
            <span class="n">extracted_frames</span><span class="p">.</span><span class="n">append</span><span class="p">(</span><span class="n">frame_path</span><span class="p">)</span>
            
    <span class="k">print</span><span class="p">(</span><span class="sa">f</span><span class="s">"</span><span class="se">\n</span><span class="s">-- FRAMES EXTRACTED --</span><span class="se">\n</span><span class="s">Frames </span><span class="si">{</span><span class="n">start_frame</span><span class="si">}</span><span class="s"> - </span><span class="si">{</span><span class="n">end_frame</span><span class="si">}</span><span class="se">\n</span><span class="s">"</span><span class="p">)</span>
                
    <span class="k">return</span> <span class="n">extracted_frames</span>
    
<span class="k">def</span> <span class="nf">chunk_processing</span><span class="p">(</span><span class="n">extracted_frames</span><span class="p">,</span> <span class="n">start_frame</span><span class="p">,</span> <span class="n">end_frame</span><span class="p">):</span>
    <span class="s">''' Start processing for each chunk '''</span>
    
    <span class="k">print</span><span class="p">(</span><span class="sa">f</span><span class="s">"</span><span class="se">\n</span><span class="s">-- START THE THREAD --</span><span class="se">\n</span><span class="s">Frames </span><span class="si">{</span><span class="n">start_frame</span><span class="si">}</span><span class="s"> - </span><span class="si">{</span><span class="n">end_frame</span><span class="si">}</span><span class="se">\n</span><span class="s">"</span><span class="p">)</span>
    
    <span class="k">for</span> <span class="n">frame_path</span> <span class="ow">in</span> <span class="n">extracted_frames</span><span class="p">:</span>
    
        <span class="c1"># Extract the image name to save the 3D image later on
</span>        <span class="n">frame_name</span> <span class="o">=</span> <span class="n">os</span><span class="p">.</span><span class="n">path</span><span class="p">.</span><span class="n">splitext</span><span class="p">(</span><span class="n">os</span><span class="p">.</span><span class="n">path</span><span class="p">.</span><span class="n">basename</span><span class="p">(</span><span class="n">frame_path</span><span class="p">))[</span><span class="mi">0</span><span class="p">]</span>
        
        <span class="c1"># Load image
</span>        <span class="n">image</span> <span class="o">=</span> <span class="n">cv2</span><span class="p">.</span><span class="n">imread</span><span class="p">(</span><span class="n">frame_path</span><span class="p">)</span>
        
        <span class="c1"># Image size
</span>        <span class="n">height</span><span class="p">,</span> <span class="n">width</span> <span class="o">=</span> <span class="n">image</span><span class="p">.</span><span class="n">shape</span><span class="p">[:</span><span class="mi">2</span><span class="p">]</span>
        
        <span class="c1"># Runing depth_processing and get depth map
</span>        <span class="n">depth</span> <span class="o">=</span> <span class="n">depth_processing</span><span class="p">(</span><span class="n">image</span><span class="p">)</span>

        <span class="c1"># Runing image3d_processing and getting a stereo pair for the image
</span>        <span class="n">PARALLAX_FUNCTIONS</span> <span class="o">=</span> <span class="p">{</span>
            <span class="mi">1</span><span class="p">:</span> <span class="n">image3d_processing_method1</span><span class="p">,</span>
            <span class="mi">2</span><span class="p">:</span> <span class="n">image3d_processing_method2</span><span class="p">,</span>
        <span class="p">}</span>

        <span class="k">if</span> <span class="n">PARALLAX_METHOD</span> <span class="ow">in</span> <span class="p">(</span><span class="mi">1</span><span class="p">,</span> <span class="mi">2</span><span class="p">):</span>
            <span class="n">left_image</span><span class="p">,</span> <span class="n">right_image</span> <span class="o">=</span> <span class="n">PARALLAX_FUNCTIONS</span><span class="p">[</span><span class="n">PARALLAX_METHOD</span><span class="p">](</span><span class="n">image</span><span class="p">,</span> <span class="n">depth</span><span class="p">,</span> <span class="n">height</span><span class="p">,</span> <span class="n">width</span><span class="p">)</span>  
        <span class="k">else</span><span class="p">:</span>
            <span class="k">print</span><span class="p">(</span><span class="sa">f</span><span class="s">"Set the correct </span><span class="si">{</span><span class="n">PARALLAX_METHOD</span><span class="si">}</span><span class="s">."</span><span class="p">)</span>

        <span class="c1"># Combining stereo pair into a common 3D image
</span>        <span class="n">image3d</span> <span class="o">=</span> <span class="n">image3d_combining</span><span class="p">(</span><span class="n">left_image</span><span class="p">,</span> <span class="n">right_image</span><span class="p">,</span> <span class="n">height</span><span class="p">,</span> <span class="n">width</span><span class="p">)</span>

        <span class="c1"># Saving 3D image
</span>        <span class="n">output_image3d_path</span> <span class="o">=</span> <span class="n">os</span><span class="p">.</span><span class="n">path</span><span class="p">.</span><span class="n">join</span><span class="p">(</span><span class="n">images3d_path</span><span class="p">,</span> <span class="sa">f</span><span class="s">'</span><span class="si">{</span><span class="n">frame_name</span><span class="si">}</span><span class="s">.jpg'</span><span class="p">)</span>
        <span class="n">cv2</span><span class="p">.</span><span class="n">imwrite</span><span class="p">(</span><span class="n">output_image3d_path</span><span class="p">,</span> <span class="n">image3d</span><span class="p">,</span> <span class="p">[</span><span class="nb">int</span><span class="p">(</span><span class="n">cv2</span><span class="p">.</span><span class="n">IMWRITE_JPEG_QUALITY</span><span class="p">),</span> <span class="mi">100</span><span class="p">])</span>

        <span class="c1"># Deleting the source file
</span>        <span class="n">os</span><span class="p">.</span><span class="n">remove</span><span class="p">(</span><span class="n">frame_path</span><span class="p">)</span>
        
    <span class="k">print</span><span class="p">(</span><span class="sa">f</span><span class="s">"</span><span class="se">\n</span><span class="s">-- THREAD DONE --</span><span class="se">\n</span><span class="s">Frames </span><span class="si">{</span><span class="n">start_frame</span><span class="si">}</span><span class="s"> - </span><span class="si">{</span><span class="n">end_frame</span><span class="si">}</span><span class="se">\n</span><span class="s">"</span><span class="p">)</span>
        
<span class="k">def</span> <span class="nf">run_processing</span><span class="p">():</span>
    <span class="s">''' The main function for starting processing threads '''</span>
    
    <span class="c1"># Total frames in video file
</span>    <span class="n">total_frames</span> <span class="o">=</span> <span class="n">get_total_frames</span><span class="p">()</span>
                        
    <span class="c1"># Threads control
</span>    <span class="k">if</span> <span class="nb">isinstance</span><span class="p">(</span><span class="n">total_frames</span><span class="p">,</span> <span class="nb">int</span><span class="p">):</span>
        <span class="k">with</span> <span class="n">ThreadPoolExecutor</span><span class="p">(</span><span class="n">max_workers</span><span class="o">=</span><span class="n">max_threads</span><span class="p">)</span> <span class="k">as</span> <span class="n">executor</span><span class="p">:</span>
            <span class="n">futures</span> <span class="o">=</span> <span class="p">[]</span>
            
            <span class="k">for</span> <span class="n">start_frame</span> <span class="ow">in</span> <span class="nb">range</span><span class="p">(</span><span class="mi">0</span><span class="p">,</span> <span class="n">total_frames</span><span class="p">,</span> <span class="n">chunk_size</span><span class="p">):</span>
                <span class="n">end_frame</span> <span class="o">=</span> <span class="nb">min</span><span class="p">(</span><span class="n">start_frame</span> <span class="o">+</span> <span class="n">chunk_size</span> <span class="o">-</span> <span class="mi">1</span><span class="p">,</span> <span class="n">total_frames</span> <span class="o">-</span> <span class="mi">1</span><span class="p">)</span>
                
                <span class="c1"># 1. Extracting frames (waiting for task to complete before starting thread)
</span>                <span class="n">extracted_frames</span> <span class="o">=</span> <span class="n">extract_frames</span><span class="p">(</span><span class="n">start_frame</span><span class="p">,</span> <span class="n">end_frame</span><span class="p">)</span>
                
                <span class="c1"># 2. Starting thread for extracted frames
</span>                <span class="n">future</span> <span class="o">=</span> <span class="n">executor</span><span class="p">.</span><span class="n">submit</span><span class="p">(</span><span class="n">chunk_processing</span><span class="p">,</span> <span class="n">extracted_frames</span><span class="p">,</span> <span class="n">start_frame</span><span class="p">,</span> <span class="n">end_frame</span><span class="p">)</span>
                <span class="n">futures</span><span class="p">.</span><span class="n">append</span><span class="p">(</span><span class="n">future</span><span class="p">)</span>
                
                <span class="c1"># 3. If thread count &gt;= max_threads, wait for any thread to finish
</span>                <span class="k">if</span> <span class="nb">len</span><span class="p">(</span><span class="n">futures</span><span class="p">)</span> <span class="o">&gt;=</span> <span class="n">max_threads</span><span class="p">:</span>
                    <span class="n">done</span><span class="p">,</span> <span class="n">not_done</span> <span class="o">=</span> <span class="n">wait</span><span class="p">(</span><span class="n">futures</span><span class="p">,</span> <span class="n">return_when</span><span class="o">=</span><span class="n">FIRST_COMPLETED</span><span class="p">)</span>
                    <span class="k">for</span> <span class="n">f</span> <span class="ow">in</span> <span class="n">done</span><span class="p">:</span>
                        <span class="n">f</span><span class="p">.</span><span class="n">result</span><span class="p">()</span>  <span class="c1"># if any thread fails, stop all processing
</span>                    <span class="n">futures</span> <span class="o">=</span> <span class="nb">list</span><span class="p">(</span><span class="n">not_done</span><span class="p">)</span>
                    
            <span class="c1"># 4. Waiting for threads to complete
</span>            <span class="k">for</span> <span class="n">future</span> <span class="ow">in</span> <span class="n">futures</span><span class="p">:</span>
                <span class="n">future</span><span class="p">.</span><span class="n">result</span><span class="p">()</span>

        <span class="k">print</span><span class="p">(</span><span class="s">"DONE."</span><span class="p">)</span>
        
    <span class="k">else</span><span class="p">:</span>
        <span class="k">print</span><span class="p">(</span><span class="s">"First, determine the value of total_frames."</span><span class="p">)</span>


<span class="c1"># START PROCESSING
</span><span class="n">run_processing</span><span class="p">()</span>


<span class="c1"># Delete model and clear Cuda cache
</span><span class="k">del</span> <span class="n">model_depth</span>
<span class="n">torch</span><span class="p">.</span><span class="n">cuda</span><span class="p">.</span><span class="n">empty_cache</span><span class="p">()</span>
</code></pre></div>  </div>
</details>
<p><br /></p>

<p>This script allows video processing without pre-extracting frames. More precisely, frames are extracted directly from the video file in separate batches.</p>

<p>Frame extraction is handled by <strong>ffmpeg</strong>. We set <strong>chunk_size</strong> (frame count per thread) and <strong>max_threads</strong> (thread count), and the script sequentially processes all frames to the end. We first obtain the total frame count using <strong>ffprobe</strong>. All parameter configuration details are in the main article. I can only note that on my setup (<strong>AMD Ryzen 5 PRO 3600, 32GB DDR4, RTX 3060 12GB</strong>), <strong>3-5</strong> threads with approximately <strong>5000</strong> frames per thread is typically sufficient.</p>

<p>Why did the idea of multi-threaded processing (pseudo-multi-threaded) arise in the first place? First, slow frame extraction. We extract by range, for example:</p>
<div class="language-bash highlighter-rouge"><div class="highlight"><pre class="highlight"><code>ffmpeg <span class="nt">-hwaccel</span> cuda <span class="nt">-i</span> video.mkv <span class="nt">-vf</span> <span class="s2">"select='between(n,5000,10000)'"</span> <span class="nt">-vsync</span> 0 <span class="nt">-start_number</span> 5000 <span class="s2">"extracted_frames/file_%06d.png"</span>
</code></pre></div></div>

<p>then:</p>
<div class="language-bash highlighter-rouge"><div class="highlight"><pre class="highlight"><code>ffmpeg <span class="nt">-hwaccel</span> cuda <span class="nt">-i</span> <span class="s2">"video.mkv"</span> <span class="nt">-vf</span> <span class="s2">"select='between(n,10001,15000)'"</span> <span class="nt">-vsync</span> 0 <span class="nt">-start_number</span> 10001 <span class="s2">"extracted_frames/file_%06d.png"</span>
</code></pre></div></div>

<p>and so on.</p>

<p>Accordingly, <strong>ffmpeg</strong> must recount all frames before extraction (or possibly all frames in video) to extract correctly. This also depends on the specific codec and encoding algorithm. I haven’t managed to speed up this process while maintaining precise synchronization (to avoid skipping or duplicating frames).</p>

<p><img src="/assets/images/2026-01-15-stereo3d-script/starwars4_c3po_3d.gif" alt="C-3PO in 3D" />
<em>C-3PO in 3D</em>
<br />
<br /></p>

<p><u>Brief command breakdown:</u></p>
<div class="language-bash highlighter-rouge"><div class="highlight"><pre class="highlight"><code>ffmpeg <span class="nt">-hwaccel</span> cuda <span class="nt">-i</span> video.mkv <span class="nt">-vf</span> <span class="s2">"select='between(n,5000,10000)'"</span> <span class="nt">-vsync</span> 0 <span class="nt">-start_number</span> 5000 <span class="s2">"extracted_frames/file_%06d.png"</span>
</code></pre></div></div>

<p>“-hwaccel cuda” - use CUDA for extraction, usually faster than CPU<br />
“-i video.mkv” - source video file<br />
“-vf “select=’between(n,5000,10000)’”” - range filter, from frame 5000 to 10000<br />
“-vsync 0” - disable timestamp synchronization, extract frames as-is<br />
“-start_number” - naming counter, starting from 5000<br />
“extracted_frames/file_%06d.png” - path where frames will be extracted and file mask, where %06d is a 6-digit counter, files will be like “file_005000.png”, “file_005001.png”, etc.</p>

<p>After complete processing, you’ll need to “manually” compile the movie from the resulting frames, remembering to include audio tracks from the source file.
Command for example:</p>
<div class="language-bash highlighter-rouge"><div class="highlight"><pre class="highlight"><code>ffmpeg <span class="nt">-framerate</span> 24000/1001 <span class="nt">-i</span> <span class="s2">"frames_3d/file_%06d.jpg"</span> <span class="nt">-i</span> video.mkv <span class="nt">-c</span>:v hevc_nvenc <span class="nt">-cq</span> 1 <span class="nt">-preset</span> p7 <span class="nt">-colorspace</span> bt709 <span class="nt">-color_primaries</span> bt709 <span class="nt">-color_trc</span> bt709 <span class="nt">-color_range</span> tv <span class="nt">-pix_fmt</span> yuv420p <span class="nt">-map</span> 0:v <span class="nt">-map</span> 1:a <span class="nt">-c</span>:a copy video_3d.mkv
</code></pre></div></div>

<p><u>Here:</u><br />
“-framerate 24000/1001” - source video frame rate, 24000/1001 = 23.976 frames per second<br />
“-i “frames_3d/file_%06d.jpg”” - folder with 3D frames<br />
“-i video.mkv” - source file with audio tracks<br />
“-c:v hevc_nvenc” - NVIDIA GPU encoder (H.265)<br />
“-cq 1 -preset p7” - high video quality<br />
“-colorspace bt709 -color_primaries bt709 -color_trc bt709” - set color parameters according to the BT.709 standard for HD video<br />
“-color_range tv” - pixel color format, yuv420p for maximum compatibility<br />
“-pix_fmt yuv420p” - standard (limited) range for video, as expected by codecs and players, for maximum compatibility and correct colors<br />
“-map 0:v” - specify using the folder with frames specified earlier for video<br />
“-map 1:a -c:a copy” - specify using audio tracks from “-i sw4.mkv” without re-encoding; “-c:a copy” - direct copy<br />
“video_3d.mkv” - output file name</p>

<p>The script can be modified to include this command for auto-execution after frame processing completes, for example:</p>
<details>
  <summary>Code:</summary>

  <div class="language-python highlighter-rouge"><div class="highlight"><pre class="highlight"><code><span class="n">compile_command</span> <span class="o">=</span> <span class="p">[</span>
    <span class="s">"ffmpeg"</span><span class="p">,</span>
    <span class="s">"-framerate"</span><span class="p">,</span> <span class="s">"24000/1001"</span><span class="p">,</span>
    <span class="s">"-i"</span><span class="p">,</span> <span class="s">"frames_3d/file_%06d.jpg"</span><span class="p">,</span>
    <span class="s">"-i"</span><span class="p">,</span> <span class="s">"video.mkv"</span><span class="p">,</span>
    <span class="s">"-c:v"</span><span class="p">,</span> <span class="s">"hevc_nvenc"</span><span class="p">,</span>
    <span class="s">"-cq"</span><span class="p">,</span> <span class="s">"1"</span><span class="p">,</span>
    <span class="s">"-preset"</span><span class="p">,</span> <span class="s">"p7"</span><span class="p">,</span>
    <span class="s">"-colorspace"</span><span class="p">,</span> <span class="s">"bt709"</span><span class="p">,</span>
    <span class="s">"-color_primaries"</span><span class="p">,</span> <span class="s">"bt709"</span><span class="p">,</span>
    <span class="s">"-color_trc"</span><span class="p">,</span> <span class="s">"bt709"</span><span class="p">,</span>
    <span class="s">"-color_range"</span><span class="p">,</span> <span class="s">"tv"</span><span class="p">,</span>
    <span class="s">"-pix_fmt"</span><span class="p">,</span> <span class="s">"yuv420p"</span><span class="p">,</span>
    <span class="s">"-map"</span><span class="p">,</span> <span class="s">"0:v"</span><span class="p">,</span>
    <span class="s">"-map"</span><span class="p">,</span> <span class="s">"1:a"</span><span class="p">,</span>
    <span class="s">"-c:a"</span><span class="p">,</span> <span class="s">"copy"</span><span class="p">,</span>
    <span class="s">"video_3d.mkv"</span>
<span class="p">]</span>

<span class="n">subprocess</span><span class="p">.</span><span class="n">run</span><span class="p">(</span><span class="n">compile_command</span><span class="p">,</span> <span class="n">check</span><span class="o">=</span><span class="bp">True</span><span class="p">)</span>
</code></pre></div>  </div>
</details>
<p><br /></p>

<p>Personally, I prefer doing it manually, as constant adjustments are needed - for example, removing some audio tracks, or experimenting with codecs, framerate, and anything else.</p>

<p>After compilation, don’t forget to delete the frames directory.</p>

<p><img src="/assets/images/2026-01-15-stereo3d-script/starwars4_darth_vader_depth.jpg" alt="Darth Vader Depth" />
<em>Depth map example for a frame</em>
<br />
<br /></p>

<h2 id="other-solutions">Other Solutions</h2>

<h3 id="vapoursynth">VapourSynth</h3>
<p>Someone suggested alternative solutions.</p>

<p>Instead of the chain: frame extraction -&gt; processing -&gt; compiling final video from rendered frames, you can use an intermediate server for on-the-fly video processing, such as <strong>VapourSynth</strong>. The scheme is roughly as follows: ffmpeg extracts a frame, immediately passes it (without saving) to a processing function (in this case, generating the 3D version of the frame), and the resulting frame is encoded into the output video file (or more precisely, queued for encoding). All this happens in <strong>RAM/VRAM</strong>, bypassing intermediate stages of saving frames to disk.</p>

<p>I haven’t experimented with this yet. I tried installing it on Ubuntu, but VapourSynth required the very latest versions of ffmpeg and some other libraries (<strong>apt update/upgrade</strong> didn’t help, stable versions weren’t sufficient). I had to manually compile the latest ffmpeg (although the latest stable version was perfectly fine for me personally), and several other libraries, but still couldn’t get VapourSynth running. I’ll definitely return to this later when I have more free time. Perhaps under <strong>Windows</strong> it’s easier to set up.</p>

<p><strong>An important point about on-the-fly processing</strong>. On one hand, it’s convenient; on the other, there are nuances. Processing one movie with the <strong>Depth-Anything-V2 Large</strong> model can take <strong>over a day</strong>, or even several. I provided an approximate calculation for the Star Wars Episode IV movie in Full HD format with a duration of 2 hours 4 minutes in the main article. On my setup (<strong>AMD Ryzen 5 PRO 3600, 32GB DDR4, RTX 3060 12GB</strong>) with the <strong>Large</strong> model, it would take approximately <strong>32 hours</strong> to process this movie, and if a failure occurs during the process or the computer accidentally shuts down - you’ll have to start all over again.</p>

<p><img src="/assets/images/2026-01-15-stereo3d-script/starwars4_darth_vader_3d.gif" alt="Darth Vader in 3D" />
<em>Darth Vader wouldn’t have tolerated this</em>
<br />
<br />
Another point. You need to be absolutely certain about your source material. In the article about upscaling old videos, I described in detail what problems can arise when working with certain sources and formats, especially if it’s <strong>DVD-MPEG2</strong> or something else from the past. There can be issues with precise framerate determination, output image format, and anything else. This needs to be considered and sources should be pre-checked, along with what comes out of them.</p>

<p>Overall, implementing a processing server without saving frames is a wonderful idea, since it doesn’t require any disk space for frames, and if we’re working with <strong>4K</strong> format and <strong>PNG</strong>, this is a very critical consideration.
<br />
<br /></p>
<h3 id="another-library-for-2d---3d-conversion">Another Library for 2D -&gt; 3D Conversion</h3>
<p>Someone also suggested <a href="https://github.com/nagadomi/nunif/tree/master/iw3">another possible solution</a>.</p>

<p>I haven’t tried it, only briefly looked at it. It has a GUI and many settings. You can select the depth model, processing method, it supports anaglyph and much more. This implementation will probably be more difficult to figure out, but the solution definitely deserves attention.</p>

<p>That’s all, may the force be with you!
<br />
<br /></p>
<h2 id="additional-materials">Additional materials</h2>
<ul>
  <li>See the <a href="https://peterplv.github.io/2026/01/13/make-anything-stereo3d">main article</a> for all key details</li>
  <li>All 2D to 3D conversion scripts are available on my GitHub:<br />
<a href="https://github.com/peterplv/MakeAnythingStereo3D">https://github.com/peterplv/MakeAnythingStereo3D</a></li>
  <li>Link to Google Drive with <a href="https://drive.google.com/drive/folders/1ovCMNJG-FLJcuOfE0Y-zuBsewUKpy_fy">examples and 3D GIFs</a></li>
  <li>Example 3D video in <a href="https://drive.google.com/file/d/1_d0UGC_srnGBT4eTdH7vp_hvLg5LGH4r/view">HOU format</a>, suitable for viewing on most 3D TVs</li>
  <li>Example 3D video in <a href="https://drive.google.com/file/d/1WrFfK1KGKpi6kDBCSWO0YsHHSptSH56s/view">FSBS format</a>, suitable for viewing in VR headsets
<br /></li>
</ul>

<p><img src="/assets/images/2026-01-15-stereo3d-script/starwars4_han_chewie_3d.gif" alt="Chewie and Han Solo in 3D" />
<em>Chewie and Han thank you for your attention</em></p>]]></content><author><name></name></author><summary type="html"><![CDATA[This is the result of the 2D to 3D conversion we will obtain This article is a continuation of the main article: How to Make 3D Version of Any Movie Using DepthAnythingV2 and Parallax (StarWars4 as Example) I recommend reading the initial article first, as it contains all the key details: the core idea of the algorithm, required libraries, the initial scripts, and a description of their parameters. It also includes examples of processed images and links to finished 3D videos (a StarWars4 clip), including versions for VR. This article is a continuation; it presents an improved script and commentary on it. Below, other solutions that can be used for converting video from 2D to 3D are also discussed. New script: import os import subprocess from concurrent.futures import ThreadPoolExecutor, wait, FIRST_COMPLETED from multiprocessing import Value import cv2 import torch import numpy as np from depth_anything_v2.dpt import DepthAnythingV2 # GENERAL OPTIONS # Path to the folder with depth generation models depth_models_path = "/home/user/DepthAnythingV2/models" # Folder with source frames video_file_path = "/home/user/video.mkv" video_file_name = os.path.splitext(os.path.basename(video_file_path))[0] # Folder for exporting frames and folder for final 3D frames frames_path = os.path.join(os.path.dirname(video_file_path), f"{video_file_name}_frames") images3d_path = os.path.join(os.path.dirname(video_file_path), f"{video_file_name}_3d") os.makedirs(frames_path, exist_ok=True) os.makedirs(images3d_path, exist_ok=True) frame_counter = Value('i', 0) # Counter for naming frames chunk_size = 5000 # Number of files per thread max_threads = 3 # Maximum streams # Computing device device = torch.device('cuda') # 3D OPTIONS PARALLAX_SCALE = 15 # Recommended 10 to 20 PARALLAX_METHOD = 1 # 1 or 2 INPAINT_RADIUS = 2 # For PARALLAX_METHOD = 2 only, recommended 2 to 5, optimum value 2-3 INTERPOLATION_TYPE = cv2.INTER_LINEAR # INTER_NEAREST, INTER_AREA, INTER_LINEAR, INTER_CUBIC, INTER_LANCZOS4 TYPE3D = "FOU" # HSBS, FSBS, HOU, FOU LEFT_RIGHT = "LEFT" # LEFT or RIGHT # 0 - if there's no need to change frame size new_width = 1920 new_height = 1080 depth_models_config = { 'vits': {'encoder': 'vits', 'features': 64, 'out_channels': [48, 96, 192, 384]}, 'vitb': {'encoder': 'vitb', 'features': 128, 'out_channels': [96, 192, 384, 768]}, 'vitl': {'encoder': 'vitl', 'features': 256, 'out_channels': [256, 512, 1024, 1024]} } # Selecting the DepthAnythingV2 model: vits - Small, vitb - Base, vitl - Large encoder = "vitl" # vits, vitb, vitl model_depth_current = os.path.join(depth_models_path, f'depth_anything_v2_{encoder}.pth') model_depth = DepthAnythingV2(**depth_models_config[encoder]) model_depth.load_state_dict(torch.load(model_depth_current, weights_only=True, map_location=device)) model_depth = model_depth.to(device).eval() def image_size_correction(current_height, current_width, left_image, right_image): ''' Image size correction if new_width and new_height are set ''' # Calculate offsets for centering top = (new_height - current_height) // 2 left = (new_width - current_width) // 2 # Create a black canvas of the desired size new_left_image = np.zeros((new_height, new_width, 3), dtype=np.uint8) new_right_image = np.zeros((new_height, new_width, 3), dtype=np.uint8) # Placing the image on a black background new_left_image[top:top + current_height, left:left + current_width] = left_image new_right_image[top:top + current_height, left:left + current_width] = right_image return new_left_image, new_right_image def depth_processing(image): ''' Creating a depth map for an image ''' # Depth calculation with torch.no_grad(): depth = model_depth.infer_image(image) # Normalization depth_normalized = depth / depth.max() return depth_normalized def image3d_processing_method1(image, depth, height, width): ''' The function of creating a stereo pair based on the source image and depth map. Method1: faster, contours smoother, but may be less accurate ''' # Creating parallax parallax = depth * PARALLAX_SCALE # Pixel coordinates x, y = np.meshgrid(np.arange(width, dtype=np.float32), np.arange(height, dtype=np.float32)) # Calculation of offsets shift_left = np.clip(x - parallax, 0, width - 1) shift_right = np.clip(x + parallax, 0, width - 1) # Applying offsets with cv2.remap left_image = cv2.remap(image, shift_left, y, interpolation=INTERPOLATION_TYPE) right_image = cv2.remap(image, shift_right, y, interpolation=INTERPOLATION_TYPE) return left_image, right_image def image3d_processing_method2(image, depth, height, width): ''' The function of creating a stereo pair based on the source image and depth map. Method2: slightly slower than the first method, but can be more accurate ''' # Calculating the value for parallax parallax = depth * PARALLAX_SCALE # Parallax rounding and conversion to int32 shift = np.round(parallax).astype(np.int32) # Grid coordinates y, x = np.indices((height, width), dtype=np.int32) # Image preparation left_image = np.zeros_like(image) right_image = np.zeros_like(image) # Left image shaping by offset coordinates x_src_left = x - shift valid_left = (x_src_left &gt;= 0) &amp; (x_src_left &lt; width) left_image[y[valid_left], x[valid_left]] = image[y[valid_left], x_src_left[valid_left]] # Right image shaping by offset coordinates x_src_right = x + shift valid_right = (x_src_right &gt;= 0) &amp; (x_src_right &lt; width) right_image[y[valid_right], x[valid_right]] = image[y[valid_right], x_src_right[valid_right]] # Missing pixel masks for inpainting mask_left = (~valid_left).astype(np.uint8) * 255 mask_right = (~valid_right).astype(np.uint8) * 255 # Filling voids via inpainting left_image = cv2.inpaint(left_image, mask_left, INPAINT_RADIUS, cv2.INPAINT_TELEA) right_image = cv2.inpaint(right_image, mask_right, INPAINT_RADIUS, cv2.INPAINT_TELEA) return left_image, right_image def image3d_combining(left_image, right_image, height, width): ''' Combining stereo pair images into a single 3D image ''' # Images size correction if new_width and new_height are set if new_width and new_height: left_image, right_image = image_size_correction(height, width, left_image, right_image) # Change the values of the original image sizes to new_height and new_width for correct gluing below height = new_height width = new_width # Image order, left first or right first img1, img2 = (left_image, right_image) if LEFT_RIGHT == "LEFT" else (right_image, left_image) # Combine left and right images into a common 3D image if TYPE3D == "HSBS": # Narrowing and combining images horizontally combined_image = np.hstack((cv2.resize(img1, (width // 2, height), interpolation=cv2.INTER_AREA), cv2.resize(img2, (width // 2, height), interpolation=cv2.INTER_AREA))) elif TYPE3D == "HOU": # Narrowing and combining images vertically combined_image = np.vstack((cv2.resize(img1, (width, height // 2), interpolation=cv2.INTER_AREA), cv2.resize(img2, (width, height // 2), interpolation=cv2.INTER_AREA))) elif TYPE3D == "FSBS": # Combining images horizontally combined_image = np.hstack((img1, img2)) elif TYPE3D == "FOU": # Combining images vertically combined_image = np.vstack((img1, img2)) return combined_image def get_total_frames(): ''' Determining the exact number of frames in a video. The first option is tried first, it is faster but rarely works. If the first option didn't work, the second one is tried, it takes a long time, but usually works well ''' cmd1 = ["ffprobe", "-v", "error", "-select_streams", "v:0", "-show_entries", "stream=nb_frames", "-of", "default=nokey=1:noprint_wrappers=1", video_file_path] cmd2 = ["ffprobe", "-v", "error", "-select_streams", "v:0", "-show_entries", "stream=nb_read_frames", "-count_frames", "-of", "default=nokey=1:noprint_wrappers=1", video_file_path] try: result = subprocess.check_output(cmd1).splitlines()[0].decode().strip() print(f"Variant1: {result}") if result != "N/A": return int(result) except Exception: pass try: result = subprocess.check_output(cmd2).splitlines()[0].decode().strip() print(f"Variant2: {result}") if result != "N/A": return int(result) except Exception: pass # If both methods fail, return None print("Error, the number of frames could not be determined.") return None def extract_frames(start_frame, end_frame): ''' Allocating image files to chunks based on chunk_size ''' frames_to_process = end_frame - start_frame + 1 extracted_frames = [] with frame_counter.get_lock(): start_counter = frame_counter.value frame_counter.value += frames_to_process print(f"\n-- EXTRACTING FRAMES --\nFrames {start_frame} - {end_frame}\n") for chunk_start in range(start_frame, end_frame + 1, chunk_size): chunk_end = min(chunk_start + chunk_size - 1, end_frame) extract_frames_path = os.path.join(frames_path, f"file_%06d.png") cmd = [ "ffmpeg", "-hwaccel", "cuda", "-i", video_file_path, "-vf", f"select='between(n,{chunk_start},{chunk_end})'", "-vsync", "0", "-start_number", str(chunk_start), extract_frames_path ] subprocess.run(cmd, check=True, stdout=subprocess.DEVNULL) print(cmd) for i in range(chunk_end - chunk_start + 1): frame_number = chunk_start + i frame_path = extract_frames_path % frame_number extracted_frames.append(frame_path) print(f"\n-- FRAMES EXTRACTED --\nFrames {start_frame} - {end_frame}\n") return extracted_frames def chunk_processing(extracted_frames, start_frame, end_frame): ''' Start processing for each chunk ''' print(f"\n-- START THE THREAD --\nFrames {start_frame} - {end_frame}\n") for frame_path in extracted_frames: # Extract the image name to save the 3D image later on frame_name = os.path.splitext(os.path.basename(frame_path))[0] # Load image image = cv2.imread(frame_path) # Image size height, width = image.shape[:2] # Runing depth_processing and get depth map depth = depth_processing(image) # Runing image3d_processing and getting a stereo pair for the image PARALLAX_FUNCTIONS = { 1: image3d_processing_method1, 2: image3d_processing_method2, } if PARALLAX_METHOD in (1, 2): left_image, right_image = PARALLAX_FUNCTIONS[PARALLAX_METHOD](image, depth, height, width) else: print(f"Set the correct {PARALLAX_METHOD}.") # Combining stereo pair into a common 3D image image3d = image3d_combining(left_image, right_image, height, width) # Saving 3D image output_image3d_path = os.path.join(images3d_path, f'{frame_name}.jpg') cv2.imwrite(output_image3d_path, image3d, [int(cv2.IMWRITE_JPEG_QUALITY), 100]) # Deleting the source file os.remove(frame_path) print(f"\n-- THREAD DONE --\nFrames {start_frame} - {end_frame}\n") def run_processing(): ''' The main function for starting processing threads ''' # Total frames in video file total_frames = get_total_frames() # Threads control if isinstance(total_frames, int): with ThreadPoolExecutor(max_workers=max_threads) as executor: futures = [] for start_frame in range(0, total_frames, chunk_size): end_frame = min(start_frame + chunk_size - 1, total_frames - 1) # 1. Extracting frames (waiting for task to complete before starting thread) extracted_frames = extract_frames(start_frame, end_frame) # 2. Starting thread for extracted frames future = executor.submit(chunk_processing, extracted_frames, start_frame, end_frame) futures.append(future) # 3. If thread count &gt;= max_threads, wait for any thread to finish if len(futures) &gt;= max_threads: done, not_done = wait(futures, return_when=FIRST_COMPLETED) for f in done: f.result() # if any thread fails, stop all processing futures = list(not_done) # 4. Waiting for threads to complete for future in futures: future.result() print("DONE.") else: print("First, determine the value of total_frames.") # START PROCESSING run_processing() # Delete model and clear Cuda cache del model_depth torch.cuda.empty_cache() This script allows video processing without pre-extracting frames. More precisely, frames are extracted directly from the video file in separate batches. Frame extraction is handled by ffmpeg. We set chunk_size (frame count per thread) and max_threads (thread count), and the script sequentially processes all frames to the end. We first obtain the total frame count using ffprobe. All parameter configuration details are in the main article. I can only note that on my setup (AMD Ryzen 5 PRO 3600, 32GB DDR4, RTX 3060 12GB), 3-5 threads with approximately 5000 frames per thread is typically sufficient. Why did the idea of multi-threaded processing (pseudo-multi-threaded) arise in the first place? First, slow frame extraction. We extract by range, for example: ffmpeg -hwaccel cuda -i video.mkv -vf "select='between(n,5000,10000)'" -vsync 0 -start_number 5000 "extracted_frames/file_%06d.png" then: ffmpeg -hwaccel cuda -i "video.mkv" -vf "select='between(n,10001,15000)'" -vsync 0 -start_number 10001 "extracted_frames/file_%06d.png" and so on. Accordingly, ffmpeg must recount all frames before extraction (or possibly all frames in video) to extract correctly. This also depends on the specific codec and encoding algorithm. I haven’t managed to speed up this process while maintaining precise synchronization (to avoid skipping or duplicating frames). C-3PO in 3D Brief command breakdown: ffmpeg -hwaccel cuda -i video.mkv -vf "select='between(n,5000,10000)'" -vsync 0 -start_number 5000 "extracted_frames/file_%06d.png" “-hwaccel cuda” - use CUDA for extraction, usually faster than CPU “-i video.mkv” - source video file “-vf “select=’between(n,5000,10000)’”” - range filter, from frame 5000 to 10000 “-vsync 0” - disable timestamp synchronization, extract frames as-is “-start_number” - naming counter, starting from 5000 “extracted_frames/file_%06d.png” - path where frames will be extracted and file mask, where %06d is a 6-digit counter, files will be like “file_005000.png”, “file_005001.png”, etc. After complete processing, you’ll need to “manually” compile the movie from the resulting frames, remembering to include audio tracks from the source file. Command for example: ffmpeg -framerate 24000/1001 -i "frames_3d/file_%06d.jpg" -i video.mkv -c:v hevc_nvenc -cq 1 -preset p7 -colorspace bt709 -color_primaries bt709 -color_trc bt709 -color_range tv -pix_fmt yuv420p -map 0:v -map 1:a -c:a copy video_3d.mkv Here: “-framerate 24000/1001” - source video frame rate, 24000/1001 = 23.976 frames per second “-i “frames_3d/file_%06d.jpg”” - folder with 3D frames “-i video.mkv” - source file with audio tracks “-c:v hevc_nvenc” - NVIDIA GPU encoder (H.265) “-cq 1 -preset p7” - high video quality “-colorspace bt709 -color_primaries bt709 -color_trc bt709” - set color parameters according to the BT.709 standard for HD video “-color_range tv” - pixel color format, yuv420p for maximum compatibility “-pix_fmt yuv420p” - standard (limited) range for video, as expected by codecs and players, for maximum compatibility and correct colors “-map 0:v” - specify using the folder with frames specified earlier for video “-map 1:a -c:a copy” - specify using audio tracks from “-i sw4.mkv” without re-encoding; “-c:a copy” - direct copy “video_3d.mkv” - output file name The script can be modified to include this command for auto-execution after frame processing completes, for example: Code: compile_command = [ "ffmpeg", "-framerate", "24000/1001", "-i", "frames_3d/file_%06d.jpg", "-i", "video.mkv", "-c:v", "hevc_nvenc", "-cq", "1", "-preset", "p7", "-colorspace", "bt709", "-color_primaries", "bt709", "-color_trc", "bt709", "-color_range", "tv", "-pix_fmt", "yuv420p", "-map", "0:v", "-map", "1:a", "-c:a", "copy", "video_3d.mkv" ] subprocess.run(compile_command, check=True) Personally, I prefer doing it manually, as constant adjustments are needed - for example, removing some audio tracks, or experimenting with codecs, framerate, and anything else. After compilation, don’t forget to delete the frames directory. Depth map example for a frame Other Solutions VapourSynth Someone suggested alternative solutions. Instead of the chain: frame extraction -&gt; processing -&gt; compiling final video from rendered frames, you can use an intermediate server for on-the-fly video processing, such as VapourSynth. The scheme is roughly as follows: ffmpeg extracts a frame, immediately passes it (without saving) to a processing function (in this case, generating the 3D version of the frame), and the resulting frame is encoded into the output video file (or more precisely, queued for encoding). All this happens in RAM/VRAM, bypassing intermediate stages of saving frames to disk. I haven’t experimented with this yet. I tried installing it on Ubuntu, but VapourSynth required the very latest versions of ffmpeg and some other libraries (apt update/upgrade didn’t help, stable versions weren’t sufficient). I had to manually compile the latest ffmpeg (although the latest stable version was perfectly fine for me personally), and several other libraries, but still couldn’t get VapourSynth running. I’ll definitely return to this later when I have more free time. Perhaps under Windows it’s easier to set up. An important point about on-the-fly processing. On one hand, it’s convenient; on the other, there are nuances. Processing one movie with the Depth-Anything-V2 Large model can take over a day, or even several. I provided an approximate calculation for the Star Wars Episode IV movie in Full HD format with a duration of 2 hours 4 minutes in the main article. On my setup (AMD Ryzen 5 PRO 3600, 32GB DDR4, RTX 3060 12GB) with the Large model, it would take approximately 32 hours to process this movie, and if a failure occurs during the process or the computer accidentally shuts down - you’ll have to start all over again. Darth Vader wouldn’t have tolerated this Another point. You need to be absolutely certain about your source material. In the article about upscaling old videos, I described in detail what problems can arise when working with certain sources and formats, especially if it’s DVD-MPEG2 or something else from the past. There can be issues with precise framerate determination, output image format, and anything else. This needs to be considered and sources should be pre-checked, along with what comes out of them. Overall, implementing a processing server without saving frames is a wonderful idea, since it doesn’t require any disk space for frames, and if we’re working with 4K format and PNG, this is a very critical consideration. Another Library for 2D -&gt; 3D Conversion Someone also suggested another possible solution. I haven’t tried it, only briefly looked at it. It has a GUI and many settings. You can select the depth model, processing method, it supports anaglyph and much more. This implementation will probably be more difficult to figure out, but the solution definitely deserves attention. That’s all, may the force be with you! Additional materials See the main article for all key details All 2D to 3D conversion scripts are available on my GitHub: https://github.com/peterplv/MakeAnythingStereo3D Link to Google Drive with examples and 3D GIFs Example 3D video in HOU format, suitable for viewing on most 3D TVs Example 3D video in FSBS format, suitable for viewing in VR headsets Chewie and Han thank you for your attention]]></summary></entry><entry><title type="html">How to Make 3D Version of Any Movie Using DepthAnythingV2 and Parallax (StarWars4 as Example)</title><link href="https://peterplv.github.io/2026/01/13/make-anything-stereo3d" rel="alternate" type="text/html" title="How to Make 3D Version of Any Movie Using DepthAnythingV2 and Parallax (StarWars4 as Example)" /><published>2026-01-13T19:15:00+03:00</published><updated>2026-01-13T19:15:00+03:00</updated><id>https://peterplv.github.io/2026/01/13/make-anything-stereo3d</id><content type="html" xml:base="https://peterplv.github.io/2026/01/13/make-anything-stereo3d"><![CDATA[<p><img src="/assets/images/2026-01-13-make-anything-stereo3d/starwars4_c3po_r2d2_title3d.gif" alt="C-3PO and R2-D2 in 3D" />
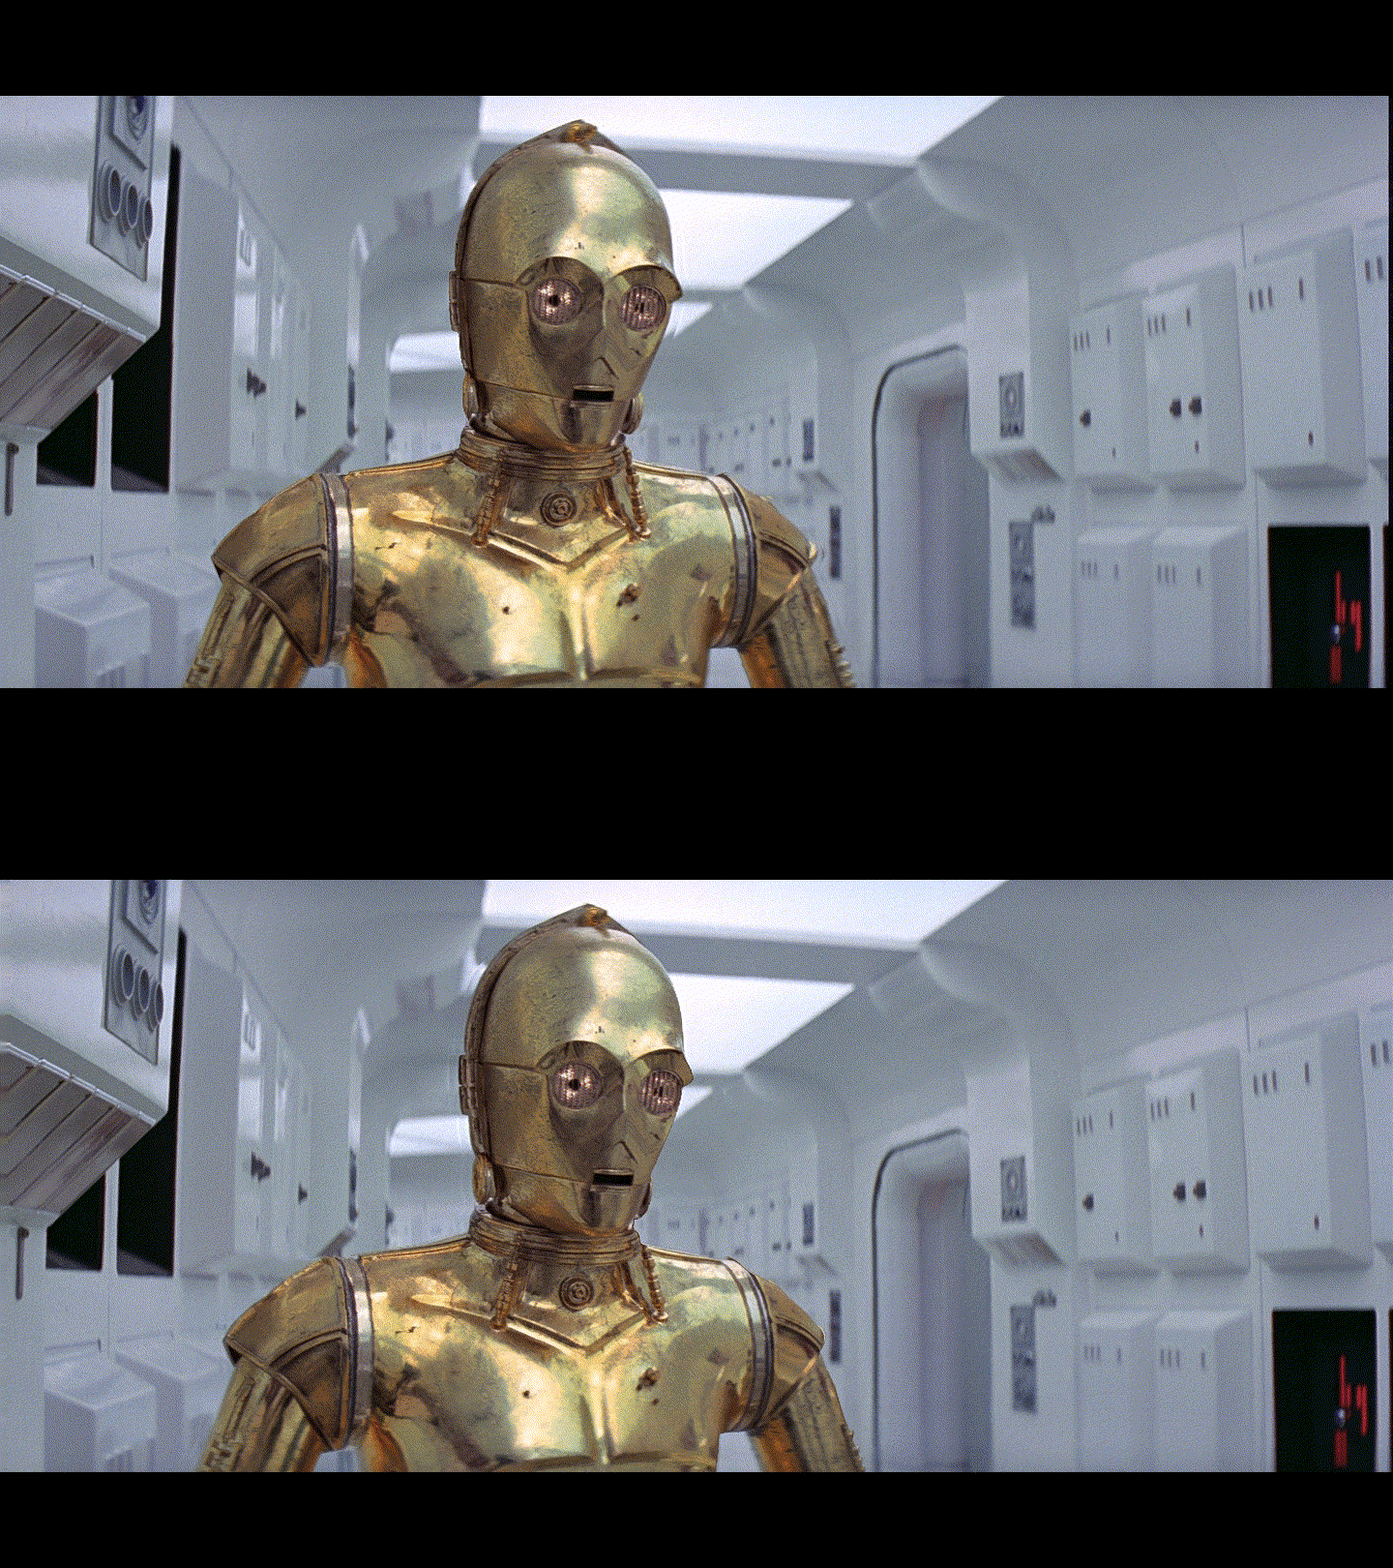
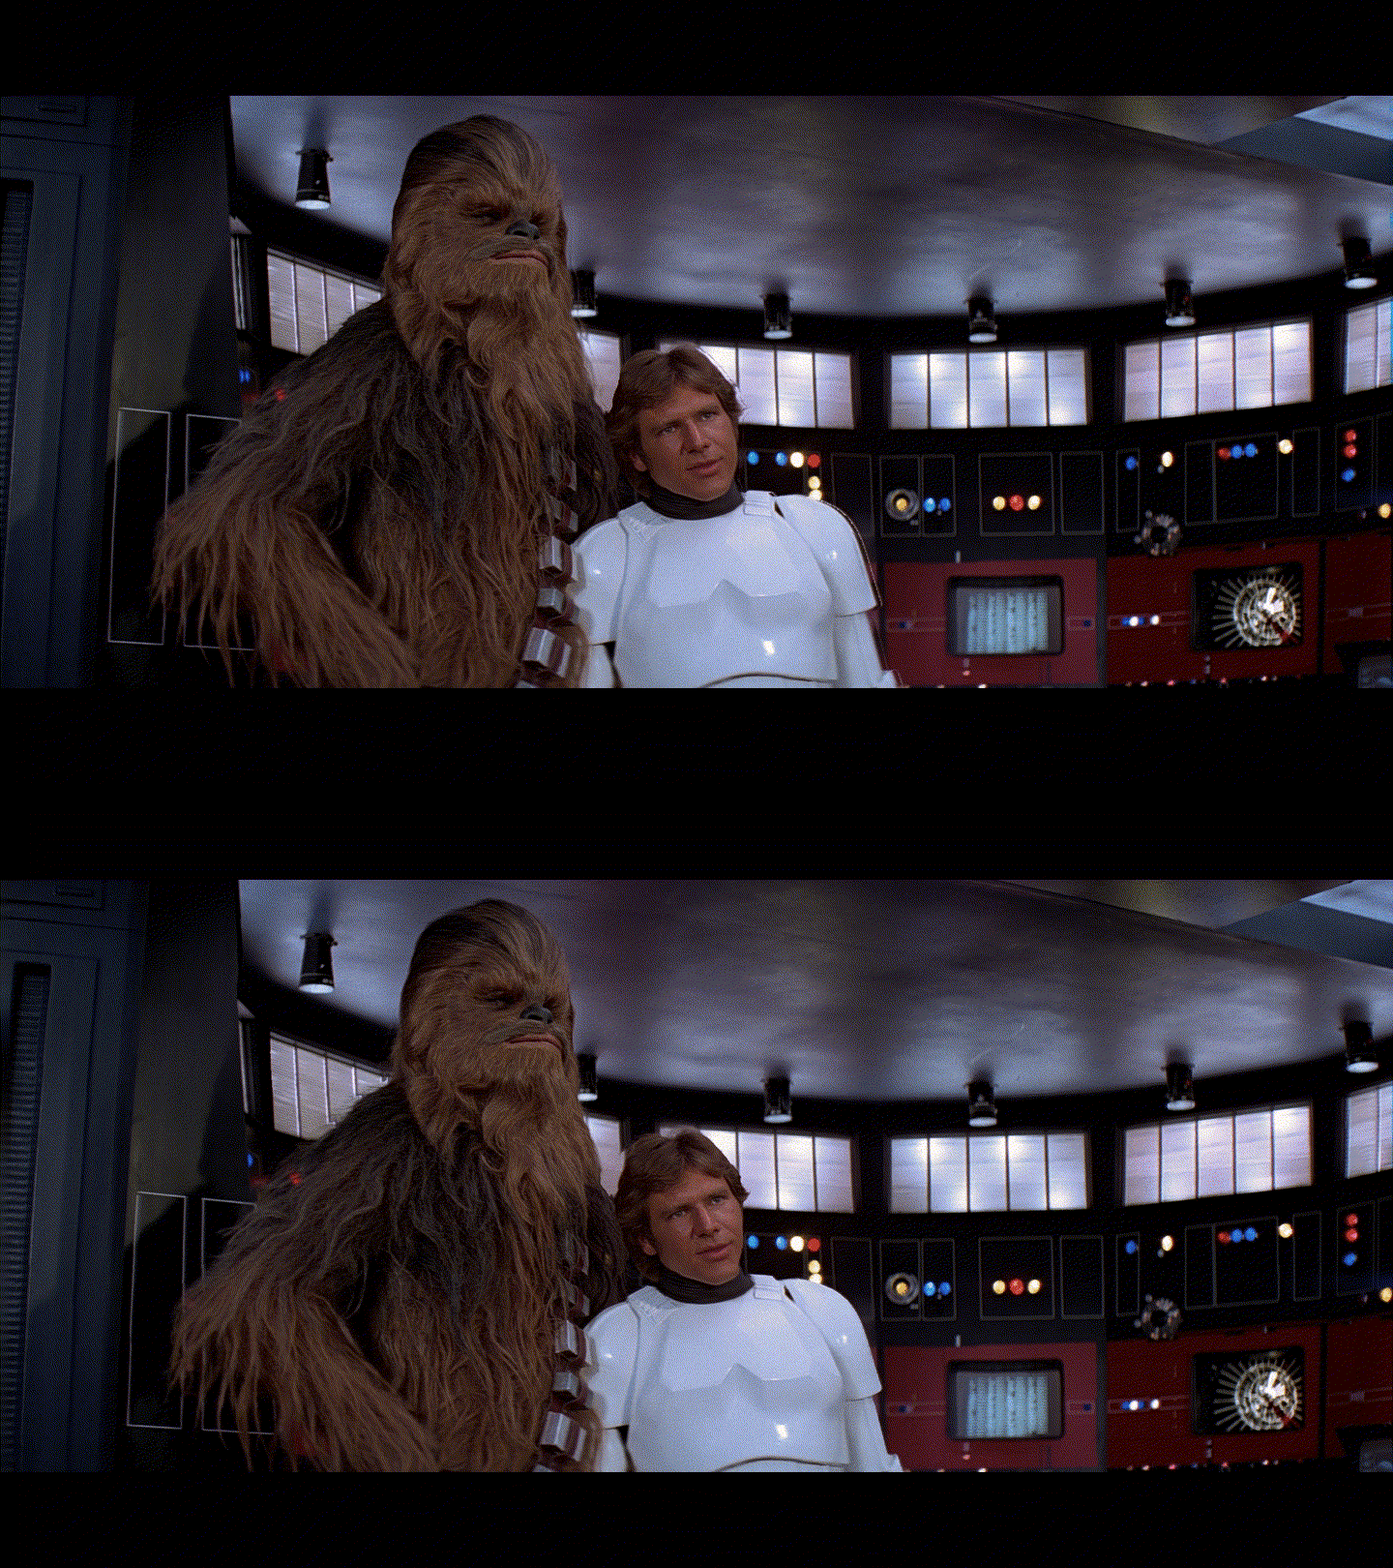
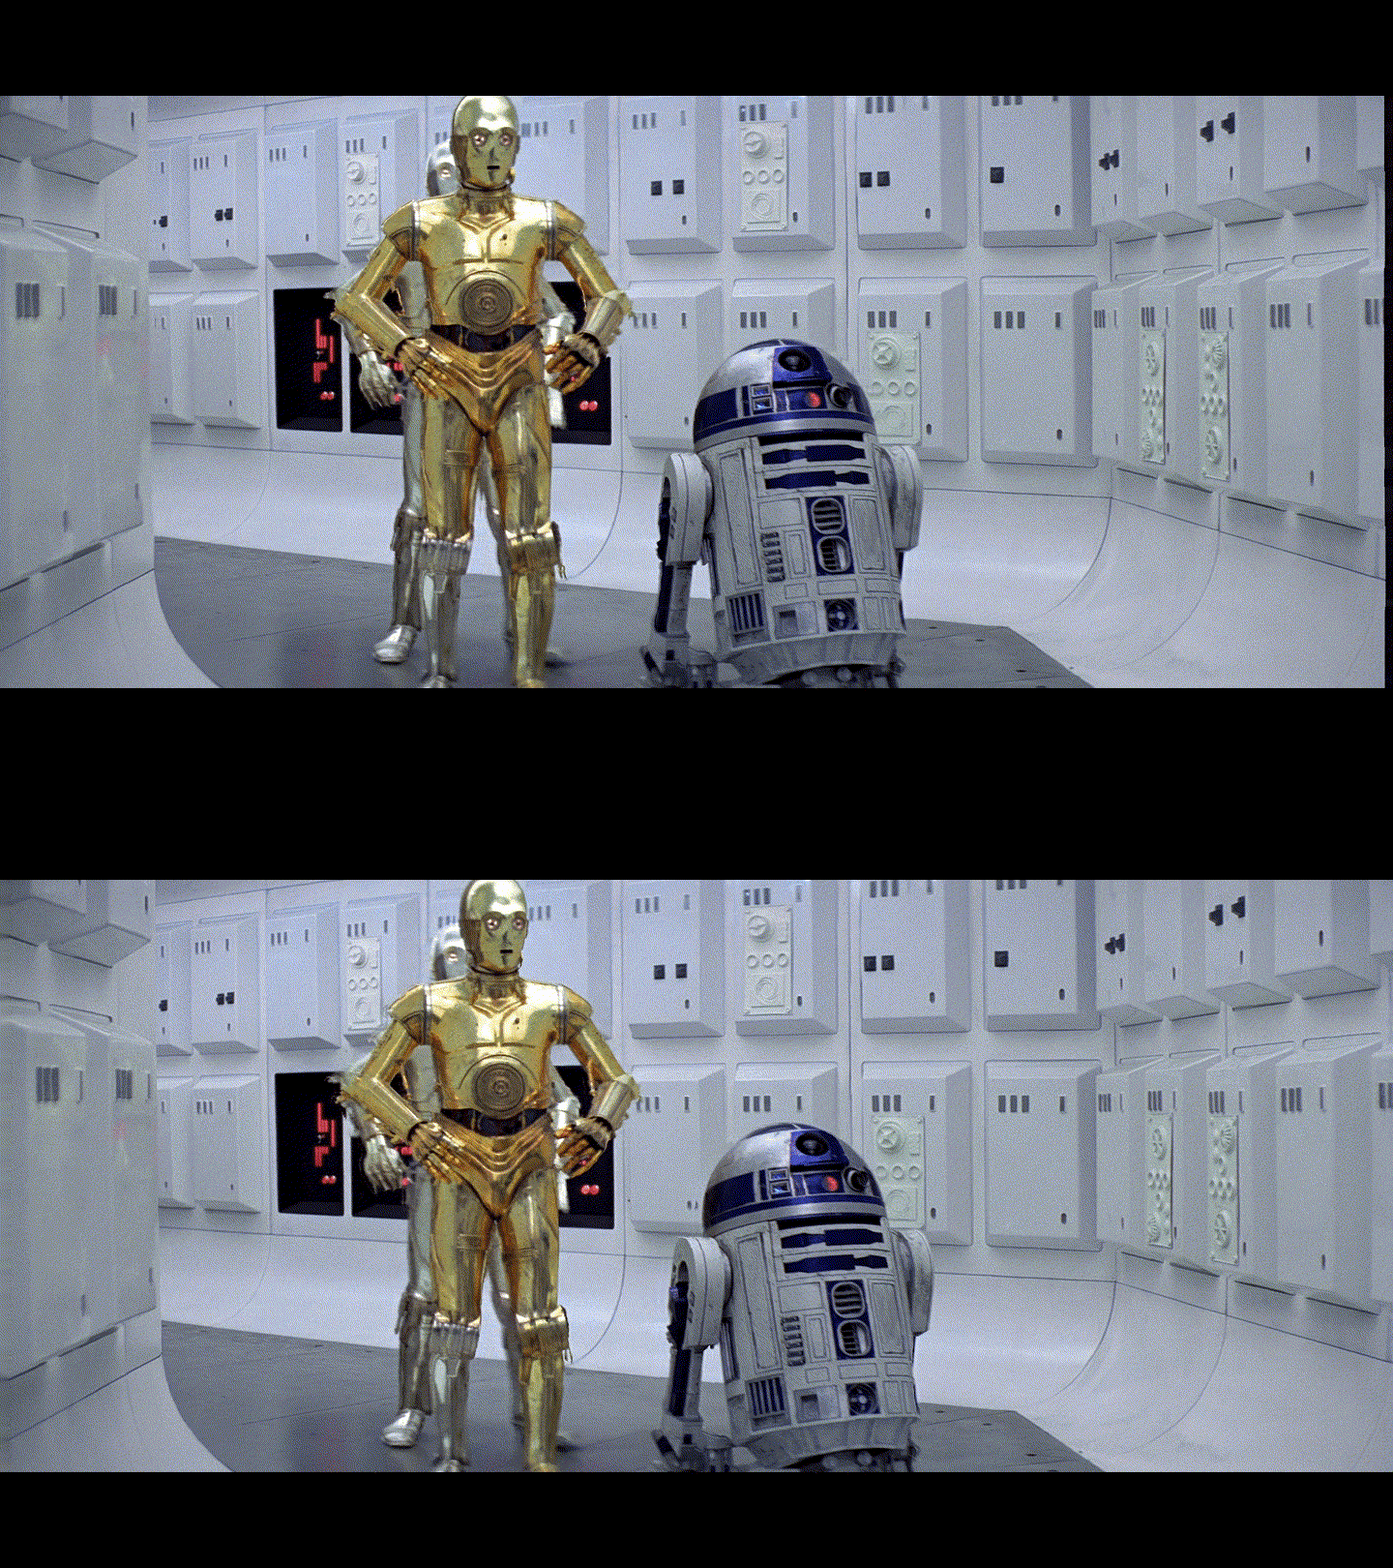
<em>This is the result of the 2D to 3D conversion we will obtain</em>
<br />
<br />
The title isn’t entirely accurate, because you can make a 3D version of any 2D material: movies, cartoons, your personal videos/photos, etc, even a screenshot from your desktop can be converted to 3D. But in this article, we’ll be making a 3D version of a movie.</p>

<p>As the source material, we will use <strong>Star Wars. Episode IV: A New Hope (1977)</strong>.</p>

<p>For this, we will need:</p>
<ul>
  <li>GPU with CUDA support</li>
  <li><a href="https://www.ffmpeg.org/">ffmpeg</a></li>
  <li>Python</li>
  <li><a href="https://github.com/DepthAnything/Depth-Anything-V2">Depth-Anything-V2 library</a></li>
  <li>A sufficient amount of disk space. For a typical FullHD 1080p movie with a duration of ~1.5–2 hours, about <strong>400–500GB</strong> will be required for the source frames in PNG format, and <strong>150–200GB</strong> for the final 3D frames in JPG format at the highest quality. In fact, the required volume for the source data can be reduced - frames can be extracted in parts, this will be discussed below.</li>
</ul>

<p>My configuration for this task:</p>
<ul>
  <li>Gigabyte A520M, AMD Ryzen 5 PRO 3600, 32GB DDR4 3200 MT/s (16+16)</li>
  <li>Gigabyte GeForce RTX 3060 12GB, CUDA Version: 12.5</li>
  <li>Ubuntu 22.04</li>
</ul>

<p>Algorithm overview:</p>
<ul>
  <li>Using ffmpeg, unpack the movie into frames</li>
  <li>Using Depth-Anything-V2, generate a depth map for each frame</li>
  <li>For each pair of images “Source frame” + “Depth map for this frame”, generate a 3D frame using the parallax effect</li>
  <li>Using ffmpeg, encode the resulting 3D frames into a 3D version of the movie + attach the audio tracks from the source material</li>
  <li>Watch and be surprised that it works</li>
</ul>

<p>Spoiler: yes, it works. The 3D quality is excellent - you would never guess that the 3D was synthesized programmatically.</p>

<p>Now to the point.
<br />
<br /></p>
<h2 id="software-installation">Software installation</h2>

<h3 id="installing-ffmpeg">Installing ffmpeg</h3>

<p>Ubuntu:</p>
<div class="language-bash highlighter-rouge"><div class="highlight"><pre class="highlight"><code><span class="nb">sudo </span>apt update
<span class="nb">sudo </span>apt <span class="nb">install </span>ffmpeg
</code></pre></div></div>

<p>Windows:
<a href="https://www.ffmpeg.org/download.html">https://www.ffmpeg.org/download.html</a></p>

<p>Download one of the latest builds, unpack the archive, either entirely or only the ffmpeg.exe file (this is the only one we need here), save it for example to c:\ffmpeg.<br />
You can add the path to the ffmpeg folder to PATH so that ffmpeg can be called from the command line anywhere in the system.
<br /></p>
<h3 id="installing-python">Installing Python</h3>

<p>Ubuntu:</p>
<div class="language-bash highlighter-rouge"><div class="highlight"><pre class="highlight"><code><span class="nb">sudo </span>apt update
<span class="nb">sudo </span>apt <span class="nb">install </span>python3 python3-pip
</code></pre></div></div>

<p>Windows:
<a href="https://www.python.org/downloads/windows/">https://www.python.org/downloads/windows/</a></p>

<p>Download one of the latest releases for your OS and install it.</p>

<p>For Python, also install the <strong>numpy</strong> library:</p>
<div class="language-bash highlighter-rouge"><div class="highlight"><pre class="highlight"><code>pip <span class="nb">install </span>numpy
</code></pre></div></div>

<h3 id="installing-depth-anything-v2">Installing Depth-Anything-V2</h3>

<p><strong>GitHub</strong>: <a href="https://github.com/DepthAnything/Depth-Anything-V2">https://github.com/DepthAnything/Depth-Anything-V2</a></p>

<p>The description from there:</p>
<div class="language-bash highlighter-rouge"><div class="highlight"><pre class="highlight"><code>git clone https://github.com/DepthAnything/Depth-Anything-V2
<span class="nb">cd </span>Depth-Anything-V2
pip <span class="nb">install</span> <span class="nt">-r</span> requirements.txt
</code></pre></div></div>

<p>The <a href="https://github.com/DepthAnything/Depth-Anything-V2#pre-trained-models">models</a> must be downloaded separately.
I work with the Large model (<strong>335.3M</strong> parameters, size ~<strong>1280Mb</strong>). The Base model (<strong>97.5M</strong> parameters, size ~<strong>372Mb</strong>) has also performed well. There is also a Small model (<strong>24.8M</strong> parameters, size ~<strong>95Mb</strong>), and the site also lists “<em>Coming soon</em>” for the <strong>Giant</strong> model with <strong>1.3B</strong> parameters.</p>

<p>More about the models. I tested all 3 models; all of them are suitable for this task, even with the Small model you get good volumetric 3D. Personally, I settled on the Large model, since processing speed is not a critical factor for me (an average movie is processed within a 24 hours), and the quality of the Large model is noticeably better, especially in details. The Base model also produces excellent 3D, and an average movie is processed overnight.
<br />
<br /></p>
<h2 id="stage-0-test-run">Stage 0: test run</h2>

<p>As a test, we take this frame:</p>

<p><img src="/assets/images/2026-01-13-make-anything-stereo3d/starwars4_c3po_r2d2_orig.jpg" alt="C-3PO and R2-D2" />
<em>C-3PO and R2-D2 do not yet suspect that they will soon become 3D</em></p>

<p>The <a href="https://github.com/DepthAnything/Depth-Anything-V2">Depth-Anything-V2 page</a> has an example for running depth map generation:</p>

<details>
  <summary>Code:</summary>

  <div class="language-python highlighter-rouge"><div class="highlight"><pre class="highlight"><code><span class="kn">import</span> <span class="nn">cv2</span>
<span class="kn">import</span> <span class="nn">torch</span>

<span class="kn">from</span> <span class="nn">depth_anything_v2.dpt</span> <span class="kn">import</span> <span class="n">DepthAnythingV2</span>

<span class="n">DEVICE</span> <span class="o">=</span> <span class="s">'cuda'</span> <span class="k">if</span> <span class="n">torch</span><span class="p">.</span><span class="n">cuda</span><span class="p">.</span><span class="n">is_available</span><span class="p">()</span> <span class="k">else</span> <span class="s">'mps'</span> <span class="k">if</span> <span class="n">torch</span><span class="p">.</span><span class="n">backends</span><span class="p">.</span><span class="n">mps</span><span class="p">.</span><span class="n">is_available</span><span class="p">()</span> <span class="k">else</span> <span class="s">'cpu'</span>

<span class="n">model_configs</span> <span class="o">=</span> <span class="p">{</span>
    <span class="s">'vits'</span><span class="p">:</span> <span class="p">{</span><span class="s">'encoder'</span><span class="p">:</span> <span class="s">'vits'</span><span class="p">,</span> <span class="s">'features'</span><span class="p">:</span> <span class="mi">64</span><span class="p">,</span> <span class="s">'out_channels'</span><span class="p">:</span> <span class="p">[</span><span class="mi">48</span><span class="p">,</span> <span class="mi">96</span><span class="p">,</span> <span class="mi">192</span><span class="p">,</span> <span class="mi">384</span><span class="p">]},</span>
    <span class="s">'vitb'</span><span class="p">:</span> <span class="p">{</span><span class="s">'encoder'</span><span class="p">:</span> <span class="s">'vitb'</span><span class="p">,</span> <span class="s">'features'</span><span class="p">:</span> <span class="mi">128</span><span class="p">,</span> <span class="s">'out_channels'</span><span class="p">:</span> <span class="p">[</span><span class="mi">96</span><span class="p">,</span> <span class="mi">192</span><span class="p">,</span> <span class="mi">384</span><span class="p">,</span> <span class="mi">768</span><span class="p">]},</span>
    <span class="s">'vitl'</span><span class="p">:</span> <span class="p">{</span><span class="s">'encoder'</span><span class="p">:</span> <span class="s">'vitl'</span><span class="p">,</span> <span class="s">'features'</span><span class="p">:</span> <span class="mi">256</span><span class="p">,</span> <span class="s">'out_channels'</span><span class="p">:</span> <span class="p">[</span><span class="mi">256</span><span class="p">,</span> <span class="mi">512</span><span class="p">,</span> <span class="mi">1024</span><span class="p">,</span> <span class="mi">1024</span><span class="p">]}</span>  
<span class="p">}</span>

<span class="n">encoder</span> <span class="o">=</span> <span class="s">"vitl"</span> <span class="c1"># vits, vitb, vitl
</span>
<span class="n">model</span> <span class="o">=</span> <span class="n">DepthAnythingV2</span><span class="p">(</span><span class="o">**</span><span class="n">model_configs</span><span class="p">[</span><span class="n">encoder</span><span class="p">])</span>
<span class="n">model</span><span class="p">.</span><span class="n">load_state_dict</span><span class="p">(</span><span class="n">torch</span><span class="p">.</span><span class="n">load</span><span class="p">(</span><span class="sa">f</span><span class="s">'checkpoints/depth_anything_v2_</span><span class="si">{</span><span class="n">encoder</span><span class="si">}</span><span class="s">.pth'</span><span class="p">,</span> <span class="n">map_location</span><span class="o">=</span><span class="s">'cpu'</span><span class="p">))</span>
<span class="n">model</span> <span class="o">=</span> <span class="n">model</span><span class="p">.</span><span class="n">to</span><span class="p">(</span><span class="n">DEVICE</span><span class="p">).</span><span class="nb">eval</span><span class="p">()</span>

<span class="n">raw_img</span> <span class="o">=</span> <span class="n">cv2</span><span class="p">.</span><span class="n">imread</span><span class="p">(</span><span class="s">'your/image/path'</span><span class="p">)</span>
<span class="n">depth</span> <span class="o">=</span> <span class="n">model</span><span class="p">.</span><span class="n">infer_image</span><span class="p">(</span><span class="n">raw_img</span><span class="p">)</span> <span class="c1"># HxW raw depth map in numpy
</span></code></pre></div>  </div>
</details>
<p><br /></p>

<p>Let’s slightly modify this script and add saving the results to a file:</p>

<details>
  <summary>Code:</summary>

  <div class="language-python highlighter-rouge"><div class="highlight"><pre class="highlight"><code><span class="kn">import</span> <span class="nn">os</span>
<span class="kn">import</span> <span class="nn">cv2</span>
<span class="kn">import</span> <span class="nn">torch</span>
<span class="kn">import</span> <span class="nn">numpy</span> <span class="k">as</span> <span class="n">np</span>

<span class="kn">from</span> <span class="nn">depth_anything_v2.dpt</span> <span class="kn">import</span> <span class="n">DepthAnythingV2</span>


<span class="c1"># GENERAL OPTIONS
# Path to the folder with depth generation models
</span><span class="n">depth_models_path</span> <span class="o">=</span> <span class="s">"/home/user/DepthAnythingV2/models"</span>

<span class="c1"># Source file path
</span><span class="n">image_path</span> <span class="o">=</span> <span class="s">"/home/user/sw4test/file_000790.png"</span>

<span class="c1"># Folder to save result
</span><span class="n">output_path</span> <span class="o">=</span> <span class="s">"/home/user/sw4test"</span>  <span class="c1"># Saving in the same folder, the filename will be file_000790_depth.png
</span>
<span class="c1"># Computing device
</span><span class="n">device</span> <span class="o">=</span> <span class="n">torch</span><span class="p">.</span><span class="n">device</span><span class="p">(</span><span class="s">'cuda'</span><span class="p">)</span>


<span class="c1"># DEPTH OPTIONS
</span><span class="n">depth_models_config</span> <span class="o">=</span> <span class="p">{</span>
        <span class="s">'vits'</span><span class="p">:</span> <span class="p">{</span><span class="s">'encoder'</span><span class="p">:</span> <span class="s">'vits'</span><span class="p">,</span> <span class="s">'features'</span><span class="p">:</span> <span class="mi">64</span><span class="p">,</span> <span class="s">'out_channels'</span><span class="p">:</span> <span class="p">[</span><span class="mi">48</span><span class="p">,</span> <span class="mi">96</span><span class="p">,</span> <span class="mi">192</span><span class="p">,</span> <span class="mi">384</span><span class="p">]},</span>
        <span class="s">'vitb'</span><span class="p">:</span> <span class="p">{</span><span class="s">'encoder'</span><span class="p">:</span> <span class="s">'vitb'</span><span class="p">,</span> <span class="s">'features'</span><span class="p">:</span> <span class="mi">128</span><span class="p">,</span> <span class="s">'out_channels'</span><span class="p">:</span> <span class="p">[</span><span class="mi">96</span><span class="p">,</span> <span class="mi">192</span><span class="p">,</span> <span class="mi">384</span><span class="p">,</span> <span class="mi">768</span><span class="p">]},</span>
        <span class="s">'vitl'</span><span class="p">:</span> <span class="p">{</span><span class="s">'encoder'</span><span class="p">:</span> <span class="s">'vitl'</span><span class="p">,</span> <span class="s">'features'</span><span class="p">:</span> <span class="mi">256</span><span class="p">,</span> <span class="s">'out_channels'</span><span class="p">:</span> <span class="p">[</span><span class="mi">256</span><span class="p">,</span> <span class="mi">512</span><span class="p">,</span> <span class="mi">1024</span><span class="p">,</span> <span class="mi">1024</span><span class="p">]}</span>
<span class="p">}</span>

<span class="c1"># Selecting the DepthAnythingV2 model: vits - Small, vitb - Base, vitl - Large
</span><span class="n">encoder</span> <span class="o">=</span> <span class="s">"vitl"</span> <span class="c1"># vits, vitb, vitl
</span>
<span class="n">model_depth_current</span> <span class="o">=</span> <span class="n">os</span><span class="p">.</span><span class="n">path</span><span class="p">.</span><span class="n">join</span><span class="p">(</span><span class="n">depth_models_path</span><span class="p">,</span> <span class="sa">f</span><span class="s">'depth_anything_v2_</span><span class="si">{</span><span class="n">encoder</span><span class="si">}</span><span class="s">.pth'</span><span class="p">)</span>
<span class="n">model_depth</span> <span class="o">=</span> <span class="n">DepthAnythingV2</span><span class="p">(</span><span class="o">**</span><span class="n">depth_models_config</span><span class="p">[</span><span class="n">encoder</span><span class="p">])</span>
<span class="n">model_depth</span><span class="p">.</span><span class="n">load_state_dict</span><span class="p">(</span><span class="n">torch</span><span class="p">.</span><span class="n">load</span><span class="p">(</span><span class="n">model_depth_current</span><span class="p">,</span> <span class="n">weights_only</span><span class="o">=</span><span class="bp">True</span><span class="p">,</span> <span class="n">map_location</span><span class="o">=</span><span class="n">device</span><span class="p">))</span>
<span class="n">model_depth</span> <span class="o">=</span> <span class="n">model_depth</span><span class="p">.</span><span class="n">to</span><span class="p">(</span><span class="n">device</span><span class="p">).</span><span class="nb">eval</span><span class="p">()</span>


<span class="c1"># START PROCESSING
# Loading the image
</span><span class="n">raw_img</span> <span class="o">=</span> <span class="n">cv2</span><span class="p">.</span><span class="n">imread</span><span class="p">(</span><span class="n">image_path</span><span class="p">)</span>

<span class="c1"># Extract the image name to save the depth map later
</span><span class="n">image_name</span> <span class="o">=</span> <span class="n">os</span><span class="p">.</span><span class="n">path</span><span class="p">.</span><span class="n">splitext</span><span class="p">(</span><span class="n">os</span><span class="p">.</span><span class="n">path</span><span class="p">.</span><span class="n">basename</span><span class="p">(</span><span class="n">image_path</span><span class="p">))[</span><span class="mi">0</span><span class="p">]</span>

<span class="c1"># Depth calculation
</span><span class="k">with</span> <span class="n">torch</span><span class="p">.</span><span class="n">no_grad</span><span class="p">():</span>
    <span class="n">depth</span> <span class="o">=</span> <span class="n">model_depth</span><span class="p">.</span><span class="n">infer_image</span><span class="p">(</span><span class="n">raw_img</span><span class="p">)</span>
    
<span class="c1"># Depth normalization before saving
</span><span class="n">depth_normalized</span> <span class="o">=</span> <span class="n">cv2</span><span class="p">.</span><span class="n">normalize</span><span class="p">(</span><span class="n">depth</span><span class="p">,</span> <span class="bp">None</span><span class="p">,</span> <span class="mi">0</span><span class="p">,</span> <span class="mi">255</span><span class="p">,</span> <span class="n">norm_type</span><span class="o">=</span><span class="n">cv2</span><span class="p">.</span><span class="n">NORM_MINMAX</span><span class="p">,</span> <span class="n">dtype</span><span class="o">=</span><span class="n">cv2</span><span class="p">.</span><span class="n">CV_8U</span><span class="p">)</span>

<span class="c1"># Saving the depth map
</span><span class="n">output_path</span> <span class="o">=</span> <span class="n">os</span><span class="p">.</span><span class="n">path</span><span class="p">.</span><span class="n">join</span><span class="p">(</span><span class="n">output_path</span><span class="p">,</span> <span class="sa">f</span><span class="s">'</span><span class="si">{</span><span class="n">image_name</span><span class="si">}</span><span class="s">_depth.png'</span><span class="p">)</span>
<span class="n">cv2</span><span class="p">.</span><span class="n">imwrite</span><span class="p">(</span><span class="n">output_path</span><span class="p">,</span> <span class="n">depth_normalized</span><span class="p">)</span>

<span class="c1"># OPTIONAL: SAVE DEPTH MAP IN COLOR
</span><span class="n">depth_colored</span> <span class="o">=</span> <span class="n">cv2</span><span class="p">.</span><span class="n">applyColorMap</span><span class="p">(</span><span class="n">depth_normalized</span><span class="p">,</span> <span class="n">cv2</span><span class="p">.</span><span class="n">COLORMAP_JET</span><span class="p">)</span>

<span class="c1"># Saving the depth map in color
</span><span class="n">output_path</span> <span class="o">=</span> <span class="n">os</span><span class="p">.</span><span class="n">path</span><span class="p">.</span><span class="n">join</span><span class="p">(</span><span class="n">output_path</span><span class="p">,</span> <span class="sa">f</span><span class="s">'</span><span class="si">{</span><span class="n">image_name</span><span class="si">}</span><span class="s">_depth_color.png'</span><span class="p">)</span>
<span class="n">cv2</span><span class="p">.</span><span class="n">imwrite</span><span class="p">(</span><span class="n">output_path</span><span class="p">,</span> <span class="n">depth_colored</span><span class="p">)</span>


<span class="k">print</span><span class="p">(</span><span class="s">"DONE."</span><span class="p">)</span>


<span class="c1"># Delete model and clear Cuda cache
</span><span class="k">del</span> <span class="n">model_depth</span>
<span class="n">torch</span><span class="p">.</span><span class="n">cuda</span><span class="p">.</span><span class="n">empty_cache</span><span class="p">()</span>
</code></pre></div>  </div>
</details>
<p><br /></p>

<p>We get a depth map:
<img src="/assets/images/2026-01-13-make-anything-stereo3d/starwars4_c3po_r2d2_depth_grey.jpg" alt="C-3PO and R2-D2 depth map" />
<em>Depth map, the lighter the object, the closer it is</em>
<br />
<br />
Or a colorized version of the depth map, for clarity (it won’t be needed for our task):
<img src="/assets/images/2026-01-13-make-anything-stereo3d/starwars4_c3po_r2d2_depth_color.jpg" alt="C-3PO and R2-D2 depth map color" />
<em>Color depth map, from dark red (closer) to dark blue (farther)</em>
<br />
<br /></p>
<blockquote>
  <p>Related article: <a href="https://peterplv.github.io/2026/01/16/depth-anything2-colors">Visual Comparison of Depth-Anything-V2 Models</a> →</p>
</blockquote>

<p><br />
Now, based on the obtained depth map, let’s make a 3D image, for example in the FOU (Full Over-Under) format:</p>
<details>
  <summary>Code:</summary>

  <div class="language-python highlighter-rouge"><div class="highlight"><pre class="highlight"><code><span class="kn">import</span> <span class="nn">os</span>
<span class="kn">import</span> <span class="nn">cv2</span>
<span class="kn">import</span> <span class="nn">numpy</span> <span class="k">as</span> <span class="n">np</span>


<span class="c1"># GENERAL OPTIONS
# Source file path
</span><span class="n">image_path</span> <span class="o">=</span> <span class="s">"/home/user/sw4test/file_000790.png"</span>

<span class="c1"># Depth map path for the source image
</span><span class="n">depth_path</span> <span class="o">=</span> <span class="s">"/home/user/sw4test/file_000790_depth.png"</span>

<span class="c1"># Folder to save result
</span><span class="n">output_path</span> <span class="o">=</span> <span class="s">"/home/user/sw4test"</span>  <span class="c1"># Saving in the same folder, the filename will be file_000790_3d.jpg
</span>
<span class="c1"># 3D OPTIONS
</span><span class="n">PARALLAX_SCALE</span> <span class="o">=</span> <span class="mi">15</span>  <span class="c1"># Recommended 10 to 20
</span><span class="n">PARALLAX_METHOD</span> <span class="o">=</span> <span class="mi">1</span>  <span class="c1"># 1 or 2
</span><span class="n">INPAINT_RADIUS</span>  <span class="o">=</span> <span class="mi">2</span>  <span class="c1"># For PARALLAX_METHOD = 2 only, recommended 2 to 5, optimum value 2-3
</span><span class="n">INTERPOLATION_TYPE</span> <span class="o">=</span> <span class="n">cv2</span><span class="p">.</span><span class="n">INTER_LINEAR</span>  <span class="c1"># INTER_NEAREST, INTER_AREA, INTER_LINEAR, INTER_CUBIC, INTER_LANCZOS4
</span><span class="n">TYPE3D</span> <span class="o">=</span> <span class="s">"FOU"</span>  <span class="c1"># HSBS, FSBS, HOU, FOU
</span><span class="n">LEFT_RIGHT</span> <span class="o">=</span> <span class="s">"LEFT"</span>  <span class="c1"># LEFT or RIGHT
</span>
<span class="c1"># 0 - if there's no need to change frame size
</span><span class="n">new_width</span>  <span class="o">=</span> <span class="mi">0</span>
<span class="n">new_height</span> <span class="o">=</span> <span class="mi">0</span>


<span class="k">def</span> <span class="nf">image_size_correction</span><span class="p">(</span><span class="n">current_height</span><span class="p">,</span> <span class="n">current_width</span><span class="p">,</span> <span class="n">left_image</span><span class="p">,</span> <span class="n">right_image</span><span class="p">):</span>
    <span class="s">''' Image size correction if new_width and new_height are set '''</span>
    
    <span class="c1"># Calculate offsets for centering
</span>    <span class="n">top</span> <span class="o">=</span> <span class="p">(</span><span class="n">new_height</span> <span class="o">-</span> <span class="n">current_height</span><span class="p">)</span> <span class="o">//</span> <span class="mi">2</span>
    <span class="n">left</span> <span class="o">=</span> <span class="p">(</span><span class="n">new_width</span> <span class="o">-</span> <span class="n">current_width</span><span class="p">)</span> <span class="o">//</span> <span class="mi">2</span>
    
    <span class="c1"># Create a black canvas of the desired size
</span>    <span class="n">new_left_image</span>  <span class="o">=</span> <span class="n">np</span><span class="p">.</span><span class="n">zeros</span><span class="p">((</span><span class="n">new_height</span><span class="p">,</span> <span class="n">new_width</span><span class="p">,</span> <span class="mi">3</span><span class="p">),</span> <span class="n">dtype</span><span class="o">=</span><span class="n">np</span><span class="p">.</span><span class="n">uint8</span><span class="p">)</span>
    <span class="n">new_right_image</span> <span class="o">=</span> <span class="n">np</span><span class="p">.</span><span class="n">zeros</span><span class="p">((</span><span class="n">new_height</span><span class="p">,</span> <span class="n">new_width</span><span class="p">,</span> <span class="mi">3</span><span class="p">),</span> <span class="n">dtype</span><span class="o">=</span><span class="n">np</span><span class="p">.</span><span class="n">uint8</span><span class="p">)</span>
    
    <span class="c1"># Placing the image on a black background
</span>    <span class="n">new_left_image</span><span class="p">[</span><span class="n">top</span><span class="p">:</span><span class="n">top</span> <span class="o">+</span> <span class="n">current_height</span><span class="p">,</span> <span class="n">left</span><span class="p">:</span><span class="n">left</span> <span class="o">+</span> <span class="n">current_width</span><span class="p">]</span> <span class="o">=</span> <span class="n">left_image</span>
    <span class="n">new_right_image</span><span class="p">[</span><span class="n">top</span><span class="p">:</span><span class="n">top</span> <span class="o">+</span> <span class="n">current_height</span><span class="p">,</span> <span class="n">left</span><span class="p">:</span><span class="n">left</span> <span class="o">+</span> <span class="n">current_width</span><span class="p">]</span> <span class="o">=</span> <span class="n">right_image</span>
    
    <span class="k">return</span> <span class="n">new_left_image</span><span class="p">,</span> <span class="n">new_right_image</span>
    
<span class="k">def</span> <span class="nf">image3d_processing_method1</span><span class="p">(</span><span class="n">image</span><span class="p">,</span> <span class="n">depth</span><span class="p">,</span> <span class="n">height</span><span class="p">,</span> <span class="n">width</span><span class="p">):</span>
    <span class="s">''' The function of creating a stereo pair based on the source image and depth map.
        Method1: faster, contours smoother, but may be less accurate
    '''</span>
    
    <span class="c1"># Creating parallax
</span>    <span class="n">parallax</span> <span class="o">=</span> <span class="n">depth</span> <span class="o">*</span> <span class="n">PARALLAX_SCALE</span>

    <span class="c1"># Pixel coordinates
</span>    <span class="n">x</span><span class="p">,</span> <span class="n">y</span> <span class="o">=</span> <span class="n">np</span><span class="p">.</span><span class="n">meshgrid</span><span class="p">(</span><span class="n">np</span><span class="p">.</span><span class="n">arange</span><span class="p">(</span><span class="n">width</span><span class="p">,</span> <span class="n">dtype</span><span class="o">=</span><span class="n">np</span><span class="p">.</span><span class="n">float32</span><span class="p">),</span> <span class="n">np</span><span class="p">.</span><span class="n">arange</span><span class="p">(</span><span class="n">height</span><span class="p">,</span> <span class="n">dtype</span><span class="o">=</span><span class="n">np</span><span class="p">.</span><span class="n">float32</span><span class="p">))</span>

    <span class="c1"># Calculation of offsets
</span>    <span class="n">shift_left</span> <span class="o">=</span>  <span class="n">np</span><span class="p">.</span><span class="n">clip</span><span class="p">(</span><span class="n">x</span> <span class="o">-</span> <span class="n">parallax</span><span class="p">,</span> <span class="mi">0</span><span class="p">,</span> <span class="n">width</span> <span class="o">-</span> <span class="mi">1</span><span class="p">)</span>
    <span class="n">shift_right</span> <span class="o">=</span> <span class="n">np</span><span class="p">.</span><span class="n">clip</span><span class="p">(</span><span class="n">x</span> <span class="o">+</span> <span class="n">parallax</span><span class="p">,</span> <span class="mi">0</span><span class="p">,</span> <span class="n">width</span> <span class="o">-</span> <span class="mi">1</span><span class="p">)</span>

    <span class="c1"># Applying offsets with cv2.remap
</span>    <span class="n">left_image</span> <span class="o">=</span>  <span class="n">cv2</span><span class="p">.</span><span class="n">remap</span><span class="p">(</span><span class="n">image</span><span class="p">,</span> <span class="n">shift_left</span><span class="p">,</span>  <span class="n">y</span><span class="p">,</span> <span class="n">interpolation</span><span class="o">=</span><span class="n">INTERPOLATION_TYPE</span><span class="p">)</span>
    <span class="n">right_image</span> <span class="o">=</span> <span class="n">cv2</span><span class="p">.</span><span class="n">remap</span><span class="p">(</span><span class="n">image</span><span class="p">,</span> <span class="n">shift_right</span><span class="p">,</span> <span class="n">y</span><span class="p">,</span> <span class="n">interpolation</span><span class="o">=</span><span class="n">INTERPOLATION_TYPE</span><span class="p">)</span>
    
    <span class="k">return</span> <span class="n">left_image</span><span class="p">,</span> <span class="n">right_image</span>

<span class="k">def</span> <span class="nf">image3d_processing_method2</span><span class="p">(</span><span class="n">image</span><span class="p">,</span> <span class="n">depth</span><span class="p">,</span> <span class="n">height</span><span class="p">,</span> <span class="n">width</span><span class="p">):</span>
    <span class="s">''' The function of creating a stereo pair based on the source image and depth map.
        Method2: slightly slower than the first method, but can be more accurate
    '''</span>
    
    <span class="c1"># Calculating the value for parallax
</span>    <span class="n">parallax</span> <span class="o">=</span> <span class="n">depth</span> <span class="o">*</span> <span class="n">PARALLAX_SCALE</span>
    
    <span class="c1"># Parallax rounding and conversion to int32
</span>    <span class="n">shift</span> <span class="o">=</span> <span class="n">np</span><span class="p">.</span><span class="nb">round</span><span class="p">(</span><span class="n">parallax</span><span class="p">).</span><span class="n">astype</span><span class="p">(</span><span class="n">np</span><span class="p">.</span><span class="n">int32</span><span class="p">)</span>

    <span class="c1"># Grid coordinates
</span>    <span class="n">y</span><span class="p">,</span> <span class="n">x</span> <span class="o">=</span> <span class="n">np</span><span class="p">.</span><span class="n">indices</span><span class="p">((</span><span class="n">height</span><span class="p">,</span> <span class="n">width</span><span class="p">),</span> <span class="n">dtype</span><span class="o">=</span><span class="n">np</span><span class="p">.</span><span class="n">int32</span><span class="p">)</span>

    <span class="c1"># Image preparation
</span>    <span class="n">left_image</span>  <span class="o">=</span> <span class="n">np</span><span class="p">.</span><span class="n">zeros_like</span><span class="p">(</span><span class="n">image</span><span class="p">)</span>
    <span class="n">right_image</span> <span class="o">=</span> <span class="n">np</span><span class="p">.</span><span class="n">zeros_like</span><span class="p">(</span><span class="n">image</span><span class="p">)</span>

    <span class="c1"># Left image shaping by offset coordinates
</span>    <span class="n">x_src_left</span> <span class="o">=</span> <span class="n">x</span> <span class="o">-</span> <span class="n">shift</span>
    <span class="n">valid_left</span> <span class="o">=</span> <span class="p">(</span><span class="n">x_src_left</span> <span class="o">&gt;=</span> <span class="mi">0</span><span class="p">)</span> <span class="o">&amp;</span> <span class="p">(</span><span class="n">x_src_left</span> <span class="o">&lt;</span> <span class="n">width</span><span class="p">)</span>
    <span class="n">left_image</span><span class="p">[</span><span class="n">y</span><span class="p">[</span><span class="n">valid_left</span><span class="p">],</span> <span class="n">x</span><span class="p">[</span><span class="n">valid_left</span><span class="p">]]</span> <span class="o">=</span> <span class="n">image</span><span class="p">[</span><span class="n">y</span><span class="p">[</span><span class="n">valid_left</span><span class="p">],</span> <span class="n">x_src_left</span><span class="p">[</span><span class="n">valid_left</span><span class="p">]]</span>

    <span class="c1"># Right image shaping by offset coordinates
</span>    <span class="n">x_src_right</span> <span class="o">=</span> <span class="n">x</span> <span class="o">+</span> <span class="n">shift</span>
    <span class="n">valid_right</span> <span class="o">=</span> <span class="p">(</span><span class="n">x_src_right</span> <span class="o">&gt;=</span> <span class="mi">0</span><span class="p">)</span> <span class="o">&amp;</span> <span class="p">(</span><span class="n">x_src_right</span> <span class="o">&lt;</span> <span class="n">width</span><span class="p">)</span>
    <span class="n">right_image</span><span class="p">[</span><span class="n">y</span><span class="p">[</span><span class="n">valid_right</span><span class="p">],</span> <span class="n">x</span><span class="p">[</span><span class="n">valid_right</span><span class="p">]]</span> <span class="o">=</span> <span class="n">image</span><span class="p">[</span><span class="n">y</span><span class="p">[</span><span class="n">valid_right</span><span class="p">],</span> <span class="n">x_src_right</span><span class="p">[</span><span class="n">valid_right</span><span class="p">]]</span>
    
    <span class="c1"># Missing pixel masks for inpainting
</span>    <span class="n">mask_left</span>  <span class="o">=</span> <span class="p">(</span><span class="o">~</span><span class="n">valid_left</span><span class="p">).</span><span class="n">astype</span><span class="p">(</span><span class="n">np</span><span class="p">.</span><span class="n">uint8</span><span class="p">)</span> <span class="o">*</span> <span class="mi">255</span>
    <span class="n">mask_right</span> <span class="o">=</span> <span class="p">(</span><span class="o">~</span><span class="n">valid_right</span><span class="p">).</span><span class="n">astype</span><span class="p">(</span><span class="n">np</span><span class="p">.</span><span class="n">uint8</span><span class="p">)</span> <span class="o">*</span> <span class="mi">255</span>

    <span class="c1"># Filling voids via inpainting
</span>    <span class="n">left_image</span>  <span class="o">=</span> <span class="n">cv2</span><span class="p">.</span><span class="n">inpaint</span><span class="p">(</span><span class="n">left_image</span><span class="p">,</span>  <span class="n">mask_left</span><span class="p">,</span>  <span class="n">INPAINT_RADIUS</span><span class="p">,</span> <span class="n">cv2</span><span class="p">.</span><span class="n">INPAINT_TELEA</span><span class="p">)</span>
    <span class="n">right_image</span> <span class="o">=</span> <span class="n">cv2</span><span class="p">.</span><span class="n">inpaint</span><span class="p">(</span><span class="n">right_image</span><span class="p">,</span> <span class="n">mask_right</span><span class="p">,</span> <span class="n">INPAINT_RADIUS</span><span class="p">,</span> <span class="n">cv2</span><span class="p">.</span><span class="n">INPAINT_TELEA</span><span class="p">)</span>

    <span class="k">return</span> <span class="n">left_image</span><span class="p">,</span> <span class="n">right_image</span>
    
<span class="k">def</span> <span class="nf">image3d_combining</span><span class="p">(</span><span class="n">left_image</span><span class="p">,</span> <span class="n">right_image</span><span class="p">,</span> <span class="n">height</span><span class="p">,</span> <span class="n">width</span><span class="p">):</span>   
    <span class="s">''' Combining stereo pair images into a single 3D image '''</span>
    
    <span class="c1"># Images size correction if new_width and new_height are set
</span>    <span class="k">if</span> <span class="n">new_width</span> <span class="ow">and</span> <span class="n">new_height</span><span class="p">:</span>
        <span class="n">left_image</span><span class="p">,</span> <span class="n">right_image</span> <span class="o">=</span> <span class="n">image_size_correction</span><span class="p">(</span><span class="n">height</span><span class="p">,</span> <span class="n">width</span><span class="p">,</span> <span class="n">left_image</span><span class="p">,</span> <span class="n">right_image</span><span class="p">)</span>
        <span class="c1"># Change the values of the original image sizes to new_height and new_width for correct gluing below
</span>        <span class="n">height</span> <span class="o">=</span> <span class="n">new_height</span>
        <span class="n">width</span> <span class="o">=</span> <span class="n">new_width</span>
        
    <span class="c1"># Image order, left first or right first
</span>    <span class="n">img1</span><span class="p">,</span> <span class="n">img2</span> <span class="o">=</span> <span class="p">(</span><span class="n">left_image</span><span class="p">,</span> <span class="n">right_image</span><span class="p">)</span> <span class="k">if</span> <span class="n">LEFT_RIGHT</span> <span class="o">==</span> <span class="s">"LEFT"</span> <span class="k">else</span> <span class="p">(</span><span class="n">right_image</span><span class="p">,</span> <span class="n">left_image</span><span class="p">)</span>
    
    <span class="c1"># Combine left and right images into a common 3D image
</span>    <span class="k">if</span> <span class="n">TYPE3D</span> <span class="o">==</span> <span class="s">"HSBS"</span><span class="p">:</span>  <span class="c1"># Narrowing and combining images horizontally
</span>        <span class="n">combined_image</span> <span class="o">=</span> <span class="n">np</span><span class="p">.</span><span class="n">hstack</span><span class="p">((</span><span class="n">cv2</span><span class="p">.</span><span class="n">resize</span><span class="p">(</span><span class="n">img1</span><span class="p">,</span> <span class="p">(</span><span class="n">width</span> <span class="o">//</span> <span class="mi">2</span><span class="p">,</span> <span class="n">height</span><span class="p">),</span> <span class="n">interpolation</span><span class="o">=</span><span class="n">cv2</span><span class="p">.</span><span class="n">INTER_AREA</span><span class="p">),</span>
                          <span class="n">cv2</span><span class="p">.</span><span class="n">resize</span><span class="p">(</span><span class="n">img2</span><span class="p">,</span> <span class="p">(</span><span class="n">width</span> <span class="o">//</span> <span class="mi">2</span><span class="p">,</span> <span class="n">height</span><span class="p">),</span> <span class="n">interpolation</span><span class="o">=</span><span class="n">cv2</span><span class="p">.</span><span class="n">INTER_AREA</span><span class="p">)))</span>
                          
    <span class="k">elif</span> <span class="n">TYPE3D</span> <span class="o">==</span> <span class="s">"HOU"</span><span class="p">:</span>  <span class="c1"># Narrowing and combining images vertically
</span>        <span class="n">combined_image</span> <span class="o">=</span> <span class="n">np</span><span class="p">.</span><span class="n">vstack</span><span class="p">((</span><span class="n">cv2</span><span class="p">.</span><span class="n">resize</span><span class="p">(</span><span class="n">img1</span><span class="p">,</span> <span class="p">(</span><span class="n">width</span><span class="p">,</span> <span class="n">height</span> <span class="o">//</span> <span class="mi">2</span><span class="p">),</span> <span class="n">interpolation</span><span class="o">=</span><span class="n">cv2</span><span class="p">.</span><span class="n">INTER_AREA</span><span class="p">),</span>
                          <span class="n">cv2</span><span class="p">.</span><span class="n">resize</span><span class="p">(</span><span class="n">img2</span><span class="p">,</span> <span class="p">(</span><span class="n">width</span><span class="p">,</span> <span class="n">height</span> <span class="o">//</span> <span class="mi">2</span><span class="p">),</span> <span class="n">interpolation</span><span class="o">=</span><span class="n">cv2</span><span class="p">.</span><span class="n">INTER_AREA</span><span class="p">)))</span>
                          
    <span class="k">elif</span> <span class="n">TYPE3D</span> <span class="o">==</span> <span class="s">"FSBS"</span><span class="p">:</span>  <span class="c1"># Combining images horizontally
</span>        <span class="n">combined_image</span> <span class="o">=</span> <span class="n">np</span><span class="p">.</span><span class="n">hstack</span><span class="p">((</span><span class="n">img1</span><span class="p">,</span> <span class="n">img2</span><span class="p">))</span>
    
    <span class="k">elif</span> <span class="n">TYPE3D</span> <span class="o">==</span> <span class="s">"FOU"</span><span class="p">:</span>  <span class="c1"># Combining images vertically
</span>        <span class="n">combined_image</span> <span class="o">=</span> <span class="n">np</span><span class="p">.</span><span class="n">vstack</span><span class="p">((</span><span class="n">img1</span><span class="p">,</span> <span class="n">img2</span><span class="p">))</span>
    
    <span class="k">return</span> <span class="n">combined_image</span>
    

<span class="c1"># PREPARATION
# Extract the image name to save the 3D image later on
</span><span class="n">image_name</span> <span class="o">=</span> <span class="n">os</span><span class="p">.</span><span class="n">path</span><span class="p">.</span><span class="n">splitext</span><span class="p">(</span><span class="n">os</span><span class="p">.</span><span class="n">path</span><span class="p">.</span><span class="n">basename</span><span class="p">(</span><span class="n">image_path</span><span class="p">))[</span><span class="mi">0</span><span class="p">]</span>

<span class="c1"># Load image and depth map
</span><span class="n">image</span> <span class="o">=</span> <span class="n">cv2</span><span class="p">.</span><span class="n">imread</span><span class="p">(</span><span class="n">image_path</span><span class="p">)</span>  <span class="c1"># Source image
</span><span class="n">depth</span> <span class="o">=</span> <span class="n">cv2</span><span class="p">.</span><span class="n">imread</span><span class="p">(</span><span class="n">depth_path</span><span class="p">,</span> <span class="n">cv2</span><span class="p">.</span><span class="n">IMREAD_GRAYSCALE</span><span class="p">).</span><span class="n">astype</span><span class="p">(</span><span class="n">np</span><span class="p">.</span><span class="n">float32</span><span class="p">)</span> <span class="o">/</span> <span class="mf">255.0</span>  <span class="c1"># Depth map
</span>
<span class="c1"># Image size
</span><span class="n">height</span><span class="p">,</span> <span class="n">width</span> <span class="o">=</span> <span class="n">image</span><span class="p">.</span><span class="n">shape</span><span class="p">[:</span><span class="mi">2</span><span class="p">]</span>

<span class="c1"># START PROCESSING
# Runing image3d_processing and getting a stereo pair for the image
</span><span class="n">PARALLAX_FUNCTIONS</span> <span class="o">=</span> <span class="p">{</span>
	<span class="mi">1</span><span class="p">:</span> <span class="n">image3d_processing_method1</span><span class="p">,</span>
	<span class="mi">2</span><span class="p">:</span> <span class="n">image3d_processing_method2</span><span class="p">,</span>
<span class="p">}</span>

<span class="k">if</span> <span class="n">PARALLAX_METHOD</span> <span class="ow">in</span> <span class="p">(</span><span class="mi">1</span><span class="p">,</span> <span class="mi">2</span><span class="p">):</span>
	<span class="n">left_image</span><span class="p">,</span> <span class="n">right_image</span> <span class="o">=</span> <span class="n">PARALLAX_FUNCTIONS</span><span class="p">[</span><span class="n">PARALLAX_METHOD</span><span class="p">](</span><span class="n">image</span><span class="p">,</span> <span class="n">depth</span><span class="p">,</span> <span class="n">height</span><span class="p">,</span> <span class="n">width</span><span class="p">)</span>  
<span class="k">else</span><span class="p">:</span>
	<span class="k">print</span><span class="p">(</span><span class="sa">f</span><span class="s">"Set the correct </span><span class="si">{</span><span class="n">PARALLAX_METHOD</span><span class="si">}</span><span class="s">."</span><span class="p">)</span>

<span class="c1"># Combining stereo pair into a common 3D image
</span><span class="n">image3d</span> <span class="o">=</span> <span class="n">image3d_combining</span><span class="p">(</span><span class="n">left_image</span><span class="p">,</span> <span class="n">right_image</span><span class="p">,</span> <span class="n">height</span><span class="p">,</span> <span class="n">width</span><span class="p">)</span>

<span class="c1"># Saving 3D image
</span><span class="n">output_path</span> <span class="o">=</span> <span class="n">os</span><span class="p">.</span><span class="n">path</span><span class="p">.</span><span class="n">join</span><span class="p">(</span><span class="n">output_path</span><span class="p">,</span> <span class="sa">f</span><span class="s">'</span><span class="si">{</span><span class="n">image_name</span><span class="si">}</span><span class="s">_3d.jpg'</span><span class="p">)</span>
<span class="n">cv2</span><span class="p">.</span><span class="n">imwrite</span><span class="p">(</span><span class="n">output_path</span><span class="p">,</span> <span class="n">image3d</span><span class="p">,</span> <span class="p">[</span><span class="nb">int</span><span class="p">(</span><span class="n">cv2</span><span class="p">.</span><span class="n">IMWRITE_JPEG_QUALITY</span><span class="p">),</span> <span class="mi">100</span><span class="p">])</span>


<span class="k">print</span><span class="p">(</span><span class="s">"DONE."</span><span class="p">)</span>
</code></pre></div>  </div>
</details>
<p><br /></p>

<p>Here it is necessary to explain the main parameters.</p>

<p><u>Parameter</u>: <strong>PARALLAX_SCALE = 15</strong><br />
The parallax value in pixels, how many pixels distant objects (more precisely, pixels) will be shifted at maximum relative to closer ones (the closest is <strong>0</strong>, the farthest is <strong>15</strong>). The larger the value, the greater the depth. At excessively large values, the image will be unwatchable. It is important to note that the shift occurs for each frame separately - for the left and for the right, thus the total parallax is doubled.</p>

<p>The recommended value is from <strong>10</strong> to <strong>20</strong>. I usually set <strong>15</strong>; this gives good depth without significant distortions.</p>

<p><u>Parameter</u>: <strong>PARALLAX_METHOD = 1</strong><br />
Available values: <strong>1</strong> or <strong>2</strong>. Choice of the parallax creation method, handled by the functions <code class="language-plaintext highlighter-rouge">image3d_processing_method1</code> and <code class="language-plaintext highlighter-rouge">image3d_processing_method2</code> respectively.</p>

<p>In the first method, the displacement occurs faster and the contours of the displaced objects look smoother. In the second method, the displacement is performed using a different principle, the processing takes a bit longer, but the 3D may be sharper. Also, the depth of different objects may differ between these methods. Overall, the depth and 3D quality are good in both cases. I recommend experimenting with both methods and choosing the one you like.</p>

<p><u>Parameter</u>: <strong>INPAINT_RADIUS</strong><br />
The radius for filling shifts in pixels for the second parallax creation method (<strong>image3d_processing_method2</strong>). Responsible for filling with neighboring pixels at the edges of images when they are shifted. Recommended values are from <strong>2</strong> to <strong>5</strong>; in most cases <strong>2–3</strong> is optimal. If the value is larger, for example <strong>INPAINT_RADIUS = 15</strong>, then the edges will be too blurred and processing time will increase significantly. With small values - <strong>0</strong> or <strong>1</strong> - the edges will look too sharp and inaccurate.</p>

<p><u>Parameter</u>: <strong>INTERPOLATION_TYPE = cv2.INTER_LINEAR</strong><br />
Interpolation type for the first parallax creation method (<strong>image3d_processing_method1</strong>). Since we deform the image by shifting objects (pixels) on it, the resulting empty areas need to be filled with something. For this, the nearest-neighbor method in various variations is used:</p>

<p><strong>INTER_NEAREST</strong> - nearest neighbor, fast and simple interpolation, not the highest quality<br />
<strong>INTER_AREA</strong> - better suited for image downscaling, in this case we will not consider it<br />
<strong>INTER_LINEAR</strong> - bilinear interpolation in a 2x2 pixel neighborhood, a balance of quality and speed, the most optimal option<br />
<strong>INTER_CUBIC</strong> - bicubic interpolation in a 4x4 pixel neighborhood, considered higher quality than bilinear, but takes a bit more time<br />
<strong>INTER_LANCZOS4</strong> - Lanczos interpolation in an 8x8 pixel neighborhood, the highest quality, but works significantly slower than the others</p>

<p>I tested all options, carefully reviewing the results; I did not notice a significant difference when viewing 3D. Therefore, I usually use the fast and optimal method - <strong>INTER_LINEAR</strong>. But if speed is not critical for you, it is better to use <strong>INTER_LANCZOS4</strong> - the best quality.</p>

<p>It should be noted here that the speed difference is measured in milliseconds. For example, here are measurements of interpolation of the frame with a resolution of <strong>1920x1080</strong>:</p>
<div class="language-bash highlighter-rouge"><div class="highlight"><pre class="highlight"><code>NEAREST: 0.039 seconds
INTER_AREA: 0.041 seconds
INTER_LINEAR: 0.041 seconds
INTER_CUBIC: 0.053 seconds
INTER_LANCZOS4: 0.090 - 0.096 seconds
</code></pre></div></div>

<p>For example, between <strong>INTER_LINEAR</strong> and <strong>INTER_LANCZOS4</strong> the difference is ~50 milliseconds per processing of the frame with a resolution of 1920x1080. This may seem insignificant, but if you multiply 50 ms by 194000 frames, you get ~162 minutes. That is, INTER_LINEAR will process faster than INTER_LANCZOS4 by 162 minutes, or 2 hours 42 minutes. And this is only parallax interpolation processing.</p>

<p>Perhaps later I will write a comparative review of all these methods, with a visual demonstration and indication of the processing time; for now I can recommend using any of these 3 methods: INTER_LINEAR, INTER_CUBIC, INTER_LANCZOS4.</p>

<p><u>Parameter</u>: <strong>TYPE3D = “FOU”</strong><br />
The type of stereo pair we want to obtain:<br />
<strong>HSBS</strong> (Half Side-by-Side) - half horizontal stereo pair<br />
<strong>FSBS</strong> (Full Side-by-Side) - full horizontal stereo pair<br />
<strong>HOU</strong> (Half Over-Under) - half vertical stereo pair<br />
<strong>FOU</strong> (Full Over-Under) - full vertical stereo pair</p>

<p>I think everything here is obvious for those who watch 3D on their devices, but just in case I will explain.<br />
<strong>HSBS</strong> - half horizontal stereo pair, the second frame is placed to the right of the first frame. If the source frame had a resolution of 1920x1080, then both frames of the stereo pair are compressed horizontally by a factor of 2 (in this case to 960 pixels, the full resolution of each frame becomes <strong>960x1080</strong>), so that the total width of the entire stereo pair remains in the original <strong>1920x1080</strong> format. When viewing, both halves of the stereo pair are stretched to full size for each frame - it was <strong>960x1080</strong>, it becomes <strong>1920x1080</strong>. In this case, there is a significant loss of detail, since the number of pixels horizontally is halved. On the other hand, the frame/video size will be significantly smaller than a full stereo pair, by <strong>1.5–2 times</strong>.</p>

<p><strong>FSBS</strong> - full horizontal stereo pair, the second frame is placed to the right of the first frame. If the source frame had a resolution of 1920x1080, then both frames of the stereo pair will create a combined frame of <strong>3840x1080</strong> pixels. In this case, there will be no loss of detail, but the frame/video size will become <strong>1.5–2 times</strong> larger.</p>

<p><strong>HOU</strong> - half vertical stereo pair, the second frame is placed below the first frame. If the source frame had a resolution of 1920x1080, then both frames of the stereo pair are compressed vertically by a factor of 2 (in this case to 540 pixels, the full resolution of each frame becomes <strong>1920x540</strong>).</p>

<blockquote>
  <p>There is an opinion that when choosing among half stereo pairs, the best choice is HOU - half vertical stereo pair. This is quite logical, given that fewer pixels are lost here: 1080/2=540, instead of 1920/2=960 in the case of a horizontal stereo pair.</p>
</blockquote>

<p><br />
<strong>FOU</strong> - full vertical stereo pair, the second frame is placed below the first frame. If the source frame had a resolution of 1920x1080, then both frames of the stereo pair will create a combined frame of <strong>1920x2160</strong> pixels.</p>

<p>Often, half stereo pairs (<strong>HSBS</strong> and <strong>HOU</strong>) work on 3D TVs. All variants work on VR headsets, and you can get maximum enjoyment from watching 3D on full stereo pairs (<strong>FSBS</strong> or <strong>FOU</strong>).</p>

<p><u>Parameter</u>: <strong>LEFT_RIGHT = “LEFT”</strong><br />
The order of the frame pair in the combined 3D image: LEFT - left first, RIGHT - right first. The default value is <strong>LEFT</strong>. This order can also be configured on the equipment when viewing 3D video.</p>

<p><u>Parameters</u>: <strong>new_width = 1920</strong> and <strong>new_height = 1080</strong><br />
An important setting. The point is that there are movies with “non-standard” resolution, for example <strong>1920x816</strong> pixels (as in our case). If we make stereo pairs with such a resolution, there will most likely be problems when playing on equipment that displays images in a standard resolution (for example FullHD 1920x1080 16:9), this is especially critical for half stereo pairs.</p>

<p>A simple and working solution was found - we increase the image to the required resolution, where the missing pixels are filled with black color, simply put - we add black bars. For example, the source frame resolution is <strong>1920x816</strong>, we want to increase it to the standard <strong>1920x1080</strong>, we specify in the parameters:</p>
<div class="language-python highlighter-rouge"><div class="highlight"><pre class="highlight"><code><span class="n">new_width</span>  <span class="o">=</span> <span class="mi">1920</span>
<span class="n">new_height</span> <span class="o">=</span> <span class="mi">1080</span>
</code></pre></div></div>

<p>Thus, the frame is not deformed (not stretched or squeezed), and the missing space is filled with black color. Instead of a 1920x816 frame, we get a standard 1920x1080 frame with added black bars vertically.</p>

<p>If it is not required to change the frame size, then we specify:</p>
<div class="language-python highlighter-rouge"><div class="highlight"><pre class="highlight"><code><span class="n">new_width</span>  <span class="o">=</span> <span class="mi">0</span>
<span class="n">new_height</span> <span class="o">=</span> <span class="mi">0</span>
</code></pre></div></div>

<blockquote>
  <p><u>Note</u>:
Here and further we use PARALLAX_METHOD = 1 (function image3d_processing_method1), all examples and calculations are based on this method.</p>
</blockquote>

<p><br />
So, let’s run the script and get a stereo pair:
<br />
<br />
<img src="/assets/images/2026-01-13-make-anything-stereo3d/starwars4_c3po_r2d2_fou.jpg" alt="C-3PO and R2-D2 stere pair" />
<em>C-3PO and R2-D2 now from two different angles, without realizing it themselves</em>
<br />
<br />
Let’s make a 3D GIF to visually demonstrate the scene’s depth:
<br />
<br />
<img src="/assets/images/2026-01-13-make-anything-stereo3d/starwars4_c3po_r2d2.gif" alt="C-3PO and R2-D2 in 3D" />
<em>C-3PO and R2-D2 in 3D now!</em>
<br />
<br /></p>
<details>
  <summary>A few more GIFs:</summary>
  <p><img src="/assets/images/2026-01-13-make-anything-stereo3d/starwars4_starship.gif" alt="Starwars4 starship.gif 3d gif" />
<em>The ship was well converted into 3D, as if DepthAnythingV2 had been trained on it as well</em>
<br />
<br />
<img src="/assets/images/2026-01-13-make-anything-stereo3d/starwars4_rebels.gif" alt="Starwars4 rebels.gif 3d gif" />
<em>The rebels cannot believe that they are now in 3D</em>
<br />
<br />
<img src="/assets/images/2026-01-13-make-anything-stereo3d/starwars4_han_luke_chewie.gif" alt="Starwars4 Han, Luke and Chewie 3d gif" />
<em>Han, Luke and Chewie are thrilled</em></p>
</details>
<p><br /></p>

<p>Other images can be viewed on my <a href="https://drive.google.com/drive/folders/1ovCMNJG-FLJcuOfE0Y-zuBsewUKpy_fy">Google Drive</a>. There are source frames, depth maps, including color ones, and 3D GIFs for clarity.</p>

<p>Now we can proceed to processing the main material.
<br />
<br /></p>
<h2 id="stage-1-extracting-frames-from-source-video">Stage 1: extracting frames from source video</h2>
<p>Full frame extraction to PNG format requires sufficient disk space. For example, in our case, a <strong>FullHD</strong> movie, approximately 2 hours long, with a frame rate of 23.976 (24000/1001), has ~<strong>194000</strong> frames, with a total volume of approximately ~<strong>430GB</strong> in <strong>PNG</strong> format.</p>

<p>Looking ahead, there are ways to reduce the required disk space. Instead of extracting all frames at once, we can extract them in ranges - for example, frames from 0 to 10000, then from 10001 to 20000, and so on. I will write about this in <a href="https://peterplv.github.io/2026/01/15/stereo3d-script">another article</a> (<strong>UPD</strong>: Done. Script and description at the link).</p>

<p>We can also extract source frames in JPG format. I do not recommend this option, I tested it, the final image is noticeably worse, even if extracting JPG at the highest quality. However, after processing (before final encoding into 3D video), it is quite acceptable to save output files in JPG format, otherwise too much disk space will be required. For example, in the case of full 3D pairs, we would need 430x2 = ~<strong>860GB</strong> for output 3D frames in <strong>PNG</strong> format.</p>

<p>So, extract frames using the command:</p>
<div class="language-bash highlighter-rouge"><div class="highlight"><pre class="highlight"><code>ffmpeg <span class="nt">-i</span> sw4.mkv <span class="s2">"/home/user/sw4frames/file_%06d.png"</span>
</code></pre></div></div>

<p><u>Here</u>:<br />
“-i sw4.mkv” - source file<br />
“/home/user/sw4frames/” - path where the frames will be extracted; the folder must be created in advance<br />
“file_%06d.png” - file mask, where %06d is a 6-digit counter starting from 000000; the files will be like “file_000000.png”, “file_000001.png”, etc.</p>

<p>A variant of the same command, but using <strong>CUDA</strong> (depending on the system, it will most likely be faster):</p>
<div class="language-bash highlighter-rouge"><div class="highlight"><pre class="highlight"><code>ffmpeg <span class="nt">-hwaccel</span> cuda <span class="nt">-i</span> sw4.mkv <span class="s2">"/home/user/sw4frames/file_%06d.png"</span>
</code></pre></div></div>
<p><br /></p>
<h2 id="stage-2-creating-3d-frames">Stage 2: creating 3D frames</h2>
<p>Now we can proceed to creating 3D frames. Below is a script that does the following:</p>
<ul>
  <li>sequentially loads each frame from the source folder</li>
  <li>creates a depth map for each frame</li>
  <li>passes the depth map + the source frame to the function for creating a 3D frame via parallax, creates a 3D version of the frame</li>
  <li>deletes the source file and saves the 3D frame to a JPG file</li>
</ul>

<details>
  <summary>Code:</summary>

  <div class="language-python highlighter-rouge"><div class="highlight"><pre class="highlight"><code><span class="kn">import</span> <span class="nn">os</span>
<span class="kn">from</span> <span class="nn">concurrent.futures</span> <span class="kn">import</span> <span class="n">ThreadPoolExecutor</span><span class="p">,</span> <span class="n">wait</span><span class="p">,</span> <span class="n">FIRST_COMPLETED</span>
<span class="kn">from</span> <span class="nn">multiprocessing</span> <span class="kn">import</span> <span class="n">Value</span>
<span class="kn">import</span> <span class="nn">cv2</span>
<span class="kn">import</span> <span class="nn">torch</span>
<span class="kn">import</span> <span class="nn">numpy</span> <span class="k">as</span> <span class="n">np</span>

<span class="kn">from</span> <span class="nn">depth_anything_v2.dpt</span> <span class="kn">import</span> <span class="n">DepthAnythingV2</span>


<span class="c1"># GENERAL OPTIONS
# Path to the folder with depth generation models
</span><span class="n">depth_models_path</span> <span class="o">=</span> <span class="s">"/home/user/DepthAnythingV2/models"</span>

<span class="c1"># Folder with source frames
</span><span class="n">frames_path</span> <span class="o">=</span> <span class="s">"/home/user/sw4frames"</span>

<span class="c1"># Get the name of the source frames folder to create a folder for 3D frames
</span><span class="n">frames_path_name</span> <span class="o">=</span> <span class="n">os</span><span class="p">.</span><span class="n">path</span><span class="p">.</span><span class="n">basename</span><span class="p">(</span><span class="n">os</span><span class="p">.</span><span class="n">path</span><span class="p">.</span><span class="n">normpath</span><span class="p">(</span><span class="n">frames_path</span><span class="p">))</span>
<span class="n">images3d_path</span> <span class="o">=</span> <span class="n">os</span><span class="p">.</span><span class="n">path</span><span class="p">.</span><span class="n">join</span><span class="p">(</span><span class="n">os</span><span class="p">.</span><span class="n">path</span><span class="p">.</span><span class="n">dirname</span><span class="p">(</span><span class="n">frames_path</span><span class="p">),</span> <span class="sa">f</span><span class="s">"</span><span class="si">{</span><span class="n">frames_path_name</span><span class="si">}</span><span class="s">_3d"</span><span class="p">)</span>
<span class="n">os</span><span class="p">.</span><span class="n">makedirs</span><span class="p">(</span><span class="n">images3d_path</span><span class="p">,</span> <span class="n">exist_ok</span><span class="o">=</span><span class="bp">True</span><span class="p">)</span>

<span class="c1"># List of source frames in the directory
</span><span class="n">all_frames</span> <span class="o">=</span> <span class="p">[</span>
    <span class="n">os</span><span class="p">.</span><span class="n">path</span><span class="p">.</span><span class="n">join</span><span class="p">(</span><span class="n">frames_path</span><span class="p">,</span> <span class="n">file_name</span><span class="p">)</span> 
    <span class="k">for</span> <span class="n">file_name</span> <span class="ow">in</span> <span class="n">os</span><span class="p">.</span><span class="n">listdir</span><span class="p">(</span><span class="n">frames_path</span><span class="p">)</span> 
    <span class="k">if</span> <span class="n">os</span><span class="p">.</span><span class="n">path</span><span class="p">.</span><span class="n">isfile</span><span class="p">(</span><span class="n">os</span><span class="p">.</span><span class="n">path</span><span class="p">.</span><span class="n">join</span><span class="p">(</span><span class="n">frames_path</span><span class="p">,</span> <span class="n">file_name</span><span class="p">))</span>
<span class="p">]</span>

<span class="n">frame_counter</span> <span class="o">=</span> <span class="n">Value</span><span class="p">(</span><span class="s">'i'</span><span class="p">,</span> <span class="mi">0</span><span class="p">)</span> <span class="c1"># Counter for naming frames
</span>
<span class="n">chunk_size</span> <span class="o">=</span> <span class="mi">1000</span>  <span class="c1"># Number of files per thread
</span><span class="n">max_threads</span> <span class="o">=</span> <span class="mi">3</span> <span class="c1"># Maximum streams
</span>
<span class="c1"># Computing device
</span><span class="n">device</span> <span class="o">=</span> <span class="n">torch</span><span class="p">.</span><span class="n">device</span><span class="p">(</span><span class="s">'cuda'</span><span class="p">)</span>

<span class="c1"># 3D OPTIONS
</span><span class="n">PARALLAX_SCALE</span> <span class="o">=</span> <span class="mi">15</span>  <span class="c1"># Recommended 10 to 20
</span><span class="n">PARALLAX_METHOD</span> <span class="o">=</span> <span class="mi">1</span>  <span class="c1"># 1 or 2
</span><span class="n">INPAINT_RADIUS</span>  <span class="o">=</span> <span class="mi">2</span>  <span class="c1"># For PARALLAX_METHOD = 2 only, recommended 2 to 5, optimum value 2-3
</span><span class="n">INTERPOLATION_TYPE</span> <span class="o">=</span> <span class="n">cv2</span><span class="p">.</span><span class="n">INTER_LINEAR</span>  <span class="c1"># INTER_NEAREST, INTER_AREA, INTER_LINEAR, INTER_CUBIC, INTER_LANCZOS4
</span><span class="n">TYPE3D</span> <span class="o">=</span> <span class="s">"FOU"</span>  <span class="c1"># HSBS, FSBS, HOU, FOU
</span><span class="n">LEFT_RIGHT</span> <span class="o">=</span> <span class="s">"LEFT"</span>  <span class="c1"># LEFT or RIGHT
</span>
<span class="c1"># 0 - if there's no need to change frame size
</span><span class="n">new_width</span>  <span class="o">=</span> <span class="mi">0</span>
<span class="n">new_height</span> <span class="o">=</span> <span class="mi">0</span>

<span class="n">depth_models_config</span> <span class="o">=</span> <span class="p">{</span>
        <span class="s">'vits'</span><span class="p">:</span> <span class="p">{</span><span class="s">'encoder'</span><span class="p">:</span> <span class="s">'vits'</span><span class="p">,</span> <span class="s">'features'</span><span class="p">:</span> <span class="mi">64</span><span class="p">,</span> <span class="s">'out_channels'</span><span class="p">:</span> <span class="p">[</span><span class="mi">48</span><span class="p">,</span> <span class="mi">96</span><span class="p">,</span> <span class="mi">192</span><span class="p">,</span> <span class="mi">384</span><span class="p">]},</span>
        <span class="s">'vitb'</span><span class="p">:</span> <span class="p">{</span><span class="s">'encoder'</span><span class="p">:</span> <span class="s">'vitb'</span><span class="p">,</span> <span class="s">'features'</span><span class="p">:</span> <span class="mi">128</span><span class="p">,</span> <span class="s">'out_channels'</span><span class="p">:</span> <span class="p">[</span><span class="mi">96</span><span class="p">,</span> <span class="mi">192</span><span class="p">,</span> <span class="mi">384</span><span class="p">,</span> <span class="mi">768</span><span class="p">]},</span>
        <span class="s">'vitl'</span><span class="p">:</span> <span class="p">{</span><span class="s">'encoder'</span><span class="p">:</span> <span class="s">'vitl'</span><span class="p">,</span> <span class="s">'features'</span><span class="p">:</span> <span class="mi">256</span><span class="p">,</span> <span class="s">'out_channels'</span><span class="p">:</span> <span class="p">[</span><span class="mi">256</span><span class="p">,</span> <span class="mi">512</span><span class="p">,</span> <span class="mi">1024</span><span class="p">,</span> <span class="mi">1024</span><span class="p">]}</span>
<span class="p">}</span>

<span class="c1"># Selecting the DepthAnythingV2 model: vits - Small, vitb - Base, vitl - Large
</span><span class="n">encoder</span> <span class="o">=</span> <span class="s">"vitl"</span> <span class="c1"># vits, vitb, vitl
</span>
<span class="n">model_depth_current</span> <span class="o">=</span> <span class="n">os</span><span class="p">.</span><span class="n">path</span><span class="p">.</span><span class="n">join</span><span class="p">(</span><span class="n">depth_models_path</span><span class="p">,</span> <span class="sa">f</span><span class="s">'depth_anything_v2_</span><span class="si">{</span><span class="n">encoder</span><span class="si">}</span><span class="s">.pth'</span><span class="p">)</span>
<span class="n">model_depth</span> <span class="o">=</span> <span class="n">DepthAnythingV2</span><span class="p">(</span><span class="o">**</span><span class="n">depth_models_config</span><span class="p">[</span><span class="n">encoder</span><span class="p">])</span>
<span class="n">model_depth</span><span class="p">.</span><span class="n">load_state_dict</span><span class="p">(</span><span class="n">torch</span><span class="p">.</span><span class="n">load</span><span class="p">(</span><span class="n">model_depth_current</span><span class="p">,</span> <span class="n">weights_only</span><span class="o">=</span><span class="bp">True</span><span class="p">,</span> <span class="n">map_location</span><span class="o">=</span><span class="n">device</span><span class="p">))</span>
<span class="n">model_depth</span> <span class="o">=</span> <span class="n">model_depth</span><span class="p">.</span><span class="n">to</span><span class="p">(</span><span class="n">device</span><span class="p">).</span><span class="nb">eval</span><span class="p">()</span>


<span class="k">def</span> <span class="nf">image_size_correction</span><span class="p">(</span><span class="n">current_height</span><span class="p">,</span> <span class="n">current_width</span><span class="p">,</span> <span class="n">left_image</span><span class="p">,</span> <span class="n">right_image</span><span class="p">):</span>
    <span class="s">''' Image size correction if new_width and new_height are set '''</span>
    
    <span class="c1"># Calculate offsets for centering
</span>    <span class="n">top</span> <span class="o">=</span> <span class="p">(</span><span class="n">new_height</span> <span class="o">-</span> <span class="n">current_height</span><span class="p">)</span> <span class="o">//</span> <span class="mi">2</span>
    <span class="n">left</span> <span class="o">=</span> <span class="p">(</span><span class="n">new_width</span> <span class="o">-</span> <span class="n">current_width</span><span class="p">)</span> <span class="o">//</span> <span class="mi">2</span>
    
    <span class="c1"># Create a black canvas of the desired size
</span>    <span class="n">new_left_image</span>  <span class="o">=</span> <span class="n">np</span><span class="p">.</span><span class="n">zeros</span><span class="p">((</span><span class="n">new_height</span><span class="p">,</span> <span class="n">new_width</span><span class="p">,</span> <span class="mi">3</span><span class="p">),</span> <span class="n">dtype</span><span class="o">=</span><span class="n">np</span><span class="p">.</span><span class="n">uint8</span><span class="p">)</span>
    <span class="n">new_right_image</span> <span class="o">=</span> <span class="n">np</span><span class="p">.</span><span class="n">zeros</span><span class="p">((</span><span class="n">new_height</span><span class="p">,</span> <span class="n">new_width</span><span class="p">,</span> <span class="mi">3</span><span class="p">),</span> <span class="n">dtype</span><span class="o">=</span><span class="n">np</span><span class="p">.</span><span class="n">uint8</span><span class="p">)</span>
    
    <span class="c1"># Placing the image on a black background
</span>    <span class="n">new_left_image</span><span class="p">[</span><span class="n">top</span><span class="p">:</span><span class="n">top</span> <span class="o">+</span> <span class="n">current_height</span><span class="p">,</span> <span class="n">left</span><span class="p">:</span><span class="n">left</span> <span class="o">+</span> <span class="n">current_width</span><span class="p">]</span> <span class="o">=</span> <span class="n">left_image</span>
    <span class="n">new_right_image</span><span class="p">[</span><span class="n">top</span><span class="p">:</span><span class="n">top</span> <span class="o">+</span> <span class="n">current_height</span><span class="p">,</span> <span class="n">left</span><span class="p">:</span><span class="n">left</span> <span class="o">+</span> <span class="n">current_width</span><span class="p">]</span> <span class="o">=</span> <span class="n">right_image</span>
    
    <span class="k">return</span> <span class="n">new_left_image</span><span class="p">,</span> <span class="n">new_right_image</span>
            
<span class="k">def</span> <span class="nf">depth_processing</span><span class="p">(</span><span class="n">image</span><span class="p">):</span>
    <span class="s">''' Creating a depth map for an image '''</span>

    <span class="c1"># Depth calculation
</span>    <span class="k">with</span> <span class="n">torch</span><span class="p">.</span><span class="n">no_grad</span><span class="p">():</span>
        <span class="n">depth</span> <span class="o">=</span> <span class="n">model_depth</span><span class="p">.</span><span class="n">infer_image</span><span class="p">(</span><span class="n">image</span><span class="p">)</span>
        
    <span class="c1"># Normalization
</span>    <span class="n">depth_normalized</span> <span class="o">=</span> <span class="n">depth</span> <span class="o">/</span> <span class="n">depth</span><span class="p">.</span><span class="nb">max</span><span class="p">()</span>

    <span class="k">return</span> <span class="n">depth_normalized</span>

<span class="k">def</span> <span class="nf">image3d_processing_method1</span><span class="p">(</span><span class="n">image</span><span class="p">,</span> <span class="n">depth</span><span class="p">,</span> <span class="n">height</span><span class="p">,</span> <span class="n">width</span><span class="p">):</span>
    <span class="s">''' The function of creating a stereo pair based on the source image and depth map.
        Method1: faster, contours smoother, but may be less accurate
    '''</span>
    
    <span class="c1"># Creating parallax
</span>    <span class="n">parallax</span> <span class="o">=</span> <span class="n">depth</span> <span class="o">*</span> <span class="n">PARALLAX_SCALE</span>

    <span class="c1"># Pixel coordinates
</span>    <span class="n">x</span><span class="p">,</span> <span class="n">y</span> <span class="o">=</span> <span class="n">np</span><span class="p">.</span><span class="n">meshgrid</span><span class="p">(</span><span class="n">np</span><span class="p">.</span><span class="n">arange</span><span class="p">(</span><span class="n">width</span><span class="p">,</span> <span class="n">dtype</span><span class="o">=</span><span class="n">np</span><span class="p">.</span><span class="n">float32</span><span class="p">),</span> <span class="n">np</span><span class="p">.</span><span class="n">arange</span><span class="p">(</span><span class="n">height</span><span class="p">,</span> <span class="n">dtype</span><span class="o">=</span><span class="n">np</span><span class="p">.</span><span class="n">float32</span><span class="p">))</span>

    <span class="c1"># Calculation of offsets
</span>    <span class="n">shift_left</span>  <span class="o">=</span> <span class="n">np</span><span class="p">.</span><span class="n">clip</span><span class="p">(</span><span class="n">x</span> <span class="o">-</span> <span class="n">parallax</span><span class="p">,</span> <span class="mi">0</span><span class="p">,</span> <span class="n">width</span> <span class="o">-</span> <span class="mi">1</span><span class="p">)</span>
    <span class="n">shift_right</span> <span class="o">=</span> <span class="n">np</span><span class="p">.</span><span class="n">clip</span><span class="p">(</span><span class="n">x</span> <span class="o">+</span> <span class="n">parallax</span><span class="p">,</span> <span class="mi">0</span><span class="p">,</span> <span class="n">width</span> <span class="o">-</span> <span class="mi">1</span><span class="p">)</span>

    <span class="c1"># Applying offsets with cv2.remap
</span>    <span class="n">left_image</span>  <span class="o">=</span> <span class="n">cv2</span><span class="p">.</span><span class="n">remap</span><span class="p">(</span><span class="n">image</span><span class="p">,</span> <span class="n">shift_left</span><span class="p">,</span>  <span class="n">y</span><span class="p">,</span> <span class="n">interpolation</span><span class="o">=</span><span class="n">INTERPOLATION_TYPE</span><span class="p">)</span>
    <span class="n">right_image</span> <span class="o">=</span> <span class="n">cv2</span><span class="p">.</span><span class="n">remap</span><span class="p">(</span><span class="n">image</span><span class="p">,</span> <span class="n">shift_right</span><span class="p">,</span> <span class="n">y</span><span class="p">,</span> <span class="n">interpolation</span><span class="o">=</span><span class="n">INTERPOLATION_TYPE</span><span class="p">)</span>
    
    <span class="k">return</span> <span class="n">left_image</span><span class="p">,</span> <span class="n">right_image</span>

<span class="k">def</span> <span class="nf">image3d_processing_method2</span><span class="p">(</span><span class="n">image</span><span class="p">,</span> <span class="n">depth</span><span class="p">,</span> <span class="n">height</span><span class="p">,</span> <span class="n">width</span><span class="p">):</span>
    <span class="s">''' The function of creating a stereo pair based on the source image and depth map.
        Method2: slightly slower than the first method, but can be more accurate
    '''</span>
    
    <span class="c1"># Calculating the value for parallax
</span>    <span class="n">parallax</span> <span class="o">=</span> <span class="n">depth</span> <span class="o">*</span> <span class="n">PARALLAX_SCALE</span>
    
    <span class="c1"># Parallax rounding and conversion to int32
</span>    <span class="n">shift</span> <span class="o">=</span> <span class="n">np</span><span class="p">.</span><span class="nb">round</span><span class="p">(</span><span class="n">parallax</span><span class="p">).</span><span class="n">astype</span><span class="p">(</span><span class="n">np</span><span class="p">.</span><span class="n">int32</span><span class="p">)</span>

    <span class="c1"># Grid coordinates
</span>    <span class="n">y</span><span class="p">,</span> <span class="n">x</span> <span class="o">=</span> <span class="n">np</span><span class="p">.</span><span class="n">indices</span><span class="p">((</span><span class="n">height</span><span class="p">,</span> <span class="n">width</span><span class="p">),</span> <span class="n">dtype</span><span class="o">=</span><span class="n">np</span><span class="p">.</span><span class="n">int32</span><span class="p">)</span>

    <span class="c1"># Image preparation
</span>    <span class="n">left_image</span>  <span class="o">=</span> <span class="n">np</span><span class="p">.</span><span class="n">zeros_like</span><span class="p">(</span><span class="n">image</span><span class="p">)</span>
    <span class="n">right_image</span> <span class="o">=</span> <span class="n">np</span><span class="p">.</span><span class="n">zeros_like</span><span class="p">(</span><span class="n">image</span><span class="p">)</span>

    <span class="c1"># Left image shaping by offset coordinates
</span>    <span class="n">x_src_left</span> <span class="o">=</span> <span class="n">x</span> <span class="o">-</span> <span class="n">shift</span>
    <span class="n">valid_left</span> <span class="o">=</span> <span class="p">(</span><span class="n">x_src_left</span> <span class="o">&gt;=</span> <span class="mi">0</span><span class="p">)</span> <span class="o">&amp;</span> <span class="p">(</span><span class="n">x_src_left</span> <span class="o">&lt;</span> <span class="n">width</span><span class="p">)</span>
    <span class="n">left_image</span><span class="p">[</span><span class="n">y</span><span class="p">[</span><span class="n">valid_left</span><span class="p">],</span> <span class="n">x</span><span class="p">[</span><span class="n">valid_left</span><span class="p">]]</span> <span class="o">=</span> <span class="n">image</span><span class="p">[</span><span class="n">y</span><span class="p">[</span><span class="n">valid_left</span><span class="p">],</span> <span class="n">x_src_left</span><span class="p">[</span><span class="n">valid_left</span><span class="p">]]</span>

    <span class="c1"># Right image shaping by offset coordinates
</span>    <span class="n">x_src_right</span> <span class="o">=</span> <span class="n">x</span> <span class="o">+</span> <span class="n">shift</span>
    <span class="n">valid_right</span> <span class="o">=</span> <span class="p">(</span><span class="n">x_src_right</span> <span class="o">&gt;=</span> <span class="mi">0</span><span class="p">)</span> <span class="o">&amp;</span> <span class="p">(</span><span class="n">x_src_right</span> <span class="o">&lt;</span> <span class="n">width</span><span class="p">)</span>
    <span class="n">right_image</span><span class="p">[</span><span class="n">y</span><span class="p">[</span><span class="n">valid_right</span><span class="p">],</span> <span class="n">x</span><span class="p">[</span><span class="n">valid_right</span><span class="p">]]</span> <span class="o">=</span> <span class="n">image</span><span class="p">[</span><span class="n">y</span><span class="p">[</span><span class="n">valid_right</span><span class="p">],</span> <span class="n">x_src_right</span><span class="p">[</span><span class="n">valid_right</span><span class="p">]]</span>
    
    <span class="c1"># Missing pixel masks for inpainting
</span>    <span class="n">mask_left</span>  <span class="o">=</span> <span class="p">(</span><span class="o">~</span><span class="n">valid_left</span><span class="p">).</span><span class="n">astype</span><span class="p">(</span><span class="n">np</span><span class="p">.</span><span class="n">uint8</span><span class="p">)</span> <span class="o">*</span> <span class="mi">255</span>
    <span class="n">mask_right</span> <span class="o">=</span> <span class="p">(</span><span class="o">~</span><span class="n">valid_right</span><span class="p">).</span><span class="n">astype</span><span class="p">(</span><span class="n">np</span><span class="p">.</span><span class="n">uint8</span><span class="p">)</span> <span class="o">*</span> <span class="mi">255</span>

    <span class="c1"># Filling voids via inpainting
</span>    <span class="n">left_image</span>  <span class="o">=</span> <span class="n">cv2</span><span class="p">.</span><span class="n">inpaint</span><span class="p">(</span><span class="n">left_image</span><span class="p">,</span>  <span class="n">mask_left</span><span class="p">,</span>  <span class="n">INPAINT_RADIUS</span><span class="p">,</span> <span class="n">cv2</span><span class="p">.</span><span class="n">INPAINT_TELEA</span><span class="p">)</span>
    <span class="n">right_image</span> <span class="o">=</span> <span class="n">cv2</span><span class="p">.</span><span class="n">inpaint</span><span class="p">(</span><span class="n">right_image</span><span class="p">,</span> <span class="n">mask_right</span><span class="p">,</span> <span class="n">INPAINT_RADIUS</span><span class="p">,</span> <span class="n">cv2</span><span class="p">.</span><span class="n">INPAINT_TELEA</span><span class="p">)</span>

    <span class="k">return</span> <span class="n">left_image</span><span class="p">,</span> <span class="n">right_image</span>
    
<span class="k">def</span> <span class="nf">image3d_combining</span><span class="p">(</span><span class="n">left_image</span><span class="p">,</span> <span class="n">right_image</span><span class="p">,</span> <span class="n">height</span><span class="p">,</span> <span class="n">width</span><span class="p">):</span>   
    <span class="s">''' Combining stereo pair images into a single 3D image '''</span>
    
    <span class="c1"># Images size correction if new_width and new_height are set
</span>    <span class="k">if</span> <span class="n">new_width</span> <span class="ow">and</span> <span class="n">new_height</span><span class="p">:</span>
        <span class="n">left_image</span><span class="p">,</span> <span class="n">right_image</span> <span class="o">=</span> <span class="n">image_size_correction</span><span class="p">(</span><span class="n">height</span><span class="p">,</span> <span class="n">width</span><span class="p">,</span> <span class="n">left_image</span><span class="p">,</span> <span class="n">right_image</span><span class="p">)</span>
        <span class="c1"># Change the values of the original image sizes to new_height and new_width for correct gluing below
</span>        <span class="n">height</span> <span class="o">=</span> <span class="n">new_height</span>
        <span class="n">width</span> <span class="o">=</span> <span class="n">new_width</span>
        
    <span class="c1"># Image order, left first or right first
</span>    <span class="n">img1</span><span class="p">,</span> <span class="n">img2</span> <span class="o">=</span> <span class="p">(</span><span class="n">left_image</span><span class="p">,</span> <span class="n">right_image</span><span class="p">)</span> <span class="k">if</span> <span class="n">LEFT_RIGHT</span> <span class="o">==</span> <span class="s">"LEFT"</span> <span class="k">else</span> <span class="p">(</span><span class="n">right_image</span><span class="p">,</span> <span class="n">left_image</span><span class="p">)</span>
    
    <span class="c1"># Combine left and right images into a common 3D image
</span>    <span class="k">if</span> <span class="n">TYPE3D</span> <span class="o">==</span> <span class="s">"HSBS"</span><span class="p">:</span>  <span class="c1"># Narrowing and combining images horizontally
</span>        <span class="n">combined_image</span> <span class="o">=</span> <span class="n">np</span><span class="p">.</span><span class="n">hstack</span><span class="p">((</span><span class="n">cv2</span><span class="p">.</span><span class="n">resize</span><span class="p">(</span><span class="n">img1</span><span class="p">,</span> <span class="p">(</span><span class="n">width</span> <span class="o">//</span> <span class="mi">2</span><span class="p">,</span> <span class="n">height</span><span class="p">),</span> <span class="n">interpolation</span><span class="o">=</span><span class="n">cv2</span><span class="p">.</span><span class="n">INTER_AREA</span><span class="p">),</span>
                          <span class="n">cv2</span><span class="p">.</span><span class="n">resize</span><span class="p">(</span><span class="n">img2</span><span class="p">,</span> <span class="p">(</span><span class="n">width</span> <span class="o">//</span> <span class="mi">2</span><span class="p">,</span> <span class="n">height</span><span class="p">),</span> <span class="n">interpolation</span><span class="o">=</span><span class="n">cv2</span><span class="p">.</span><span class="n">INTER_AREA</span><span class="p">)))</span>
                          
    <span class="k">elif</span> <span class="n">TYPE3D</span> <span class="o">==</span> <span class="s">"HOU"</span><span class="p">:</span>  <span class="c1"># Narrowing and combining images vertically
</span>        <span class="n">combined_image</span> <span class="o">=</span> <span class="n">np</span><span class="p">.</span><span class="n">vstack</span><span class="p">((</span><span class="n">cv2</span><span class="p">.</span><span class="n">resize</span><span class="p">(</span><span class="n">img1</span><span class="p">,</span> <span class="p">(</span><span class="n">width</span><span class="p">,</span> <span class="n">height</span> <span class="o">//</span> <span class="mi">2</span><span class="p">),</span> <span class="n">interpolation</span><span class="o">=</span><span class="n">cv2</span><span class="p">.</span><span class="n">INTER_AREA</span><span class="p">),</span>
                          <span class="n">cv2</span><span class="p">.</span><span class="n">resize</span><span class="p">(</span><span class="n">img2</span><span class="p">,</span> <span class="p">(</span><span class="n">width</span><span class="p">,</span> <span class="n">height</span> <span class="o">//</span> <span class="mi">2</span><span class="p">),</span> <span class="n">interpolation</span><span class="o">=</span><span class="n">cv2</span><span class="p">.</span><span class="n">INTER_AREA</span><span class="p">)))</span>
                          
    <span class="k">elif</span> <span class="n">TYPE3D</span> <span class="o">==</span> <span class="s">"FSBS"</span><span class="p">:</span>  <span class="c1"># Combining images horizontally
</span>        <span class="n">combined_image</span> <span class="o">=</span> <span class="n">np</span><span class="p">.</span><span class="n">hstack</span><span class="p">((</span><span class="n">img1</span><span class="p">,</span> <span class="n">img2</span><span class="p">))</span>
    
    <span class="k">elif</span> <span class="n">TYPE3D</span> <span class="o">==</span> <span class="s">"FOU"</span><span class="p">:</span>  <span class="c1"># Combining images vertically
</span>        <span class="n">combined_image</span> <span class="o">=</span> <span class="n">np</span><span class="p">.</span><span class="n">vstack</span><span class="p">((</span><span class="n">img1</span><span class="p">,</span> <span class="n">img2</span><span class="p">))</span>
    
    <span class="k">return</span> <span class="n">combined_image</span>
    
<span class="k">def</span> <span class="nf">extract_frames</span><span class="p">(</span><span class="n">start_frame</span><span class="p">,</span> <span class="n">end_frame</span><span class="p">):</span>
    <span class="s">''' Allocating image files to chunks based on chunk_size '''</span>
    
    <span class="n">frames_to_process</span> <span class="o">=</span> <span class="n">end_frame</span> <span class="o">-</span> <span class="n">start_frame</span> <span class="o">+</span> <span class="mi">1</span>
    
    <span class="k">with</span> <span class="n">frame_counter</span><span class="p">.</span><span class="n">get_lock</span><span class="p">():</span>
        <span class="n">start_counter</span> <span class="o">=</span> <span class="n">frame_counter</span><span class="p">.</span><span class="n">value</span>
        <span class="n">frame_counter</span><span class="p">.</span><span class="n">value</span> <span class="o">+=</span> <span class="n">frames_to_process</span>
        
    <span class="c1"># List of files based on chunk size
</span>    <span class="n">chunk_files</span> <span class="o">=</span> <span class="n">all_frames</span><span class="p">[</span><span class="n">start_frame</span><span class="p">:</span><span class="n">end_frame</span><span class="o">+</span><span class="mi">1</span><span class="p">]</span>  <span class="c1"># end_frame inclusive
</span>    <span class="k">print</span><span class="p">(</span><span class="sa">f</span><span class="s">"</span><span class="se">\n</span><span class="s">-- FRAMES FOR NEW THREAD --</span><span class="se">\n</span><span class="s">Frames </span><span class="si">{</span><span class="n">start_frame</span><span class="si">}</span><span class="s"> - </span><span class="si">{</span><span class="n">end_frame</span><span class="si">}</span><span class="se">\n</span><span class="s">"</span><span class="p">)</span>
    
    <span class="k">return</span> <span class="n">chunk_files</span>

<span class="k">def</span> <span class="nf">chunk_processing</span><span class="p">(</span><span class="n">extracted_frames</span><span class="p">,</span> <span class="n">start_frame</span><span class="p">,</span> <span class="n">end_frame</span><span class="p">):</span>
    <span class="s">''' Start processing for each chunk '''</span>
    
    <span class="k">print</span><span class="p">(</span><span class="sa">f</span><span class="s">"</span><span class="se">\n</span><span class="s">-- START THE THREAD --</span><span class="se">\n</span><span class="s">Frames </span><span class="si">{</span><span class="n">start_frame</span><span class="si">}</span><span class="s"> - </span><span class="si">{</span><span class="n">end_frame</span><span class="si">}</span><span class="se">\n</span><span class="s">"</span><span class="p">)</span>
	
    <span class="k">for</span> <span class="n">frame_path</span> <span class="ow">in</span> <span class="n">extracted_frames</span><span class="p">:</span>
    
        <span class="c1"># Extract the image name to save the 3D image later on
</span>        <span class="n">frame_name</span> <span class="o">=</span> <span class="n">os</span><span class="p">.</span><span class="n">path</span><span class="p">.</span><span class="n">splitext</span><span class="p">(</span><span class="n">os</span><span class="p">.</span><span class="n">path</span><span class="p">.</span><span class="n">basename</span><span class="p">(</span><span class="n">frame_path</span><span class="p">))[</span><span class="mi">0</span><span class="p">]</span>
        
        <span class="c1"># Load image
</span>        <span class="n">image</span> <span class="o">=</span> <span class="n">cv2</span><span class="p">.</span><span class="n">imread</span><span class="p">(</span><span class="n">frame_path</span><span class="p">)</span>
        
        <span class="c1"># Image size
</span>        <span class="n">height</span><span class="p">,</span> <span class="n">width</span> <span class="o">=</span> <span class="n">image</span><span class="p">.</span><span class="n">shape</span><span class="p">[:</span><span class="mi">2</span><span class="p">]</span>
        
        <span class="c1"># Runing depth_processing and get depth map
</span>        <span class="n">depth</span> <span class="o">=</span> <span class="n">depth_processing</span><span class="p">(</span><span class="n">image</span><span class="p">)</span>

        <span class="c1"># Runing image3d_processing and getting a stereo pair for the image
</span>        <span class="n">PARALLAX_FUNCTIONS</span> <span class="o">=</span> <span class="p">{</span>
            <span class="mi">1</span><span class="p">:</span> <span class="n">image3d_processing_method1</span><span class="p">,</span>
            <span class="mi">2</span><span class="p">:</span> <span class="n">image3d_processing_method2</span><span class="p">,</span>
        <span class="p">}</span>
        
        <span class="k">if</span> <span class="n">PARALLAX_METHOD</span> <span class="ow">in</span> <span class="p">(</span><span class="mi">1</span><span class="p">,</span> <span class="mi">2</span><span class="p">):</span>
            <span class="n">left_image</span><span class="p">,</span> <span class="n">right_image</span> <span class="o">=</span> <span class="n">PARALLAX_FUNCTIONS</span><span class="p">[</span><span class="n">PARALLAX_METHOD</span><span class="p">](</span><span class="n">image</span><span class="p">,</span> <span class="n">depth</span><span class="p">,</span> <span class="n">height</span><span class="p">,</span> <span class="n">width</span><span class="p">)</span>  
        <span class="k">else</span><span class="p">:</span>
            <span class="k">print</span><span class="p">(</span><span class="sa">f</span><span class="s">"Set the correct </span><span class="si">{</span><span class="n">PARALLAX_METHOD</span><span class="si">}</span><span class="s">."</span><span class="p">)</span>

        <span class="c1"># Combining stereo pair into a common 3D image
</span>        <span class="n">image3d</span> <span class="o">=</span> <span class="n">image3d_combining</span><span class="p">(</span><span class="n">left_image</span><span class="p">,</span> <span class="n">right_image</span><span class="p">,</span> <span class="n">height</span><span class="p">,</span> <span class="n">width</span><span class="p">)</span>

        <span class="c1"># Saving 3D image
</span>        <span class="n">output_image3d_path</span> <span class="o">=</span> <span class="n">os</span><span class="p">.</span><span class="n">path</span><span class="p">.</span><span class="n">join</span><span class="p">(</span><span class="n">images3d_path</span><span class="p">,</span> <span class="sa">f</span><span class="s">'</span><span class="si">{</span><span class="n">frame_name</span><span class="si">}</span><span class="s">.jpg'</span><span class="p">)</span>
        <span class="n">cv2</span><span class="p">.</span><span class="n">imwrite</span><span class="p">(</span><span class="n">output_image3d_path</span><span class="p">,</span> <span class="n">image3d</span><span class="p">,</span> <span class="p">[</span><span class="nb">int</span><span class="p">(</span><span class="n">cv2</span><span class="p">.</span><span class="n">IMWRITE_JPEG_QUALITY</span><span class="p">),</span> <span class="mi">100</span><span class="p">])</span>

        <span class="c1"># Deleting the source file
</span>        <span class="n">os</span><span class="p">.</span><span class="n">remove</span><span class="p">(</span><span class="n">frame_path</span><span class="p">)</span>
        
    <span class="k">print</span><span class="p">(</span><span class="sa">f</span><span class="s">"</span><span class="se">\n</span><span class="s">-- THREAD DONE --</span><span class="se">\n</span><span class="s">Frames </span><span class="si">{</span><span class="n">start_frame</span><span class="si">}</span><span class="s"> - </span><span class="si">{</span><span class="n">end_frame</span><span class="si">}</span><span class="se">\n</span><span class="s">"</span><span class="p">)</span>
    
<span class="k">def</span> <span class="nf">run_processing</span><span class="p">():</span>
    <span class="s">''' The main function for starting processing threads '''</span>
    
    <span class="c1"># Total frames in video file
</span>    <span class="n">total_frames</span> <span class="o">=</span> <span class="nb">len</span><span class="p">(</span><span class="n">all_frames</span><span class="p">)</span>
                        
    <span class="c1"># Threads control
</span>    <span class="k">if</span> <span class="nb">isinstance</span><span class="p">(</span><span class="n">total_frames</span><span class="p">,</span> <span class="nb">int</span><span class="p">):</span>
        <span class="k">with</span> <span class="n">ThreadPoolExecutor</span><span class="p">(</span><span class="n">max_workers</span><span class="o">=</span><span class="n">max_threads</span><span class="p">)</span> <span class="k">as</span> <span class="n">executor</span><span class="p">:</span>
            <span class="n">futures</span> <span class="o">=</span> <span class="p">[]</span>
            
            <span class="k">for</span> <span class="n">start_frame</span> <span class="ow">in</span> <span class="nb">range</span><span class="p">(</span><span class="mi">0</span><span class="p">,</span> <span class="n">total_frames</span><span class="p">,</span> <span class="n">chunk_size</span><span class="p">):</span>
                <span class="n">end_frame</span> <span class="o">=</span> <span class="nb">min</span><span class="p">(</span><span class="n">start_frame</span> <span class="o">+</span> <span class="n">chunk_size</span> <span class="o">-</span> <span class="mi">1</span><span class="p">,</span> <span class="n">total_frames</span> <span class="o">-</span> <span class="mi">1</span><span class="p">)</span>
                
                <span class="c1"># 1. Extracting frames (waiting for task to complete before starting thread)
</span>                <span class="n">extracted_frames</span> <span class="o">=</span> <span class="n">extract_frames</span><span class="p">(</span><span class="n">start_frame</span><span class="p">,</span> <span class="n">end_frame</span><span class="p">)</span>
                
                <span class="c1"># 2. Starting thread for extracted frames
</span>                <span class="n">future</span> <span class="o">=</span> <span class="n">executor</span><span class="p">.</span><span class="n">submit</span><span class="p">(</span><span class="n">chunk_processing</span><span class="p">,</span> <span class="n">extracted_frames</span><span class="p">,</span> <span class="n">start_frame</span><span class="p">,</span> <span class="n">end_frame</span><span class="p">)</span>
                <span class="n">futures</span><span class="p">.</span><span class="n">append</span><span class="p">(</span><span class="n">future</span><span class="p">)</span>
                
                <span class="c1"># 3. If thread count reached &gt;= max_threads, wait for any thread to finish
</span>                <span class="k">if</span> <span class="nb">len</span><span class="p">(</span><span class="n">futures</span><span class="p">)</span> <span class="o">&gt;=</span> <span class="n">max_threads</span><span class="p">:</span>
                    <span class="n">done</span><span class="p">,</span> <span class="n">not_done</span> <span class="o">=</span> <span class="n">wait</span><span class="p">(</span><span class="n">futures</span><span class="p">,</span> <span class="n">return_when</span><span class="o">=</span><span class="n">FIRST_COMPLETED</span><span class="p">)</span>
                    <span class="k">for</span> <span class="n">f</span> <span class="ow">in</span> <span class="n">done</span><span class="p">:</span>
                        <span class="n">f</span><span class="p">.</span><span class="n">result</span><span class="p">()</span>  <span class="c1"># if any thread fails, stop all processing
</span>                    <span class="n">futures</span> <span class="o">=</span> <span class="nb">list</span><span class="p">(</span><span class="n">not_done</span><span class="p">)</span>
                    
            <span class="c1"># 4. Waiting for threads to complete
</span>            <span class="k">for</span> <span class="n">future</span> <span class="ow">in</span> <span class="n">futures</span><span class="p">:</span>
                <span class="n">future</span><span class="p">.</span><span class="n">result</span><span class="p">()</span>
                
        <span class="k">print</span><span class="p">(</span><span class="s">"DONE."</span><span class="p">)</span>
        
    <span class="k">else</span><span class="p">:</span>
        <span class="k">print</span><span class="p">(</span><span class="s">"First, determine the value of total_frames."</span><span class="p">)</span>


<span class="c1"># START PROCESSING
</span><span class="n">run_processing</span><span class="p">()</span>


<span class="c1"># Delete model and clear Cuda cache
</span><span class="k">del</span> <span class="n">model_depth</span>
<span class="n">torch</span><span class="p">.</span><span class="n">cuda</span><span class="p">.</span><span class="n">empty_cache</span><span class="p">()</span>
</code></pre></div>  </div>
</details>
<p><br /></p>

<blockquote>
  <p><u>Note</u>:
The extract_frames function in this script has nothing to do with “unpacking/extracting”, as one might think from its name, because the frames are already unpacked and located in the “sw4frames/” folder. In this case, it only prepares frame batches for each thread in the amount of chunk_size. The name is preserved for compatibility with the <a href="https://peterplv.github.io/2026/01/15/stereo3d-script">other script</a>, where frame extraction occurs in batches directly from the source video file without the need for preliminary exporting.</p>
</blockquote>

<p><br />
The script implements naive-multithreading. Naive, because these are purely preemptive threads that execute the same thing. This is done with the idea that at any given moment each thread can perform different tasks: load a file into memory, save a file to disk, compute a depth map (GPU), do parallax (CPU), etc. And even with such pseudo-multithreading, processing occurs significantly faster. Personally, I found <strong>2–3</strong> threads to be optimal; a larger number of threads does not affect processing speed in any way, but does increase GPU memory usage.</p>

<blockquote>
  <p><u>Note</u>:
This applies to working with already extracted frames. In the other script, where frames are extracted in batches rather than all at once, pseudo-multithreading works even better, and empirically I found <strong>3–5 threads</strong> to be optimal. This will be covered in another article.</p>
</blockquote>

<p><br />
Below is a comparison of the script’s performance on a test set of <strong>100 frames</strong> with different numbers of threads; the Large model was used everywhere, all other settings were identical:</p>

<p><strong>1 thread</strong> (100 files per thread):<br />
First run: <strong>1 minute 20 seconds</strong>.<br />
Control run: <strong>1 minute 19 seconds</strong>.<br />
Maximum GPU memory usage (here and below - excluding reserved): <strong>2675.17 MB</strong>.</p>

<p><strong>2 threads</strong> (50 files per thread):<br />
First run: <strong>1 minute 9 seconds</strong>.<br />
Control run: <strong>1 minute 9 seconds</strong>.<br />
Maximum GPU memory usage: <strong>3994.97 MB</strong>.</p>

<blockquote>
  <p>10 seconds saved via pseudo-multithreading, or a <strong>12.5%</strong> speed increase. This may seem minor, but this was only for 100 frames, while the full movie has ~194000 frames the total time saved will be several hours (<strong>~5 hours</strong>). A rough total processing time estimate is given below.</p>
</blockquote>

<p><br />
<strong>3 threads</strong> (34 + 34 + 32 files per thread):<br />
First run: <strong>1 minute 9 seconds</strong>.<br />
Control run: <strong>1 minute 9 seconds</strong>.<br />
Maximum GPU memory usage: <strong>5351.92 MB</strong>.</p>

<blockquote>
  <p>Specifically on this test sample, there is no difference between 2 and 3 threads (except for increased video memory usage with 3 threads), but on measurements with larger samples there was a slight increase.</p>
</blockquote>

<p><br />
<strong>4 threads</strong> (25 files per thread):<br />
First run: <strong>1 minute 9 seconds</strong>.<br />
Control run: <strong>1 minute 9 seconds</strong>.<br />
Maximum video memory usage: <strong>6708.48 MB</strong>.</p>

<p>Execution speed does not change further, but video memory usage changes.</p>

<p>For comparison, let’s see how long it takes to process the same test sample with <strong>2 threads</strong> for the <strong>Base</strong> model:<br />
First run: <strong>24.30 seconds</strong>.<br />
Control run: <strong>24.47 seconds</strong>.<br />
Maximum video memory usage: <strong>2415.44 MB</strong>.</p>

<p>And for the <strong>Small</strong> model:<br />
First run: <strong>11.68 seconds</strong>.<br />
Control run: <strong>11.59 seconds</strong>.<br />
Maximum video memory usage: <strong>1134.84 MB</strong>.</p>

<p>Now we can roughly (very roughly!) estimate how much time it will take to process all <strong>194000</strong> frames.<br />
For the <strong>Large</strong> model: If it took 59 seconds on 2 threads to process 100 frames, it will take 114460 seconds for 194000 frames, or ~<strong>32 hours</strong>.<br />
For the <strong>Base</strong> model: ~<strong>13 hours</strong>.<br />
For the <strong>Small</strong> model: ~<strong>6 hours</strong>.
<br />
<br /></p>
<h2 id="stage-3-compiling-3d-video">Stage 3: compiling 3D video</h2>

<p>Now we need to compile the final 3D video with the original audio tracks attached.<br />
I use the <strong>hevc_nvenc</strong> codec - encoding occurs on the <strong>GPU</strong>, which is significantly faster than the CPU.</p>

<p>Command:</p>
<div class="language-bash highlighter-rouge"><div class="highlight"><pre class="highlight"><code>ffmpeg <span class="nt">-framerate</span> 24000/1001 <span class="nt">-i</span> <span class="s2">"/home/user/sw4frames_3d/file_%06d.jpg"</span> <span class="nt">-i</span> sw4.mkv <span class="nt">-c</span>:v hevc_nvenc <span class="nt">-cq</span> 1 <span class="nt">-preset</span> p7 <span class="nt">-color_range</span> tv <span class="nt">-colorspace</span> bt709 <span class="nt">-color_primaries</span> bt709 <span class="nt">-color_trc</span> bt709 <span class="nt">-pix_fmt</span> yuv420p <span class="nt">-map</span> 0:v <span class="nt">-map</span> 1:a <span class="nt">-c</span>:a copy sw4_3d.mkv
</code></pre></div></div>

<p><u>Here:</u><br />
“-framerate 24000/1001” - source video frame rate, 24000/1001 = 23.976 frames per second<br />
“-i “/home/user/sw4frames_3d/file_%06d.jpg”” - folder with 3D frames<br />
“-i sw4.mkv” - source file with audio tracks<br />
“-c:v hevc_nvenc” - NVIDIA GPU encoder (H.265)<br />
“-cq 1 -preset p7” - high video quality<br />
“-colorspace bt709 -color_primaries bt709 -color_trc bt709” - set color parameters according to the BT.709 standard for HD video<br />
“-color_range tv” - pixel color format, yuv420p for maximum compatibility<br />
“-pix_fmt yuv420p” - standard (limited) range for video, as expected by codecs and players, for maximum compatibility and correct colors<br />
“-map 0:v” - specify using the folder with frames specified earlier for video<br />
“-map 1:a -c:a copy” - specify using audio tracks from “-i sw4.mkv” without re-encoding; “-c:a copy” - direct copy<br />
“sw4_3d.mkv” - output file name</p>

<p>Wait for compilation and… enjoy watching.
<br />
<br /></p>
<h2 id="other-considerations">Other considerations</h2>
<p>We processed a FullHD (1920x1080) movie. You can also work with other formats, including 4K UltraHD (3840x2160). I have not yet made full 3D versions in 4K, but I tested working with this resolution and did not notice significant differences in processing time. However, it should be understood that frames at a resolution of <strong>3840x2160</strong> require significantly more disk space, especially in <strong>PNG</strong> format; here the required size increases by about <strong>4 times</strong> compared to 1920x1080 frames.</p>

<p>Speaking of disk usage: since 3D conversion is relatively fast, it is not necessary to store both the original and the 3D version of the movie on disk. You can always synthesize the 3D version, watch it, and delete it, keeping only the original as an archive. The original can even be in 4K, while the 3D version can be synthesized in FullHD for speed. The frame extraction command would be:</p>
<div class="language-bash highlighter-rouge"><div class="highlight"><pre class="highlight"><code>ffmpeg <span class="nt">-i</span> video4k.mkv <span class="nt">-vf</span> <span class="s2">"scale=1920:1080"</span> <span class="s2">"/home/user/frames_in/file_%06d.png"</span>
</code></pre></div></div>

<p>Or the other command where only the width is specified (height will be calculated automatically):</p>
<div class="language-bash highlighter-rouge"><div class="highlight"><pre class="highlight"><code>ffmpeg <span class="nt">-i</span> video4k.mkv <span class="nt">-vf</span> <span class="s2">"scale=1920:-2"</span> <span class="s2">"/home/user/frames_in/file_%06d.png"</span>
</code></pre></div></div>

<p>If the source video has a high frame rate, for example 60 fps (many YouTube videos), it makes sense to reduce the frame rate to the standard 23.976 (24000/1001). This alone speeds up processing by <strong>2.5x</strong>. The frame extraction command would be:</p>
<div class="language-bash highlighter-rouge"><div class="highlight"><pre class="highlight"><code>ffmpeg <span class="nt">-i</span> video4k.mkv <span class="nt">-vf</span> <span class="s2">"fps=24000/1001"</span> <span class="s2">"/home/user/frames_in/file_%06d.png"</span>
</code></pre></div></div>

<p>Or a combined command:</p>
<div class="language-bash highlighter-rouge"><div class="highlight"><pre class="highlight"><code>ffmpeg <span class="nt">-i</span> video4k.mkv <span class="nt">-vf</span> <span class="s2">"scale=1920:-2,fps=24000/1001"</span> <span class="s2">"/home/user/frames_in/file_%06d.png"</span>
</code></pre></div></div>

<p>Another important thing - Depth-Anything-V2 works just as well with <strong>black-and-white</strong> images as with color ones. There is no difference in processing. I have already tried adding depth to black-and-white films, and the results are excellent. Personally, I even prefer black-and-white 3D films - depth is perceived differently there, but that is probably a matter of personal taste.</p>

<p>Are there any drawbacks to the method? Yes, but they are minor. If you do not know that you are watching synthesized rather than native 3D, you most likely will not notice anything. In some dynamic scenes, where there is a rapid change of objects, the depth of neighboring frames may change. For example, in the current frame there is a person standing and a motorcycle rushes by nearby, and in the next frame (exactly a frame, not a second) the motorcycle is already gone, only the person remains - the depth of these two frames will likely differ significantly due to the changed scene composition. But again, this is noticeable only if you deliberately look for it.</p>

<p>On the other hand, there are amusing side effects. For example, reflections in mirrors will most likely appear three-dimensional, as will drawings on paper. This does not cause discomfort - on the contrary, it feels like an added layer of “magic,” some kind of interactivity. I made a 3D version of a music festival I once attended, there was a large stand with a top-down map of the venue, showing various objects. In the 3D-video, the entire map became volumetric - it looked very interesting and, surprisingly, quite natural.
<br />
<br /></p>
<h2 id="conclusion">Conclusion</h2>
<p>So, can you convert any movie to 3D using this approach? Yes - absolutely any movie, and in fact any material, such as YouTube videos. By the way, there are many first-person videos on YouTube (for example, travel vloggers), and they look very good in 3D.</p>

<p>I have a huge list of films I would like to rewatch in 3D. Take, for example, Christopher Nolan’s films - he was opposed to 3D (which is understandable - since 3D equipment significantly complicates and constrains the filming process). Now all his films can be rewatched in high-quality 3D, and given his love for close-ups and his use of light and shadow, the volumetric versions should look spectacular. Kubrick’s films, with his perfectionism in scene composition, ideal geometry, etc. - no comments needed. Other classic films, such as the Back to the Future trilogy, Indiana Jones, and many others, are waiting their turn - everything begs to be rewatched.</p>

<p>I have already watched the original Star Wars trilogy (episodes 4, 5, 6) in 3D. I won’t write about the delight anymore, I think it’s already clear, I’ll just note that these pictures look fresher in 3D, as if the volume modernizes them. Alright, time to finish with the lyrical part.
<br />
<br /></p>
<h2 id="additional-materials">Additional materials</h2>
<ul>
  <li>Next article with the <a href="https://peterplv.github.io/2026/01/15/stereo3d-script">new script and alternative solutions</a> →</li>
  <li>Related article on the <a href="https://peterplv.github.io/2026/01/16/depth-anything2-colors">visual comparison of Depth-Anything-V2 models</a> →</li>
  <li>Scripts from the article are available on my GitHub:<br />
<a href="https://github.com/peterplv/MakeAnythingStereo3D">https://github.com/peterplv/MakeAnythingStereo3D</a></li>
  <li>Link to Google Drive with <a href="https://drive.google.com/drive/folders/1ovCMNJG-FLJcuOfE0Y-zuBsewUKpy_fy">examples and 3D GIFs</a></li>
  <li>Example 3D video in <a href="https://drive.google.com/file/d/1_d0UGC_srnGBT4eTdH7vp_hvLg5LGH4r/view">HOU format</a>, suitable for viewing on most 3D TVs</li>
  <li>Example 3D video in <a href="https://drive.google.com/file/d/1WrFfK1KGKpi6kDBCSWO0YsHHSptSH56s/view">FSBS format</a>, suitable for viewing in VR headsets</li>
</ul>]]></content><author><name></name></author><summary type="html"><![CDATA[This is the result of the 2D to 3D conversion we will obtain The title isn’t entirely accurate, because you can make a 3D version of any 2D material: movies, cartoons, your personal videos/photos, etc, even a screenshot from your desktop can be converted to 3D. But in this article, we’ll be making a 3D version of a movie. As the source material, we will use Star Wars. Episode IV: A New Hope (1977). For this, we will need: GPU with CUDA support ffmpeg Python Depth-Anything-V2 library A sufficient amount of disk space. For a typical FullHD 1080p movie with a duration of ~1.5–2 hours, about 400–500GB will be required for the source frames in PNG format, and 150–200GB for the final 3D frames in JPG format at the highest quality. In fact, the required volume for the source data can be reduced - frames can be extracted in parts, this will be discussed below. My configuration for this task: Gigabyte A520M, AMD Ryzen 5 PRO 3600, 32GB DDR4 3200 MT/s (16+16) Gigabyte GeForce RTX 3060 12GB, CUDA Version: 12.5 Ubuntu 22.04 Algorithm overview: Using ffmpeg, unpack the movie into frames Using Depth-Anything-V2, generate a depth map for each frame For each pair of images “Source frame” + “Depth map for this frame”, generate a 3D frame using the parallax effect Using ffmpeg, encode the resulting 3D frames into a 3D version of the movie + attach the audio tracks from the source material Watch and be surprised that it works Spoiler: yes, it works. The 3D quality is excellent - you would never guess that the 3D was synthesized programmatically. Now to the point. Software installation Installing ffmpeg Ubuntu: sudo apt update sudo apt install ffmpeg Windows: https://www.ffmpeg.org/download.html Download one of the latest builds, unpack the archive, either entirely or only the ffmpeg.exe file (this is the only one we need here), save it for example to c:\ffmpeg. You can add the path to the ffmpeg folder to PATH so that ffmpeg can be called from the command line anywhere in the system. Installing Python Ubuntu: sudo apt update sudo apt install python3 python3-pip Windows: https://www.python.org/downloads/windows/ Download one of the latest releases for your OS and install it. For Python, also install the numpy library: pip install numpy Installing Depth-Anything-V2 GitHub: https://github.com/DepthAnything/Depth-Anything-V2 The description from there: git clone https://github.com/DepthAnything/Depth-Anything-V2 cd Depth-Anything-V2 pip install -r requirements.txt The models must be downloaded separately. I work with the Large model (335.3M parameters, size ~1280Mb). The Base model (97.5M parameters, size ~372Mb) has also performed well. There is also a Small model (24.8M parameters, size ~95Mb), and the site also lists “Coming soon” for the Giant model with 1.3B parameters. More about the models. I tested all 3 models; all of them are suitable for this task, even with the Small model you get good volumetric 3D. Personally, I settled on the Large model, since processing speed is not a critical factor for me (an average movie is processed within a 24 hours), and the quality of the Large model is noticeably better, especially in details. The Base model also produces excellent 3D, and an average movie is processed overnight. Stage 0: test run As a test, we take this frame: C-3PO and R2-D2 do not yet suspect that they will soon become 3D The Depth-Anything-V2 page has an example for running depth map generation: Code: import cv2 import torch from depth_anything_v2.dpt import DepthAnythingV2 DEVICE = 'cuda' if torch.cuda.is_available() else 'mps' if torch.backends.mps.is_available() else 'cpu' model_configs = { 'vits': {'encoder': 'vits', 'features': 64, 'out_channels': [48, 96, 192, 384]}, 'vitb': {'encoder': 'vitb', 'features': 128, 'out_channels': [96, 192, 384, 768]}, 'vitl': {'encoder': 'vitl', 'features': 256, 'out_channels': [256, 512, 1024, 1024]} } encoder = "vitl" # vits, vitb, vitl model = DepthAnythingV2(**model_configs[encoder]) model.load_state_dict(torch.load(f'checkpoints/depth_anything_v2_{encoder}.pth', map_location='cpu')) model = model.to(DEVICE).eval() raw_img = cv2.imread('your/image/path') depth = model.infer_image(raw_img) # HxW raw depth map in numpy Let’s slightly modify this script and add saving the results to a file: Code: import os import cv2 import torch import numpy as np from depth_anything_v2.dpt import DepthAnythingV2 # GENERAL OPTIONS # Path to the folder with depth generation models depth_models_path = "/home/user/DepthAnythingV2/models" # Source file path image_path = "/home/user/sw4test/file_000790.png" # Folder to save result output_path = "/home/user/sw4test" # Saving in the same folder, the filename will be file_000790_depth.png # Computing device device = torch.device('cuda') # DEPTH OPTIONS depth_models_config = { 'vits': {'encoder': 'vits', 'features': 64, 'out_channels': [48, 96, 192, 384]}, 'vitb': {'encoder': 'vitb', 'features': 128, 'out_channels': [96, 192, 384, 768]}, 'vitl': {'encoder': 'vitl', 'features': 256, 'out_channels': [256, 512, 1024, 1024]} } # Selecting the DepthAnythingV2 model: vits - Small, vitb - Base, vitl - Large encoder = "vitl" # vits, vitb, vitl model_depth_current = os.path.join(depth_models_path, f'depth_anything_v2_{encoder}.pth') model_depth = DepthAnythingV2(**depth_models_config[encoder]) model_depth.load_state_dict(torch.load(model_depth_current, weights_only=True, map_location=device)) model_depth = model_depth.to(device).eval() # START PROCESSING # Loading the image raw_img = cv2.imread(image_path) # Extract the image name to save the depth map later image_name = os.path.splitext(os.path.basename(image_path))[0] # Depth calculation with torch.no_grad(): depth = model_depth.infer_image(raw_img) # Depth normalization before saving depth_normalized = cv2.normalize(depth, None, 0, 255, norm_type=cv2.NORM_MINMAX, dtype=cv2.CV_8U) # Saving the depth map output_path = os.path.join(output_path, f'{image_name}_depth.png') cv2.imwrite(output_path, depth_normalized) # OPTIONAL: SAVE DEPTH MAP IN COLOR depth_colored = cv2.applyColorMap(depth_normalized, cv2.COLORMAP_JET) # Saving the depth map in color output_path = os.path.join(output_path, f'{image_name}_depth_color.png') cv2.imwrite(output_path, depth_colored) print("DONE.") # Delete model and clear Cuda cache del model_depth torch.cuda.empty_cache() We get a depth map: Depth map, the lighter the object, the closer it is Or a colorized version of the depth map, for clarity (it won’t be needed for our task): Color depth map, from dark red (closer) to dark blue (farther) Related article: Visual Comparison of Depth-Anything-V2 Models → Now, based on the obtained depth map, let’s make a 3D image, for example in the FOU (Full Over-Under) format: Code: import os import cv2 import numpy as np # GENERAL OPTIONS # Source file path image_path = "/home/user/sw4test/file_000790.png" # Depth map path for the source image depth_path = "/home/user/sw4test/file_000790_depth.png" # Folder to save result output_path = "/home/user/sw4test" # Saving in the same folder, the filename will be file_000790_3d.jpg # 3D OPTIONS PARALLAX_SCALE = 15 # Recommended 10 to 20 PARALLAX_METHOD = 1 # 1 or 2 INPAINT_RADIUS = 2 # For PARALLAX_METHOD = 2 only, recommended 2 to 5, optimum value 2-3 INTERPOLATION_TYPE = cv2.INTER_LINEAR # INTER_NEAREST, INTER_AREA, INTER_LINEAR, INTER_CUBIC, INTER_LANCZOS4 TYPE3D = "FOU" # HSBS, FSBS, HOU, FOU LEFT_RIGHT = "LEFT" # LEFT or RIGHT # 0 - if there's no need to change frame size new_width = 0 new_height = 0 def image_size_correction(current_height, current_width, left_image, right_image): ''' Image size correction if new_width and new_height are set ''' # Calculate offsets for centering top = (new_height - current_height) // 2 left = (new_width - current_width) // 2 # Create a black canvas of the desired size new_left_image = np.zeros((new_height, new_width, 3), dtype=np.uint8) new_right_image = np.zeros((new_height, new_width, 3), dtype=np.uint8) # Placing the image on a black background new_left_image[top:top + current_height, left:left + current_width] = left_image new_right_image[top:top + current_height, left:left + current_width] = right_image return new_left_image, new_right_image def image3d_processing_method1(image, depth, height, width): ''' The function of creating a stereo pair based on the source image and depth map. Method1: faster, contours smoother, but may be less accurate ''' # Creating parallax parallax = depth * PARALLAX_SCALE # Pixel coordinates x, y = np.meshgrid(np.arange(width, dtype=np.float32), np.arange(height, dtype=np.float32)) # Calculation of offsets shift_left = np.clip(x - parallax, 0, width - 1) shift_right = np.clip(x + parallax, 0, width - 1) # Applying offsets with cv2.remap left_image = cv2.remap(image, shift_left, y, interpolation=INTERPOLATION_TYPE) right_image = cv2.remap(image, shift_right, y, interpolation=INTERPOLATION_TYPE) return left_image, right_image def image3d_processing_method2(image, depth, height, width): ''' The function of creating a stereo pair based on the source image and depth map. Method2: slightly slower than the first method, but can be more accurate ''' # Calculating the value for parallax parallax = depth * PARALLAX_SCALE # Parallax rounding and conversion to int32 shift = np.round(parallax).astype(np.int32) # Grid coordinates y, x = np.indices((height, width), dtype=np.int32) # Image preparation left_image = np.zeros_like(image) right_image = np.zeros_like(image) # Left image shaping by offset coordinates x_src_left = x - shift valid_left = (x_src_left &gt;= 0) &amp; (x_src_left &lt; width) left_image[y[valid_left], x[valid_left]] = image[y[valid_left], x_src_left[valid_left]] # Right image shaping by offset coordinates x_src_right = x + shift valid_right = (x_src_right &gt;= 0) &amp; (x_src_right &lt; width) right_image[y[valid_right], x[valid_right]] = image[y[valid_right], x_src_right[valid_right]] # Missing pixel masks for inpainting mask_left = (~valid_left).astype(np.uint8) * 255 mask_right = (~valid_right).astype(np.uint8) * 255 # Filling voids via inpainting left_image = cv2.inpaint(left_image, mask_left, INPAINT_RADIUS, cv2.INPAINT_TELEA) right_image = cv2.inpaint(right_image, mask_right, INPAINT_RADIUS, cv2.INPAINT_TELEA) return left_image, right_image def image3d_combining(left_image, right_image, height, width): ''' Combining stereo pair images into a single 3D image ''' # Images size correction if new_width and new_height are set if new_width and new_height: left_image, right_image = image_size_correction(height, width, left_image, right_image) # Change the values of the original image sizes to new_height and new_width for correct gluing below height = new_height width = new_width # Image order, left first or right first img1, img2 = (left_image, right_image) if LEFT_RIGHT == "LEFT" else (right_image, left_image) # Combine left and right images into a common 3D image if TYPE3D == "HSBS": # Narrowing and combining images horizontally combined_image = np.hstack((cv2.resize(img1, (width // 2, height), interpolation=cv2.INTER_AREA), cv2.resize(img2, (width // 2, height), interpolation=cv2.INTER_AREA))) elif TYPE3D == "HOU": # Narrowing and combining images vertically combined_image = np.vstack((cv2.resize(img1, (width, height // 2), interpolation=cv2.INTER_AREA), cv2.resize(img2, (width, height // 2), interpolation=cv2.INTER_AREA))) elif TYPE3D == "FSBS": # Combining images horizontally combined_image = np.hstack((img1, img2)) elif TYPE3D == "FOU": # Combining images vertically combined_image = np.vstack((img1, img2)) return combined_image # PREPARATION # Extract the image name to save the 3D image later on image_name = os.path.splitext(os.path.basename(image_path))[0] # Load image and depth map image = cv2.imread(image_path) # Source image depth = cv2.imread(depth_path, cv2.IMREAD_GRAYSCALE).astype(np.float32) / 255.0 # Depth map # Image size height, width = image.shape[:2] # START PROCESSING # Runing image3d_processing and getting a stereo pair for the image PARALLAX_FUNCTIONS = { 1: image3d_processing_method1, 2: image3d_processing_method2, } if PARALLAX_METHOD in (1, 2): left_image, right_image = PARALLAX_FUNCTIONS[PARALLAX_METHOD](image, depth, height, width) else: print(f"Set the correct {PARALLAX_METHOD}.") # Combining stereo pair into a common 3D image image3d = image3d_combining(left_image, right_image, height, width) # Saving 3D image output_path = os.path.join(output_path, f'{image_name}_3d.jpg') cv2.imwrite(output_path, image3d, [int(cv2.IMWRITE_JPEG_QUALITY), 100]) print("DONE.") Here it is necessary to explain the main parameters. Parameter: PARALLAX_SCALE = 15 The parallax value in pixels, how many pixels distant objects (more precisely, pixels) will be shifted at maximum relative to closer ones (the closest is 0, the farthest is 15). The larger the value, the greater the depth. At excessively large values, the image will be unwatchable. It is important to note that the shift occurs for each frame separately - for the left and for the right, thus the total parallax is doubled. The recommended value is from 10 to 20. I usually set 15; this gives good depth without significant distortions. Parameter: PARALLAX_METHOD = 1 Available values: 1 or 2. Choice of the parallax creation method, handled by the functions image3d_processing_method1 and image3d_processing_method2 respectively. In the first method, the displacement occurs faster and the contours of the displaced objects look smoother. In the second method, the displacement is performed using a different principle, the processing takes a bit longer, but the 3D may be sharper. Also, the depth of different objects may differ between these methods. Overall, the depth and 3D quality are good in both cases. I recommend experimenting with both methods and choosing the one you like. Parameter: INPAINT_RADIUS The radius for filling shifts in pixels for the second parallax creation method (image3d_processing_method2). Responsible for filling with neighboring pixels at the edges of images when they are shifted. Recommended values are from 2 to 5; in most cases 2–3 is optimal. If the value is larger, for example INPAINT_RADIUS = 15, then the edges will be too blurred and processing time will increase significantly. With small values - 0 or 1 - the edges will look too sharp and inaccurate. Parameter: INTERPOLATION_TYPE = cv2.INTER_LINEAR Interpolation type for the first parallax creation method (image3d_processing_method1). Since we deform the image by shifting objects (pixels) on it, the resulting empty areas need to be filled with something. For this, the nearest-neighbor method in various variations is used: INTER_NEAREST - nearest neighbor, fast and simple interpolation, not the highest quality INTER_AREA - better suited for image downscaling, in this case we will not consider it INTER_LINEAR - bilinear interpolation in a 2x2 pixel neighborhood, a balance of quality and speed, the most optimal option INTER_CUBIC - bicubic interpolation in a 4x4 pixel neighborhood, considered higher quality than bilinear, but takes a bit more time INTER_LANCZOS4 - Lanczos interpolation in an 8x8 pixel neighborhood, the highest quality, but works significantly slower than the others I tested all options, carefully reviewing the results; I did not notice a significant difference when viewing 3D. Therefore, I usually use the fast and optimal method - INTER_LINEAR. But if speed is not critical for you, it is better to use INTER_LANCZOS4 - the best quality. It should be noted here that the speed difference is measured in milliseconds. For example, here are measurements of interpolation of the frame with a resolution of 1920x1080: NEAREST: 0.039 seconds INTER_AREA: 0.041 seconds INTER_LINEAR: 0.041 seconds INTER_CUBIC: 0.053 seconds INTER_LANCZOS4: 0.090 - 0.096 seconds For example, between INTER_LINEAR and INTER_LANCZOS4 the difference is ~50 milliseconds per processing of the frame with a resolution of 1920x1080. This may seem insignificant, but if you multiply 50 ms by 194000 frames, you get ~162 minutes. That is, INTER_LINEAR will process faster than INTER_LANCZOS4 by 162 minutes, or 2 hours 42 minutes. And this is only parallax interpolation processing. Perhaps later I will write a comparative review of all these methods, with a visual demonstration and indication of the processing time; for now I can recommend using any of these 3 methods: INTER_LINEAR, INTER_CUBIC, INTER_LANCZOS4. Parameter: TYPE3D = “FOU” The type of stereo pair we want to obtain: HSBS (Half Side-by-Side) - half horizontal stereo pair FSBS (Full Side-by-Side) - full horizontal stereo pair HOU (Half Over-Under) - half vertical stereo pair FOU (Full Over-Under) - full vertical stereo pair I think everything here is obvious for those who watch 3D on their devices, but just in case I will explain. HSBS - half horizontal stereo pair, the second frame is placed to the right of the first frame. If the source frame had a resolution of 1920x1080, then both frames of the stereo pair are compressed horizontally by a factor of 2 (in this case to 960 pixels, the full resolution of each frame becomes 960x1080), so that the total width of the entire stereo pair remains in the original 1920x1080 format. When viewing, both halves of the stereo pair are stretched to full size for each frame - it was 960x1080, it becomes 1920x1080. In this case, there is a significant loss of detail, since the number of pixels horizontally is halved. On the other hand, the frame/video size will be significantly smaller than a full stereo pair, by 1.5–2 times. FSBS - full horizontal stereo pair, the second frame is placed to the right of the first frame. If the source frame had a resolution of 1920x1080, then both frames of the stereo pair will create a combined frame of 3840x1080 pixels. In this case, there will be no loss of detail, but the frame/video size will become 1.5–2 times larger. HOU - half vertical stereo pair, the second frame is placed below the first frame. If the source frame had a resolution of 1920x1080, then both frames of the stereo pair are compressed vertically by a factor of 2 (in this case to 540 pixels, the full resolution of each frame becomes 1920x540). There is an opinion that when choosing among half stereo pairs, the best choice is HOU - half vertical stereo pair. This is quite logical, given that fewer pixels are lost here: 1080/2=540, instead of 1920/2=960 in the case of a horizontal stereo pair. FOU - full vertical stereo pair, the second frame is placed below the first frame. If the source frame had a resolution of 1920x1080, then both frames of the stereo pair will create a combined frame of 1920x2160 pixels. Often, half stereo pairs (HSBS and HOU) work on 3D TVs. All variants work on VR headsets, and you can get maximum enjoyment from watching 3D on full stereo pairs (FSBS or FOU). Parameter: LEFT_RIGHT = “LEFT” The order of the frame pair in the combined 3D image: LEFT - left first, RIGHT - right first. The default value is LEFT. This order can also be configured on the equipment when viewing 3D video. Parameters: new_width = 1920 and new_height = 1080 An important setting. The point is that there are movies with “non-standard” resolution, for example 1920x816 pixels (as in our case). If we make stereo pairs with such a resolution, there will most likely be problems when playing on equipment that displays images in a standard resolution (for example FullHD 1920x1080 16:9), this is especially critical for half stereo pairs. A simple and working solution was found - we increase the image to the required resolution, where the missing pixels are filled with black color, simply put - we add black bars. For example, the source frame resolution is 1920x816, we want to increase it to the standard 1920x1080, we specify in the parameters: new_width = 1920 new_height = 1080 Thus, the frame is not deformed (not stretched or squeezed), and the missing space is filled with black color. Instead of a 1920x816 frame, we get a standard 1920x1080 frame with added black bars vertically. If it is not required to change the frame size, then we specify: new_width = 0 new_height = 0 Note: Here and further we use PARALLAX_METHOD = 1 (function image3d_processing_method1), all examples and calculations are based on this method. So, let’s run the script and get a stereo pair: C-3PO and R2-D2 now from two different angles, without realizing it themselves Let’s make a 3D GIF to visually demonstrate the scene’s depth: C-3PO and R2-D2 in 3D now! A few more GIFs: The ship was well converted into 3D, as if DepthAnythingV2 had been trained on it as well The rebels cannot believe that they are now in 3D Han, Luke and Chewie are thrilled Other images can be viewed on my Google Drive. There are source frames, depth maps, including color ones, and 3D GIFs for clarity. Now we can proceed to processing the main material. Stage 1: extracting frames from source video Full frame extraction to PNG format requires sufficient disk space. For example, in our case, a FullHD movie, approximately 2 hours long, with a frame rate of 23.976 (24000/1001), has ~194000 frames, with a total volume of approximately ~430GB in PNG format. Looking ahead, there are ways to reduce the required disk space. Instead of extracting all frames at once, we can extract them in ranges - for example, frames from 0 to 10000, then from 10001 to 20000, and so on. I will write about this in another article (UPD: Done. Script and description at the link). We can also extract source frames in JPG format. I do not recommend this option, I tested it, the final image is noticeably worse, even if extracting JPG at the highest quality. However, after processing (before final encoding into 3D video), it is quite acceptable to save output files in JPG format, otherwise too much disk space will be required. For example, in the case of full 3D pairs, we would need 430x2 = ~860GB for output 3D frames in PNG format. So, extract frames using the command: ffmpeg -i sw4.mkv "/home/user/sw4frames/file_%06d.png" Here: “-i sw4.mkv” - source file “/home/user/sw4frames/” - path where the frames will be extracted; the folder must be created in advance “file_%06d.png” - file mask, where %06d is a 6-digit counter starting from 000000; the files will be like “file_000000.png”, “file_000001.png”, etc. A variant of the same command, but using CUDA (depending on the system, it will most likely be faster): ffmpeg -hwaccel cuda -i sw4.mkv "/home/user/sw4frames/file_%06d.png" Stage 2: creating 3D frames Now we can proceed to creating 3D frames. Below is a script that does the following: sequentially loads each frame from the source folder creates a depth map for each frame passes the depth map + the source frame to the function for creating a 3D frame via parallax, creates a 3D version of the frame deletes the source file and saves the 3D frame to a JPG file Code: import os from concurrent.futures import ThreadPoolExecutor, wait, FIRST_COMPLETED from multiprocessing import Value import cv2 import torch import numpy as np from depth_anything_v2.dpt import DepthAnythingV2 # GENERAL OPTIONS # Path to the folder with depth generation models depth_models_path = "/home/user/DepthAnythingV2/models" # Folder with source frames frames_path = "/home/user/sw4frames" # Get the name of the source frames folder to create a folder for 3D frames frames_path_name = os.path.basename(os.path.normpath(frames_path)) images3d_path = os.path.join(os.path.dirname(frames_path), f"{frames_path_name}_3d") os.makedirs(images3d_path, exist_ok=True) # List of source frames in the directory all_frames = [ os.path.join(frames_path, file_name) for file_name in os.listdir(frames_path) if os.path.isfile(os.path.join(frames_path, file_name)) ] frame_counter = Value('i', 0) # Counter for naming frames chunk_size = 1000 # Number of files per thread max_threads = 3 # Maximum streams # Computing device device = torch.device('cuda') # 3D OPTIONS PARALLAX_SCALE = 15 # Recommended 10 to 20 PARALLAX_METHOD = 1 # 1 or 2 INPAINT_RADIUS = 2 # For PARALLAX_METHOD = 2 only, recommended 2 to 5, optimum value 2-3 INTERPOLATION_TYPE = cv2.INTER_LINEAR # INTER_NEAREST, INTER_AREA, INTER_LINEAR, INTER_CUBIC, INTER_LANCZOS4 TYPE3D = "FOU" # HSBS, FSBS, HOU, FOU LEFT_RIGHT = "LEFT" # LEFT or RIGHT # 0 - if there's no need to change frame size new_width = 0 new_height = 0 depth_models_config = { 'vits': {'encoder': 'vits', 'features': 64, 'out_channels': [48, 96, 192, 384]}, 'vitb': {'encoder': 'vitb', 'features': 128, 'out_channels': [96, 192, 384, 768]}, 'vitl': {'encoder': 'vitl', 'features': 256, 'out_channels': [256, 512, 1024, 1024]} } # Selecting the DepthAnythingV2 model: vits - Small, vitb - Base, vitl - Large encoder = "vitl" # vits, vitb, vitl model_depth_current = os.path.join(depth_models_path, f'depth_anything_v2_{encoder}.pth') model_depth = DepthAnythingV2(**depth_models_config[encoder]) model_depth.load_state_dict(torch.load(model_depth_current, weights_only=True, map_location=device)) model_depth = model_depth.to(device).eval() def image_size_correction(current_height, current_width, left_image, right_image): ''' Image size correction if new_width and new_height are set ''' # Calculate offsets for centering top = (new_height - current_height) // 2 left = (new_width - current_width) // 2 # Create a black canvas of the desired size new_left_image = np.zeros((new_height, new_width, 3), dtype=np.uint8) new_right_image = np.zeros((new_height, new_width, 3), dtype=np.uint8) # Placing the image on a black background new_left_image[top:top + current_height, left:left + current_width] = left_image new_right_image[top:top + current_height, left:left + current_width] = right_image return new_left_image, new_right_image def depth_processing(image): ''' Creating a depth map for an image ''' # Depth calculation with torch.no_grad(): depth = model_depth.infer_image(image) # Normalization depth_normalized = depth / depth.max() return depth_normalized def image3d_processing_method1(image, depth, height, width): ''' The function of creating a stereo pair based on the source image and depth map. Method1: faster, contours smoother, but may be less accurate ''' # Creating parallax parallax = depth * PARALLAX_SCALE # Pixel coordinates x, y = np.meshgrid(np.arange(width, dtype=np.float32), np.arange(height, dtype=np.float32)) # Calculation of offsets shift_left = np.clip(x - parallax, 0, width - 1) shift_right = np.clip(x + parallax, 0, width - 1) # Applying offsets with cv2.remap left_image = cv2.remap(image, shift_left, y, interpolation=INTERPOLATION_TYPE) right_image = cv2.remap(image, shift_right, y, interpolation=INTERPOLATION_TYPE) return left_image, right_image def image3d_processing_method2(image, depth, height, width): ''' The function of creating a stereo pair based on the source image and depth map. Method2: slightly slower than the first method, but can be more accurate ''' # Calculating the value for parallax parallax = depth * PARALLAX_SCALE # Parallax rounding and conversion to int32 shift = np.round(parallax).astype(np.int32) # Grid coordinates y, x = np.indices((height, width), dtype=np.int32) # Image preparation left_image = np.zeros_like(image) right_image = np.zeros_like(image) # Left image shaping by offset coordinates x_src_left = x - shift valid_left = (x_src_left &gt;= 0) &amp; (x_src_left &lt; width) left_image[y[valid_left], x[valid_left]] = image[y[valid_left], x_src_left[valid_left]] # Right image shaping by offset coordinates x_src_right = x + shift valid_right = (x_src_right &gt;= 0) &amp; (x_src_right &lt; width) right_image[y[valid_right], x[valid_right]] = image[y[valid_right], x_src_right[valid_right]] # Missing pixel masks for inpainting mask_left = (~valid_left).astype(np.uint8) * 255 mask_right = (~valid_right).astype(np.uint8) * 255 # Filling voids via inpainting left_image = cv2.inpaint(left_image, mask_left, INPAINT_RADIUS, cv2.INPAINT_TELEA) right_image = cv2.inpaint(right_image, mask_right, INPAINT_RADIUS, cv2.INPAINT_TELEA) return left_image, right_image def image3d_combining(left_image, right_image, height, width): ''' Combining stereo pair images into a single 3D image ''' # Images size correction if new_width and new_height are set if new_width and new_height: left_image, right_image = image_size_correction(height, width, left_image, right_image) # Change the values of the original image sizes to new_height and new_width for correct gluing below height = new_height width = new_width # Image order, left first or right first img1, img2 = (left_image, right_image) if LEFT_RIGHT == "LEFT" else (right_image, left_image) # Combine left and right images into a common 3D image if TYPE3D == "HSBS": # Narrowing and combining images horizontally combined_image = np.hstack((cv2.resize(img1, (width // 2, height), interpolation=cv2.INTER_AREA), cv2.resize(img2, (width // 2, height), interpolation=cv2.INTER_AREA))) elif TYPE3D == "HOU": # Narrowing and combining images vertically combined_image = np.vstack((cv2.resize(img1, (width, height // 2), interpolation=cv2.INTER_AREA), cv2.resize(img2, (width, height // 2), interpolation=cv2.INTER_AREA))) elif TYPE3D == "FSBS": # Combining images horizontally combined_image = np.hstack((img1, img2)) elif TYPE3D == "FOU": # Combining images vertically combined_image = np.vstack((img1, img2)) return combined_image def extract_frames(start_frame, end_frame): ''' Allocating image files to chunks based on chunk_size ''' frames_to_process = end_frame - start_frame + 1 with frame_counter.get_lock(): start_counter = frame_counter.value frame_counter.value += frames_to_process # List of files based on chunk size chunk_files = all_frames[start_frame:end_frame+1] # end_frame inclusive print(f"\n-- FRAMES FOR NEW THREAD --\nFrames {start_frame} - {end_frame}\n") return chunk_files def chunk_processing(extracted_frames, start_frame, end_frame): ''' Start processing for each chunk ''' print(f"\n-- START THE THREAD --\nFrames {start_frame} - {end_frame}\n") for frame_path in extracted_frames: # Extract the image name to save the 3D image later on frame_name = os.path.splitext(os.path.basename(frame_path))[0] # Load image image = cv2.imread(frame_path) # Image size height, width = image.shape[:2] # Runing depth_processing and get depth map depth = depth_processing(image) # Runing image3d_processing and getting a stereo pair for the image PARALLAX_FUNCTIONS = { 1: image3d_processing_method1, 2: image3d_processing_method2, } if PARALLAX_METHOD in (1, 2): left_image, right_image = PARALLAX_FUNCTIONS[PARALLAX_METHOD](image, depth, height, width) else: print(f"Set the correct {PARALLAX_METHOD}.") # Combining stereo pair into a common 3D image image3d = image3d_combining(left_image, right_image, height, width) # Saving 3D image output_image3d_path = os.path.join(images3d_path, f'{frame_name}.jpg') cv2.imwrite(output_image3d_path, image3d, [int(cv2.IMWRITE_JPEG_QUALITY), 100]) # Deleting the source file os.remove(frame_path) print(f"\n-- THREAD DONE --\nFrames {start_frame} - {end_frame}\n") def run_processing(): ''' The main function for starting processing threads ''' # Total frames in video file total_frames = len(all_frames) # Threads control if isinstance(total_frames, int): with ThreadPoolExecutor(max_workers=max_threads) as executor: futures = [] for start_frame in range(0, total_frames, chunk_size): end_frame = min(start_frame + chunk_size - 1, total_frames - 1) # 1. Extracting frames (waiting for task to complete before starting thread) extracted_frames = extract_frames(start_frame, end_frame) # 2. Starting thread for extracted frames future = executor.submit(chunk_processing, extracted_frames, start_frame, end_frame) futures.append(future) # 3. If thread count reached &gt;= max_threads, wait for any thread to finish if len(futures) &gt;= max_threads: done, not_done = wait(futures, return_when=FIRST_COMPLETED) for f in done: f.result() # if any thread fails, stop all processing futures = list(not_done) # 4. Waiting for threads to complete for future in futures: future.result() print("DONE.") else: print("First, determine the value of total_frames.") # START PROCESSING run_processing() # Delete model and clear Cuda cache del model_depth torch.cuda.empty_cache() Note: The extract_frames function in this script has nothing to do with “unpacking/extracting”, as one might think from its name, because the frames are already unpacked and located in the “sw4frames/” folder. In this case, it only prepares frame batches for each thread in the amount of chunk_size. The name is preserved for compatibility with the other script, where frame extraction occurs in batches directly from the source video file without the need for preliminary exporting. The script implements naive-multithreading. Naive, because these are purely preemptive threads that execute the same thing. This is done with the idea that at any given moment each thread can perform different tasks: load a file into memory, save a file to disk, compute a depth map (GPU), do parallax (CPU), etc. And even with such pseudo-multithreading, processing occurs significantly faster. Personally, I found 2–3 threads to be optimal; a larger number of threads does not affect processing speed in any way, but does increase GPU memory usage. Note: This applies to working with already extracted frames. In the other script, where frames are extracted in batches rather than all at once, pseudo-multithreading works even better, and empirically I found 3–5 threads to be optimal. This will be covered in another article. Below is a comparison of the script’s performance on a test set of 100 frames with different numbers of threads; the Large model was used everywhere, all other settings were identical: 1 thread (100 files per thread): First run: 1 minute 20 seconds. Control run: 1 minute 19 seconds. Maximum GPU memory usage (here and below - excluding reserved): 2675.17 MB. 2 threads (50 files per thread): First run: 1 minute 9 seconds. Control run: 1 minute 9 seconds. Maximum GPU memory usage: 3994.97 MB. 10 seconds saved via pseudo-multithreading, or a 12.5% speed increase. This may seem minor, but this was only for 100 frames, while the full movie has ~194000 frames the total time saved will be several hours (~5 hours). A rough total processing time estimate is given below. 3 threads (34 + 34 + 32 files per thread): First run: 1 minute 9 seconds. Control run: 1 minute 9 seconds. Maximum GPU memory usage: 5351.92 MB. Specifically on this test sample, there is no difference between 2 and 3 threads (except for increased video memory usage with 3 threads), but on measurements with larger samples there was a slight increase. 4 threads (25 files per thread): First run: 1 minute 9 seconds. Control run: 1 minute 9 seconds. Maximum video memory usage: 6708.48 MB. Execution speed does not change further, but video memory usage changes. For comparison, let’s see how long it takes to process the same test sample with 2 threads for the Base model: First run: 24.30 seconds. Control run: 24.47 seconds. Maximum video memory usage: 2415.44 MB. And for the Small model: First run: 11.68 seconds. Control run: 11.59 seconds. Maximum video memory usage: 1134.84 MB. Now we can roughly (very roughly!) estimate how much time it will take to process all 194000 frames. For the Large model: If it took 59 seconds on 2 threads to process 100 frames, it will take 114460 seconds for 194000 frames, or ~32 hours. For the Base model: ~13 hours. For the Small model: ~6 hours. Stage 3: compiling 3D video Now we need to compile the final 3D video with the original audio tracks attached. I use the hevc_nvenc codec - encoding occurs on the GPU, which is significantly faster than the CPU. Command: ffmpeg -framerate 24000/1001 -i "/home/user/sw4frames_3d/file_%06d.jpg" -i sw4.mkv -c:v hevc_nvenc -cq 1 -preset p7 -color_range tv -colorspace bt709 -color_primaries bt709 -color_trc bt709 -pix_fmt yuv420p -map 0:v -map 1:a -c:a copy sw4_3d.mkv Here: “-framerate 24000/1001” - source video frame rate, 24000/1001 = 23.976 frames per second “-i “/home/user/sw4frames_3d/file_%06d.jpg”” - folder with 3D frames “-i sw4.mkv” - source file with audio tracks “-c:v hevc_nvenc” - NVIDIA GPU encoder (H.265) “-cq 1 -preset p7” - high video quality “-colorspace bt709 -color_primaries bt709 -color_trc bt709” - set color parameters according to the BT.709 standard for HD video “-color_range tv” - pixel color format, yuv420p for maximum compatibility “-pix_fmt yuv420p” - standard (limited) range for video, as expected by codecs and players, for maximum compatibility and correct colors “-map 0:v” - specify using the folder with frames specified earlier for video “-map 1:a -c:a copy” - specify using audio tracks from “-i sw4.mkv” without re-encoding; “-c:a copy” - direct copy “sw4_3d.mkv” - output file name Wait for compilation and… enjoy watching. Other considerations We processed a FullHD (1920x1080) movie. You can also work with other formats, including 4K UltraHD (3840x2160). I have not yet made full 3D versions in 4K, but I tested working with this resolution and did not notice significant differences in processing time. However, it should be understood that frames at a resolution of 3840x2160 require significantly more disk space, especially in PNG format; here the required size increases by about 4 times compared to 1920x1080 frames. Speaking of disk usage: since 3D conversion is relatively fast, it is not necessary to store both the original and the 3D version of the movie on disk. You can always synthesize the 3D version, watch it, and delete it, keeping only the original as an archive. The original can even be in 4K, while the 3D version can be synthesized in FullHD for speed. The frame extraction command would be: ffmpeg -i video4k.mkv -vf "scale=1920:1080" "/home/user/frames_in/file_%06d.png" Or the other command where only the width is specified (height will be calculated automatically): ffmpeg -i video4k.mkv -vf "scale=1920:-2" "/home/user/frames_in/file_%06d.png" If the source video has a high frame rate, for example 60 fps (many YouTube videos), it makes sense to reduce the frame rate to the standard 23.976 (24000/1001). This alone speeds up processing by 2.5x. The frame extraction command would be: ffmpeg -i video4k.mkv -vf "fps=24000/1001" "/home/user/frames_in/file_%06d.png" Or a combined command: ffmpeg -i video4k.mkv -vf "scale=1920:-2,fps=24000/1001" "/home/user/frames_in/file_%06d.png" Another important thing - Depth-Anything-V2 works just as well with black-and-white images as with color ones. There is no difference in processing. I have already tried adding depth to black-and-white films, and the results are excellent. Personally, I even prefer black-and-white 3D films - depth is perceived differently there, but that is probably a matter of personal taste. Are there any drawbacks to the method? Yes, but they are minor. If you do not know that you are watching synthesized rather than native 3D, you most likely will not notice anything. In some dynamic scenes, where there is a rapid change of objects, the depth of neighboring frames may change. For example, in the current frame there is a person standing and a motorcycle rushes by nearby, and in the next frame (exactly a frame, not a second) the motorcycle is already gone, only the person remains - the depth of these two frames will likely differ significantly due to the changed scene composition. But again, this is noticeable only if you deliberately look for it. On the other hand, there are amusing side effects. For example, reflections in mirrors will most likely appear three-dimensional, as will drawings on paper. This does not cause discomfort - on the contrary, it feels like an added layer of “magic,” some kind of interactivity. I made a 3D version of a music festival I once attended, there was a large stand with a top-down map of the venue, showing various objects. In the 3D-video, the entire map became volumetric - it looked very interesting and, surprisingly, quite natural. Conclusion So, can you convert any movie to 3D using this approach? Yes - absolutely any movie, and in fact any material, such as YouTube videos. By the way, there are many first-person videos on YouTube (for example, travel vloggers), and they look very good in 3D. I have a huge list of films I would like to rewatch in 3D. Take, for example, Christopher Nolan’s films - he was opposed to 3D (which is understandable - since 3D equipment significantly complicates and constrains the filming process). Now all his films can be rewatched in high-quality 3D, and given his love for close-ups and his use of light and shadow, the volumetric versions should look spectacular. Kubrick’s films, with his perfectionism in scene composition, ideal geometry, etc. - no comments needed. Other classic films, such as the Back to the Future trilogy, Indiana Jones, and many others, are waiting their turn - everything begs to be rewatched. I have already watched the original Star Wars trilogy (episodes 4, 5, 6) in 3D. I won’t write about the delight anymore, I think it’s already clear, I’ll just note that these pictures look fresher in 3D, as if the volume modernizes them. Alright, time to finish with the lyrical part. Additional materials Next article with the new script and alternative solutions → Related article on the visual comparison of Depth-Anything-V2 models → Scripts from the article are available on my GitHub: https://github.com/peterplv/MakeAnythingStereo3D Link to Google Drive with examples and 3D GIFs Example 3D video in HOU format, suitable for viewing on most 3D TVs Example 3D video in FSBS format, suitable for viewing in VR headsets]]></summary></entry></feed>